Brother Morgan Posted October 10, 2021 Author Share Posted October 10, 2021 Hi everyone. After 24 years of working for the same company, I've been made redundant. My last working day is 30th November, so I plan to make as many Squats as I can before then as I start to stockpile parts, bits, paints etc. to reduce my monthly hobby expenditure. I plan on having December off to recharge the batteries and cram in as much hobby time before I start looking in 2022 for a new job and fresh challenges. After my previous issues with Halfords white primer, I have bought some Biostrip 20 paint stripper and also some Ammo one shot white primer to use in my airbrush, so hopefully over the next few weeks, I can strip and re-prime the affected models and then also undercoat all of the Squats to start batch painting. As usual, excellent work. You’re on a roll with putting together a really unique and flavorful force. I suspect that many of us would love to see a tutorial. Hi Shovellovin. I have included a mini tutorial on how I make my push moulds as requested: This is a shot of my work desk at the moment with some of the moulds I have made and also some of the milliput and plastic parts I'll use for future models. You can see at the top the blue and white silicon putty pots (labelled "A" and "B") that I bought on ebay and though expensive, you don't have to use much when making a mould, so it lasts a very long time - you can see the number of moulds I've made and the pots have hardly been touched. I've bought packets of 2 part silicon putty off of ebay and will no longer do that as I waste the majority of the contents as they have gone hard in the packets - a sealed pot is the way forward. I've gone for a 2 part (equal measure) silicon putty that remains fairly flexible when cured, to allow for easier extraction of the milliput cast parts. The silicon putty takes around an hour to fully cure but I like to give it a bit longer to be sure. Having chosen which part you want to cast, remove all the mould lines etc. You can see on the left Arkanaut, I've already filled the hole in his belly in preparation of making his quilted flak jacket. Before I mould the model on the right, I would remove all of the glyphs, belt and loincloth and would also fill the hole, sculpting a new belly out of milliput. Once that was done I would then need to decide what part of the model would I want to mould. It is to difficult to mould the whole body in one go. It is easier to make multiple moulds e.g. torso and legs, giving better casts and allowing the mould to survive to make multiple copies. You need to plan ahead as you really don't want to have any overhangs on your models as they will not be easy to remove from the mould and will result in the mould tearing or you having to cut it too remove the cured part/s. I'll show some examples later. To make a mould of this torso, I could not envelope the whole of the torso in silicon putty as his arms prevent easy removing of the original part and also it would be difficult to get milliput into the arm moulds when copying. Therefore, I have squeezed the silicon putty around the whole of the front of the torso and around most of the arms, leaving part of the back uncovered. You don't want to over work the putty, constantly prodding and moving it around as you will get air pockets or bits of the original cast won't be fully moulded. After allowing the silicon putty to cure, I carefully removed the plastic original piece. You then need to mix enough milliput to fill the new mould, this is not an exact science, so sometimes you may not have mixed enough milliput and will have to mix up another batch or other times, you mix up too much milliput - always have other moulds near by, so if you have made too much, you can always fill the extra moulds to get other cast parts for future models. You then need to force the milliput into all the nooks and crannies of the mould - if there are arms or legs, I form a small thin sausage of milliput and thread it into the arm or leg and then use a wet dental sculpting tool and force as much milliput in as I can. Milliput will stick to your tool, so keep it damp but not dripping wet. I fill in all of the awkward parts of the mould first before adding a large enough quantity of milliput to fill the rest of the mould. The important thing here is too keep on pushing the tool into the milliput to ensure there are no air pockets and that milliput has covered the whole model - preventing parts not being cast. You then need to allow the milliput to dry - this takes a couple of hours (I normally leave 24 hours before de-moulding to ensure the milliput is rock hard). After the milliput has hardened, you need to carefully remove the milliput part from the mould. You can see the part in the bottom left of the picture above. You can see where there wasn't a mould on the back of the part. This will need to be cleaned up with scalpel and files and if you haven't been careful, some more milliput to sculpt muscles etc. If you aren't any good at sculpting, you can always cover mould issues with backpacks. cloaks, slung lasguns etc. You can see the mould on the right is of a Chaos icon (taken from a FW Chaos Renegade Guardsman). I place a small amount of milliput on this mould and with a damp sculpting tool, smooth the milliput to a very thin layer - you need to set this aside for around 2 hours for it to be cured enough to easily remove it from the mould and still soft enough to place and carefully feather out the excess milliput to give the front of the chest the distinct Chaos Icon chest brand I have on all of my bare chested Squats. Once dry, I have made another mould of the new milliput part with the Chaos Icon chest brand to make future copies quicker and easier. If you look closely at the mould on the top, you can see the Chaos Icon impression on the belly of the mould. This shows the fully cured and cleaned Squat naked torso with Chaos Icon chest brand ready for the next model. You need to plan how you make moulds of your parts. Each part may need to have a different mould made. There are 9 moulds in this photo, starting from the top left: 1) This is the 3/4 mould covered earlier to make a naked torso with Chaos icon chest brand. 2) I have made a mould of each boot and every time I have excess milliput, I fill in these boot moulds to ensure I have a ready supply of boots available. The completed pair can be seen in front of the moulds. You cannot make a mould of the whole of the bum, legs and feet/boots as you will not be able to get the part out of the silicon without cutting/tearing the mould. 3) This is the mould I made for a kneeling pose. I have removed the right boot before making the mould as it would be impossible to remove the part/cast part if this was still attached. The right boot has it's own mould. 4) This is is the mould I've made for the Squat's distinctive flak jacket. It's an easy one piece, easy to remove mould. 5) This is a mould of a pair of advancing bum and legs with knee pads. As discussed earlier, the boots are cast from a separate mould. With these moulds, I normally carefully cut horizontally with a scalpel the silicon putty until I can see the bottom of the ankles of the cast part. These 2 holes are then used to help push the milliput parts out of the mould for easy removing. 6) The front left mould is of a Vulkite Berzerker with left arm raised. This is a case where I have carefully cut the mould to allow for the hardened left arm to be removed. When filling the mould in future with milliput, I have to ensure the mould is carefully aligned otherwise, the left arm comes out badly. 7) This is a Vulkite Berzerker with the right arm raised. Just like the left arm, I had to cut the mould to allow the right arm to be released. 8) This is for a pair of naked Vulkite Berzerker legs and feet. I have had to cut the mould in 2 places to allow for the feet to be removed. Ramming this model with milliput is hard as you have to ensure all of the mould is aligned otherwise a lot of remedial work is required. 9) Another pair of bum and legs - you can see the excess milliput that has squeezed out of the 2 holes I cut in the mould to make removal of the cast piece easier. Hopefully, that has given you all a chance to find out the methods I use to make the majority of my models. If anybody has any other questions, please feel free to ask. Daily Update time Another "Special Forces" homage with this one. I've used moulds for Vulkite Berzerker bare legs with boots added. Catachan arms were used with the usual Chaos Icon belt buckle and pouches. I added a shoulder harness holstered laspistol and a vizored helmet. The Lasgun has had a silencer added from a Space Marine Scout Sniper rifle and a Primaris sniper scope. A Chaos space marine chainsword was also added to his left hand. You can see the plasticard straps and grenades, spare lasgun magazine, water bottle and knife in this shot. Till next time, Phil Noserenda, Cactus, Augustus b'Raass and 3 others 6 Back to top Link to comment Share on other sites More sharing options...
Shovellovin Posted October 10, 2021 Share Posted October 10, 2021 Excellent write-up; thank you! from reading your tutorial it seems that the part that will require the most practice is determining how to make the molds to where you can remove the cast pieces with damaging them or the mould. I assume any silicone putty will work? Sorry to hear about your job. Best of luck! Link to comment Share on other sites More sharing options...
Brother Morgan Posted October 19, 2021 Author Share Posted October 19, 2021 Excellent write-up; thank you! from reading your tutorial it seems that the part that will require the most practice is determining how to make the molds to where you can remove the cast pieces with damaging them or the mould. I assume any silicone putty will work? Sorry to hear about your job. Best of luck! Sorry for the delay Shovellovin. I use silicon putty from ebay and I think most/any silicon putty can be used. Making moulds is a learning process. Trial and error. Remember, even if the mould tears/rips when removing the original part, you still have the original part to make another, slightly different mould for next time. Give it a go, it's not that difficult. Update time: I wanted a simple classic looking Squat model firing his lasgun. So I used the usual torso and legs and having carefully removed the shoulder pads of a pair of Cadian arms, I added them with some gauntlets sculpted. I added a pouch on his upper arms and a bandolier of pouches across his back (like you see in the cover of WD111 and the classic old plastic squats). Spiky shoulder pads, holster and lasgun magazine. Grenades and a Catachan knife was used to finish his load out. I saw some of the Anvil Industries model parts and had to buy these. There's a Void body and legs with a Hazmat helmet. A Genestealer Cult shotgun was added to finish. I've bought multiples of the Blackstone Fortress Traitor Guardsmen and decided to convert them to make each as individual as I could. The model in the middle is the original pose throwing a grenade. The one on the left, I removed the grenade and armed him with a las pistol from another Traitor Guardsman and a rusty knife from a Dark Vengeance Chaos Cultist. The model on the right had a large double handed axe instead. Till next time, Phil. Khornestar, Shovellovin, Tallarn Commander and 2 others 5 Back to top Link to comment Share on other sites More sharing options...
Shovellovin Posted October 19, 2021 Share Posted October 19, 2021 Excellent work, as always. Very cool to see the same traitor guard given different poses. I really like that! Link to comment Share on other sites More sharing options...
Brother Morgan Posted October 20, 2021 Author Share Posted October 20, 2021 Excellent work, as always. Very cool to see the same traitor guard given different poses. I really like that! Thanks Shovellovin. I think it looks really strange when you see the exact same pose on multiple models (even if they have been painted slightly differently). A small amount of conversion like swopping a head or weapons I think, really makes a difference. Update time: I wanted another Special Forces vibe when I made my 29th model and thought he would look cool with a beret. I made a mould of a Scion Beret head and then added the milliput beret onto the top of an existing Squat head with sunglasses. I added an extra small layer to the beret to add a bit more depth. I also sculpted a kneeling pose which I though would go well with his clenched right fist (to stop moving). As I added a slung bolter over his right shoulder, I added some spare magazines at the front of his harness. I used a Horus Heresy Bolter with a plasticard strap. Milliput was used to make the clasps. I added elbow and knee guards with plasticard straps to give the old Squat vibe. As he had his laspistol drawn, I sculpted an empty left handed holster. A backpack, pouches and grenades were also added to finish this one. Just to finish today's update, here are some Enforcers I've made. I liked the idea of each of them having a whip to "encourage" their charges and sourced them from Necromunda and Dark Eldar bits. I did alter some of their feet by using moulds of Blackstone Fortress Traitor Guardsman instead of the usual Cadian. The one in the middle I have basecoated his red uniform and painted the rest of the model in black as a starting point for all of the other colours. I am slowly losing the building bug and can feel an urge to start painting again Till next time, Phil. Cactus 1 Back to top Link to comment Share on other sites More sharing options...
Brother Morgan Posted October 21, 2021 Author Share Posted October 21, 2021 Daily update: Continuing my Special Forces Squats, I wanted to make a Hot Lasgun wielding traitor. Using a mould of the kneeling legs from my previous model, I made this one. A little bit of milliput was used to hide the gaps in the cabling joining the backpack to the Hot Lasgun. I used a Cadian left arm with the shoulder pad removed and added a pouch on his bicep and sculpted a gauntlet as well. Following on from previous posts, here are some conversions on the same Blackstone Fortress Traitor Guardsman. I removed the laspistol and blade from the original pose and added 2 Chaos Axe (from the Chaos Marauders) to the model on the left and on the right, an autogun and arms taken from a Dark Vengeance Chaos Cultist with a head swop from a mould of another Blackstone Fortress Traitor Guardsman. Till next time, Phil. Shovellovin, Grotsmasha, LameBeard and 1 other 4 Back to top Link to comment Share on other sites More sharing options...
Brother Morgan Posted October 22, 2021 Author Share Posted October 22, 2021 Update time: For model 31, I went for a gun swinger - 2 laspistols with shoulder holsters!! I used pieces from moulds I've used previously. The only exception is having to create the empty holster on his right harness strap. I've since moulded that so I now also have a left hand empty holster for future models. I wonder how much Squats could bench press? Look at the guns on him!! I added a sword across his back for an extra "edge" in close combat - pardon the pun! Till next time, Phil. Shovellovin, Dr_Ruminahui, Cactus and 1 other 4 Back to top Link to comment Share on other sites More sharing options...
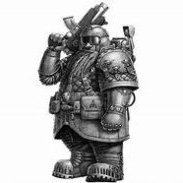
Brother Morgan Posted October 23, 2021 Author Share Posted October 23, 2021 Update time: I wanted to create a Melta loving Squat with this one: I added some ski goggles and rebreather to his head to hide his hideously disfigured face. I gave him a Scion Melta gun alongside a melta bomb on his back. I thought it would be cool to have him carrying a large Space Marine mine on his back as well. And finally, another Chaos Traitor Renegade I've made .... Just need to strip the truly awful primer and start again with this one. Till next time, Phil. Grotsmasha, LameBeard, Tallarn Commander and 2 others 5 Back to top Link to comment Share on other sites More sharing options...
Naryn Posted October 24, 2021 Share Posted October 24, 2021 I look forward to every update. The care you put into these guys is inspirational! Link to comment Share on other sites More sharing options...
Brother Morgan Posted October 24, 2021 Author Share Posted October 24, 2021 I look forward to every update. The care you put into these guys is inspirational! Thanks Naryn - I'm really happy with how this project is progressing. I've just started painting my first Squat to test the palette. I'll add some pictures soon. Update time: I wanted to go back and create another prone model so created this Squat. I went with a naked bottom half and added some knee pads and straps - you can just see his peachy bum!!! You can see the Cadian left arm I converted by removing the shoulder pad and added a gauntlet and bicep pouch. I needed to add some milliput to the base to blend the model into/onto the base. I have some Vallejo Dark Mud to add to the base, but have never used it before so I have a bit of trepidation. We'll have to see how it turns out. As they say, every day is a learning day I am expecting the Dark Mud to be covering his nether region and soles of his feet. Just to finish today's post, here's a shot of the same Blackstone Fortress Traitor Guardsman pose that I have converted. The model in the middle is the stock pose. I added a lasgun from another Blackstone Fortress Traitor Guardsman on the one on the left. I added a grenade launcher to the one on the right and swopped the spare fuel cannister with a spare grenade magazine. I'm happy with how the glowing eyes have turned out - I added fluorescent green paint and I think it looks better in the flesh. I just need to do the base to finish this one. Till next time, Phil. Cactus 1 Back to top Link to comment Share on other sites More sharing options...
Brother Morgan Posted October 26, 2021 Author Share Posted October 26, 2021 Update time: I went for a "Miner" vibe for my 34th Chaos Squat to go with the space dwarf theme and wanted to base it on one of the classic metal squats I've seen. I used the usual moulds for torso and kneeling legs and sculpted some sun glasses onto the top of his field cap. I went for a Scion Power Fist in his raised right arm. I added a DKoK backpack and then some cabling made from Greenstuffworld's tentacle maker. A power axe was taken from a Space Marine kit. You can see the plasticard strap on his head to hold the sun glasses on. And finally today, a trio of Chaos Renegades. The one on the left is a Blackstone Fortress Chaos Cultist with his autogun swopped for a lasgun and his head with a mould from a Blackstone Fortress Traitor Guardsman. The middle one has a FW Chaos Renegade torso with a Cadian right arm and Catachan left arm. The one on the right again has a FW Chaos Renegade torso with Cadian arms and a Dark Vengeance Chaos Cultists legs. I've finished painting my first Squat. I'm waiting for a brighter day to take some photo's so I will show him as soon as I can. Till next time, Phil. Tallarn Commander, Shovellovin, Cactus and 2 others 5 Back to top Link to comment Share on other sites More sharing options...
Brother Christopher Posted October 26, 2021 Share Posted October 26, 2021 I just wanted to let you know that I really like what you're doing here: your devotion to the project, creatibity and attention to detail is admirable. Also, you're very skilled (and patient!) with Milliput casts. Can't wait to see some paint on these! Link to comment Share on other sites More sharing options...
Brother Morgan Posted October 27, 2021 Author Share Posted October 27, 2021 I just wanted to let you know that I really like what you're doing here: your devotion to the project, creatibity and attention to detail is admirable. Also, you're very skilled (and patient!) with Milliput casts. Can't wait to see some paint on these! Thanks Brother Cristopher for your kind words. I have some news for everyone.... Update time: I'm really pleased to have finished painting my first Chaos Squat. I based the colours on the original Squat painting adorning WD111 - Red flak jacket, gauntlets and elbow/knee guards and green tunic. Each Squat in WD111 seems to have a different helmet paint job, but I have opted to go with the same colour of red. You can see his peachy bum in the shot as well. Since the photo, I have gone back and sponged some more Vallejo Dark Mud onto the back of his legs, elbows and gauntlets to mimic mud splatter. I sponged some rust on the exposed metal parts (look at the water bottle for example) as well. I'm really happy with how it turned out and now know how to paint all the other Squats. The weather is poor at the moment so I can't spray any undercoat but when the weather improves, I want to get them all undercoated and start paining asap!! Being a patriotic Welsh man, I also managed to finish my tribute to the 24th Foot (a Welsh regiment famously portrayed in the films Zulu and Zulu Dawn). Although not everything is historically accurate, I enjoyed painting this one. I chose white harness and equipment and also added epaulettes and a red stripe down his blue trousers. Since this photo was taken, I have sponged more Vallejo Dark Mud over his knees and the back of his trousers and also sponged congealed blood along his bayonet. I've just finished another Squat and another Chaos Guard based on the British Light Infantry from the Napoleonic War but I'm waiting for the base to be dry before taking some pictures. Till next time, Phil. Loquille, Shovellovin, Tallarn Commander and 1 other 4 Back to top Link to comment Share on other sites More sharing options...
Brother Morgan Posted October 29, 2021 Author Share Posted October 29, 2021 Update time: Just finished my second Chaos Squat. Like all good snipers, he is also armed with a chainsword!! I sponged mud onto his knees and back of the legs and congealed blood along his chainsword. You can make out the congealed blood better on this shot. I also finished my take on a British Light Infantryman from the Napoleonic War. I used Anvil Industries head and torso and converted Cadian legs and arms. I wanted to make him look a bit dishevelled so I only put his left epaulette on, the right I made out of plasticard. Congealed blood was sponged onto the bayonet as well. Mud was sponged onto his legs, knees and elbows for a bit more realism. I added a moulded backpack from a Catachan medic. I have some more Squats on my painting table. More will follow soon. Till next time, Phil. Cactus, LameBeard, Shovellovin and 3 others 6 Back to top Link to comment Share on other sites More sharing options...
Brother Morgan Posted October 31, 2021 Author Share Posted October 31, 2021 Update time: I managed to finish 3 more Squats yesterday. The first one is armed with 2 swords. I sponged rust and congealed blood onto both swords and also sponged some blood onto his beard - cast off from sword slashes. I also sponged some mud onto his feet, legs and other parts of his body as well. The knife had both rust and blood sponged onto it as well. I went with a right handed lasgun for this model. Mud was sponged onto his knee pads, elbows and gauntlets to give a realistic impression of him crawling in the mud. And finally, a left handed lasgun. Again, blood and rust was sponged onto his knife along with mud over various parts of the model. Here's a group shot of the first 5 Chaos Squats I've finished. Till next time, Phil. Tallarn Commander and Grotsmasha 2 Back to top Link to comment Share on other sites More sharing options...
Naryn Posted November 7, 2021 Share Posted November 7, 2021 The carefully placed blood splatter really sells these guys as hardened warriors! Link to comment Share on other sites More sharing options...
Freakshow668 Posted November 8, 2021 Share Posted November 8, 2021 This is excellent, as a chaos dwarf fan, I particularly love the squats, you're making the world a better place. Keep up the good work. Link to comment Share on other sites More sharing options...
Grotsmasha Posted November 8, 2021 Share Posted November 8, 2021 =] This is a family friendly board, pants are MANDATORY [= grailkeeper 1 Back to top Link to comment Share on other sites More sharing options...
Cactus Posted November 8, 2021 Share Posted November 8, 2021 I need to check this thread more often, I think I nearly ran out of likes today! Link to comment Share on other sites More sharing options...
Brother Morgan Posted November 30, 2021 Author Share Posted November 30, 2021 Update time: I managed to finish the first couple of naked Chaos Squats (modesty bars have been included): I love this model. He is literally drenched in blood. You do not want to meet this berzerker!!! What do you think of this cool dude? Shades and baseball cap reversed!!!! And finally, a keen to reach combat Chaos Squat.... Plenty more to follow. Till next time, Phil. Freakshow668, Grotsmasha, grailkeeper and 3 others 6 Back to top Link to comment Share on other sites More sharing options...
Shovellovin Posted November 30, 2021 Share Posted November 30, 2021 Good stuff, as always. I especially like “cool dude”. That models looks like he could have been in the Rogue Trader book. LameBeard 1 Back to top Link to comment Share on other sites More sharing options...
Brother Morgan Posted November 30, 2021 Author Share Posted November 30, 2021 Good stuff, as always. I especially like “cool dude”. That models looks like he could have been in the Rogue Trader book. That’s the look I was going for Shovellovin. I added pouches on his bicep, just like the artwork shows. I’ve finished a few more Squats that I’ll show over the next few days but I have been concentrating and enjoying finishing some of my Chaos Traitor Guardsmen post redundancy. Regards Phil LameBeard 1 Back to top Link to comment Share on other sites More sharing options...
Brother Morgan Posted December 1, 2021 Author Share Posted December 1, 2021 Update time: Here's another Chaos Squat "commando"........ Till next time, Phil. Tallarn Commander and Cactus 2 Back to top Link to comment Share on other sites More sharing options...
Brother Morgan Posted December 6, 2021 Author Share Posted December 6, 2021 Update time: I managed to finish another 2 Chaos Squats before I got bored and switched to painting up some Chaos Imperial Guardsmen. I like to think this Squat would be a Close Combat monster. I sponged on a lot of congealed blood. I'm sure in reality the blades would be clean from all the blood being thrown off when they start spinning, but why have realism in 40k!!! I wanted to make a Grenadier/Bombardier with this one, so I added grenades in both hands and lots of grenades across his body. The grenades across his chest came from the Space Marine Scouts Biker set. I moved onto painting some of the many converted Famous regiments Imperial Guard Chaos renegades I've made. The first one is from the 122nd Valhallan Regiment: I thought I would give him a combat spade sharpened (like in the Sven Hassel WW2 books I've read in the past) to make him a Close Combat animal. This has a Catachan torso and a converted Anvil Industries legs. The head and blanket were taken from a mould of a real GW Valhallan I have (but didn't have the heart or wallet to butcher it into Chaos!). Apologies for the eyes - They are my one weakness when painting figures. Plenty more to follow. Regards, Phil. LameBeard and Cactus 2 Back to top Link to comment Share on other sites More sharing options...
Brother Morgan Posted December 12, 2021 Author Share Posted December 12, 2021 Update time: I wanted to give this Chaos Traitor an American Civil War Union trooper "feel" with a dark blue jacket and lighter blue trousers. I modelled ripped sleeves and trousers and his left boot missing. Sponged blood and mud was also used on his clothes to give a battle worn look. I've decided to paint all of my troopers with eye lenses a glossy green to give a "bug" impression. This is my Tallarn Traitor. Apologies for his eyes - I know I will make it worse if I try to repaint them!!! This trooper is a follower of Khorne - hence all the blood! Till next time, Phil. LameBeard, Grotsmasha, tinpact and 1 other 4 Back to top Link to comment Share on other sites More sharing options...

Recommended Posts
Create an account or sign in to comment
You need to be a member in order to leave a comment
Create an account
Sign up for a new account in our community. It's easy!
Register a new accountSign in
Already have an account? Sign in here.
Sign In Now