Veteran Brother Karjalas Martäinen
Entry posted by Brother Tyler in Veteran Brother Karjalas Martäinen
6247 views
First up is the kill team's fighter, Veteran Brother Karjalas Martäinen of the Emperor's Hounds Chapter.
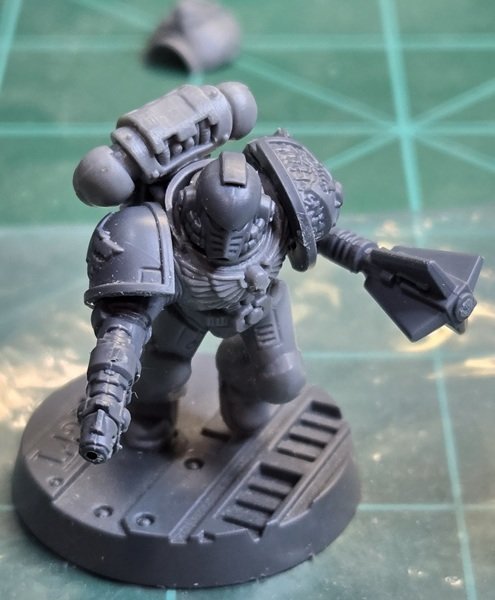
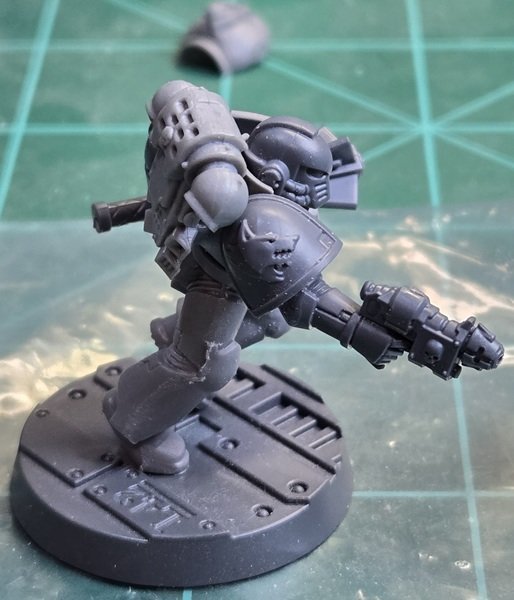
The power maul and both shoulder pads are from the Deathwatch kit; the grav-pistol is from the Sternguard Veteran Squad kit (I think), I forget where the helmet came from (it came out of my expansive bits box), the running legs come from the Assault squad kit, and the torso and backpack come from either the Tactical or Devastator squad kits.
The Emperor's Hounds are the modern update of the first Chapter for which I ever collected a full army, the Iron Hounds. I painted this army up for the Third War for Armageddon campaign. Prior to this, I had only painted individual models, so I didn't realize the work I was creating for myself in promising to play a 2,000 point game with an army that I hadn't even painted in only a few weeks. It was my first time really playing the game. Prior to that, I had only followed the lore and painted individual models for fun. Once I realized what I dummy I was, I settled on a fairly quick scheme - primer black with red fists (I've always been a fan of the Crimson Fists Chapter), red chest decorations, and red right kneepads. The Chapter badge was intended to be a black hound's head (akin to the badge for the Space Wolves) on a crimson diamond. Since the Space Wolves upgrade sprue wasn't yet available and I sucked at applying decals, I settled for the crimson diamond and imagined the hound's head. You can see an example of the paint scheme below, showing an Assault squad veteran sergeant equipped with a bolt pistol and single lightning claw.
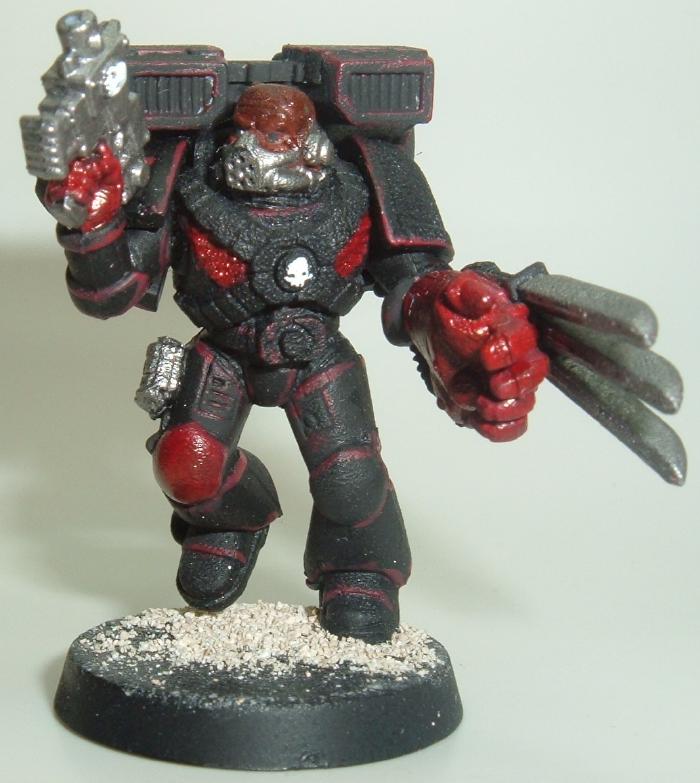
Yes, I screwed up the priming big time, and my experiment with the red highlighting was a pretty big failure. I used several layers of inks to get the glossy effect on the red. If I had a time machine, I would go back and reduce the army size to about 1,200 points and take more time painting the models. Alas, that's not possible.
Later, when the Eye of Terror campaign gave us the Marines Exemplar and an Index Astartes article showed us that Chapter's color scheme, I turned the surviving Iron Hounds models into Marines Exemplar. In my mind, I was dropping the Iron Hounds, developing the in-universe explanation that the Chapter had fallen to a Tyranid fleet. I liked the pathos of the Marines Exemplar and really liked the "sleeved" color scheme. I even turned an old 2nd edition Veteran Sergeant model into a Captain equipped with a bolt pistol, power axe, combat shield, and jump pack.
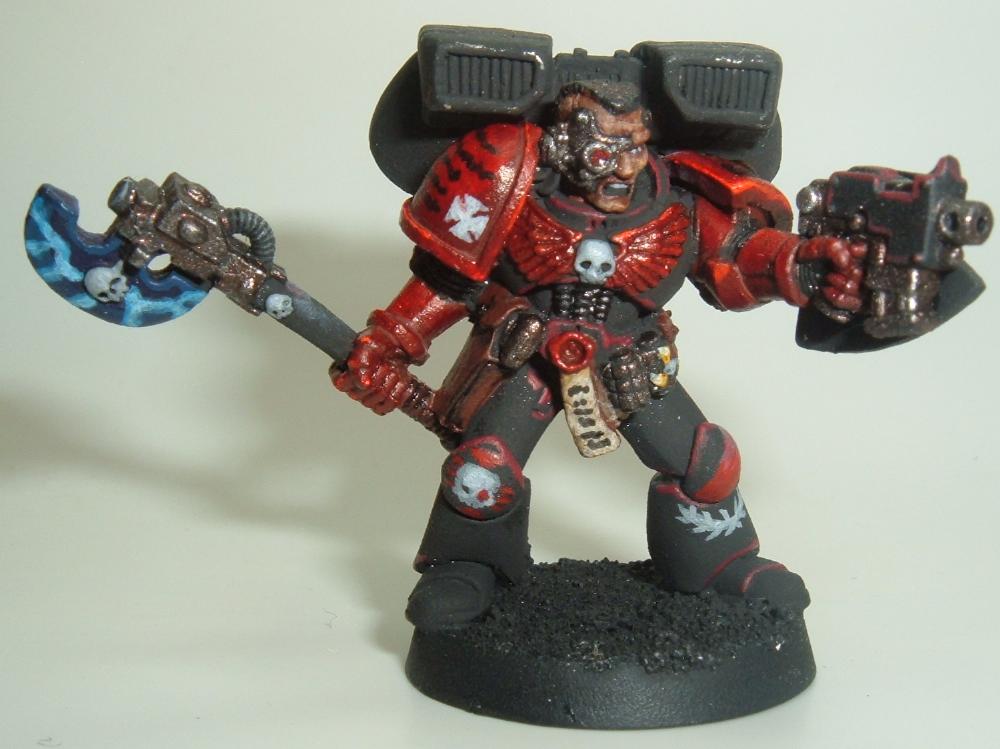
I never finished painting this guy (obviously), but I think he's stored in a box somewhere. The Captain's terminator honours are indicated by the crux on his right shoulder pad, though he incorporates decidedly non-Codex litanies upon the rest of that shoulder pad. The decoration upon the right kneepad is intended to indicate that he served in the Deathwatch. The marking upon his left kneepad indicates that he leads the 3rd Company (Battle), and the white laurel upon the left greave was just a design to fill some space (it was an experiment that failed). The red highlighting is slightly better, but slightly better than really sucky is still sucky.
Anyhoo, Games Workshop has given us an official Iron Hounds Chapter, forever ending any fantasy I might have to resurrect the Chapter via the Ultima Founding. Instead, I've taken the color scheme and modified it to create the Emperor's Hounds. I haven't developed any lore for the Chapter yet, but it's somewhere on my list of things to do. I've simplified things a bit by removing the crimson diamond, allowing the hound's head to be larger (coincidentally, as large as the standard Space Wolves wolf head badge  ). Where the original Iron Hounds badge was envisioned as black, I've changed the hound's head to a metallic silver on a crimson field. I haven't thought about the Chapter's color scheme beyond that.
One of the downsides of getting old is that my eyesight has gotten weaker. To compensate, I've found that taking pictures of my models helps me to see the areas that need to be filed and cleaned up before any priming takes place. As you can see from the images at the top of this entry, there is a little work to be done before the airbrush comes out.
- Grotsmasha, Rusted Boltgun and W.A.Rorie
-
 1
1
-
 2
2
3 Comments
Recommended Comments
Create an account or sign in to comment
You need to be a member in order to leave a comment
Create an account
Sign up for a new account in our community. It's easy!
Register a new accountSign in
Already have an account? Sign in here.
Sign In Now