Imperial Knight Conversion
Entry posted by Captain Caine 24th in Imperial Knight
49 views
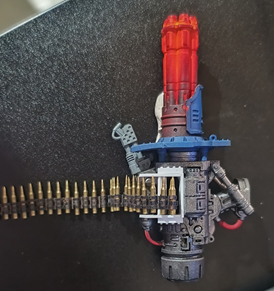
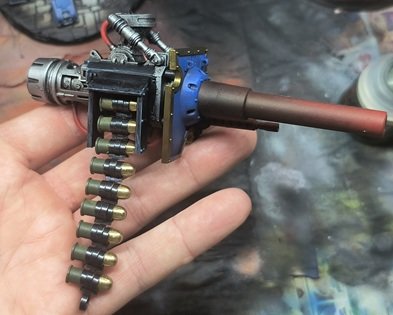
1. Source. 1/6 scale action figure ammunition. At the outset we have a number of decisions. First we have two design options: (1) a closed belt makes functional sense, and (2) the open links look awesome. Second, if we go with linked ammo - plastic linked ammunition is super cheap and available, but actual brass with separable links looks and feels just like the real deal. Plastic doesn't sink with weight (though it may have applications). Third, the size has to be right. .50 caliber (12.7mm) is about right. 7.62 roughly works for some autocannons. 5.56 works for some stubbers. Scale modellers would absolutely riot at what i'm saying (and rightfully so), but this is 40k and rule of cool wins.
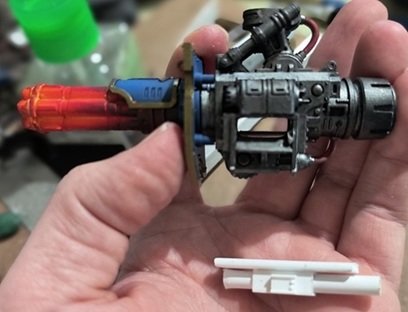
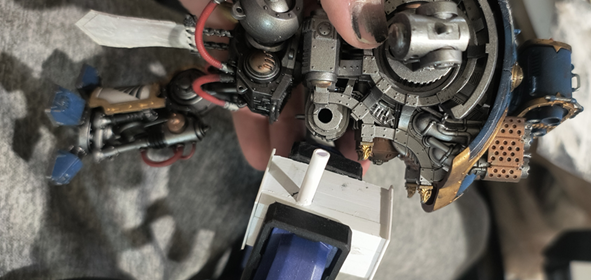
2. Conversion/Modification. There are almost certainly much better ways to do this. I'm positive somebody following my lead will do it much better. The great pain of conversions is always realizing it can be done better after the fact. Well, some can picture end products in their head much better. Anyway, I had to make an intake and ejection port. This resulted in a big hole in the gun that I didn't plan for. So, to cover it up I had to make an internal firing mechanism (e.g. bolt carrier group - firing pin fires round, gas pushes the bolt back and feeds another round, it comes forward, fires round, and so on). I didn't spend too much time on this as... who's really looking? Let's not get crazy here.
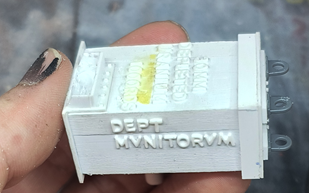
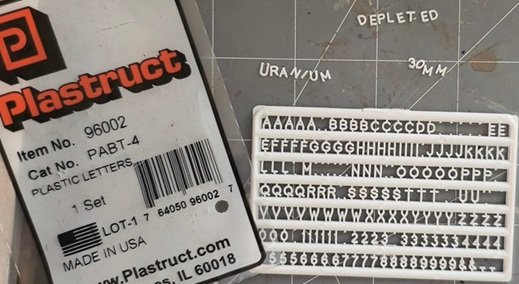
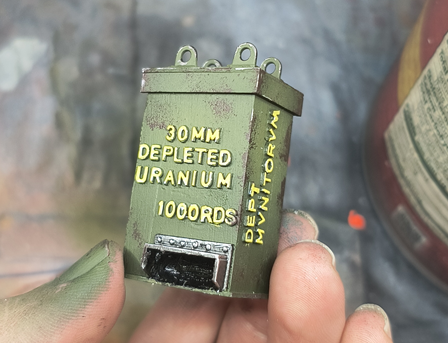
3. Ammo Can. Another one in hindsight that could have been way better. But, I wanted to push through and see how it turned out. "Do" instead of "think" is the motto here. Available materials: I had a lot of styrene beams (which were leftovers used essentially to represent 12"x 12" timber in my Vraks/Krieg display boards). Second, my styrene cutting is never (and I do mean never) straight and square - even with tools. I don't get it. Whatever. Anyway, building a simple box wouldn't work. So, I cut my styrene timber into 12 sections and made a box. I added some handles and a feed port. In hindsight I'd have made it thinner but longer so it would mechanically look practical. Styrene letters were used. Amusingly I ran out, so I subbed in some letter Vs for U, and chopped up two Ns to make an M. Still ran out though - it should say DEPARTMENTO MUNITORUM. Clearly it should not be "1000" but I got too excited at this point. ...I still think it needs more carry handles. The feed port also should have been pre-cut/drilled as it was excessively difficult to make it after-the-fact. Sanding the styrene inadvertently helped make a wood grain texture... which I'm actually ok with.
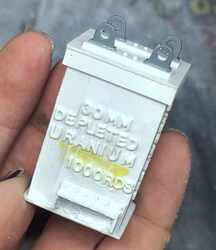
4. Painting. Super quick with some GW greens in gradient, sponged-on weathering, and yellow on the letters for visibility. This gives a 'modern' feel which isn't necessarily 40k... but in my defense here we want this thing to read as an ammunition can. That is, everybody can tell what this is, and 40k isn't always obvious
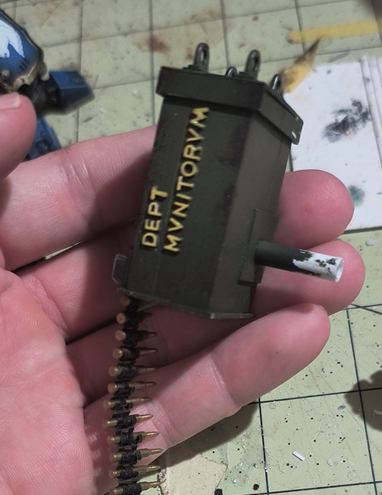
5. Mounting. I didn't spend much time on making the rear side look good - it could use rivets and such to make it look pretty. But it is hidden. I drilled into my ammo can and used a styrene rod. Four reasons why I didn't go with magnets: (1) this fits snug and perfect; (2) I can rotate/pivet the ammo can to seat just under the shoulder pad; (3) the can + ammo are heavy and get caught on things so the connection must be strong; (4) I didn't have to tear apart the model to install magnets - it's just a simple drill hole (which also means I can swap this arm and ammo can out easily for gameplay). This worked surprisingly well.
6. The Battle cannon needs updating. Using 1/6 scale brass and link here again, this time 40mm grenades (unfortunately these 40mm grenades are very hard to find with links- these bits were sitting in my bits bin for like 5 years now). I painted the rear of the shell green but left the tip brass for now. I had all these bits and models sitting on the shelf for 5 years. Anyway, same idea here - new intake feed, and ejection port. Still trying to figure out the overheated barrel effect on this one. I'm not in love with the design, but I'll have to sit an think about it.
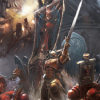
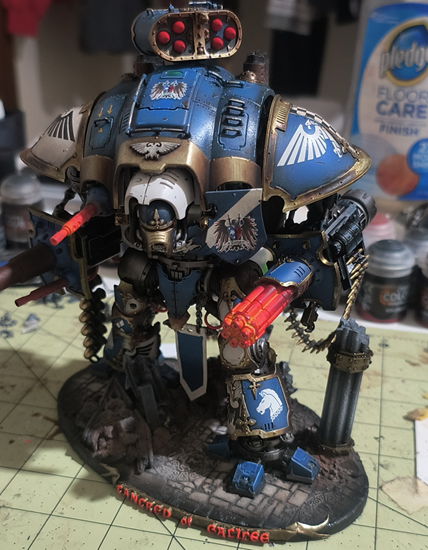
7. Getting it painted! Work in progress so far. I'm really liking contrast paints for blending. I've got work to do, but above the tilt plates and head you can see I've got some real blending going! Happy about that. Shoulders need work. I got a 3d printer for cathedral bits on the base. I used greenstuff world texture roller for the stones. I made a banner out of greenstuff and added gothic letters from GreenStuffWorld. Purchasing a custom 'nameplate' is probably way smarter - but my bases don't have a bevel, they're essentially cylindrical (mdf base w/ rolled texture on top). So there isn't a pre-fabricated nameplate for my situation. I'm naming all mine crusader names - this here is TANCRED. Lots of candles and cherubs to make here still and lots of fine tuning the paint job.
Edited by Captain Caine 24th
- Lathe Biosas, Bouargh and Shard of Magnus
-
 1
1
-
 2
2
2 Comments
Recommended Comments
Create an account or sign in to comment
You need to be a member in order to leave a comment
Create an account
Sign up for a new account in our community. It's easy!
Register a new accountSign in
Already have an account? Sign in here.
Sign In Now