I got in another game this weekend with Tyriks and remembered to take pictures this time. We decided to play 1000 points again because we're still getting back into 40k since a long pause during 9th and a shorter break between the start of 10th and now due to life being chaotic. The lists are in the comments below this Batrep Post to keep the clutter down.
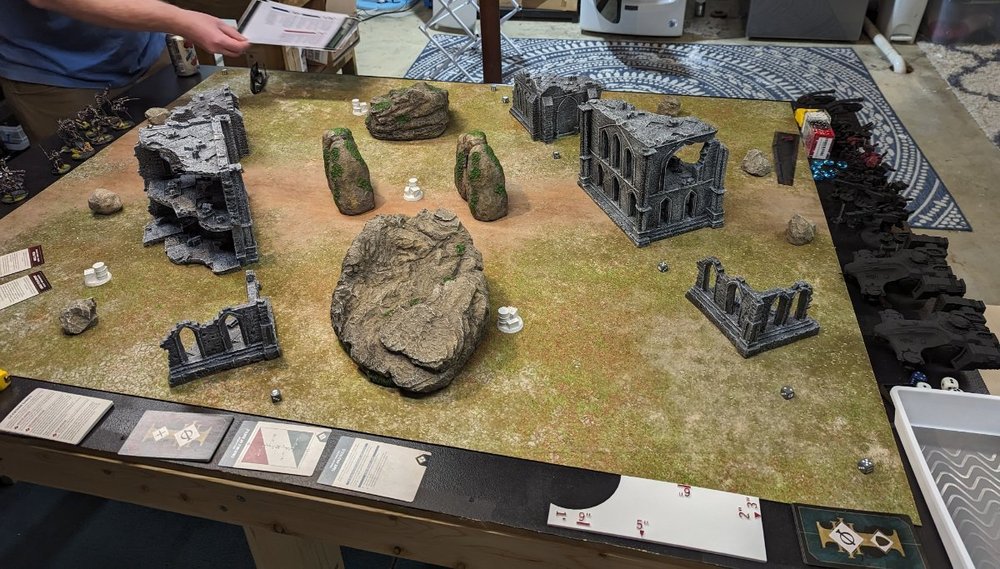
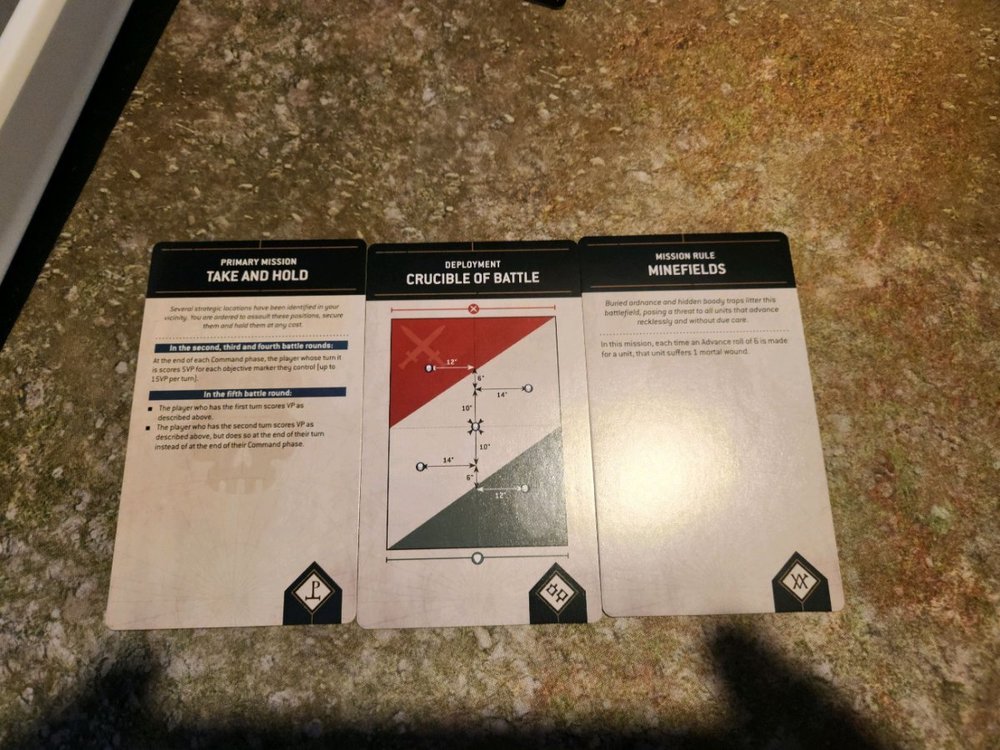
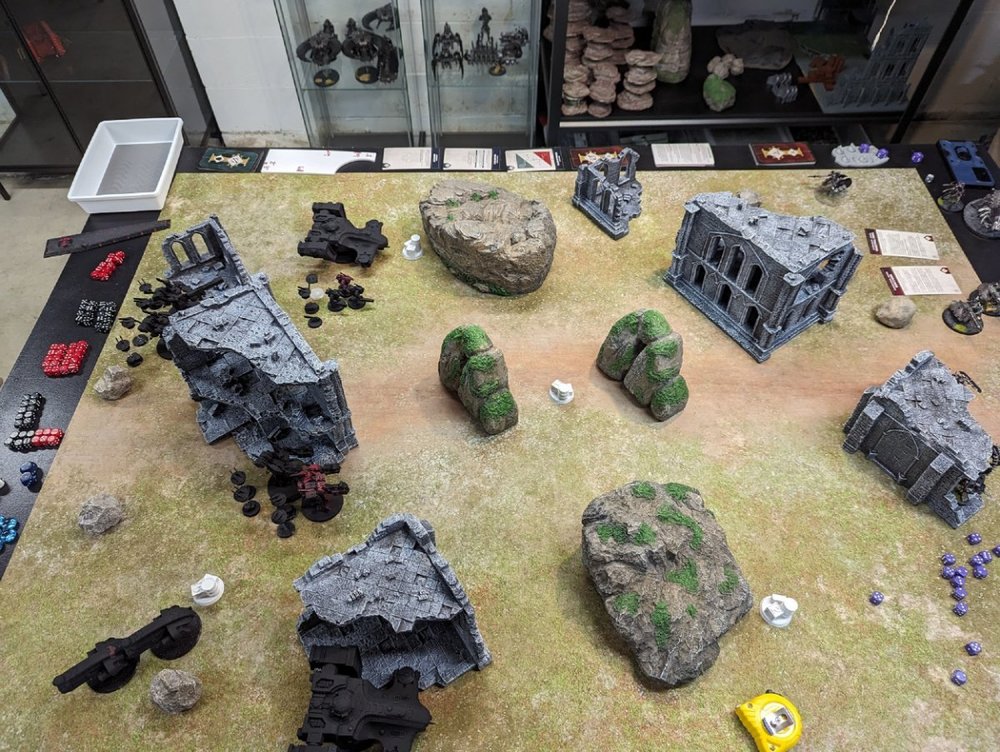
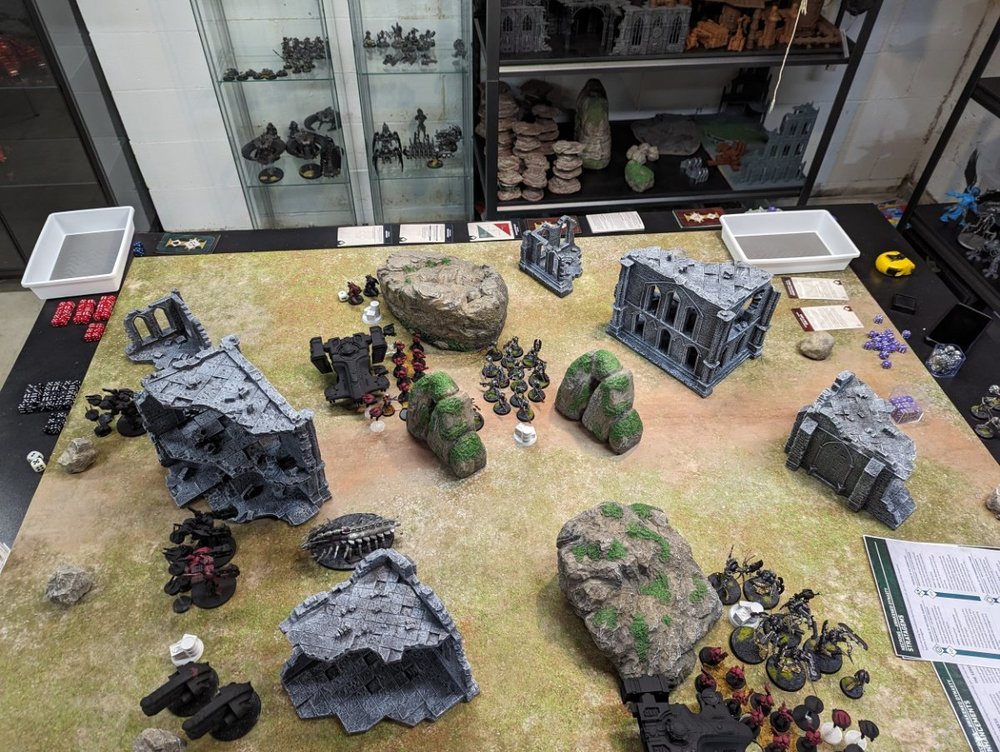
Tyriks graciously set up the table for us after drawing a random deployment card, which was Crucible Of Battle or diagonal deployment zones on the short sides of the board edges.
1. Initial Board State
For the mission and rules, we drew Take And Hold with Minefields modifying the overall mission. Minefields causes 6's on advance roles to cause the unit damage and the mission overall is just attempting to keep objectives under your control, capping at 15 points per turn for 3 held. For our secondarys, the Necrons opted for Bring it Down and Engage on All Fronts and the Tau selected Storm Hostile Objective and Engage on All Fronts.
2. Mission rules
Deployment
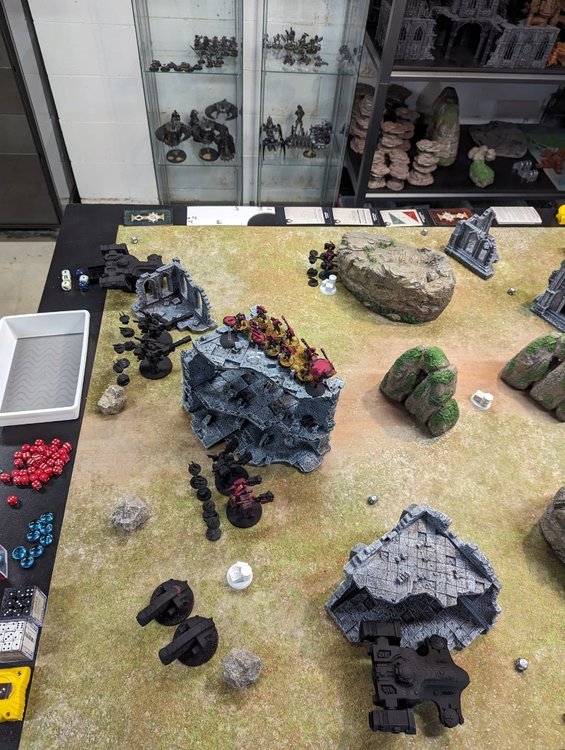
We both had a generous amount of cover to deploy into and I elected to place my pathfinders in my large center ruin while the rest of my army, which could mostly not benefit from cover anyway, deployed evenly to either side of the main ruin. My rail rifle Broadsides and one squad of Breachers in their devilfish deployed to the left side of the ruin, lining up for a supported drive towards the center objective with an eye at having the rail rifles neutralize the heavy destroyers. On the right side, my tetras posted up on my objective with my high yield missile broadsides and the other unit of Breachers in their Devilfish. Finally, I placed my stealth team on the left no-man's-land objective behind the large rock so they could spot into the other objective zones.
3. Tau Deployment
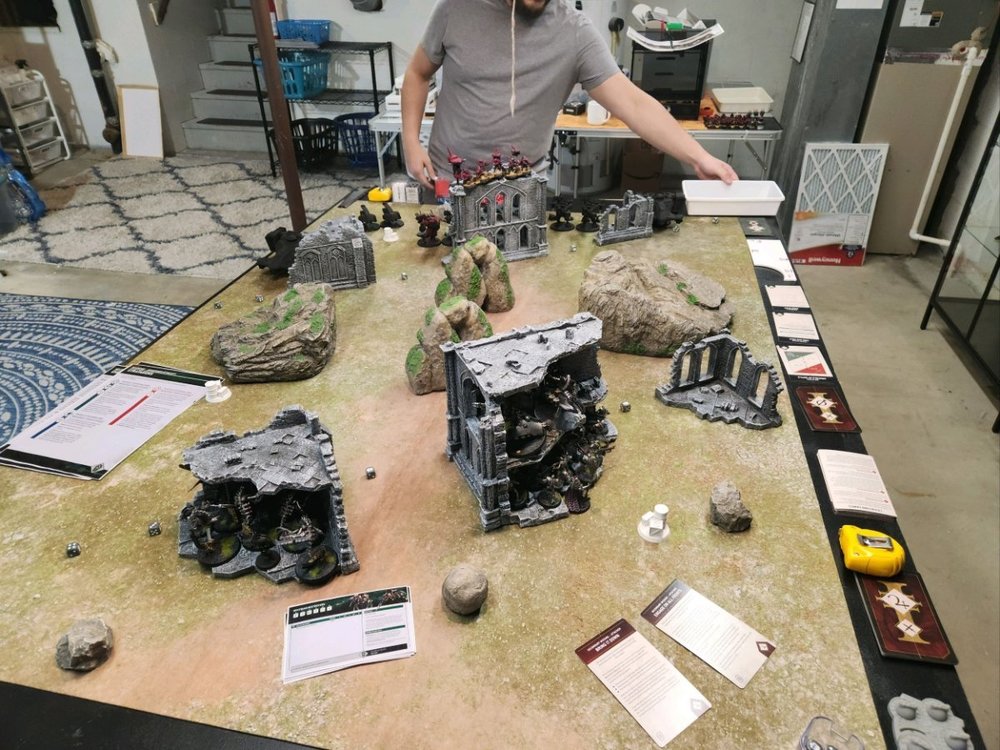
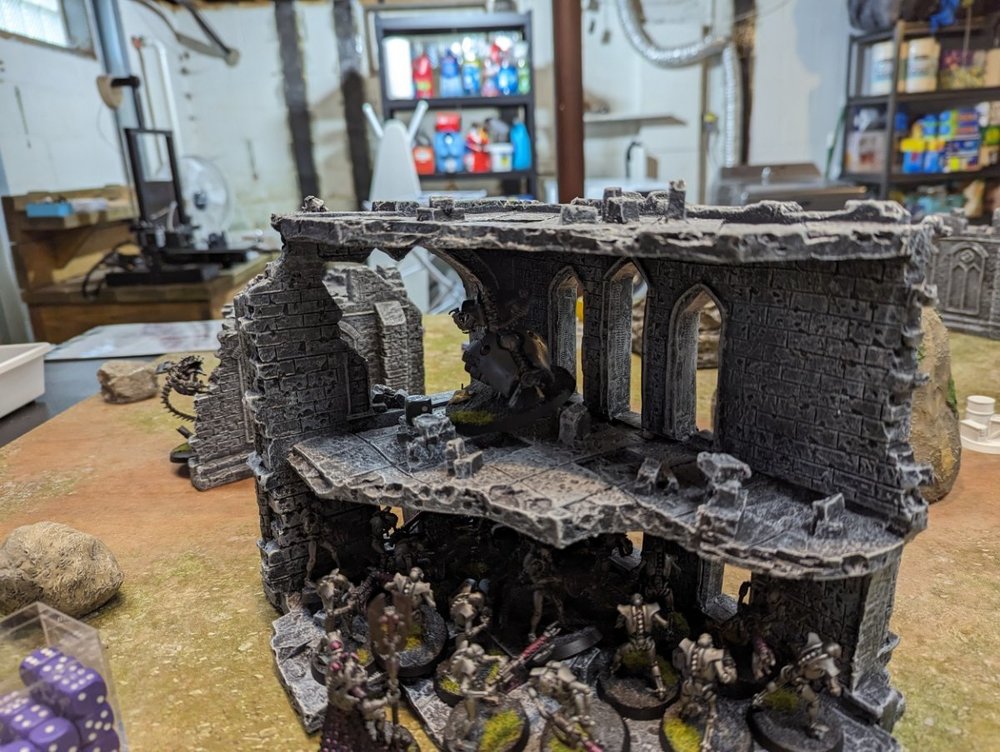
My opponent placed his warriors on the first floor of his central ruin and his heavy destroyers on the second level, overlooking the battlefield. The ophidians hid behind the small ruin opposite of my tetras eyeing the other mid-field objective behind the rock closer to his deployment zone. His Canoptek Stalker and Hexmark Destroyer lurked in deep Strike waiting to jump into action where they could do the most damage.
4. Necron Deployment
Turn 1
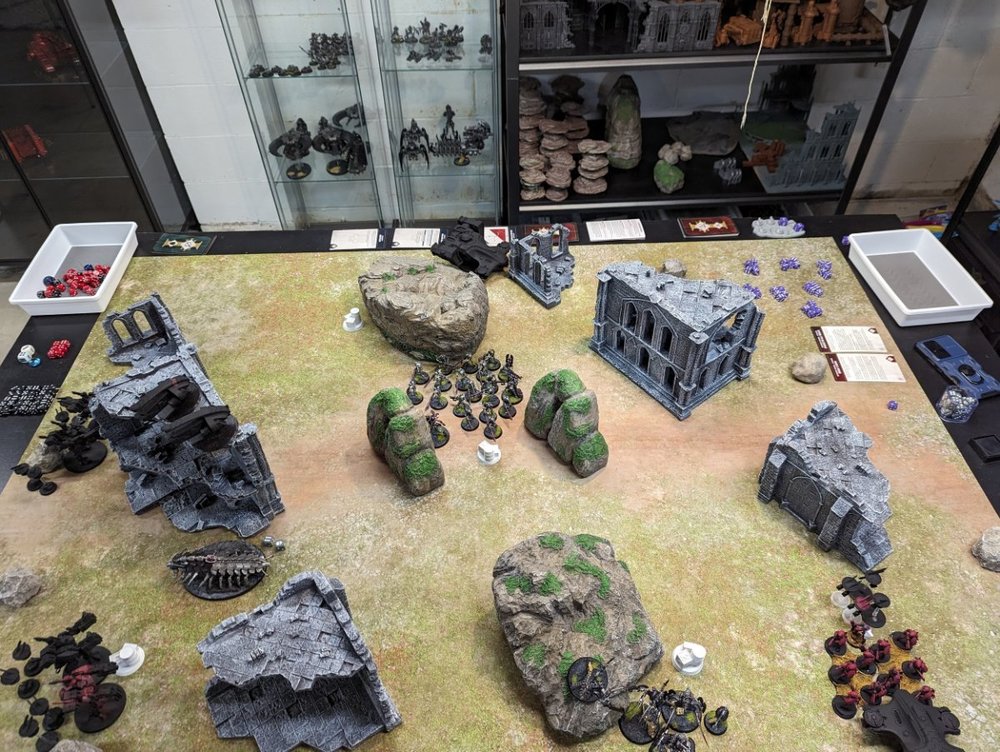
Tyrik's won first turn and decided that discretion was the better part of valor and mostly remained for the first turn of movement after seeing a disappointing advance roll for his warriors, commenting that in prior games rash early movement had gotten him into trouble. Instead, he shuffled his warriors back to hold his home objective and instructed his Heavy Destroyers to take out the pathfinders from their second story overwatch position. A withering barrage of enmitic exterminator fire quickly yielded exactly 10 unsaved wounds for the poor pathfinders, taking the Tau's primary spotter unit out of action before a single Markerlight had illuminated an enemy of the Greater Good. Ending his turn, the Necrons scored 0 secondary points but dealt a major blow to the Tau's spotting network.
In response, Tau shuffled the Tetras over to get a fix on the Heavy Destroyer's with their High Intensity Markerlights and instructed the rail rifle Broadsides to remain stationary, anchoring their battlesuits into the ground to get every bit of stability. The stealth suit hopped out to also gain a spotting angle while the nearby Devilfish jetted onto the objective they had left. The missile-equipped broadsides strode forward and barely got one suit into range of the destroyers as well.
5. Tau Turn 1 Movement
Once movement had ceased, the broadside teams opened fire on the Heavy Destroyers and their attached Lord, leading to one wound from the missile barrage and four wounding hits from the heavy rail rifles. Two wounding hits from the heavy rail rifles were absorbed by the Locust Lord, who failed both invulnerable saves but managed to save the unit from potential destruction. The remaining two wounding hits killed off two whole Locust destroyers, leaving a single, minorly damaged survivor amongst the wreckage of his comrades.
6. The lone survivor
Turn 2
The necron warriors with their attached Overlord managed to roll a respectable 3" for their advance roll this round and struck out through the ruin's windows and out onto the center of the battlefield, making a straight line for the middle objective. The living metal of one of the scrapped Heavy Destroyers crept to life and mended the clean, precise rail rifle shot that had put it out of commission only moments before, allowing it and its now-full-health compatriot to jet out of the ruin and down to the objective behind the ruin. The squad of Ophidians slithered to the nearby neutral objective and took it. At the end of all the shuffling movement, the two deep striking units emerged, hopping together on the center objective after failing to find a good backfield area to invade.
7. Necron Movement
The Necron warriors and the newly-arrived Hexmark fired into the stealth suits, managing to down one and put a wound on another despite their powerful obscuring fields. The canoptek stalker fired into the broadsides to its front and then attempted to charge, but only managed to take a wound from overwatch fire before the failed charge roll. The necrons again scored 0 secondary points but scored a single objective: 5-0, Necrons
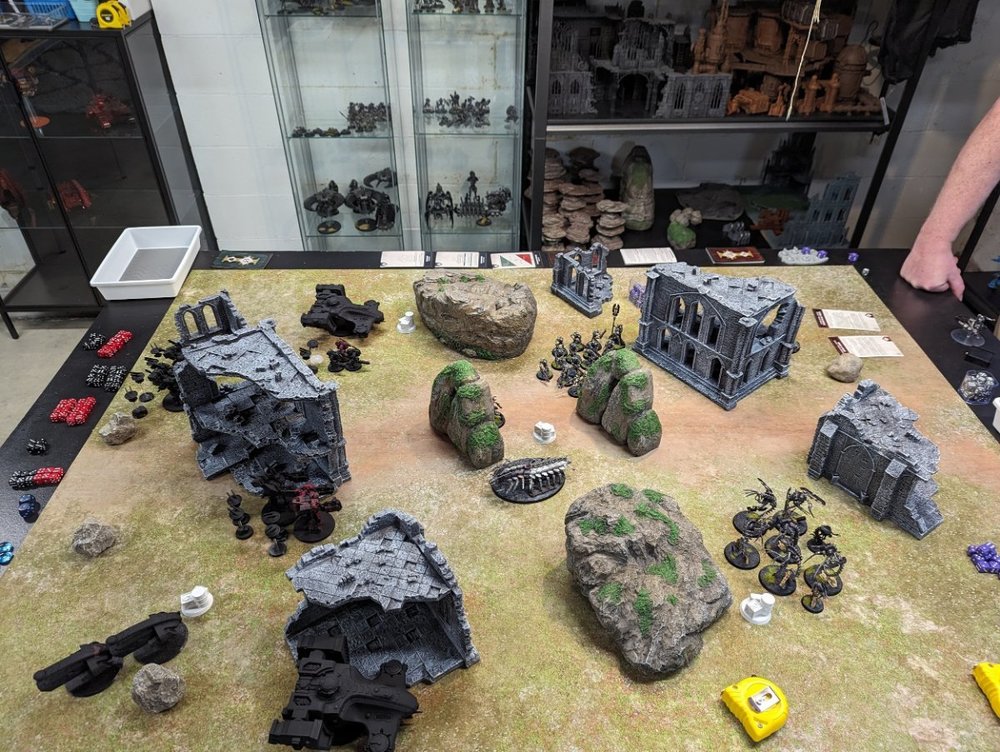
Seeing the enemy advance into the open, the inexperienced Tau commander decided that they had waited long enough and sent forth all forces for their strikes. Both Devilfish screamed forward and delivered their breachers, sending the Gue'Vesa to confront the Necron warriors and their tau comrades to face down the Ophidians. Both broadside pairs shuffled to get better lines of sight to their chosen quarry. The stealth team jumped back to their original position to mark the Ophidians using the corridor through the the center rocks.
8. Tau Movement (Messed up framing and cut off the bottom of the board :/ )
Starting off the shooting, the Gue'Vesa in the middle of the board fired their full salvo of Pulse Blaster fire, aided by the high intensity markerlights of the Tetras and their Fireblade, and managed to down a little more than half of the block of warriors. The warriors used a strategem to return fire, felling 3 of the human auxiliaries. The Heavy Rail Rifle broadsides threaded a needle through their side of the board and wiped out the heavy destroyers over the heads of their vulnerable human allies. In an error, the Tau breachers fired before the missile broadsides, killing off the two Ophidian Destroyers that their support fire could see. This left their fire going into the Canoptek Stalker, which took no damage from the weak but plentiful missiles. Two objectives and Engage on All fronts were scored: 5-12 Tau
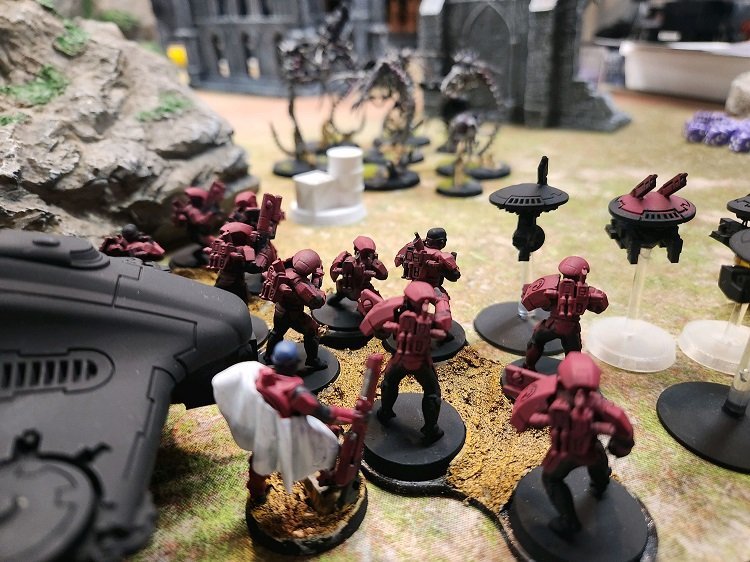
9. Breachers Confront the Ophidian Destroyers
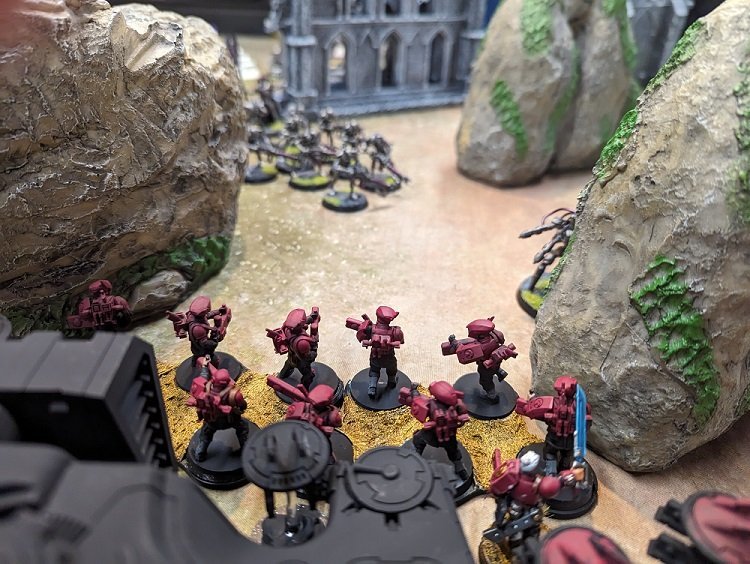
10. Gue'Vesa breachers pouring fire into the Advancing Necron Warriors
Turn 3
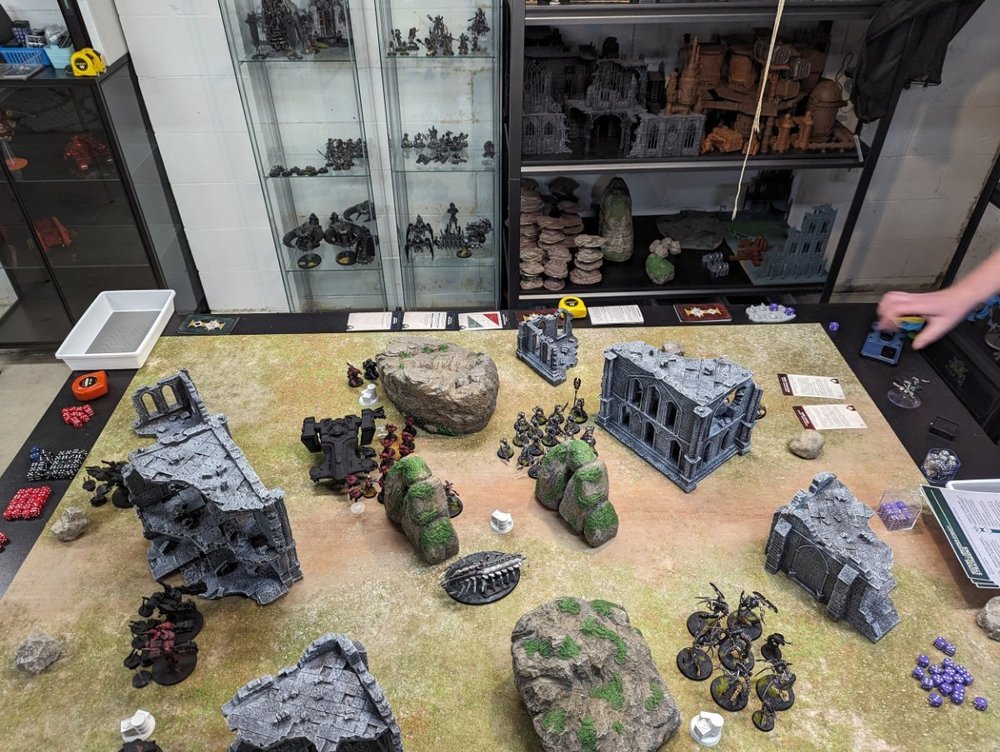
Resurrection returned several warriors and one ophidian, leaving both units near full strength ad they advanced forward towards the breachers that had fired into them. The stalker scurried towards the broadside that it had been dueling with since it arrived from deep striking into the center. The Hexmark remained stationary to target the stealth suits.
11. Necron Movement
The Necron warriors fired into the breachers and killed six more breachers with the rapid fire gauss fire, leaving only one of the squad living alongside their attached Fireblade. The Hexmark Destroyer fired into the stealth team and easily felled the remaining two members. The stalker again fired at the missile broadsides but their armor proved fit to handle all the hits, taking no wounds. The other breachers managed to avoid any casualties to fire from the Ophidians and were subsequently charged. In response, they used Emergency Embarkation and jumped back into their transport. The Devilfish was then retargeted for the charge and took 8 wounds of damage from the vicious machines. The stalker charged into the missile broadsides, taking one damage from overwatch, and proceeded to do no damage.
Starting with two objectives and scoring no secondaries again, they gained 10 points: 15-12 Necrons
Feeling the overwhelming onslaught of the Necrons turn the tide in basically a single turn, the Tau began to withdraw as much as they could. The remaining Gue'Vesa piled into their devilfish which jetted down the top board edge towards the enemies deployment zone. The other Devilfish followed suit and fell back over the Ophidians. (I misread the rule at first and disembarked my breachers, but we double checked after the picture was taken and reembarked them.) The missile broadsides fell back in hopes that their counterparts with the rail rifles could swing back around the ruin and fell the T9 stalker for them. Unfortunately, the rail rifle broadsides who had been crack shots up until now failed to wound at all. With only one objective scored and not enough table quarters, the Tau only gained 5 points: 15 - 17 Tau
12. Tau Movement
Turn 4
With a large majority of the Tau force dead and fleeing and with time short (Dang afternoon weddings), the game was conceded by the Tau after running through possibilities for scoring with so few troops left on the board. Necron Victory.
Conclusion
Saracen: I am still learning Tau and I think I made plenty of mistakes this game. It is weird coming from GK and other former armies where 3+ was the standard across the board for shooting and fighting. Tau really need to rely on having spotters available and also need to coordinate to take opponent's down together. I thought a single breacher squad with minimal support would be enough to handle large threats and they really needed to be deployed together rather than on their own. If I would have rushed the center and shot the warriors off the board, Tyriks would have had less of an easy time figuring out how to fight back even though I would have left the Ophidians to move freely. Some lessons were learned and fun was had, though, so I think the game was a success overall.
Edited by _Saracen
- Bouargh, Khulu, TrawlingCleaner and 1 other
-
 4
4

3 Comments
Recommended Comments
Create an account or sign in to comment
You need to be a member in order to leave a comment
Create an account
Sign up for a new account in our community. It's easy!
Register a new accountSign in
Already have an account? Sign in here.
Sign In Now