Lord Solar in a Weekend: Bringing the Hobby Back
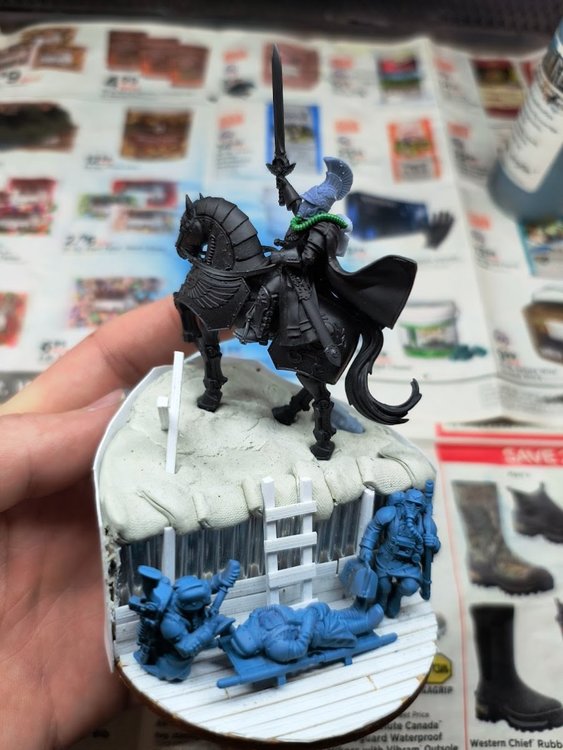
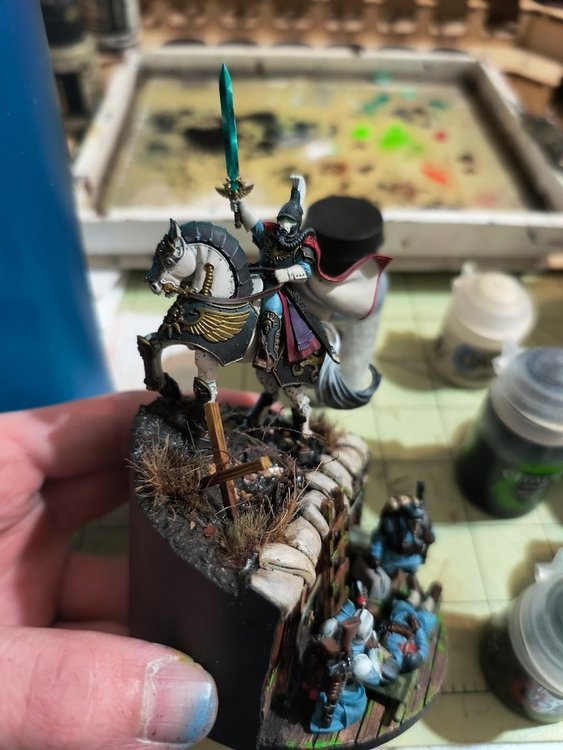
Lord Solar: Yes, I know. It's been done. We've all seen 100's of conversions of Lord Solar. Leave me alone. I felt the hobby inspiration. I had to go with it.
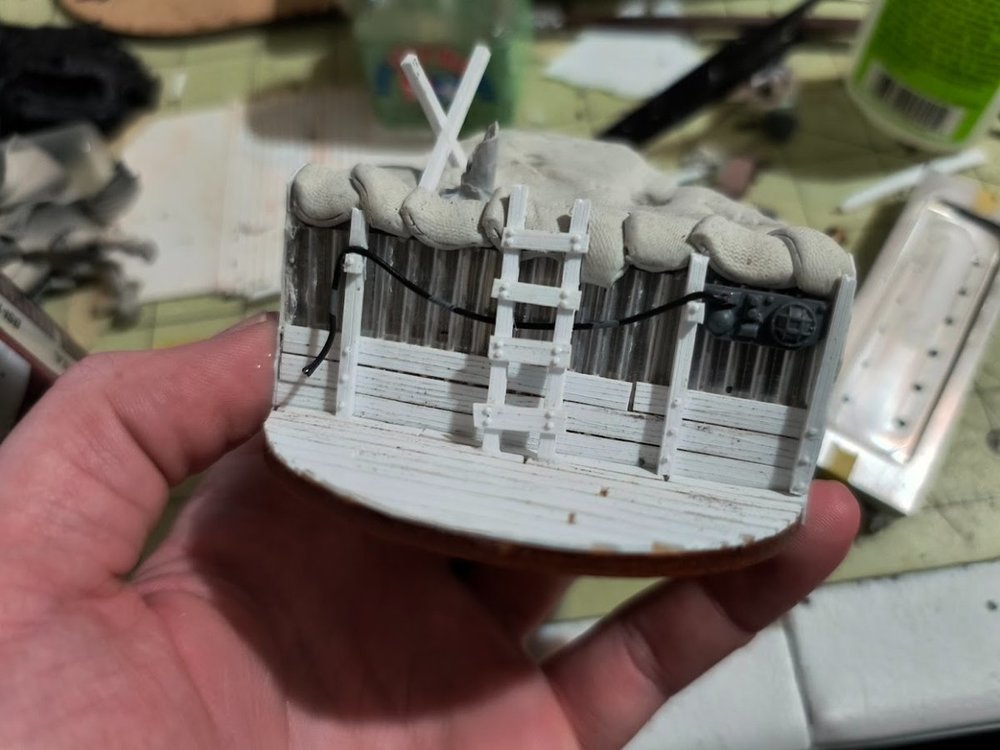
Construction - building off of my previous display boards.
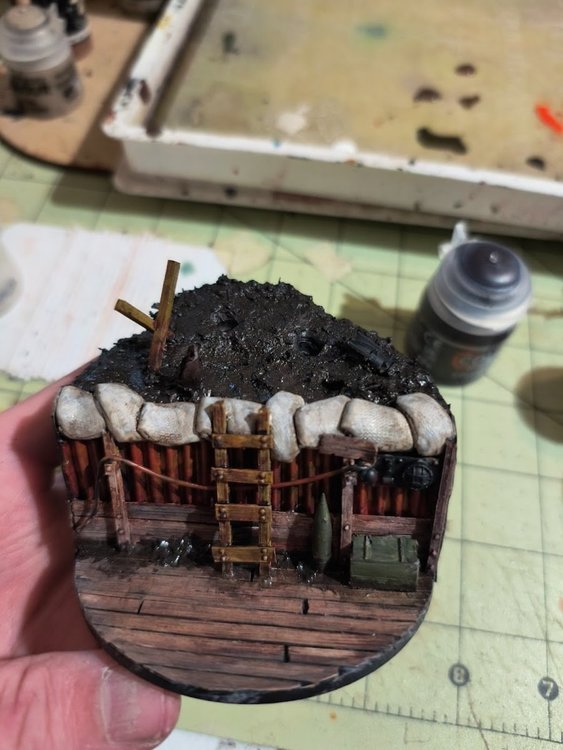
Base: went to mdf round 80mm base. This is no time for the slanted standard GW base.
Shape: two half circles of cork, with styrene wrapped around the half-circle shape. The MDF base allowed me to glue the styrene to the flat edge. No water effects this time... but we could have. on top of the cork I added apoxy sculpt to shape a bit of a hill for a good pose. In hindsight i ought to have spent more time on the pose to get a great angle overall.
Wood: Styrene strips. Razor saw, x-acto knife & 220 grit sandpaper for wood grain texture. UMM-USA punch for nails. My favorite tool. The best tool. Come at me. I'll die on this hill.
Sandbags: could have tried harder. Apoxy sculpt 2-part mixed for 5 minutes, rolled into log, then the roll is sliced into small sections with x-acto knife. Press each section with finger to form sandbag - use cloth to make texture. I should experiment more with getting a more exact shape. Still, apoxy sculpt is a cost-effective method.
Corrugated metal: heavy tin foil costs a tenth of the foil/hobby pewter sheet via greenstuff world or wherever. I did spend some more time on this adding a lower wooden section to the walls but I was too impatient. I should have went with a much larger wood plank along the bottom. It looks too close to the floor boards.
Razor Wire: I rushed it a bit without a clear plan - just wanting to get it done this weekend. I don't use the twisted wire. I see now there are 3d printers making interesting small scale barbed wire for basing. Here I'm adding rows of it. I use Royal models 1/35 barbed wire brass etch. Like real barbed wire it is a problem to work with.
Conversion: The replacement head is Reptilian Overlords (i think) off of an etsy printer. I use the green stuff roller to make the mouth/breather tubing. On the back is a backpack from Tiny legends 3d printed range.
Medic: old Krieg model with new kill team medic bits.
Stretcher & casualty: Tiny legends.
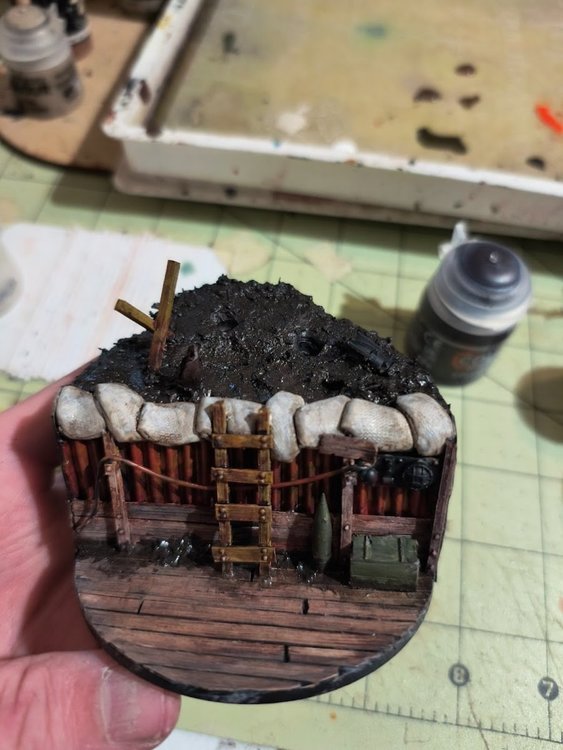
Painting: Got some color on it. Aging wood is always fun. Simply wiping off excess paint reveals the white styrene underneath creating a decent distressed effect. I had to play around a bit.
Details: I really really wanted to add a nurgle rat from Cursed City, but ran out of space. A 1/35 panzer shell and a crate will have to do for detail bits. I'm ok with the light and wire, but it seems like it could have been more.
Mud: With dry dirt I have little trouble adding various browns. In fact I figured out how to add oil stains and all sorts of color variation on the last display board. But... Wet mud is somehow very hard for me. Basically I'm just slopping on Vallejo Russian Mud. It works I guess...
Painting: I got the paint blocked in. This is the part where not rushing the early stages and getting it right matters. I'm too impatient though - Forward! I find that painting white or cream is easy on the airbrush, but awful on a simple paint brush.
Grass: i tried some grass tufts. The uniformity of height was a real turn off. I've still got some scale 75 natural fibers. Using that makes a much more realistic dead plant, at the mere cost of my sanity in trying to get the super glue to fix them correctly.
Can't wait for some 'try-hard' to argue with me about modelling to advantage at a tournament. Time to get 2 more DORNS painted. Then we ride.
Edited by Captain Caine 24th



1 Comment
Recommended Comments
Create an account or sign in to comment
You need to be a member in order to leave a comment
Create an account
Sign up for a new account in our community. It's easy!
Register a new accountSign in
Already have an account? Sign in here.
Sign In Now