Drudge Dreadnought Posted July 15, 2010 Share Posted July 15, 2010 I need a break from my Flawless Host. Painting a tabletop scheme is just too much quantity over quality, and I'm having to suppress my urges to try out more advanced techniques in the name of consistency. This has caused me to become bored with the project overall. So I decided to pick up the new Sanguinary Guard box, and find out exactly how good of a painter I am after two years of 40k. I want to do this as a full and proper WIP log, so I'm starting it early, even though I don't have much to show yet. Here's the picture of them all right before I started to prime them. The first coat is drying as I type this. http://i4.photobucket.com/albums/y133/Necrologic/Sanguinary%20Guard/SangGuardPieces1.jpg As can be seen, I've decided to paint them in pieces. Every piece is pinned, so that they can be easily assembled once painted. It has taken me several days to get them all to this point. So far these models have been great fun to work with. GW's plastic mould detail has really come a long way. These surpass some metal models. Sanguinary Guard are traditionally pure gold, but I don't want to paint ONLY gold. So I will be doing a variant scheme, with red as the main body color. There will still be a lot of gold present. I should have the first stage of the painting posted up tomorrow. Wish me luck! Link to comment https://bolterandchainsword.com/topic/206477-sanguinary-guard/ Share on other sites More sharing options...
Shadow Nugz Posted July 15, 2010 Share Posted July 15, 2010 Very cool idea! I would like to take a break from the hordes of stuff I'm working on but there doesn't seem like enough time... Good luck! Link to comment https://bolterandchainsword.com/topic/206477-sanguinary-guard/#findComment-2463365 Share on other sites More sharing options...
Pig Of Sparta Posted July 15, 2010 Share Posted July 15, 2010 I'm looking forward to how this project progresses. I too sucumbed to the Red Thirst (although I only purchased a single Sanguinary Guard) and will be trying to push myself on painting him as well... I think I'm going to steal your painting separte sub assemblies idea for mine <_< cheers James Link to comment https://bolterandchainsword.com/topic/206477-sanguinary-guard/#findComment-2463595 Share on other sites More sharing options...
Chaplain Hiltraud Posted July 15, 2010 Share Posted July 15, 2010 By the looks of your tabletop quality minis, these will turn out awesome! I think a non-gold paint scheme will turn out sweet...have a look at some of the flesh tearer SG that are floating around the forum. I always find it easier to paint everything in pieces, IMHO it works out allot better and cancels out those 'finiky' hard to reach bits...all the best in your SG adventure ;) BTW: Totally stealing the way you do those bases! Very nice. Chaplain Hiltraud Link to comment https://bolterandchainsword.com/topic/206477-sanguinary-guard/#findComment-2463810 Share on other sites More sharing options...
Drudge Dreadnought Posted July 15, 2010 Author Share Posted July 15, 2010 BTW: Totally stealing the way you do those bases! Very nice. The bases are simply bits of sprue and some plasticard hacked up with clippers, my knife, and my drill. There are a few scraps in there as well. The stuff that looks like hose is from the defiler's flail close combat arm. I've drilled holes through the bases so that I can simply stick that huge pin in the model's feet through and then clip it on the bottom. I can take some close ups of just them if you want. Link to comment https://bolterandchainsword.com/topic/206477-sanguinary-guard/#findComment-2463823 Share on other sites More sharing options...
Drudge Dreadnought Posted July 16, 2010 Author Share Posted July 16, 2010 Well, I've already encountered the first obstacle of this project: http://www.bolterandchainsword.com/index.p...p;#entry2464089 I just spray-primed some models with GW primer. However, the coat seems to have gone on a bit gritty. In some places they are just fine. In other places, the surface is more like fine sandpaper. What caused this? I had cleaned the models first, so it was nothing left over from the molding process. I sprayed them indoors in a room-temperature room, under the exact same conditions that have I have primed some 5000 pts of models before with no issue. The only thing I can think of was that the can was nearly empty, but I've sprayed cans till they were empty before without problems. Is this a common problem? Are there any suggestions to fix it? Link to comment https://bolterandchainsword.com/topic/206477-sanguinary-guard/#findComment-2464091 Share on other sites More sharing options...
Edemia Posted July 16, 2010 Share Posted July 16, 2010 Hey mate, I've had this problem now and again with GW primers, and i've been spraying outside the whole 8 years i've been in the hobby. A few other folks get it now and again, I don't think its necessarily something you've done differently. I'm contemplating trying out other primers to see if they work a wee bit better. The only thing you could maybe try (i've yet to try this myself) is a method I saw on Beasts of War on youtube - basically leave the can in a bucket or basin of warm water for a few minutes, then shake the hell out of it then spray. Hope you get something sorted out, and looking forward to seeing some paint on these guys :) Edemia Link to comment https://bolterandchainsword.com/topic/206477-sanguinary-guard/#findComment-2464213 Share on other sites More sharing options...
Drudge Dreadnought Posted July 16, 2010 Author Share Posted July 16, 2010 The can is about empty anyway, I'll just get a new one. Right now it looks like I'm going to have to strip the bodies and re-prime them. Most of the other pieces seem to be fine actually, it's only really the bodies that are the problem. This is going to be annoying, but I can paint the pieces that came out fine while the others strip, so shouldn't actually cost me much time overall. Link to comment https://bolterandchainsword.com/topic/206477-sanguinary-guard/#findComment-2464233 Share on other sites More sharing options...
Chaplain Hiltraud Posted July 16, 2010 Share Posted July 16, 2010 Drudge Dreadnought: Thank you very much for the 'how to' on your bases, that makes my job allot easier! I now have something to do with those old guitar strings!! <_< I really feel for you with the whole undercoat thing, I too have fallen victim to the 'granularation' But I have never had a problem since I started shaking the can vigourously for a couple of minutes... But in your case (since you've done it a load of times the same way) I can only guess that the gods of chaos were upset that you decided to branch out... I hope your models recover and everything goes good for you. Chaplain Hiltraud Link to comment https://bolterandchainsword.com/topic/206477-sanguinary-guard/#findComment-2464251 Share on other sites More sharing options...
Drudge Dreadnought Posted July 16, 2010 Author Share Posted July 16, 2010 I've gone through and examined all of the pieces to see which ones need stripping. All of the torso+legs do, and 4 of the 5 heads. Nothing else! This leads me to believe that the problem was caused by something being on the models. If it was due to spraying technique, then surely it would have affected other bits as well, as I sprayed them all at the same time. The trouble pieces are now taking a simple green bath. I guess I'll start my painting with the backpacks instead of the torso+legs. Preliminary pictures should be coming later today, and by later today I mean very early tomorrow morning! Drudge Dreadnought: Thank you very much for the 'how to' on your bases, that makes my job allot easier! I now have something to do with those old guitar strings!! Thanks. I've been meaning to try bases like this for awhile, but have always held off since they add a good deal of height to the model, and so can cause complications when used for gaming. I'll snap a few pictures of them later when I'm taking pictures. They are really very simple, but I think they fall into the category of simple and elegant. Link to comment https://bolterandchainsword.com/topic/206477-sanguinary-guard/#findComment-2464682 Share on other sites More sharing options...
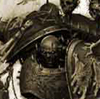
Drudge Dreadnought Posted July 17, 2010 Author Share Posted July 17, 2010 Right, it's picture time. This picture isn't super great quality, because it's 5:00 in the morning here, so the lighting is...sub-optimal. But anyway, despite it's not so great quality, it still does it's job: You can see the beginning of my shading on the red! I've spent the last few hours trying different combinations of colors to build highlights. I think here my shadows are still not as dark as I want (slightly less dark than in the picture in reality.) I doubt this will be the final color, but it gives an idea of what I'm doing here. This is my first time doing this, so I'm pleased with myself, regardless. http://i4.photobucket.com/albums/y133/Necrologic/Sanguinary%20Guard/FirstBackpackShading.jpg I've decided that the way I'm going to do this is to paint one of any given part, and then do the rest all the same time. I know if I try a full test model, I will have trouble duplicating it. Doing it a bit at a time will make this more consistent. Link to comment https://bolterandchainsword.com/topic/206477-sanguinary-guard/#findComment-2465010 Share on other sites More sharing options...
Drudge Dreadnought Posted August 8, 2010 Author Share Posted August 8, 2010 Alright, this project got delayed on a biblical scale by first the primer problem, and then me spending a couple weeks on a Black Library submission. But now I'm back. Due to the primer problem, I decided to paint one whole model and then do the other four at the same time. The first guys is done, and here he is. http://i4.photobucket.com/albums/y133/Necrologic/Sanguinary%20Guard/SGFistF2.png http://i4.photobucket.com/albums/y133/Necrologic/Sanguinary%20Guard/SGFistF1.png http://i4.photobucket.com/albums/y133/Necrologic/Sanguinary%20Guard/SGFistL2.png http://i4.photobucket.com/albums/y133/Necrologic/Sanguinary%20Guard/SGFistR1.png http://i4.photobucket.com/albums/y133/Necrologic/Sanguinary%20Guard/SGFistL1.png http://i4.photobucket.com/albums/y133/Necrologic/Sanguinary%20Guard/SGFistB2.png http://i4.photobucket.com/albums/y133/Necrologic/Sanguinary%20Guard/SGFistB1.png http://i4.photobucket.com/albums/y133/Necrologic/Sanguinary%20Guard/SGFistTop1.png My camera ran out of batteries partway through the photoshoot, so I can't get a better picture from the front for awhile. This guy has been my first foray into sourced lightning, and various blending/glazing techniques. There are a lot of mistakes, but ultimately I am pleased with it. I am considering re-painting his gun, and you can see that there is a bit of grain still on his helmet from the primer accident. The next four will be cleaner. If anyone is interested in my recipes, I have taken detailed notes of all my color breakdowns. I'll be starting on the rest of the squad soon, and I am thinking to post step-by-step pictures of their progress. In the meantime, C & C welcome. Link to comment https://bolterandchainsword.com/topic/206477-sanguinary-guard/#findComment-2483550 Share on other sites More sharing options...
Noctus Cornix Posted August 8, 2010 Share Posted August 8, 2010 Nice Paint job mate. :pirate: LOL kinda reminds me a bit of iron man :) Link to comment https://bolterandchainsword.com/topic/206477-sanguinary-guard/#findComment-2483641 Share on other sites More sharing options...
CREATOR_OF_ALL_SINS Posted August 8, 2010 Share Posted August 8, 2010 Really nice and impressive work. I don't like one thing, the yellow in the jet pack thing. I just like plain black in mine. Link to comment https://bolterandchainsword.com/topic/206477-sanguinary-guard/#findComment-2483725 Share on other sites More sharing options...
Recommended Posts
Archived
This topic is now archived and is closed to further replies.