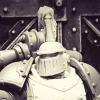
Pig Of Sparta Posted October 3, 2010 Share Posted October 3, 2010 It's been a while since I posted anything in this forum that wasn't in the IBH thread but I wanted to see what the wider forum thought of these 'test mini's'. Having admired all of the Ultra's that he's posted up so far, I downloaded winterdyne's tutorial for painting Ultramarines. After looking over it a few times I decided to give it a try as I really like the darker look and I have an Ultramarines dreadnought waiting for paint. Sadly I don't have an airbrush so was unable to replicate the technique properly (even if I did have one the weather is far too wet and cold here to think about using one :lol:) so I thought I'd try drybrushing. Now I know what many of you will think and to be honest I'd be inclined to agree, drybrushing doesn't usually yield the best results, however I've been reasonably impressed by it. If and when I use this technique to paint my dreadnought, I would be trying to blend the layers more smoothly than I have achieved here. Wandering preamble out of the way, this is how these 'test mini's' are looking just now: http://i347.photobucket.com/albums/p456/pigofsparta/DSCF9076-1.jpghttp://i347.photobucket.com/albums/p456/pigofsparta/DSCF9079-1.jpg I wanted to include some elements of the original Ultramarines Terminators' imagery, namely the red casings on the storm bolters and the hazard stripes on the powerfists. After much thought I decided that I would put the hazard stripes on the besegaw as I didn't feel confident that I could do the whole outer plate of the pwerfist without making a mess of it. I'm going to try freehanding iconograpy on the right shoulder pad and on the white half of the besegaw as I need the practice and I think it'd look quite good too. any comments or criticism welcome thanks James Link to comment https://bolterandchainsword.com/topic/212490-ultramarines-terminators/ Share on other sites More sharing options...
chaplainmikey Posted October 3, 2010 Share Posted October 3, 2010 Looing good so far,though there are a few things i'd like to point out. Firstly i have to say the both the white and the hazard stipes look great and its apparent from these that you are a talented painter. However i really don't like the the drybrushsing on the armour.Its not that i think it looks bad,more because i think it leaves too much black showing through on the armour. I'm also not a fan of the really dark blue armour,which at the minute strikes me more as the shade of colour used by the Crimson fists rather than the Ultramarines.Now this is just my personal opinion,i do like dark Ultramarines i just think this one is possibly too dark,most likely due to the Drybrushing. These aren't really critism,more just my personal opinion and i actually think the model is looking pretty nice so far. Looking forward to seeing where this goes. Cheers, Mike. Link to comment https://bolterandchainsword.com/topic/212490-ultramarines-terminators/#findComment-2527715 Share on other sites More sharing options...
subtlebrush Posted October 4, 2010 Share Posted October 4, 2010 I remember the days when all anyone would ever do was dry brush. Really liking this scheme, what colors did you use if you wouldn't mind? Link to comment https://bolterandchainsword.com/topic/212490-ultramarines-terminators/#findComment-2527789 Share on other sites More sharing options...
Shortsonfire79 Posted October 4, 2010 Share Posted October 4, 2010 If you're like me, you'd like comments in your personal thread :) Well, first...is it really called the besegaw?? Thats really weird! And I really like the white chest eagle, I really like the way the blue came out, it doesn't even look drybrushed. It looks more like inks. But I really like the way it looks. Link to comment https://bolterandchainsword.com/topic/212490-ultramarines-terminators/#findComment-2527820 Share on other sites More sharing options...
Scathainn Posted October 4, 2010 Share Posted October 4, 2010 This is just a personal nitpick of mine, but I would paint the bottoms of the shoulderpads white as well, the part that overlaps the arms. Otherwise very nice! Link to comment https://bolterandchainsword.com/topic/212490-ultramarines-terminators/#findComment-2527848 Share on other sites More sharing options...
winterdyne Posted October 4, 2010 Share Posted October 4, 2010 Nice as is, but you're getting a fair amount of chalkiness from the drybrushing. You can work this away by glazing asurmen blue over the black (or try a mordian / black mix with some glaze agent, you want it translucent) and blending it so your highlights are mostly untouched, it'll smooth things out. You'll find this only really needs to be done where the chalkiness is bad, or the area is large. If you're attempting to do the zenital work by hand, glazing up usually works better than drybrushing for the most part. By better I mean faster - to drybrush the gradient on a smooth surface effectively you have to do so many stages that the blend (glaze / feathering) method works out quicker. Looking great for TT though! Edit: Looking again, you'll also need to lighten the upper surfaces a little more - thin glazes of UM blue leaving the edges bright should work. Link to comment https://bolterandchainsword.com/topic/212490-ultramarines-terminators/#findComment-2527904 Share on other sites More sharing options...
Pig Of Sparta Posted October 4, 2010 Author Share Posted October 4, 2010 @ chaplainmikey: thankyou for your comments brother. I agree it is a very dark blue I think it's probably down to the ise of drybrushing and the fact that as I don't have it I had to substitute Regal Blue for Mordian Blue. I think the foundation's more intense colour might have provided a better starting blue than I have here. These were really only ever destined to be test models and as such are really just part of the learning curve for the colour scheme :lol:. @ Shortsonfire79: I think it's called the besegaw. I was trying to look big and clever, but that's what Replica called them... I actually kinda like drybrushing for the texture that it can give to smooth plates. The 'chipped' effect it proves gives ceramite a more realistic look I think, in GW artwork, power armour sometimes looks more like stone than metal. I think for table top, these look fine but if they were for display or a competition I would be trying to smooth the transitions a bit more. Glad you like them though :P. @ Mr.Malevolent: For the blue I started with a heavy drybrush of Regal Blue all over the model. Next I used a 50/50 mix of Regal Blue and Ultramarines Blue and drybrushed downwards to try to start creating zenital highlights. Then I used pure Ultramarines Blue in the same way Followed by a 50/50 mix of Ultramarines Blue and Space Wolves Grey, again drybrushing downwards Finally, (and this might be why the blue appears so dark) I added a harsh edge highlight with pure Space Wolves Grey. This was painted in normally rather than drybrushed. I think the transition to the highlights might've looked better had a added a light drybrush of Space Wolves Grey first. @ Scathainn: I think I see what you mean, but the reason I haven't done this is to simulate the look of the 'real' terminator shoulder pads. If these weren't AOBR terminators (not that AOBR terminators aren't great) the outer (white) plate would be separate from the arm and there would be no need to paint the underside of them as they are longer than the shoulder pad underneath. @ winterdyne: thankyou for your comments. I did wonder if I'd be able to entice you into this thread to get some critique, I'm glad you stopped by. I think I'll definately try adding the glazes of Ultramarines Blue, but by upper surfaces do you just mean the top panel of the armour, or to the upper area of each armour plate? I think I will try using blending the next time I do this. I thought I'd give drybrushing a try to see if I could simulate the effect of the airbrushing, as I thought I could do it quicker than blending the blue up layer by layer. (I've only got a couple of hours in the evening that I can paint in) thanks James Link to comment https://bolterandchainsword.com/topic/212490-ultramarines-terminators/#findComment-2527963 Share on other sites More sharing options...
winterdyne Posted October 4, 2010 Share Posted October 4, 2010 The zenital effect works to some extent by drawing the eye up to the upper surfaces /edges - so yeah, the top panel (in fact anything that can be seen 'from above') should be notably lighter towards the front (highest edge). When viewed from directly above the mini should be mostly highlight, and when looked at from below almost all black. Every other angle should basically be a gradient between the two, with edge highlights used to delineate shapes. You can do the zenital effect by drybrushing, but it works best with a very large, round, soft brush (about 3/4" diameter). Finding one that doesn't shed bristles is tricky. Use a 'blushing' technique (that is a tight, circular motion with the brush, very little pressure and very little paint on the brush) and work from about 45 degrees to the vertical. Edit: Regal blue is massively darker than Mordian. Try 4 or 5:1 UM blue and black. This said, for drybrushing you're going to need to add stages to keep it smooth - Regal Blue (or Necron Abyss) are both pretty good starting colours. The more stages you do the smoother it'll look and the less chalkiness you'll notice. Link to comment https://bolterandchainsword.com/topic/212490-ultramarines-terminators/#findComment-2527992 Share on other sites More sharing options...
Captain Mick Posted October 4, 2010 Share Posted October 4, 2010 Really great painted models, u can be proud on them. Well done :) . Link to comment https://bolterandchainsword.com/topic/212490-ultramarines-terminators/#findComment-2528029 Share on other sites More sharing options...
onipunk Posted October 4, 2010 Share Posted October 4, 2010 I do think they look great, but instead of doing the whole insignia on the besegaw I would opt for half of the U. I like the idea behind the classic old-school Termies but think you might have been better off using a brighter colour scheme to showcase these ideas instead of winterdyne's rather gritty. I think the drybrushing works well, it's not a perfect replacement for an airbrush, but as a fellow Scot I can sympathise with your contempt for our crap weather (most of the time it rains too hard I can't even prime my models... and it's not going to get any better now winter's drawing in). I'd still like to see these finished though, as only practice can make perfect, and I admire your willingness to try out new techniques and branch out instead of finding one you like and sticking to it like ice does to a Scottish lamp-post. good work. Link to comment https://bolterandchainsword.com/topic/212490-ultramarines-terminators/#findComment-2528122 Share on other sites More sharing options...
dijital_llama Posted October 4, 2010 Share Posted October 4, 2010 loving the hazard stripes and the chest eagle looks really strong mate. good to see another darker ultra scheme, personally i'm a big fan. and just a tad jealous your drybrushing has turned out way neater than mine! Link to comment https://bolterandchainsword.com/topic/212490-ultramarines-terminators/#findComment-2528253 Share on other sites More sharing options...
verpine Posted October 4, 2010 Share Posted October 4, 2010 Hey Pig of Sparta, I like what you've done there, they look a lot like how i paint my ultras. In fact i use the same colors but instead of drybrushing i paint it in layers (see profile pic). If you haven't already, you should check out spikyjames' stuff (link down there), I based my ultramarines off of him. They're really similar to how winterdyne paints his. edit: darn broken link... hold on... here: http://s32.photobucket.com/albums/d42/spik...s/Ultramarines/ Link to comment https://bolterandchainsword.com/topic/212490-ultramarines-terminators/#findComment-2528291 Share on other sites More sharing options...
Pig Of Sparta Posted October 5, 2010 Author Share Posted October 5, 2010 Once again, thanks for all the comments guys, it's pushing me to finish these test mini's off before I move on to my next projects :). @ winterdyne: thanks for the pointers, I'll definately bear what you've said about the drybrushing in mind. I didn't realise that Regal Blue was darker than Mordian Blue, so I plan to pick up a pot of Mordian for use in future projects. @ captain mick: thanks mate. I've always liked Ultra's but only ever painted one before, it's kinda cool to be working on what are posibbly the most liked and reviled chapter of Astartes :P. @ Dark Link: as a fellow scot, perhaps you can join me in hoping the weather is half reasonable for long enough for me to get my next few projects primed :). As I said above, I didn't realise that Regal Blue was so much darker than Mordian, but the lesson has been learned and I'll be trying this colour technique again, hopefully with cleaner results. I was thinking exactly what you were about the besegaw, a half U in blue to contrast against the stripes and the white. Now all I've got to do is keep my hands steady to paint them.... @ dijital_llama: I'm glad the hazard stripes have been recieved so well, when I was painting them I couldn't help wonder if I was going against the grain too much. None of the white details are finished yet, so hopefully when they're done you'll still like them just as much. @ verpine: Thanks for the link mate, I enviously admired that army in White Dwarf last year, I didn't realise that it was a member of the forum who had painted it! I love the smoothness of the layers on your Ultra's. Yours, spikeyjames' and winterdyne's work is really inspiring me to aim higher with mine in future :) cheers James +EDIT+ more pictures will be coming soon! Link to comment https://bolterandchainsword.com/topic/212490-ultramarines-terminators/#findComment-2528749 Share on other sites More sharing options...
onipunk Posted October 5, 2010 Share Posted October 5, 2010 We shall fervently pray to our pagan gods and do a little dance around a fire (possibly while sacrificing a small goat) to ensure that there is decent weather for you :P It's not so awful for me, living in the central belt of Scotland, so I'm not so far north as you are. But this is all relatively speaking, so good weather in a Scottish winter usually means you can get with only wearing three layers :cuss Link to comment https://bolterandchainsword.com/topic/212490-ultramarines-terminators/#findComment-2528909 Share on other sites More sharing options...
Pig Of Sparta Posted October 6, 2010 Author Share Posted October 6, 2010 The praying and sacrifice is nice of you, thanks Dark Link :lol:. Just a quick update photo of these guys, I've highlighted the casings on the storm bolters, highlighted the hazard stripes and I've painted their heads. Eyes need a bit of a tidy up, bu otherwise I'm quite happy with them: http://i347.photobucket.com/albums/p456/pigofsparta/DSCF9083-1.jpg still quite a lot to do though... cheers James Link to comment https://bolterandchainsword.com/topic/212490-ultramarines-terminators/#findComment-2529434 Share on other sites More sharing options...
winterdyne Posted October 6, 2010 Share Posted October 6, 2010 Excellent face work - little blue wash under the eyes and a little red wash on the lips, yeah? If you want a less red lip, I find the ogryn flesh wash works pretty well built up in a couple of passes. Also try building a (Very very) little red on the end / bottom sides (bulgy bits, anatomy fails me) of the nose and cheeks to flush the face a bit - it'll detract from the lipstick look and make it look like red-faced rage... Link to comment https://bolterandchainsword.com/topic/212490-ultramarines-terminators/#findComment-2529453 Share on other sites More sharing options...
onipunk Posted October 6, 2010 Share Posted October 6, 2010 There's just something I absolutely love about these guys. The drybrushing works well, and opting for bare heads allows a lot more character into the models. Makes me want to do an entire helmetless squad if I didn't suck at faces :drool: Link to comment https://bolterandchainsword.com/topic/212490-ultramarines-terminators/#findComment-2529633 Share on other sites More sharing options...
Captain Mick Posted October 6, 2010 Share Posted October 6, 2010 Damn that terminators look truely GREAT, u can be really proud on this :tu: . Link to comment https://bolterandchainsword.com/topic/212490-ultramarines-terminators/#findComment-2529648 Share on other sites More sharing options...
Pig Of Sparta Posted October 6, 2010 Author Share Posted October 6, 2010 @ winterdyne: thanks for the ideas on the faces. I used a Regal Blue/Bleached Bone glaze for the eyes and a Scab Red glaze for the lips, but I guess they did go on bit too heavily. I'll definately be trying the glaze on the area around the nose, I'd never thought of that before. I really do need to get a more complete paint set as I've only got a few of the washes just now and I keep hearing such great things about the other ones :D. @ Dark Link: I was using the bare heads as I didn't have any Terminator helmets, but I agree they do add a lot of character to the mini's. When I was putting them together I thought of the idea that they were between missions, posing for a 'publicity shot' for morale purposes :). @ captain mick: thanks mate, glad they're going down well :) cheers James Link to comment https://bolterandchainsword.com/topic/212490-ultramarines-terminators/#findComment-2529805 Share on other sites More sharing options...
Pig Of Sparta Posted October 9, 2010 Author Share Posted October 9, 2010 Some update photos: http://i347.photobucket.com/albums/p456/pigofsparta/DSCF9087.jpghttp://i347.photobucket.com/albums/p456/pigofsparta/DSCF9086.jpghttp://i347.photobucket.com/albums/p456/pigofsparta/DSCF9085.jpghttp://i347.photobucket.com/albums/p456/pigofsparta/DSCF9084.jpg as you can see, I've started work on the chapter symbols. I decided to paint their heraldry different as it would help to individualise them more. I know it's not perfect, but I'm pretty happy with how it's looking. I have a genuine respect for anyone who freehands the Ultramarines 'U' as these were a pain in the ass to get right. I also thought I'd take a couple of photos of their crux terminatus as well to see what people thought. I'm aiming for a kind of 'stone' look to them: http://i347.photobucket.com/albums/p456/pigofsparta/DSCF9095.jpghttp://i347.photobucket.com/albums/p456/pigofsparta/DSCF9094.jpg any comments or criticism welcome thanks James Link to comment https://bolterandchainsword.com/topic/212490-ultramarines-terminators/#findComment-2532201 Share on other sites More sharing options...
winterdyne Posted October 9, 2010 Share Posted October 9, 2010 If you push the upper surface highlights on the crux towards 'white-ish' (about 20-60-20 fortress / white / bleached bone I think) it should look more in keeping with the zenithals elsewhere. The bone or some other warmish tone in the mix should help avoid it looking NMM and keep the feel more natural. Nice work on the U's too. Once you've done a few they get a lot easier... :-) Link to comment https://bolterandchainsword.com/topic/212490-ultramarines-terminators/#findComment-2532209 Share on other sites More sharing options...
Candleshoes Posted October 10, 2010 Share Posted October 10, 2010 Really like the stylized "U"'s that you achieved, nice hard cut lines give them great shape. Even though you can see that they are touched up a bit to keep them neat, they still give an excellent personal and unique feel. Like winterdyne said, more attempts will see it become easier. Two thumbs up. Link to comment https://bolterandchainsword.com/topic/212490-ultramarines-terminators/#findComment-2532248 Share on other sites More sharing options...
Captain Mick Posted October 10, 2010 Share Posted October 10, 2010 Truely great painted models, well done :P . Link to comment https://bolterandchainsword.com/topic/212490-ultramarines-terminators/#findComment-2532338 Share on other sites More sharing options...
Pig Of Sparta Posted October 10, 2010 Author Share Posted October 10, 2010 thanks for the comments guys, @ winterdyne: I didn't think of using bone in the mix. I don't have Fortress Grey so I'll try mixing up some Skull White, Codex Grey and Bleached Bone (the top highlights are Skull/Codex just now). I did find that the 'U's were ok to block in, it was more achieveing symmetry and getting them straight on the curved surface was the awkward part, but I guess you're right, the more you do anything the easier it gets ;) @ candleshoes: yeah, I noticed that really bad bit when I posted the photos up. I can easily cover that up, and I was going to add a little more definition to them with a gentle highlight to all the 'upper' surfaces. Once the white on the shoulders is highlighted up too, hopefully they'll fit right in... @ captain mick: cheers mate :P thanks James Link to comment https://bolterandchainsword.com/topic/212490-ultramarines-terminators/#findComment-2532371 Share on other sites More sharing options...
onipunk Posted October 10, 2010 Share Posted October 10, 2010 For more of a stone effect instead of just grey, you may want to apply some weathering, even just a lighter colour stippled extremely lightly across the top to represent stone's rought texture. Great freehand, though. Link to comment https://bolterandchainsword.com/topic/212490-ultramarines-terminators/#findComment-2532402 Share on other sites More sharing options...
Recommended Posts
Archived
This topic is now archived and is closed to further replies.