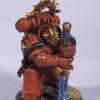
Sinsinatus Posted January 31, 2011 Share Posted January 31, 2011 A short review and then pictures... The good - Well, putting together a Stormraven for the first time was a surprisingly easy piece of work. For a kit with well over 100 parts (almost all of which get used), it went together rather rapidly. Just over an hour and a half in this case. Whether by forethought or happenstance the mould lines were located in places easily cleaned or able to be ignored. As is true for most vehicle kits, if you are going to paint the interior, you really have to do it before assembly. Crew figures are well posed and detailed though have little to no easy options for customizing. The positionable doors and engines are a nice - though I glued them in place on mine to prevent unnecessary wear-and-tear on the paint. Detail throughout the kit was crisp and well considered. There were no gaps that needed greenstuffing and assembly didn't really require taping or rubber banding. Lastly, I CAN confirm that the kit comes with a full set of Grey Knight emblems on the sprues (wink wink). The bad - Number one would be the tail assembly. Unless you are paying attention it is a 50% chance that you put the tail fins on backwards. It fits equally well both ways and actually seems more logical backwards if you go just by shape. Next, the frame pieces for the canopies are quite a loose fit and if you clip them from the frame too closely you will neet to greenstuff them. The standard rants about their instruction books apply to the Stormraven as well - proofread and/or try building one from the sheet before putting it in the box. Another disappointment was the lack of a new decal sheet. This would have been a great opportunity to introduce some aircraft specific imagery. Finaly, there are VERY few leftover bits - one set of nose guns, 2 sets of turret guns, either the door set or the hurricane bolter assembly, and one set of chapter logos. Overall, despite some of my qualms over the look of the ship itself, the kit is a solid A-. If you have been considering one for your army, dont let concerns about model quality keep you away from getting one. This one is up on ebay right now So, after quite a hiatus, I have waded deep into a sea of red paint to bring you this... http://i276.photobucket.com/albums/kk25/Sinsinatus/Painted%20Miniatures/Warhammer%2040k/Space%20Marines/Blood%20Angels/Stormraven/DSCN5645.jpg http://i276.photobucket.com/albums/kk25/Sinsinatus/Painted%20Miniatures/Warhammer%2040k/Space%20Marines/Blood%20Angels/Stormraven/DSCN5656.jpg http://i276.photobucket.com/albums/kk25/Sinsinatus/Painted%20Miniatures/Warhammer%2040k/Space%20Marines/Blood%20Angels/Stormraven/DSCN5671.jpg http://i276.photobucket.com/albums/kk25/Sinsinatus/Painted%20Miniatures/Warhammer%2040k/Space%20Marines/Blood%20Angels/Stormraven/DSCN5662.jpg http://i276.photobucket.com/albums/kk25/Sinsinatus/Painted%20Miniatures/Warhammer%2040k/Space%20Marines/Blood%20Angels/Stormraven/DSCN5654.jpg http://i276.photobucket.com/albums/kk25/Sinsinatus/Painted%20Miniatures/Warhammer%2040k/Space%20Marines/Blood%20Angels/Stormraven/DSCN5664.jpg http://i276.photobucket.com/albums/kk25/Sinsinatus/Painted%20Miniatures/Warhammer%2040k/Space%20Marines/Blood%20Angels/Stormraven/DSCN5665.jpg http://i276.photobucket.com/albums/kk25/Sinsinatus/Painted%20Miniatures/Warhammer%2040k/Space%20Marines/Blood%20Angels/Stormraven/DSCN5666.jpg See this mini and many others at my Photobucket page. http://s276.photobucket.com/home/Sinsinatus/index See the auction for this item on ebay at http://cgi.ebay.com/ws/eBayISAPI.dll?ViewI...=STRK:MESELX:IT Link to comment https://bolterandchainsword.com/topic/221136-stormraven-takes-flight/ Share on other sites More sharing options...
Zeller Posted January 31, 2011 Share Posted January 31, 2011 That's some very nice work and I'm glad to hear that the kit both consists of many many parts as well as being a solid build. When assembling the canopies would be it plausible to keep the canopy glass off the model, paint the canopy frame, and then glue the canopy and frame in place after the fuselage has been painted without having to go back and worry about gaps or paint touchups? Also, does the canopy glass actually need to be glued in place or is it held down? I'd like to avoid that hazy effect that comes from the plastic glue. Link to comment https://bolterandchainsword.com/topic/221136-stormraven-takes-flight/#findComment-2640851 Share on other sites More sharing options...
Sinsinatus Posted January 31, 2011 Author Share Posted January 31, 2011 That's some very nice work and I'm glad to hear that the kit both consists of many many parts as well as being a solid build. When assembling the canopies would be it plausible to keep the canopy glass off the model, paint the canopy frame, and then glue the canopy and frame in place after the fuselage has been painted without having to go back and worry about gaps or paint touchups? Also, does the canopy glass actually need to be glued in place or is it held down? I'd like to avoid that hazy effect that comes from the plastic glue. The frame I ws speaking of wat the 2 small "bars" that cross the canopy glass. They are very thin and the length is the issue. Once they are in place, paint the entire canopy assembly minus the clear windscreen. I use elmers white craft clue to attach the clear plastic. Also do this when attaching the assembly to the fuselage. White glue wont fume and create the haze/frosting that CA glue or styrene glue will. Also, dont install the glass until AFTER you clearcoat and seal the model for the same reason. Hope that this helps. Link to comment https://bolterandchainsword.com/topic/221136-stormraven-takes-flight/#findComment-2640855 Share on other sites More sharing options...
Baal Dropout Posted January 31, 2011 Share Posted January 31, 2011 Well, for a BS4 vehicle, I'd say give that servitor a terminator honor ;) Apart from that, thanks a bunch for the review ^_^ Link to comment https://bolterandchainsword.com/topic/221136-stormraven-takes-flight/#findComment-2640944 Share on other sites More sharing options...
Zincite Posted January 31, 2011 Share Posted January 31, 2011 Considering it's a flying toaster, you've made it look very good. :) Link to comment https://bolterandchainsword.com/topic/221136-stormraven-takes-flight/#findComment-2641480 Share on other sites More sharing options...
Sinsinatus Posted January 31, 2011 Author Share Posted January 31, 2011 Considering it's a flying toaster, you've made it look very good. :) Toasters need love too :P Link to comment https://bolterandchainsword.com/topic/221136-stormraven-takes-flight/#findComment-2641503 Share on other sites More sharing options...
Recommended Posts
Archived
This topic is now archived and is closed to further replies.