TemplarCoyote Posted September 22, 2011 Author Share Posted September 22, 2011 Thanks Redfinger! I ended up talking to some model airplane guys that suggested many of the same things. 1. I had some brush-on glosscote I used on the shoulder. 2. I cut four lines in between the arrows of the assault symbol so it would adhear to the pad better, but I might have to try the scouring technique you mentioned. 3. Soaked the decal in warm water till it slid off 4. I used Micro-Set as the base solution to place the decals in (applied it to the shoulder) and then applied the decal. It was very different from the Mirco-Sol I normal use for this step. 5. After it dried, I applied Micro-Sol. I had to battle with wrinkling but using a damp towel helped to flaten it. 6. Two coats of dullcote and I'm done. Thanks again; have to try the scouring technique on the decal! Link to comment https://bolterandchainsword.com/topic/237495-star-phantoms-fifth-company/page/2/#findComment-2882506 Share on other sites More sharing options...
Vilicate Posted September 22, 2011 Share Posted September 22, 2011 What are your steps for that color scheme? I was thinking about doing these guys at some point down the road, and yours looks very nice. Link to comment https://bolterandchainsword.com/topic/237495-star-phantoms-fifth-company/page/2/#findComment-2882873 Share on other sites More sharing options...
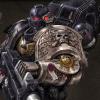
TemplarCoyote Posted September 23, 2011 Author Share Posted September 23, 2011 For me, it's pretty simple and not as time intensive as my Templars or Grey Knights. 1) Prime miniature fortress grey. 2) Spray miniature(s) with Testors White primer 3) Paint the black area's black and the silver area's boltgun 4) Paint aquilas with a mixture of shinning gold and mithril silver 5) Wash the cracks, lines, and metals with watered down Badab Black (I finally broke down and sacrificed my nearly empty bottle for this) 6) Re-Paint the white with skull white/morrow white/pure white (your choice, I use morrow) 7) Armor damage: black out area's for damage, then go back over with mithril silver leaving some black showing 8) highlight silver area's with chainmail (one highlight) 9) Highlight black area's with codex grey (one highlight) and then wash with the mix 10) Eyes: saw a tutorial in the blood angel's section thats faster than how I've been doing it and after trying it, will probably switch to it (white the eyes, go over the eyes and area under them with very watered down ice blue in successive layers, then re-white the eyes. I went a little further and added white in to tone down the blue on my white helms 11) Already went over decals 12) Base: glue on dirt, prime a dark brown, then drybrush in successivly lighter browns till you use bleached bone (or menoth base) at the end (really, i use four diffrent P3 browns at this statge) then glue on some static grass. 13) Two dullcotes 14) Kill the enemies of the Emperor Hope that helps! I've just about gotten twenty-six infantry models finished (need to do another twelve and I'll have my 1500 point infantry models done) which is very very fast for me. I omitted the purity seals and leather pouches which take a wee little more time, but thats the basic marine in a nutshell. Link to comment https://bolterandchainsword.com/topic/237495-star-phantoms-fifth-company/page/2/#findComment-2882940 Share on other sites More sharing options...
Adeptus-Alaska Posted March 1, 2013 Share Posted March 1, 2013 · Hidden by Brother Tyler, March 2, 2013 - Necro bump - no value Hidden by Brother Tyler, March 2, 2013 - Necro bump - no value wow, just thought I'd bring this SP force back into the light! Link to comment https://bolterandchainsword.com/topic/237495-star-phantoms-fifth-company/page/2/#findComment-3318003
Recommended Posts
Archived
This topic is now archived and is closed to further replies.