Olis Posted February 1, 2012 Share Posted February 1, 2012 @Olisredan: I already did, :P Oh. Whoops. ;) Link to comment https://bolterandchainsword.com/topic/244959-lpc-2012-vow-marius-perdos-doom-fists/page/2/#findComment-2983179 Share on other sites More sharing options...
Marius Perdo Posted February 3, 2012 Author Share Posted February 3, 2012 A bit more work, still lots of highlighting/detail to do. Someday I'll remember to take photos when it isn't dark Link to comment https://bolterandchainsword.com/topic/244959-lpc-2012-vow-marius-perdos-doom-fists/page/2/#findComment-2984865 Share on other sites More sharing options...
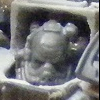
Marius Perdo Posted February 8, 2012 Author Share Posted February 8, 2012 Well...I have worked on the other four to be in the squad, as I am happy enough with the test one for him to be in the final five. Started work on their scenic bases, oddly enough I am doing three from scratch and just using one other FW one. I'll still add some rusting metal bits etc but I am waiting for some Grandt Line SKU 156, 127, 128, and 15. In plain English those would be some larger scale rivets and three different sizes of nuts and bolts, which should look good on metal detritus and pick up rust effects and weathering powders quite nicely. So whilst I wait for them to arrive (which should be soon hopefully) I have started assembling the Armoured Land Raider Proteus. Usual FW nonsense of trying to dry fit stuff, filing, bending things into the correct shape using hot water and then setting with iced water etc. Currently the main cabin is pinned and glued and everything is held together with my trusty elastic bands whilst the Araldite sets whilst everything is aligned properly and square. Might even get the thing fully built tomorrow. Popped out and got some Marmite to try that on weathering and battle damage. I think I'll do two types of undercoat colouring for the damage; some old Boltgun Spray around obvious areas of impact/abrasion covered in hairspray, and then Marmite over the base armour colour and red chevrons for less exposed parts of the hull. I'll paint the tracks seperately and use some nice WWII model techniques I have seen used on a Panzer IV (if I recall), the rest of the LR I'll paint when fully assembled. Obligatory picture time, not that is shows much. Link to comment https://bolterandchainsword.com/topic/244959-lpc-2012-vow-marius-perdos-doom-fists/page/2/#findComment-2988402 Share on other sites More sharing options...
zxyogi Posted February 8, 2012 Share Posted February 8, 2012 Like the colour combination! Keep the good work coming! Link to comment https://bolterandchainsword.com/topic/244959-lpc-2012-vow-marius-perdos-doom-fists/page/2/#findComment-2988526 Share on other sites More sharing options...
Tyrannicide Posted February 9, 2012 Share Posted February 9, 2012 As always, a pleasure to see more done on the hordes of Doom Fists, Marius. :ph34r: Link to comment https://bolterandchainsword.com/topic/244959-lpc-2012-vow-marius-perdos-doom-fists/page/2/#findComment-2988642 Share on other sites More sharing options...
Marius Perdo Posted February 9, 2012 Author Share Posted February 9, 2012 Thanks lads. The LR is coming along but as it needs constant heat reshaping, pinning and then leaving to dry so the Araldite sets...well, it is taking a wee while. Or I could just throw it together with superglue and no pins and watch it come apart in my hands :P Next post will be when it is assembled and cleaned and waiting for paint. Still no nuts & bolts in the post :( Link to comment https://bolterandchainsword.com/topic/244959-lpc-2012-vow-marius-perdos-doom-fists/page/2/#findComment-2989247 Share on other sites More sharing options...
Castellan Alaric Posted February 9, 2012 Share Posted February 9, 2012 all i can say i'm VERY jealous of your painting/modeling station my friend...absolutely awesome! i hope one day whenever i get married my wife will let me have something so EPIC :( thanks for sharing your vow, mine's kinda stagnant right now because of school :P happy to see some members vows going well though, well done! Link to comment https://bolterandchainsword.com/topic/244959-lpc-2012-vow-marius-perdos-doom-fists/page/2/#findComment-2989283 Share on other sites More sharing options...
Marius Perdo Posted February 11, 2012 Author Share Posted February 11, 2012 Oddly enough it was the wife (well, not married but 13 years and living together for 11 is as good as) who insisted I tidy up how I did stuff, and actually helped me set it up by holding shelves in place, marking drill holes with a pen etc. Wifies can be so cool. So I guess any models I build benefit from the stations circumstance bonus she insisted I build. She does so prefer things to be tidy and ordered. I'm lucky her dad builds model trains/railways, my hobby took a lot less explaining than it would do otherwise :) He keeps nicking techniques we use on our toy soldiers. As an aside the new FW crew stuff is influencing this, I'll try and add a FW heavy bolter to represent a pintle mount one as per the new FW pictures. That didn't stop me spending another £345 at FW on the new crews, damocles, FW razorbacks, the new pred/rhino armour kits, prometheus, icon packs etc. Oh FW, your resin crack is irresistable :) Link to comment https://bolterandchainsword.com/topic/244959-lpc-2012-vow-marius-perdos-doom-fists/page/2/#findComment-2990199 Share on other sites More sharing options...
grimáldus Posted February 11, 2012 Share Posted February 11, 2012 hi brother Marius Perdo i am lovin your terminaters what heads are you useing for them keep up the grate work :) Link to comment https://bolterandchainsword.com/topic/244959-lpc-2012-vow-marius-perdos-doom-fists/page/2/#findComment-2990231 Share on other sites More sharing options...
Marius Perdo Posted February 11, 2012 Author Share Posted February 11, 2012 @grimáldus: If you mean the very unusual ones I am using Tyberos the Red Wakes head. He is the FW model and a Charcharadon special character. I also use his body and legs for my sergeant, as well as the shoulder pads on some others after cutting off Hunger and Slake (the relic lightning claw chainfist things he has). Other heads include Red Scorpion Carab Culln's termie helmet (which has an Aquila on it, used on my sergeant) and normal plastic ones with the forehead filed down as per Machinpriests technique, and also plastic termie Wolf Guard helms with the foreheads also filed down. Link to comment https://bolterandchainsword.com/topic/244959-lpc-2012-vow-marius-perdos-doom-fists/page/2/#findComment-2990397 Share on other sites More sharing options...
Marius Perdo Posted February 11, 2012 Author Share Posted February 11, 2012 As an aside the new FW crew stuff is influencing this, I'll try and add a FW heavy bolter to represent a pintle mount one as per the new FW pictures. Or alternatively realise the heavy bolter part is actually in the LR Proteus kit, and wouldn't clip on the side of the Armoured LR Proteus kits hatch anyway. Doh. As shown here when I actually looked in the "normal" Proteus kit I got at Gamesday. Pity really, the LR Proteus inlcudes the HB and MM pintle mount parts as options, but the Armoured LR Proteus doesn't include a hull mounted twin-linked heavy flamer part as an option or pintle options that are designed to fit the armoured hull top plate. It does mean when this Vow is done the first thing I am building for my Doom Fists WIP thread is the "normal" LR Proteus :lol: Link to comment https://bolterandchainsword.com/topic/244959-lpc-2012-vow-marius-perdos-doom-fists/page/2/#findComment-2990413 Share on other sites More sharing options...
Marius Perdo Posted February 13, 2012 Author Share Posted February 13, 2012 The constrcuction or the Armoured Proteus is nearly there, held together with a fair bit of pins as it will need to be painted in seperate parts. Included a crusader for size comparison. Basically it is a little bit shorter but a little bit taller. Link to comment https://bolterandchainsword.com/topic/244959-lpc-2012-vow-marius-perdos-doom-fists/page/2/#findComment-2992144 Share on other sites More sharing options...
Marius Perdo Posted February 15, 2012 Author Share Posted February 15, 2012 As Mr T says in UK Snickers adverts "Get some nuts!". So I have ;) The order arrived so I can now finish off various broken girders for the termies bases using the hex nuts and bolts to go with rivetted stuff. The Armoured Proteus is pretty much built, including a tank commander. I just need to clean up the tracks and dry fit them, although I will paint them seperately. Then for the main tank some cleaning up of excess Araldite with a scalpel, and some gap filling with green stuff. Then a full clean and it'll be time to paint. The Araldite needs to dry/set overnight anyway, but the whole thing is mostly pinned together so I can decide what order to paint things in as seperate parts if I need/want to. I am thinking of using the Proteus kit's pintle mounted heavy bolter. Looking at it I can carefully cut the mount and move it through 180 degrees it can sit on the commander right side, as opposed to the left side of the turret where it fits on the central cupola on the "normal" Proteus kit. It'll be spare as I will put a multi-melta on my Proteus...well, I think I will, still undecided :) I'll probably switch to the KG25 project soon so I get the Crimson Fist stuff done for the 25/02 in store stuff at my local GW. Edit: Whilst actually reading the experimental FW rules for the Proteus I noticed something quite important, transports 8 models. Oh well, it isn't their transport I guess :) It becomes a sort of super heavy Razorback with scouting and enhanced communications and jamming. I'll probably use it as command vehicle of some kind, whether for a company or the chapter remains to be seen. It might carry less than a Prometheus (I have one coming in the post) but it certainly outguns one with the pintle heavy bolter and all those lascannons. Guess I'd best go read some rule books to be sure :) Link to comment https://bolterandchainsword.com/topic/244959-lpc-2012-vow-marius-perdos-doom-fists/page/2/#findComment-2993594 Share on other sites More sharing options...
Marius Perdo Posted March 15, 2012 Author Share Posted March 15, 2012 Finally did the last bits of brass etching, purity seals, and rivets on the terminators. Done a little bit more than shown and then stopped as I realised less was more and I was getting carried away ^_^ Then I did explode them into marine trees... and now I am off outside to spray them with their chaos black undercoat. Latex masking, airbrushing, purity sealing and hairspray madness tomorrow when they have dried. Link to comment https://bolterandchainsword.com/topic/244959-lpc-2012-vow-marius-perdos-doom-fists/page/2/#findComment-3016692 Share on other sites More sharing options...
Marius Perdo Posted March 17, 2012 Author Share Posted March 17, 2012 Yesterday's acheivements, and I use the term achievement loosely. Chaos Black undercoat and then Orkshide Shade, then Orkshide Shade/Gnarloc Green mix, then Purity Seal, then Wella Silvirkin Hairspray. Then... Gretchin Green and then Gretchin Green/Rotting Flesh mix. Now to finish off the white helms with a layer of Skull White, now that my airbrush is cleaned and sparkly again :blush: They were Chaos Black undercoat with Adeptus Battlegrey base then Adeptus Battlegrey/Astronomican Grey mix, then just Astronomican Grey, then some watered down Badab Black. The sergeant's red helm was Mechrite Red/Red Gore/Scab Red base over Chaos Black, then Red Gore, then Baal Red, then Red Gore/Blood Red mix, the Blood Red, then Red Ink, then Blood Red and Blazing Orange. I am posting the "recipes" here in case I forget, which given the cleaning solvent funes is likely :P Once the white is done it will be latex peeling, then hot water and a toothpick to apply the battle damage and clean off the light green paint from guns etc. Then some more Purity Seal (this is the only thing I have ever found it fit for), and then a Devlan Mud wash, then some Rotting Flesh extreme edge highlights. Then dinner :P At this rate I might actually fulfill my Vow... Link to comment https://bolterandchainsword.com/topic/244959-lpc-2012-vow-marius-perdos-doom-fists/page/2/#findComment-3017889 Share on other sites More sharing options...
subtlebrush Posted March 17, 2012 Share Posted March 17, 2012 I have done a couple of left handed storm bolter guys. Seemed like a good excuse to try and do an earlier type of powerfist, for which I used the FW resin ones from the upgrade pack. Excuse me while I steal this amazing idea! I absolutely love the FW power fists myself and never thought to throw them on Termies. They look so bad ass. +++Mr.M+++ Link to comment https://bolterandchainsword.com/topic/244959-lpc-2012-vow-marius-perdos-doom-fists/page/2/#findComment-3018127 Share on other sites More sharing options...
Marius Perdo Posted March 18, 2012 Author Share Posted March 18, 2012 @Mr.Malevolent: I was surprised how good they looked myself. I initially only did the one on the left but was so happy with the potential I did the other one as well. I only took basic shots but they work from all angles. The again they didn't make the final cut for the LPC2012 "Pugnus Irae", mainly as they'd have needed a fair amount of greenstuff work and I have had a busy few months. Right, back to fiddling with battle damage on the chosen ones B) Link to comment https://bolterandchainsword.com/topic/244959-lpc-2012-vow-marius-perdos-doom-fists/page/2/#findComment-3018475 Share on other sites More sharing options...
Marius Perdo Posted March 19, 2012 Author Share Posted March 19, 2012 A little more work. Just waiting for some plastic rod I have sprayed brass to dry and then I can put shell casings on the bases and finish them off with some final ash and rust blending. Whilst I wait I'll Devlan mud wash the termie parts and get ready to do some Rotting Flesh highlights and some B pencil battle damage before final glaze of watered down Devlan Mud. Then it is just the white, red, and brass bits, and then the weapons and purity seals etc. Oh, and transfers of course :D Link to comment https://bolterandchainsword.com/topic/244959-lpc-2012-vow-marius-perdos-doom-fists/page/2/#findComment-3019566 Share on other sites More sharing options...
Doghouse Posted March 19, 2012 Share Posted March 19, 2012 I love the colours on these guys, the red is really vibrant against the lighter green. Really nice work. :lol: Link to comment https://bolterandchainsword.com/topic/244959-lpc-2012-vow-marius-perdos-doom-fists/page/2/#findComment-3019587 Share on other sites More sharing options...
Marius Perdo Posted March 20, 2012 Author Share Posted March 20, 2012 I love the colours on these guys, the red is really vibrant against the lighter green. Really nice work. :lol: Coming from you that really means something, as I have been a big fan of your work since I first troll...erm, visited these boards :) The green did take a little while to settle on, with too much Rotting Flesh at the start, and too much Bleached Bone later on. You can see ealier horror stories, long sinced Dettoled, on my main Doom Fists WIP thread. Oddly the red was easy by comparison, but I did do Blood Angels many, many years ago so it might be down to that. Right, update time. As the guys had a watered down Devlan Mud wash prior to extreme edge highlighting I had to let them dry naturally to avoid horrible tidemarks. Thus I played about with adding the spent bullet casings to the bases before final weathering. 1mm diameter plastic rod sprayed Chaos Black, then airbrushed Vallejo Rust and then Bright Brass, and then washed Devlan Mud, and then light overbrush of Bright Brass again. I have to agree with Machinepriest, Bright Brass is amazing whether airbrushing or paint brushing. Some casings might be a little bit too long but sod it, learning process and all that, going for effect over precision ;) Then it was more FW weathering powders, specifically Dry Mud, Grey Ash, Light Rust and Orange Rust. And a B pencil. A bit of blending with MIG Thinners for Washes but not set in stone (or Pigment Fixer) as yet. I might actually just use a matt spray varnish to act as the fixative. It does look quite dusty at the moment, but I quite like that. It should also tie in nicely when using some Dry Mud and Grey Ash, and a blend thereof, on the legs of the termies, especially around those legs with bonding studs on. Obligatory picture, if slightly goldfish bowly: Edit: I was thinking of adding small bits of grey and dusty rubble, using superglued tiny slate pieces, directly to the reinforcement grids for the concrete (or plascrete or ferrocrete or whatever) slabs but given the scale it would probably be overkill. Link to comment https://bolterandchainsword.com/topic/244959-lpc-2012-vow-marius-perdos-doom-fists/page/2/#findComment-3020250 Share on other sites More sharing options...
Lachdannan Posted March 20, 2012 Share Posted March 20, 2012 Awesome looking bases. what Matt spray do you use to seal the powders? Link to comment https://bolterandchainsword.com/topic/244959-lpc-2012-vow-marius-perdos-doom-fists/page/2/#findComment-3020273 Share on other sites More sharing options...
Marius Perdo Posted March 20, 2012 Author Share Posted March 20, 2012 @Brother Syth: Thanks mate. I have found Windsor & Newton All Purpose Matt Varnish, which I get from an art shop, to be very good. £5.95 for 150ml, but you get what you pay for I guess :lol: It is less "satiny" than Purity Seal, which I do use for the sealing part of the weathering processes of the green of my lads. It is matt enough to keep the dusty looking appearance whilst still sealing and protecting the base. Link to comment https://bolterandchainsword.com/topic/244959-lpc-2012-vow-marius-perdos-doom-fists/page/2/#findComment-3020286 Share on other sites More sharing options...
Marius Perdo Posted March 24, 2012 Author Share Posted March 24, 2012 Not much done really, been busy the past few days, and the Vow time is ticking down... Basically done some edge lining on some, worked out I am very happy with the bases, started working up the red on the pads, and accepted that operation aside I have a fairly clear week next week. If my eyes are Okay after I'll do it, if not I'll fail :P The Vow that is. However an hour ago GW called me up about the new 145 paints range so I am off to see if there is anything to have a geekgasm over. In my curmudgeonly past I'd po-poo it but I have grown to like Foundation Paints for example so I will check it out and if it looks even vaguely promising I'll order the complete set with free army case. Tomorrow will be a non-starter as I'll have a bastard-behind-the-eyes. Off to see Craig Charles who is doing a funk, soul, and Mowtown gig at Preston Uni. Yes, that Craig Charles, Lister from Red Dwarf ;) Seen him before at the Big Chill, very good, you get an absolute groove on. So with clock changes and hangovers painting fine highlighting detail is just not going to happen tomorrow ;) There is always Monday... Link to comment https://bolterandchainsword.com/topic/244959-lpc-2012-vow-marius-perdos-doom-fists/page/2/#findComment-3023201 Share on other sites More sharing options...
Marius Perdo Posted March 28, 2012 Author Share Posted March 28, 2012 The lads are coming along nicely and I have even got to the point where I am finally happy to undercoat the tank but... I had surgery today, specifically septoplasty and trimming my turbinates to clear my airways and sinuses. Reading the literature I feel aboslutely fine, including no pain without meds (although that is probably the whole SCN9A thing), whereas the pamphlets say I should feel weak, poo, listless, irregular, and pointless with no appetite (I am basically the opposite). Bleeding a bit is to be expected, especially when I sneezed Red Gore all over the dog. The horrible little ghoul hound just licked it all up and looked at me as if expecting more. Waste not, want not I guess. Anyway, as marine (players) we all know Pain is an Illusion of the Senses, Despair an Illusion of the Mind, but understandably I have to avoid dust/particulates and that means a mask* so whilst the lads will get done by 31/03 the tank certainly won't as that would involve far too much airbrushing and weathering powders. So Vow failed then ;) Oh well... Which means what tutorial do people fancy? I can do one on making bases out of Ravendove Miliput pancakes with plasticard girder with Grandt Line Nuts & Bolts, bird feeder cage inforcement bars and guitar wire power cables (and weathering powders). Or I can do one on all the fun and games you can have with Grandt Line Rivets, of various sizes (or equivalents), on bonding studding up your marines. That sounds a bit kinky :D But I have emulated some stuff on other power armoured Doom Fists bits whilst things dried that folks might like to see, and it is very easy and cheap to do. Or both, as I am going to be so very, very bored for the next three weeks when, for insurance purposes, I have to act like I'm an invalid even if I am not. That was almost excessively rambly, even for me ^_^ Oh, and given I had to drop £4.4k on an operation (a sensible thing) I rather obstinately insisted I get to treat myself as I won't be having a holiday this year due to lost earning time due to recovery (a silly thing). So I ordered myself all the new FW marine toys that are out early April, the 145, and for reasons that escape me (beyond not having one yet and getting free shipping) a Thunderhawk Transporter to go with my Thunderhawk that has been gathering dust for years (well, the bags have). It does come with a Land Raider included, as if that makes all the difference. Right, off to watch some Homelands and then play BF3, as the Clan know I am not allowed to operate heavy machinery IRL for the next 24 hours and want to see how badly I screw up flying helicopters and driving tanks virtually :) Some pictures tomorrow of the progress on the termies (batteries re-charging, like a spoon I left the bloody camera on). *Edit: I don't advise trying to wear a dusk mask over a borked nose, it hurt like hell :) Link to comment https://bolterandchainsword.com/topic/244959-lpc-2012-vow-marius-perdos-doom-fists/page/2/#findComment-3026634 Share on other sites More sharing options...
Marius Perdo Posted March 31, 2012 Author Share Posted March 31, 2012 Well, I got them this far before failing: Been an enjoyable learning process and at least two new techniques (to me) that I can do Articles on. Learnt some fairly useful lessons. 1) Don't attach the shoulders, paint them red seperately and glue on for ease of access to parts that purity seals will block. 2) Build and and convert loads before airbrushing for effective use of time (and paint), so on my main WIP it will be build for a while. 3) Remember FW vehicles, particularly big solid blocks of resin like the Proteus, can take a lot of TLC to get right. 4) Read rule entries for vehicles, so you actually build an appropriate transport, unlike the Proteus. 5) This site has some great members with great ideas that can really help your projects, whether DV8 using the hairspray battle damage technique on infantry, Machinepriest's Grand Line rivets as bonding studs on infantry, Ravendove's Miliput cakes for making broken plascrete, or Brother Argos inspiring me to make more of an effort with the bases. And many others. So, has failing demotivated me at all? Not in the bloody slightest ;) Link to comment https://bolterandchainsword.com/topic/244959-lpc-2012-vow-marius-perdos-doom-fists/page/2/#findComment-3029210 Share on other sites More sharing options...
Recommended Posts
Archived
This topic is now archived and is closed to further replies.