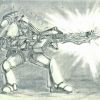
Volfen Posted January 4, 2013 Share Posted January 4, 2013 Ok, for Christmas, my kids got me a Storm Talon kit, along with the challenge to "make it look not so Fugly"With that challenge in mind,I present to you the beginnings of the Golden Lion Sky Shark Gunship.The idea was to make a cross between an A-10 Warthog and an Apache Gunship; hopefully giving the impression the durn thing could actually fly.I plan to give the wings an actual airfoil ( I know, close to heresy ) and add at least one more weapon mount for missiles. The Heavy Bolter / Lascannons will be magnetized, and as of now, the landing struts will be on the ends of the wingsThe engine area was set further behind the cockpit and slimmed down to lengthen the main fuselage area.The monstrously large chin turret was cut down and the assault cannons from the land speeder were used in place of the giant ones in the kit.You can see the beginnings of the new tail assembly. The side fans were donated from my son's drop pod. Still up in the air is whether or not the wing flaps will be posed as moving.The aft view should give an idea of the final cross - section of the tail assembly Link to comment https://bolterandchainsword.com/topic/269229-yet-another-storm-talon-mod-finally-finished-23-4-13/ Share on other sites More sharing options...
Danasdfgh58 Posted January 13, 2013 Share Posted January 13, 2013 Looks good. What material are you using to make the wings? Link to comment https://bolterandchainsword.com/topic/269229-yet-another-storm-talon-mod-finally-finished-23-4-13/#findComment-3281299 Share on other sites More sharing options...
Volfen Posted January 15, 2013 Author Share Posted January 15, 2013 The wings are made from square rod glued in-line. The front edge is half of a round rod cut to size. The support for the airfoil section is more tiny solid round rod. The trailing edge was cut down for the airfoil shape, and I'll be doing something simular for the flaps/airlerons. I will eventually cover the assembly with very fine plasticard, so as to represent the "skin" of the airfoil. I'll be taking more pictures (this weekend hopefully) as progress is made, and as soon as the board can allow photo updates, I'll share :) Link to comment https://bolterandchainsword.com/topic/269229-yet-another-storm-talon-mod-finally-finished-23-4-13/#findComment-3284016 Share on other sites More sharing options...
GodEmperorOfMankind Posted January 15, 2013 Share Posted January 15, 2013 Nice to see some good converting work there! looks miles better than stock Link to comment https://bolterandchainsword.com/topic/269229-yet-another-storm-talon-mod-finally-finished-23-4-13/#findComment-3284148 Share on other sites More sharing options...
ChromeZephyr Posted January 15, 2013 Share Posted January 15, 2013 Finally, a picture of what the Ravenwing assault cannons look like in the turret mount. They're a much better scale than the "My First GAU-8" the originals that come with the kit look like. I'd move them up a little closer to the body of the craft, but that's just me. Well done on the tail-lengthening, what size styrene did you use? Link to comment https://bolterandchainsword.com/topic/269229-yet-another-storm-talon-mod-finally-finished-23-4-13/#findComment-3284430 Share on other sites More sharing options...
Volfen Posted January 16, 2013 Author Share Posted January 16, 2013 The wings are 5/16" square rod, the fuselage extension is .040" sheet, cut to simulate the aircraft skin. I like to use the sheet styrene that has the .1" squares pre cut on one side: It make measuring and cutting to size much easier. Link to comment https://bolterandchainsword.com/topic/269229-yet-another-storm-talon-mod-finally-finished-23-4-13/#findComment-3285060 Share on other sites More sharing options...
MrSocks Posted January 16, 2013 Share Posted January 16, 2013 It's looking pretty cool, it does look deceptively like an apache gunship =P, all you need now are some copter blades =D. This is an excellent conversion, definitely a step towards "Can we please stop GW making ugly space marine fliers" (If I was working on this model I would be SOOOOO tempted to make it into a bi-plane!!!!) Link to comment https://bolterandchainsword.com/topic/269229-yet-another-storm-talon-mod-finally-finished-23-4-13/#findComment-3285067 Share on other sites More sharing options...
notsoevil Posted January 16, 2013 Share Posted January 16, 2013 I'll buy one know. :) Very nice conversion. Whereas I feel comfortable converting fleshy-nurgly bits with greenstuff, I just can't get proportions/angles/etc right with trying to build stuff with plasticard. Yours is inspiring though. Link to comment https://bolterandchainsword.com/topic/269229-yet-another-storm-talon-mod-finally-finished-23-4-13/#findComment-3285136 Share on other sites More sharing options...
Volfen Posted January 29, 2013 Author Share Posted January 29, 2013 Ok, time to see if I can learn the new system well enough to share progress. The first pic shows the new wing along with obvious gaps that will need filling The new missile racks, along with the front of the Landing Gear / Wing Support New Tail Support / Landing Gear; made to look as if it is partially extended. Should I cut it down to make it in the fully retracted mode? The Golden Lion symbol attached to the right cockpit side. You can see the gap in the wing root, hopefully get an idea of the airfoil shape. Beginning gap fill. Using Milliput - I might not use this in the future. The wingtip missiles will represent the air to air version, the missiles on the rack the ground support missiles. The Lascannon and Heavy Bolter front pieces are magnetized. advice, criticism welcome After initial sanding and priming. I plan to paint the inside of the cockpit then add the "glass" of the cockpit prior to final color. Right Wing. Still needs sanding and smoothing. Should I add more rivets? Top View Left cockpit side Link to comment https://bolterandchainsword.com/topic/269229-yet-another-storm-talon-mod-finally-finished-23-4-13/#findComment-3293086 Share on other sites More sharing options...
Ch@oZ Posted January 29, 2013 Share Posted January 29, 2013 This is shaping up really nicely, kinda makes me want to build one of those myself. Btw- i think this is the first imperial flyer with an earodynamic wing profile i've seen. Link to comment https://bolterandchainsword.com/topic/269229-yet-another-storm-talon-mod-finally-finished-23-4-13/#findComment-3293184 Share on other sites More sharing options...
Volfen Posted March 12, 2013 Author Share Posted March 12, 2013 Just a small update. The bird is almost out of the hangar. Cockpit shots - these are not super detailed, but I did want something visible through the cockpit windows when it finally gets to the game board. Once the pilot was finished and in place the cockpit glass was masked and glued, I wanted to show the final profile. Hopefully, the airbrush will do base colors this weekend. I toyed with the idea of changing the stock "rounded" canopy to a more sloped version, and if I ever do another, I may try it, but this is the Skyshark ready for base colors. Comments, Critiques, and Suggestions welcome. Link to comment https://bolterandchainsword.com/topic/269229-yet-another-storm-talon-mod-finally-finished-23-4-13/#findComment-3326427 Share on other sites More sharing options...
parabelumwolf Posted March 12, 2013 Share Posted March 12, 2013 looks really good, Link to comment https://bolterandchainsword.com/topic/269229-yet-another-storm-talon-mod-finally-finished-23-4-13/#findComment-3326538 Share on other sites More sharing options...
Kierdale Posted March 13, 2013 Share Posted March 13, 2013 Very nice work indeed! Link to comment https://bolterandchainsword.com/topic/269229-yet-another-storm-talon-mod-finally-finished-23-4-13/#findComment-3326747 Share on other sites More sharing options...
Volfen Posted March 31, 2013 Author Share Posted March 31, 2013 Well, the airbrushing of base colors was finished today. I tried a "ghost" pattern for a generic camo style. The underside is light blue grey and light blue, the topside more of a camo grey - green pattern. The underside does not show up well in the photo. Hopefully you can tell its there :) The home stretch for this project is in sight now, just have to get engines, missiles, guns, and weathering done. No problem, right? ;) Side View Top View - maybe a better idea of the camo pattern Bottom View - the light Blue - Blue grey ghost pattern is only barely visible in this photo So what do you guys think? Link to comment https://bolterandchainsword.com/topic/269229-yet-another-storm-talon-mod-finally-finished-23-4-13/#findComment-3339340 Share on other sites More sharing options...
Volfen Posted April 23, 2013 Author Share Posted April 23, 2013 Ok, after much Real Life interruptions and one major modeling disaster (after airbrushing, basic detailing, and in the middle of putting on decals, the model fell off the workbench breaking a wing an doing major damage to the wingtip missile and chin gun) -- I must confess I said a bad word , the Golden Lion Skyshark Pattern Storm Talon is now finished. I think it is ready for the tabletop This configuration is for when neither the Heavy Bolter or Las Cannon is equipped. Top View Side close up - the HUD display is a little too dark, but is transparent under normal light. right side view - the wing insignia is freehand, the fuselage insignia is a decal - you can also see the last evidence of the modelling disaster on the wingtip missile Close up of the left side - the number decals and the shark mouth are from an old WW II decal set Business end with Las Cannons - I was happy with the way the shark mouth came out A little better view of the cockpit showing the HUD and the Heavy Bolter option. Overall, this has been a fun project. I'm anxious to see how it does in games Link to comment https://bolterandchainsword.com/topic/269229-yet-another-storm-talon-mod-finally-finished-23-4-13/#findComment-3356047 Share on other sites More sharing options...
Kierdale Posted April 24, 2013 Share Posted April 24, 2013 Very, very nice work! The grey makes it look very much like a Warthog to me. The HUD looks great in that last photo. One thing I would suggest is about the engine vents: there's weathering coming from the vents -which is great- but inside the vents themselves looks like it's still light grey. How about a black wash in there to darken them. Link to comment https://bolterandchainsword.com/topic/269229-yet-another-storm-talon-mod-finally-finished-23-4-13/#findComment-3356069 Share on other sites More sharing options...
Disruptor_fe404 Posted April 24, 2013 Share Posted April 24, 2013 Yeah, I'm sorry to say that the vents really do look like they're unpainted! Excellent freehand though. Link to comment https://bolterandchainsword.com/topic/269229-yet-another-storm-talon-mod-finally-finished-23-4-13/#findComment-3356373 Share on other sites More sharing options...
Volfen Posted April 25, 2013 Author Share Posted April 25, 2013 Dohh!!!!!!!!!! I just KNEW I was forgetting something with the vents I'll break out the paints this weekend to repair that. Thanks much guys :D Link to comment https://bolterandchainsword.com/topic/269229-yet-another-storm-talon-mod-finally-finished-23-4-13/#findComment-3356924 Share on other sites More sharing options...
Recommended Posts
Archived
This topic is now archived and is closed to further replies.