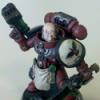
BKZer0 Posted March 3, 2013 Share Posted March 3, 2013 Introduction: This is a very picture heavy tutorial for all the steps it take to make the simple desert bases that I use on my army. http://www.bolterandchainsword.com/topic/272170-blood-ravens-5th-battle-company-wip/ A lot of people asked me how they are made so I figured a nice how-to was in order. I can’t take 100% credit for these bases. I was originally inspired to make these bases by some pictures I saw online a long time ago. I can’t remember where as it has been years. The tutorial will show you how to make the desert themed bases. However, at the bottom of the tutorial, I will go over how to use the sme technique for my Blood Ravens volcanic ash bases. Supplies: 1 Old brush (This tutorial literally shreds brushes, use an old one) 1 or more Bases (25mm, 40mm, 60mm any size works accept flying bases) A sheet of 1/8 inch cork board A bottle PVA (white) Glue Tub of course grit sand A bottle of Vallejo English Uniform (70921) A bottle of Delta Ceramcoat Flesh Tan A bottle of Delta Ceramcoat Palomine Tan A Can of Flat Brown Spray Paint (Rust-Oleum) Notes: 1. Palomine Tan is a discontinued color however it is easily made by a 2:1 mixture of (2)Delta Ceramcoat Spice Tan to (1)Delta Ceramcoat Drizzle Grey. 2. You don’t need to uses the colors I used, You just basically need 1 Dirt Brown, 1 Flesh Tan, and one Orangey Tan. Tutorial: Ok enough reading, on to the pictures. Step 1. http://www.40k.zombiecrisis.org/Bases/tutorial-step1.jpg Grab a base, any size will due. I used a combination of 25mm and 60mm bases in this tutorial. Flying Bases wont work because the cork has a hard time adhering to their convex shape. Make sure you clean the sprue burrs off the bases before continuing. Step 2. http://www.40k.zombiecrisis.org/Bases/tutorial-step2.jpg Rip the cork with your fingers until you get shapes that make a pattern that you are happy with. Be random, some bases may have one piece, other 3, 4, or even more. Step 3. http://www.40k.zombiecrisis.org/Bases/tutorial-step3.jpg Before you do any gluing, line up all your pieces and make sure you are happy with the results. Step 4. http://www.40k.zombiecrisis.org/Bases/tutorial-step4.jpg Rub a thin but generous layer of PVA glue all over the surface of the base. Be as even as possible. Try not to put it on too thick. Step 5. http://www.40k.zombiecrisis.org/Bases/tutorial-step5.jpg Put the cork on your newly glue covered base. Make sure the cork lies flush on the base. You don’t want send getting under the cork and ruing your base. Step 6. http://www.40k.zombiecrisis.org/Bases/tutorial-step6.jpg http://www.40k.zombiecrisis.org/Bases/tutorial-step6b.jpg While the glue is still wet, sprinkle course grit sand all over places where the glue is still exposed. Allow your base to sit for about 30 seconds to a minute in the sand to let it really sink into the glue. Then, dump the excess sand off your base. Step 7. http://www.40k.zombiecrisis.org/Bases/tutorial-step7.jpg Lay your bases face down on a flat surface and then put something very heavy on top of them like a stack of books, the heavier the better. If you don’t apply a generous amount of weight to the bases like this, the cork will actually begin to curl up as it absorbs the liquid in the glue. Allow the bases to sit like this for at least 30 minutes to 1 hour. Step 8. http://www.40k.zombiecrisis.org/Bases/tutorial-step8.jpg http://www.40k.zombiecrisis.org/Bases/tutorial-step8b.jpg Your bases should now be fairly dry, and ready to be sprayed. Go outside or to where ever you typically spray paint and give them a nice coat of flat brown spray paint. I would recommend using only brown. Using other colors such as black of white tends to make your bases too dark or light. Also spray paint takes a while to dry. I usually leave them to dry like this over night. Step 9. http://www.40k.zombiecrisis.org/Bases/tutorial-step9.jpg http://www.40k.zombiecrisis.org/Bases/tutorial-step9b.jpg Give them a fairly generous coat on Vallejo English Uniform on both the sand a cork. Don’t forget to get the sides of the cork. Step 10. http://www.40k.zombiecrisis.org/Bases/tutorial-step10.jpg Give the top of the cork a THICK layer of Palomine Tan. Make sure you only get the top of the cork, not the sides, or the sand. I know it looks thick, but the idea here is to fill all those little holes on the drop of the cork and give it some texture. I usually give it 2 passes. Also, Let the bases dry for a good hour or so after this. You want a nice dry surface, and the cork absorbs moisture and stays wet for a bit. http://www.40k.zombiecrisis.org/Bases/tutorial-step10b.jpg Pass 1 http://www.40k.zombiecrisis.org/Bases/tutorial-step10c.jpg Pass 2 http://www.40k.zombiecrisis.org/Bases/tutorial-step10d.jpg All the bases Step 11. http://www.40k.zombiecrisis.org/Bases/tutorial-step11.jpg Heavily dry brush the edges of the top of the cork with the Ceramcoat Flesh Tan. And let it dry for a minute or 2 Step 12. http://www.40k.zombiecrisis.org/Bases/tutorial-step12.jpg http://www.40k.zombiecrisis.org/Bases/tutorial-step12b.jpg Lightly dry brush the top and sides of the cork, and the top of the sand with the Ceramcoat Flesh Tan. You can start light, and then build up in the different areas until you get your desired look. I prefer going heavier on the top of the sand and the sides of he cork. Step 13. http://www.40k.zombiecrisis.org/Bases/tutorial-step13.jpg http://www.40k.zombiecrisis.org/Bases/tutorial-step13b.jpg Clean up the sides of the base by giving them a nice coating of Vallejo English Uniform Step 14. http://www.40k.zombiecrisis.org/Bases/tutorial-step14.jpg Add you models by attaching them to your base with super glue. Super Glue works Great on these bases. The porous cork really binds to the glue. Once your models are attached, you are all finished. Congratulations! Flying Base: For the large vehicle base, I drilled a hole in the back of the base with a 1/8 inch drill bit, right through the cork. Once I had the hole, I just pushed the flying peg into the hole in the cork, turned it a few times so it made a mark where I had to cut, and just dug out the surrounding cork with a tooth pick till the original plastic was exposed. Ashe Wasteland: This same technique can be used to make bases in various themes. to make bases like I use on my Blood Ravens army: http://www.40k.zombiecrisis.org/ravens-entry1.jpeg For that I used the following theme: 1 Prime: Chaos Black 2 Paint whole base: Codex Grey 3 Paint whole base second coat: Codex Grey 4 Wash base: Badab Black 5 Highlight Cork: Codex Grey 6 Highlight Sand: Codex Grey 7 Highlight All: Fortress Grey 8 Highlight Cork: Skill White 9 Watered Down Wash Sand: Badab Black 10 Rim: Graveyard Earth I also used ground up slate in with the sand. It gave the appearance of jagged rocks. Link to comment https://bolterandchainsword.com/topic/272185-making-simple-desert-bases/ Share on other sites More sharing options...
Sanguine Eternal Posted March 3, 2013 Share Posted March 3, 2013 That looks easy enough, and looks great for both your desert and urban bases. I picked up 16 12"x12" squares at the my local dollar store for for I think $6. I will put that to good use. I know you said to have a clean base with no sand on it, but did you try it on all ready sanded bases??It's easy enough to take off a base I know, but the problem is I have a 40"x60" game table that I sanded as well and I would like to do the same process pretty much to the table, since it looks so great, and I have more than enough. Also for the flying bases, did you try hot glue on individual pieces, then brush in pva into crevices and add sand later? Thanks for the tut. Link to comment https://bolterandchainsword.com/topic/272185-making-simple-desert-bases/#findComment-3319179 Share on other sites More sharing options...
BKZer0 Posted March 4, 2013 Author Share Posted March 4, 2013 Sanguine Eternal, on 03 Mar 2013 - 12:58, said: I know you said to have a clean base with no sand on it, but did you try it on all ready sanded bases?? It should still work. You may want to add some extra pressure(weight) to the cork while the glue is drying at Step 7. The idea is the make the cork as flat as possible. Also the cork tends to want to curl up on the edges when it is wet from the glue. Sanguine Eternal, on 03 Mar 2013 - 12:58, said: Also for the flying bases, did you try hot glue on individual pieces, then brush in pva into crevices and add sand later? Thanks for the tut. No. For the flying bases, I used the exact same steps as the standard 25mm bases. However, I didn't use the clear flying bases as they are not flat and have a pitch to them. I used Large 60mm bases, since they are the same dimensions as the large flying vehicle bases. Link to comment https://bolterandchainsword.com/topic/272185-making-simple-desert-bases/#findComment-3319963 Share on other sites More sharing options...
Sanguine Eternal Posted March 4, 2013 Share Posted March 4, 2013 I tried it out last night on a piece of terrain that I had already sanded/painted desert colours. I did have to add the extra weight to most pieces because of the bumpyness with the sand, but it worked out fine. I can see why a clean base just makes the process so much easier. As for my game table, I will just have to do it bit by bit, applying heavy objects to give the cork a good bond. Thanks again, it looks great, and really affordable. Link to comment https://bolterandchainsword.com/topic/272185-making-simple-desert-bases/#findComment-3320095 Share on other sites More sharing options...
huntingbane Posted March 5, 2013 Share Posted March 5, 2013 I think this is a great technique for any army. Link to comment https://bolterandchainsword.com/topic/272185-making-simple-desert-bases/#findComment-3320683 Share on other sites More sharing options...
miniaturepainter Posted March 8, 2013 Share Posted March 8, 2013 Great stuff, personally I think cork bases are over done about now. I've seen some pretty ridiculous ones. But, yours are very subtle. Can barely see they are standing on a large rock or stone slab. Awesome. Link to comment https://bolterandchainsword.com/topic/272185-making-simple-desert-bases/#findComment-3323871 Share on other sites More sharing options...
Sanguine Eternal Posted March 18, 2013 Share Posted March 18, 2013 I got a bunch done this way with slight variation. I added some yellow grass that I found at my local Michaels store for a decent price. I think they still need some agrax earthshade to finish them off, but for now, this will do. Thanks for the great idea, they turned out nice. I extended mine off the base a bit so the marines legs have more glueing surface. http://i1273.photobucket.com/albums/y404/Stevezi/DSCF2736_zpsa134a466.jpg Link to comment https://bolterandchainsword.com/topic/272185-making-simple-desert-bases/#findComment-3330572 Share on other sites More sharing options...
Valerian Posted August 17, 2013 Share Posted August 17, 2013 Great tutorial; thanks for sharing. I've just started cork basing some Orks, and was planning on going with the desert theme, so this will be perfect for me. Valerian Link to comment https://bolterandchainsword.com/topic/272185-making-simple-desert-bases/#findComment-3425803 Share on other sites More sharing options...
battle captain corpus Posted April 19, 2014 Share Posted April 19, 2014 Smashing tutorial, very inspiring thankyou! :) BCC Link to comment https://bolterandchainsword.com/topic/272185-making-simple-desert-bases/#findComment-3657871 Share on other sites More sharing options...
Pyromancer Posted May 9, 2014 Share Posted May 9, 2014 I might use the sand one for my next HH army. Thanks! Link to comment https://bolterandchainsword.com/topic/272185-making-simple-desert-bases/#findComment-3680570 Share on other sites More sharing options...
Darth Mustard Posted May 9, 2014 Share Posted May 9, 2014 Pretty cool tutorial What I used to do was on your Step 10 add some wood glue to your paint. It thickens the paint and aslo helps to have a layer that fills the gaps between the bits of cork. You can even add a pinch of very thin sand. Link to comment https://bolterandchainsword.com/topic/272185-making-simple-desert-bases/#findComment-3680573 Share on other sites More sharing options...
Uprising Posted May 9, 2014 Share Posted May 9, 2014 When I first start this hobby(five years now?), my first proper basing was done by following this tutorial. I still use it today with a variation of color and bits add. Thank you for your help over the years. Link to comment https://bolterandchainsword.com/topic/272185-making-simple-desert-bases/#findComment-3680680 Share on other sites More sharing options...
BKZer0 Posted May 13, 2014 Author Share Posted May 13, 2014 When I first start this hobby(five years now?), my first proper basing was done by following this tutorial. I still use it today with a variation of color and bits add. Thank you for your help over the years. Thanks for the kind words. It is my pleasure to help. Link to comment https://bolterandchainsword.com/topic/272185-making-simple-desert-bases/#findComment-3685157 Share on other sites More sharing options...
Recommended Posts
Archived
This topic is now archived and is closed to further replies.