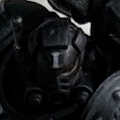
twopounder Posted March 1, 2020 Share Posted March 1, 2020 I've dabbled in 3d printing for a while, but never bought a printer myself. Filament printers have poor detailing and better quality printers are extremely expensive. However, UV resin printers have come down significantly in price, and I decided to purchase an Elegoo Mars UV printer. Some things to know about resin printing (for those that are going to be suddenly enamored): 1) It smells (it didn't really bother me, but it does smell like burning plastic). I used a respirator when working directly with the resin and many people have said that they can't stand the smell. 2) Its toxic, sticky and can get everywhere fast. Gloves, a respirator and googles are MUST when working with it. It is absolutely not for children. 3) It cures with any amount of sunlight. This means you need to be very diligent about cleaning your tools, work space and the resin tray. Bottles of resin are about $36 each and will be ruined if left open. Further, if any gets onto something and you don't clean it off (or can't) the resin will harden and may destroy it. Carpet especially. 4) Its not very strong, even after fully cured. 5) It shrinks as it cures. If you don't have good direct sunlight (like me), you'll need to build or buy a UV curing box. If you don't cure it before painting, the shrinkage could cause the paint to crack. 6) It takes a long time. The print below took over 13 hours. The taller the model, the longer its going to take. You can speed it up by sacrificing details though. If I left it on .005 stepping level, it would be done 5x faster. That being said, resin printing seems to have very good detailing. Unfortunately, the first print I did was without a support gantry, so it failed pretty badly. I figured out how to add the gantry in the software and printed again. This time it was much better, but I learned a few more lessons: 1) The helmet was ruined because it was at the same level as the other support gantries, so it lost most of its details 2) The back of the mini looks melted because of the supports that were printed into it. I was trying to save time by leaving it horizontal, but I think I would have to bite the bullet and build the gantry on the feet. However, you can get an idea of the accuracy of the printer by the front and top of the backpack. In the future, I will be very careful and selective of how the model is aligned before slicing. Also, the two servo arms were lost somehow. I didn't see them, so its possible that they broke off and were lost into the vat of resin. Overall, I'm pretty happy with the results. The resin printing is messy, difficult and a bit temperamental, but the prints can look fantastic. I think I'll get the 4k screen upgrade for higher resolution prints and a couple extra trays, as they seem to be fragile and any smears will block the UV light and ruin prints. This is making me want to start modelling again . I'll post updates to other prints as I make them, but as I don't actually play the game anymore, it will be more for modelling sake than trying to make any level of "play ready" parts. Link to comment https://bolterandchainsword.com/topic/362323-testing-the-3d-print-waters/ Share on other sites More sharing options...
Recommended Posts
Archived
This topic is now archived and is closed to further replies.