Bonehead Posted January 8 Author Share Posted January 8 (edited) Manged to get the brown on and the black wash. Small steps, but they make a difference. And I just realised that I completely failed to do the cockpits. I'll have to do them before I glue them together. Dang it. Well, shouldn't take too long. The new nuln oil formula is pretty crap, as has been variously noted. Anyone know any decent alternatives? I'll be just chucking in some black templar and some medium otherwise, which sort of works, but it'd be a lot easier to just find a brand that works. Edited January 8 by Bonehead Gnasher, Focslain and The Pounder 3 Back to top Link to comment https://bolterandchainsword.com/topic/384347-the-yantar-8th-aka-why-didnt-bonehead-do-this-while-he-was-building-and-painting-them/page/2/#findComment-6085959 Share on other sites More sharing options...
Bonehead Posted January 8 Author Share Posted January 8 Also, thoughts on the fuel tanks? I was thinking i'd just paint yellow warning triangles in the corners, but does anyone feel they ought to be wholly a different colour? Link to comment https://bolterandchainsword.com/topic/384347-the-yantar-8th-aka-why-didnt-bonehead-do-this-while-he-was-building-and-painting-them/page/2/#findComment-6085960 Share on other sites More sharing options...
The Pounder Posted January 8 Share Posted January 8 Personally I like how they are. As you said warning symbols would add a point of interest. Im liking how these are coming along by the way! A real labour of love. Bonehead 1 Back to top Link to comment https://bolterandchainsword.com/topic/384347-the-yantar-8th-aka-why-didnt-bonehead-do-this-while-he-was-building-and-painting-them/page/2/#findComment-6086021 Share on other sites More sharing options...
Bonehead Posted January 9 Author Share Posted January 9 Thanks! After finally getting them to a stage where I can glue them together, I agree that the tanks should stay the colour they are and just get a warning symbol. Having got them to the stage of assembly, here they are assembled: You can see more or less what the final look will be on the venator in the corner. That one doesn't have rolling wheels or working headlights though. Yet. Give me time. Cockpits detailed: It was after seeing how this one particular tank (in the stowage) looked as as safely much smaller area to test that I came to the belief that the main tanks are fine as they sit. Just the new ones: And a closer view of the one trooper I've been doing alongside the crews. She was the only one I'd actually got paint-ready: there are nine more built, but not not based properly yet. Too lazy. She'll go in third platoon's command squad. After third platoon is finished, I guess it's moving onto a few bits around the margins. Another mortar squad, a missile squad, maybe something else if I think of it. Maybe some more advisors. Focslain 1 Back to top Link to comment https://bolterandchainsword.com/topic/384347-the-yantar-8th-aka-why-didnt-bonehead-do-this-while-he-was-building-and-painting-them/page/2/#findComment-6086269 Share on other sites More sharing options...
huntmaster7 Posted January 22 Share Posted January 22 What are these vehicles called? I'm new so I'm assuming it's an out of production/ old forge world vehicle? Bonehead 1 Back to top Link to comment https://bolterandchainsword.com/topic/384347-the-yantar-8th-aka-why-didnt-bonehead-do-this-while-he-was-building-and-painting-them/page/2/#findComment-6089470 Share on other sites More sharing options...
Dr_Ruminahui Posted January 22 Share Posted January 22 (edited) You are partway correct - the original resin models were from FW, and were from the Elysian imperial guard line, which were the original (non storm trooper) drop troops for the imperial guard (now known as the Astra Millitarum). The vehicle is called a Tauros, and in essence it was an air dropable jeep. I think they came in both a short version and a longer version. These particular models are the plastic kit that came out more recently for the Necromunda Enforcers - a link to it in the GW store is here. Bonehead has then done some conversions to it, I think, to make it look more like the old short version FW Elysian kit. What he did is on page 1 of this thread, but involved (among other changes) cutting a portion out of the middle of it to make it shorter and adding LED head lights (the latter is a feature that was not on the original FW models). That said, in the last picture you can see the short ones along side the long version (which is on the right). Edited January 22 by Dr_Ruminahui huntmaster7 and Bonehead 1 1 Back to top Link to comment https://bolterandchainsword.com/topic/384347-the-yantar-8th-aka-why-didnt-bonehead-do-this-while-he-was-building-and-painting-them/page/2/#findComment-6089474 Share on other sites More sharing options...
Bonehead Posted January 22 Author Share Posted January 22 Exactly as the good Doctor said, @huntmaster7. They're the plastic necromunda Tauros venator, doctored somewhat so they appear like the original Elysian Drop Troops Tauros, now sadly out of production. All the details of how to convert them are in the first page. Meanwhile, I finally manged to get them another step or two down the line to being finished. I got some paint chipping done and then got in around the exhausts with some soot weathering powder. For the paint chipping, I chose a light grey (celestra grey?) and used a sponge to apply it in a nice random pattern. The light's a bit grey in the uk at the moment, so the pictures are kind of washed out. you can see I also managed to get some heat discolouration done on the flamers as well, though. Here's a front view: You can see that the sponge does a decent job of randomising the patterns of wear. Here's a rear view, showing the sooty exhaust: This one has no rear lights- it's the first one I did, before I got around to LED installs. No chance of fititng those in now. I'll just fill them in with red once the chipping is done. These pictures are all pre-matte varnish, which I have now done. I didn't take pictures of that because they look exactly the same. The matte went on at this stage, because it dulls the metallics; While that works on the gun barels, it won't do for the paint chipping. So, the next stage is to reinforce the sponge work in grey paint with some flecks of metallics, somewhat less all over thshop, to show the deeper scratches where we're down to bare metal. After that, it's time to do my favourite bit: mixing up rust weathering powder with white spirit and adding it to the model to show rusty patches, amazingly enough. With the white spirit it runs very nicely along panel lines and collects where water would. Then you go back with a clean brush, get just white spirit on it, and thin out the heaviest patches, and drag them downwards to look like it's streaked where water flows. once that's done, it's time to just go nuts with dirt-coloured weathering powder all over the wheels and the lower third of the model. Maybe go back ad add a touch more soot by the exhausts, touch everyhting up, and it's finished. They might be all done tomorrow; depends how busy I am. Bonus shots: side chipping and all three rears: Cool. Stay tuned! EmprahsStrongestGuardsman, Gnasher, Dr_Ruminahui and 1 other 3 1 Back to top Link to comment https://bolterandchainsword.com/topic/384347-the-yantar-8th-aka-why-didnt-bonehead-do-this-while-he-was-building-and-painting-them/page/2/#findComment-6089701 Share on other sites More sharing options...
huntmaster7 Posted January 23 Share Posted January 23 Thanks for the info about these. The result looks great. I also did the light grey and sponge to represent chipping. Dr_Ruminahui and Bonehead 2 Back to top Link to comment https://bolterandchainsword.com/topic/384347-the-yantar-8th-aka-why-didnt-bonehead-do-this-while-he-was-building-and-painting-them/page/2/#findComment-6089708 Share on other sites More sharing options...
Bonehead Posted January 27 Author Share Posted January 27 (edited) I did in fact get them finished the next day, but some things came up and I wasn't able to post them. Ok, next I did the metal, as advertised, and then moved on to rust washing, with weathering powder and white spirit: You can see that the rust is laid on pretty thick in these photos. Fortunately, you just need a clean brush with some white spirit, and a clean cloth or paper towel, and you can rub it back off thanks to the matte varnish. I did do that, but for some reason moved onto dirt weathering powder first. This is much easier; just take a knackered brush, dip it in the powder (dry) and smear it all over the model where you want it. Because the model is dry and so is the pwder, you get realistic streaking, and an overall effect that's just a layer of dried mud. The tyres get a particularly heavy coat, for obvious reasons. Now, you might be asking yourself why there are onyl two vehicles in the photos. Well, the particularly heavy coat on the tyres can be a little too heavy. Had to prop it up so it glued straight, so no photos. Meanwhile, here's the other two, now with dirt powder: You can see how much better the rust looks on the newer two versus the older model, which I did before I knew about the white spirit rust technique. And here's an overly bright shot that shows the over-rusting pretty dramatically. It wasn't as bad as this in real life, but it did need dialling back. The light and my crap camera weren't helping, but here's how they actually ended up looking once I'd reduced the rust quite a lot: Lights still working, I'm pleased to show. And there you go. Final shot of the fronts, in poor light: That'll do. Infantry next? Another platoon perhaps? Edited January 27 by Bonehead Focslain, Gnasher, EmprahsStrongestGuardsman and 1 other 4 Back to top Link to comment https://bolterandchainsword.com/topic/384347-the-yantar-8th-aka-why-didnt-bonehead-do-this-while-he-was-building-and-painting-them/page/2/#findComment-6090908 Share on other sites More sharing options...
The Pounder Posted January 29 Share Posted January 29 They look amazing! You should be really proud. I’d like to see more Infantry! Bonehead 1 Back to top Link to comment https://bolterandchainsword.com/topic/384347-the-yantar-8th-aka-why-didnt-bonehead-do-this-while-he-was-building-and-painting-them/page/2/#findComment-6091204 Share on other sites More sharing options...
Bonehead Posted January 29 Author Share Posted January 29 Thanks, I really appreciate it! Well, I'll have to see what I can do for you then. I've got plenty of them, after all, so it shouldn't be too much trouble. And I'll be having a decent number more as I go on, as it happens. Today I received a double mood enhancer; Both a resupply of 3d printed heads and some more VM parts. Now, while this box does contain 260 gas-masked heads, it's worth noting that most of them are destined for another army. Specifically, I ordered 120 of the plainest ones. A majority of those are destined for the SW storm-trooper themed force I gave a brief mention to in the previous page. Check my Lost and Damned log for progress on those dangerous nutcases. The box: And also the stuff from VM: This is mostly stuff for the baddies, honestly. Just a few kneeling legs and twenty torsos for the 8th Yantar. This is because VM have released .stl files for the legs I use in this army, and while I generally avoid having large parts of my models being 3d printed because 3d prints just love to shatter, and I have Tourette's, the thing about .stl files is you can print them the other way round as easily as pressing a button or five. So every remaining trooper in the 8th Yantar is going to have mirrored legs because that means I can suddenly create only poses that have never occurred before in the regiment. And I just love having a variety of poses. I might have to do an extra large platoon just so I can do more troopers. Then I'll sprinkle them back in among the existing squads, because of course I'll do something like that. But that means waiting for more files to be printed, which realistically means waiting for payday next month, so I guess next I'll do a shoot for the sentinels. Or perhaps I should shoot the command squad, and the specialists of the HQ platoon? Hmm. Good options both. EmprahsStrongestGuardsman 1 Back to top Link to comment https://bolterandchainsword.com/topic/384347-the-yantar-8th-aka-why-didnt-bonehead-do-this-while-he-was-building-and-painting-them/page/2/#findComment-6091435 Share on other sites More sharing options...
EmprahsStrongestGuardsman Posted February 1 Share Posted February 1 Do you have any tips on using weathering powders? I got some pots of different types of it but never had the courage to use it yet. Don't like to try out stuff I'm unsure of on models I put some work into already. Do you use some kind of seal to keep it in place, etc? Bonehead 1 Back to top Link to comment https://bolterandchainsword.com/topic/384347-the-yantar-8th-aka-why-didnt-bonehead-do-this-while-he-was-building-and-painting-them/page/2/#findComment-6092076 Share on other sites More sharing options...
Bonehead Posted February 3 Author Share Posted February 3 On 2/1/2025 at 11:51 PM, EmprahsStrongestGuardsman said: Do you have any tips on using weathering powders? I got some pots of different types of it but never had the courage to use it yet. Don't like to try out stuff I'm unsure of on models I put some work into already. Do you use some kind of seal to keep it in place, etc? I know that people do fix weathering powder in place with white spirit, and other solvents, but I don't like the way it looks when you do that. Adding the solvent tends to de-clump it and make it spread out more like a wash. I just leave it as it sits on top of the varnish, by and large. If it rubs off I can just put more on. My advice for using weathering powder is in two parts: first part is only use it on top of a layer of matt varnish. The matt varnish represents a tough surface that you can clean the weathering powder off with white spirit, or if you don't have that, a soft damp cloth. That way you can have confidence that any mistake you make is reversible. The second part is: practise a bit. Do a really quick paint job on an unpainted vehicle model. Just a spray job undercoat and basecoat. Then do a matt varnish on it; keep it thin so you can paint over it again. I use Colour Forge matte spray. Then, you have two options for applying the powder. If you're doing a soot effect, like on exhausts, or a dry mud effect, like on tracks and the sides, then just get a clean dry makeup brush, dip it in the powder, and smear the stuff where you want it. That's literally the way to apply it, it's great. Generally you want to treat it like drybrushing. Not very much powder on the brush, and build it up over a number of strokes. If you want to do really dirty tracks, then just put more powder on the brush and be generous. You can basically remove it by just taking a clean brush and doing the same motions again if you feel it's too much. If you want to delete it completely and start over, then a big soft brush, first dry and then dipped in water, applied a good few times, will get you a completely clean model. White spirit will also do that for you. That's the reason you put the matte varnish on. it creates a layer you can just go back to at any point; so you can practice on the same model over and over, then just get rid of all the powder one last time and do your actual paintjob. The other method is what they call a pin wash. If you mix powder with a solvent medium like white spirit, or enamel medium, you get a coloured liquid that will flow along panel lines and such. So just load up a small brush and touch it to the model at a panel join, and the mix will flow off the brush along the line. It's kind of mind-blowing. Then because you're using a solvent, the liquid will evaporate and leave the dry powder behind, deposited neatly along the lines of the model. And thanks to the varnish under it, you can come along and manipulate the powder more. With a clean dry drybrush, you can sort of push the powder around a bit and diffuse the colour effect. With a conventional brush dipped in whatever solvent you used, you can drag the powder around in streaks. Typically you do this to drag rust powder down from rusty bolts and the like. The more subtle the better with rust; but the great thing about this method is if you're too heavy at first, just keep on brushing clean solvent on to it, dragging it as you do, and you thin down the rust effect until it's more realistic. Reference photos are your friend here: there's tons of rusty things just a google away. You can also create random rust spatters by flicking a brush with pwder-solvent mix on it, but this is easy to go overboard with. Practice will see you right. I hope that's useful to you mate. EmprahsStrongestGuardsman 1 Back to top Link to comment https://bolterandchainsword.com/topic/384347-the-yantar-8th-aka-why-didnt-bonehead-do-this-while-he-was-building-and-painting-them/page/2/#findComment-6092238 Share on other sites More sharing options...
Bonehead Posted February 3 Author Share Posted February 3 Also, watch this video. This guy does it all better than i do. He'll show you the techniques: then my answer up above is how I use what I learned from him. I don't go nearly as far as he does, and I get decent results: you don't need to either. All the diluted glue and alcohol stages are cool as hell, but you don't need them at all if you're not trying to win a competition. The Pounder and EmprahsStrongestGuardsman 1 1 Back to top Link to comment https://bolterandchainsword.com/topic/384347-the-yantar-8th-aka-why-didnt-bonehead-do-this-while-he-was-building-and-painting-them/page/2/#findComment-6092241 Share on other sites More sharing options...
The Pounder Posted February 3 Share Posted February 3 Always great to see a master at work! Bonehead 1 Back to top Link to comment https://bolterandchainsword.com/topic/384347-the-yantar-8th-aka-why-didnt-bonehead-do-this-while-he-was-building-and-painting-them/page/2/#findComment-6092380 Share on other sites More sharing options...
Bonehead Posted February 27 Author Share Posted February 27 Had a bit of a think about what to do next. Didn't quite feel like hacking the wheels off the big tauroses and chucking lights in them yet, so I cast around for something else to work on. Boom: rough riders. I have two squads from the VM kickstarter, and I finally realised they weren't going to paint themselves. Squad one, with flash and without: And squad two: Just painting in all the brown for the webbing, equipment and tack took more than an hour on five troopers, and I was being careless so I could go as fast as I could. My god, this is going to take a little while. Still, soonest started, soonest finished, etc. Some of the lance shafts were so preposterously wobbly that they were unusable, hence there being only seven among them, and one of those seven had the lance replaced with a brass rod. Considering how bad you can see a couple of the ones I was prepared to keep are, you can imagine how bad the really bad ones were. Still, I'm looking forward to having these done; I think they're going to look great in the end. Horsey colours are as yet undecided. The troopers will be the same as all the others. Suggestions for horsey colour schemes welcome. Gnasher, Focslain, EmprahsStrongestGuardsman and 1 other 3 1 Back to top Link to comment https://bolterandchainsword.com/topic/384347-the-yantar-8th-aka-why-didnt-bonehead-do-this-while-he-was-building-and-painting-them/page/2/#findComment-6097382 Share on other sites More sharing options...
The Pounder Posted March 1 Share Posted March 1 I saw those on their site! Beautiful sculpts. I was going to do Praetorians but then the Krieg range was announced! Personally I like dark horses. Looking at your force I think you could get away with a black or brown scheme. Good luck with y the painting! Bonehead 1 Back to top Link to comment https://bolterandchainsword.com/topic/384347-the-yantar-8th-aka-why-didnt-bonehead-do-this-while-he-was-building-and-painting-them/page/2/#findComment-6097934 Share on other sites More sharing options...
Bonehead Posted March 2 Author Share Posted March 2 Thanks! I'm erring toward brown or grey; still not made my mind up yet. it'll be a while yet before I actually get round to the horseys themselves anyway, so there's time yet to mull it over. The Pounder 1 Back to top Link to comment https://bolterandchainsword.com/topic/384347-the-yantar-8th-aka-why-didnt-bonehead-do-this-while-he-was-building-and-painting-them/page/2/#findComment-6098071 Share on other sites More sharing options...
Bonehead Posted March 7 Author Share Posted March 7 Got the riders' camo done. It obscured quite a lot of the brown I'd already laid in due to my general haste, but they always look this bad at this stage. Next we do the dark green armour, then we do the brown again, then it's finishing up and the riders will be done. To be honest, the zandri dust undercoat is actually looking pretty decent next to the browns and greens, and it is a shade close to the horsey colour they call 'dun'. In terms of composition, it looks pretty decent to me- especially considering the bases will be flocked and tufted. I reckon the horseys will all be dun, unless something strikes me. Dark muzzles and fetlocks, the odd spot of white on a face or foot. Could definitely work, and you don't see them painted that much, I don't think. Tallarn Commander and Focslain 2 Back to top Link to comment https://bolterandchainsword.com/topic/384347-the-yantar-8th-aka-why-didnt-bonehead-do-this-while-he-was-building-and-painting-them/page/2/#findComment-6098803 Share on other sites More sharing options...
casb1965 Posted March 8 Share Posted March 8 Love the old Tairos models, what do you intend proxying them as? Bonehead 1 Back to top Link to comment https://bolterandchainsword.com/topic/384347-the-yantar-8th-aka-why-didnt-bonehead-do-this-while-he-was-building-and-painting-them/page/2/#findComment-6098883 Share on other sites More sharing options...
Bonehead Posted March 8 Author Share Posted March 8 5 hours ago, casb1965 said: Love the old Tairos models, what do you intend proxying them as? Well, I don't play, to be honest. Tenth edition puts me off a ton. If I was to play, it'd be 5th ed, so they'd just be tauroses. If I was to play 2nd edition, which is where I got in the game and I still look back fondly on, i'd just bastardise something off the landspeeder rules. EmprahsStrongestGuardsman and casb1965 1 1 Back to top Link to comment https://bolterandchainsword.com/topic/384347-the-yantar-8th-aka-why-didnt-bonehead-do-this-while-he-was-building-and-painting-them/page/2/#findComment-6098906 Share on other sites More sharing options...
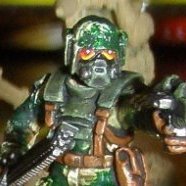
Bonehead Posted March 13 Author Share Posted March 13 Very modest progress on the rough riders this week. Turns out they take a LOT longer than ordinary infantry to paint. This is probably the most messy stage of all. Past this point, hopefully they should start to look more and more coherent. With flash: No flash: And yes, I did forget to do the gasmask on the rightmost guy. Dang it. The Pounder, Gnasher and Focslain 3 Back to top Link to comment https://bolterandchainsword.com/topic/384347-the-yantar-8th-aka-why-didnt-bonehead-do-this-while-he-was-building-and-painting-them/page/2/#findComment-6099771 Share on other sites More sharing options...
The Pounder Posted March 17 Share Posted March 17 Yeah, I always find Cavalry takes longer than you would think! You’ve inspired me to build my Deathriders now! Bonehead 1 Back to top Link to comment https://bolterandchainsword.com/topic/384347-the-yantar-8th-aka-why-didnt-bonehead-do-this-while-he-was-building-and-painting-them/page/2/#findComment-6100428 Share on other sites More sharing options...
Bonehead Posted March 17 Author Share Posted March 17 40 minutes ago, The Pounder said: Yeah, I always find Cavalry takes longer than you would think! You’ve inspired me to build my Deathriders now! Nice! I'll be looking forward to seeing those on your log. I was having a think about the possibility of getting some of them to convert for my traitor guard- but it depends on how they go together. Let me know if they're easy to build without the riders or if they have to have them on, please! Link to comment https://bolterandchainsword.com/topic/384347-the-yantar-8th-aka-why-didnt-bonehead-do-this-while-he-was-building-and-painting-them/page/2/#findComment-6100434 Share on other sites More sharing options...
Bonehead Posted March 20 Author Share Posted March 20 When I say they're taking a long time, I'm continually having to revise up just how long. About two hours today, and I got just five of them detailed up with redoing the brown and then a black wash on that and the dark green armour. Ballache. Still got drybrush highlights on the green and standard ones on the brown to go, and then after that it'll be metallics and eye lenses- and after that I'll still have the damn horses to go. And that's only five of them. Bugger. Flash: No flash: Emperor Ming, The Pounder, Focslain and 3 others 4 2 Back to top Link to comment https://bolterandchainsword.com/topic/384347-the-yantar-8th-aka-why-didnt-bonehead-do-this-while-he-was-building-and-painting-them/page/2/#findComment-6100852 Share on other sites More sharing options...
Recommended Posts
Create an account or sign in to comment
You need to be a member in order to leave a comment
Create an account
Sign up for a new account in our community. It's easy!
Register a new accountSign in
Already have an account? Sign in here.
Sign In Now