The Aurora
Entry posted by zulu.tango in Star Striders board
736 views
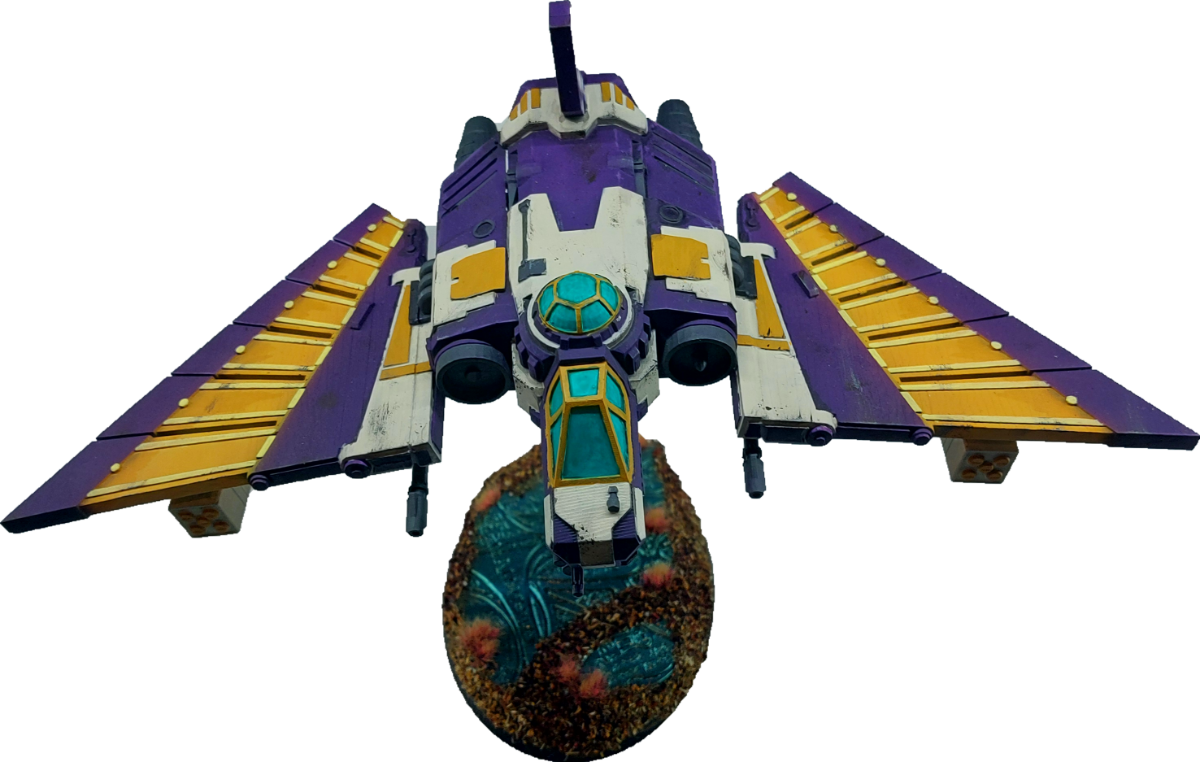
This ship was something of an exercise in perseverance through frustration. Initially this ship was going to be an included, but removable, portion of the display board itself. I had designed a tray which incorporated the base of the ship into a corner of the board, serving as both base for the ship and a transfer tray for the kill-team. I had an IOU 3D print from a kid in my local Kill Team group that I called in to get this ship made, and received assurances that it was an easy print, and I would have it in plenty of time to be incorporated into the board. But, high-school kids being high-school kids, he missed my initial date on when I wanted it...by like 2 months. Not entirely his fault, the print itself has a rather large solid body with no room for the resin interior to cure, and since he hadn't printed anything this large didn't know how to cure it. He eventually did the research and got the piece to me, but by that point it was well past my deadline and could no longer be built in to the board as I'd originally planned without a huge amount of re-work on my part. Oh well. 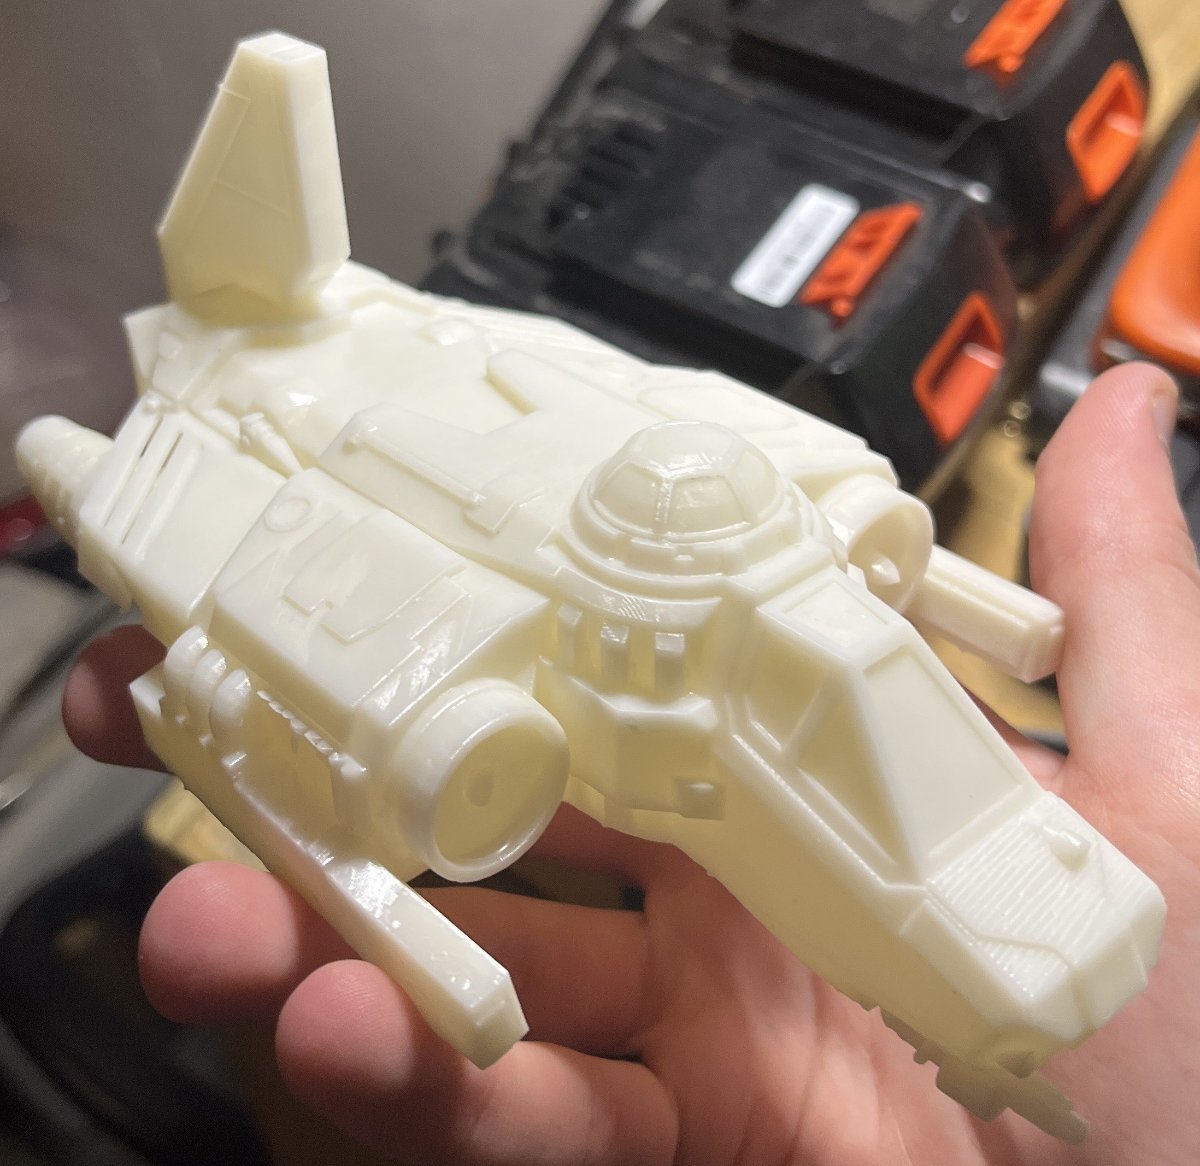
The print was pretty good, though it affirmed my aversion to 3d prints. And my aversion to working with Resin. I pinned the wings to the body at three separate points, and did some minor gap filling, certainly could have done more, but I was reasonably satisfied with it. In addition to the ship itself I had him print me off of a couple of las-cannons and rocket-pods to attach to the wings, as the Aquilla is not traditionally a gunship, but this one needed to be. Painting it went fairly quickly all things considered. My airbrush once again proved to be an invaluable tool for me
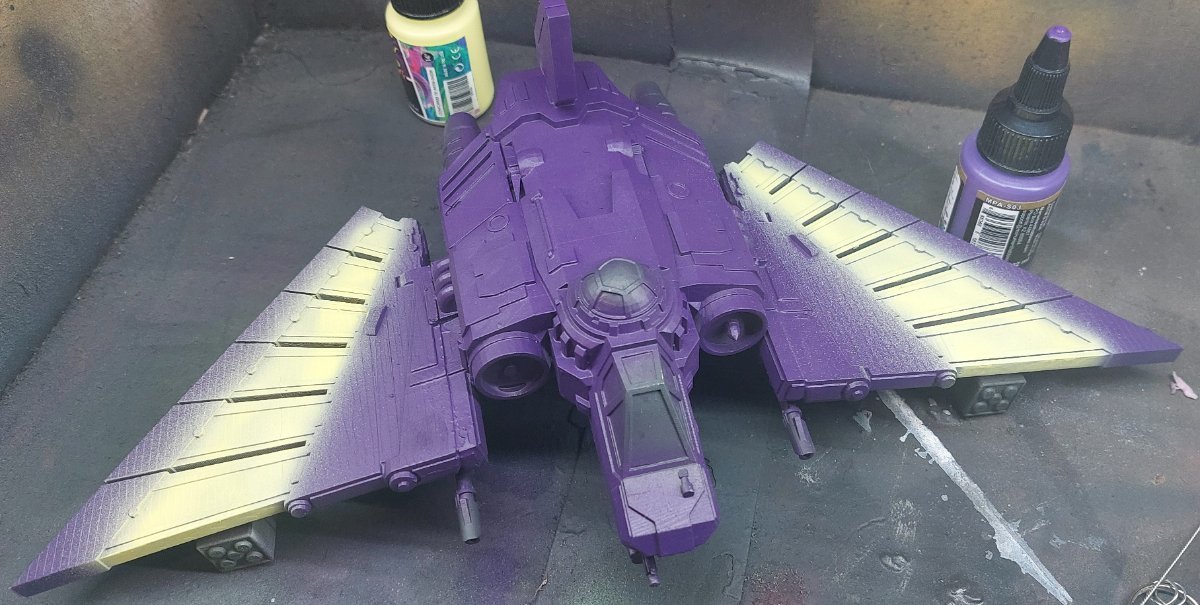
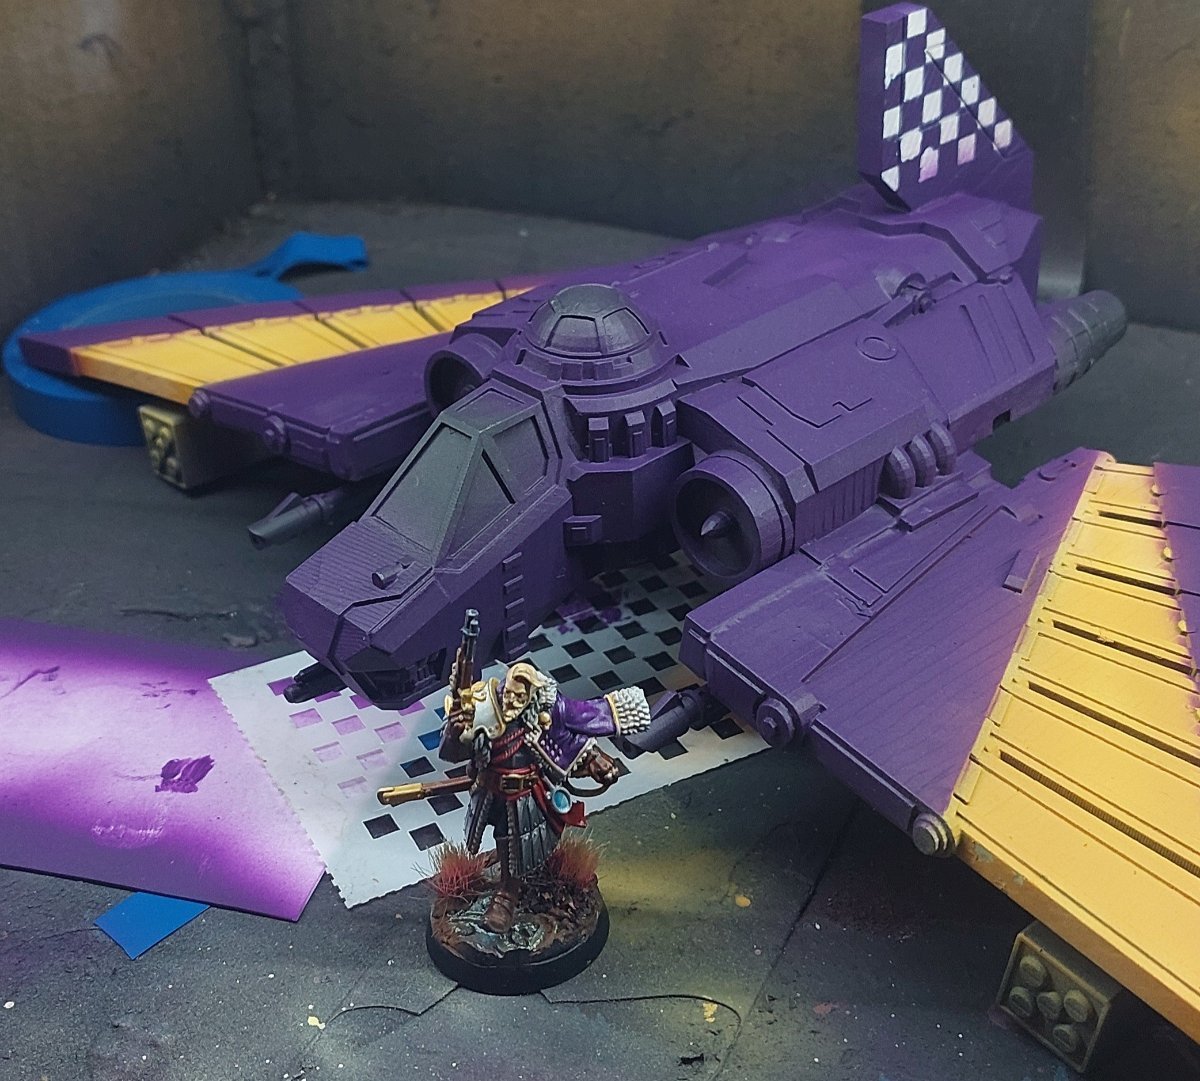
I wanted some flair for the ship so added a checkerboard pattern on the back thanks to some stencils I already had on hand. Resin, specifically 3d printed resin, just DRINKS paint in my experience. It took several coats to get my base colors where I wanted them.
I thought about adding a free-hand design and had a few designs sketched up....but...I just couldn't get up the motivation for it. I'm sure others reading this can relate, but occasionally I hit a point in a project that just murders my motivation. I wasn't happy with the model at this stage, I no longer had the pressure of making a (self imposed) deadline, and I didn't need it for anything...it was always a vanity piece. The entire thing started to feel like a weight around my neck.
So I switched to ":cuss: it, get it done" mode. Normally this happens WAYYYY later into projects for me, but its what I call the point where I no longer care about pushing myself to try harder, and just want to be done. Perfection is the enemy of progress, and I was more than ready to get done, so I hit the throttle. 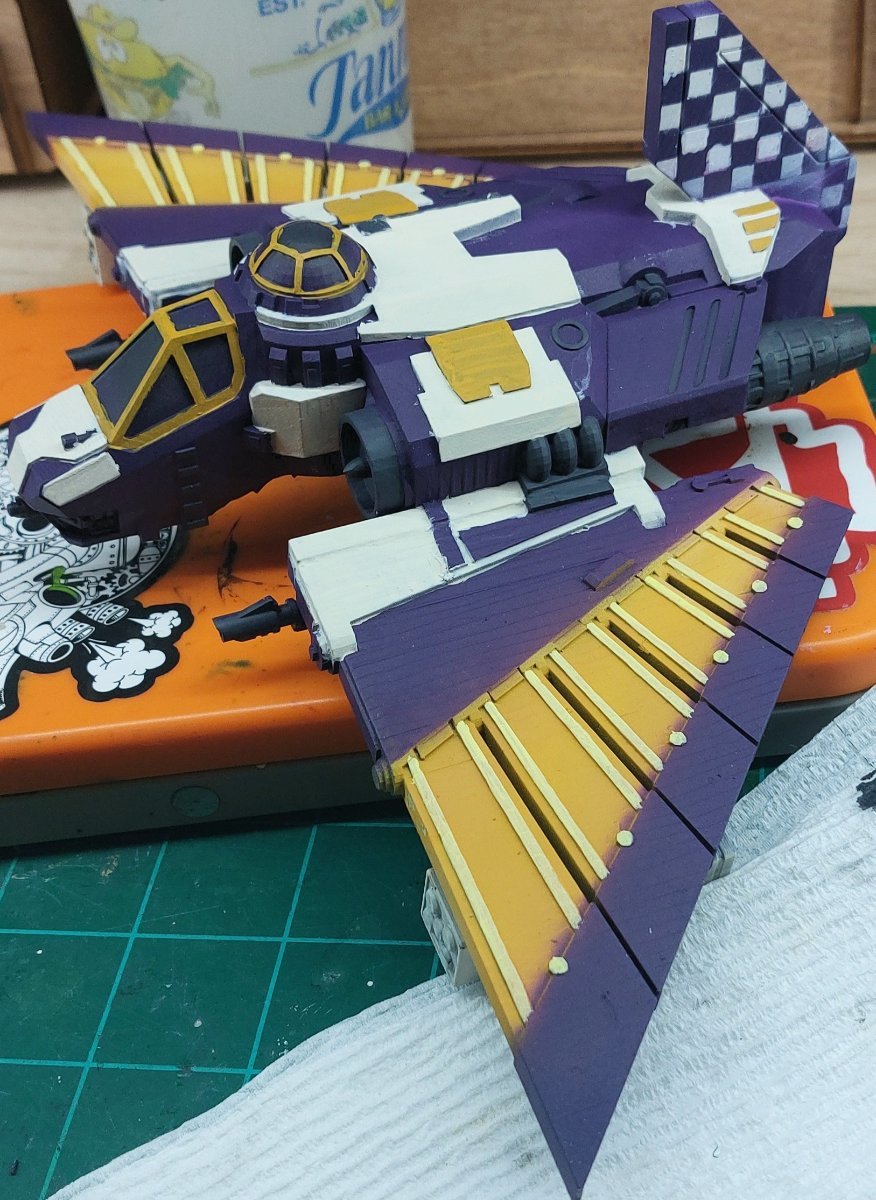
I didn't use metalics for the kill-team itself, so I wanted to keep with that trend on the ship. I made a minor exception for the weathering that I added later, but its such a small amount that you can't notice it outside of 1' away. I also found out that tamiya panel liner hate resin almost as much as I do, and wants to ruin it. If you're going to use enamel paints on resin, 2 passes of lacquer just wont do apparently. Once I was satisfied with the paint job I moved onto basing. There was a hex-cut in the bottom of the model for a standard flight stand, but since I didn't have any of those and generally think they look dumb...I went with an acrylic rod.
If you haven't worked with acrylic rods before, they rule. They can be heated up with a heat gun (or probably a hair dryer, they don't have to be that hot) and be bent to shape. Once they cool they maintain that shape, and their original strength. At this stage in the project I still thought I might try to incorporate the ship into the board (**spoiler alert **- I didn't) so I wanted to give the ship a more swooping look. This ended up being a bigger ask than I anticipated, and the end result is less swoopy than I would have liked. This was due in part to maintain balance on a base, but also in part because the resin of the print started cracking the moment I got the rod inserted into a hole I drilled toward the rear of the ship. I was able to mitigate most of the damage, and fortunately it was contained to the underside. I eventually realized that the interior print supports of the hull were still attached, and inserting the rod forced them outwards, resulting in the cracks. This contributed to my ":cuss: it get it done" mood, and I settled on a less dynamic pose. I secured the rod to the ship with super-glue, and then made a "cap" out of miliput which I painted to match the hull. I don't have any pictures, but it blends in pretty well and the rod isn't slipping in the slightest so it worked reasonably well.
I also had a small problem with getting a base big enough to sufficiently hold the ship without it toppling over. I ended up sawing the heads off a few landscaping nails I had in the garage to give it weight. They were superglued along with the acrylic rod to a base, giving it enough weight and stability to stand unsupported on a table.
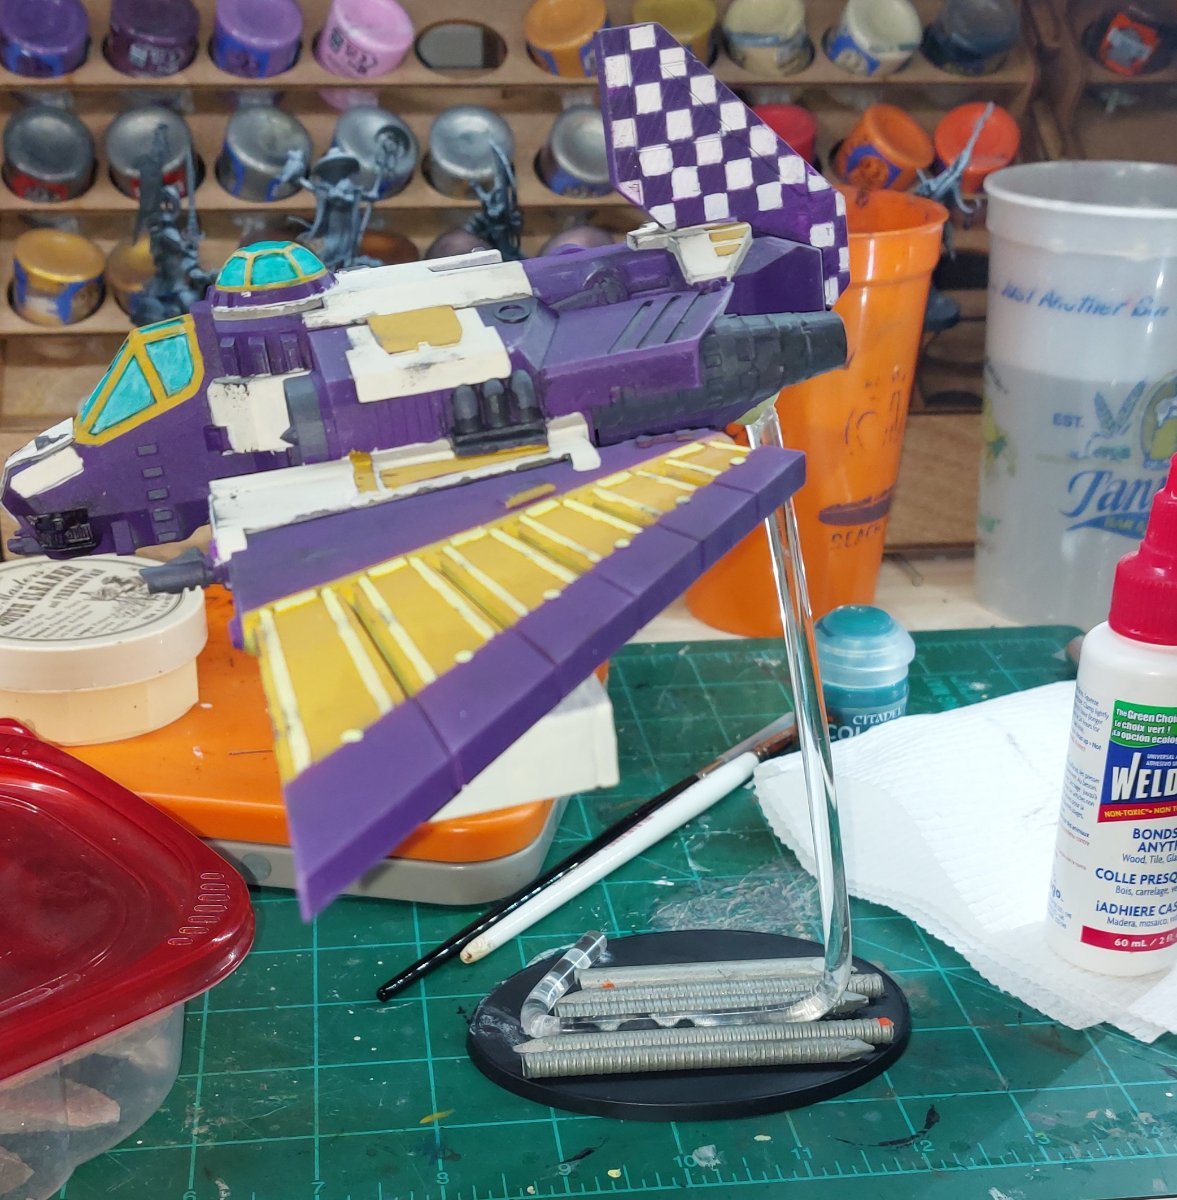
(Note - This picture shows a 150 mm base, I ripped this off after I decided it was too small and upgraded it to a 170mm oval I had on hand.)
Once I had the ship supported and weighed down I started to add the basing. I went with air-dry clay to build up the base higher and add more weight. I love this stuff.
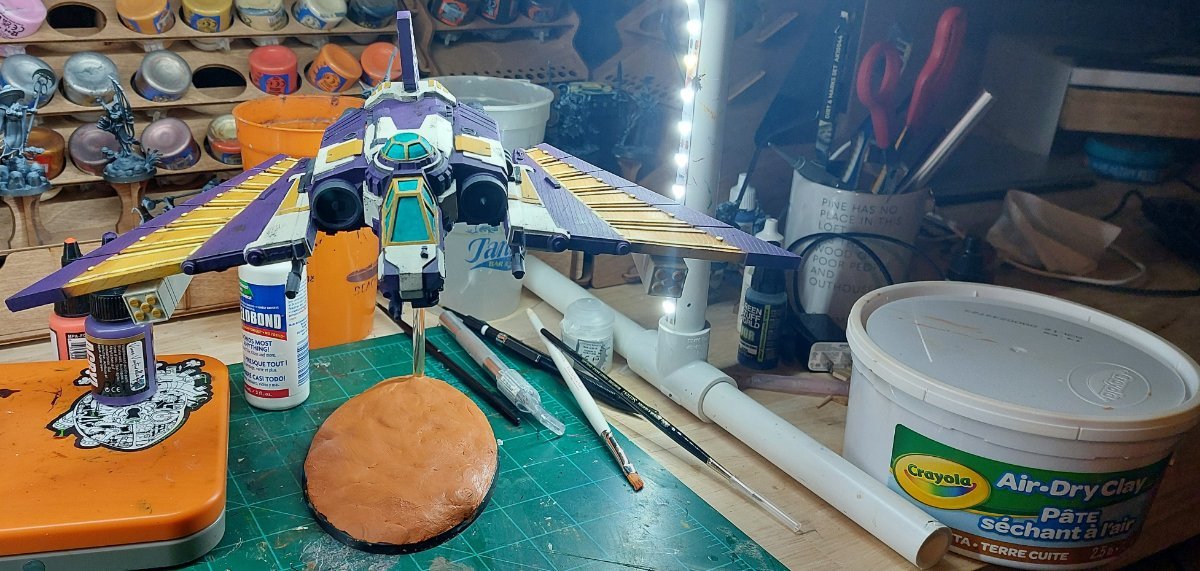
The rest of the base came together super quickly and was easily the most satisfyingly part of this whole build. I still had a bunch of the eldar textures from the original board/bases, and kept one particularly large piece for this base. Once that was on, I used some vallejo mud terrain paste to gap-fill and then used the last of the citrus tea-leaves as ground cover. Once they were dry I added the bushes to fill out the base and I was done. 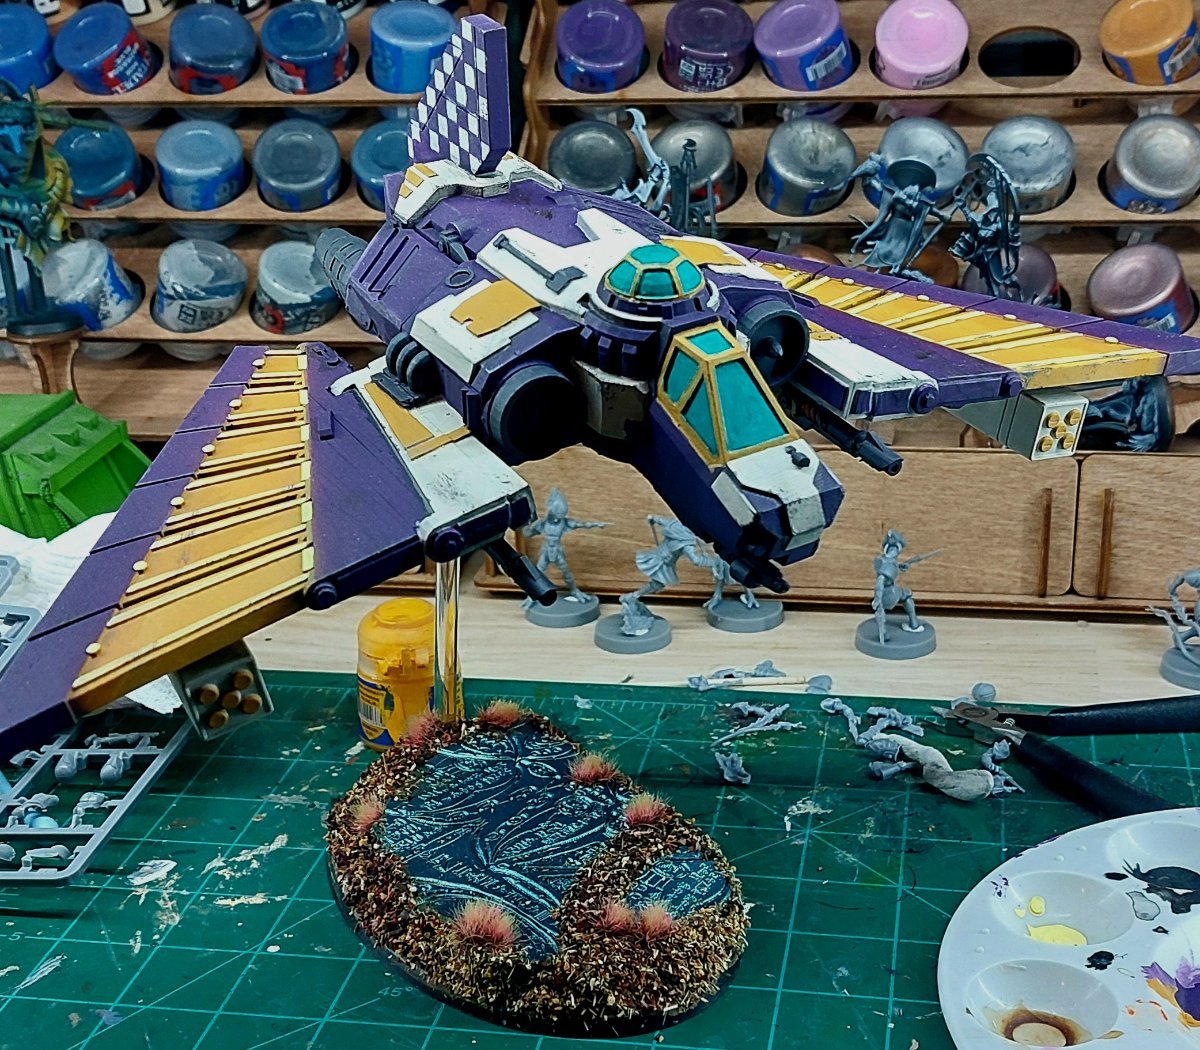
All in all I'm happy with the final result, but it was a frustrating one. It sat on my desk for nearly 2 months, but part of this hobby is the ability to push through difficult projects, and in the end I'm glad I finished this rather than shelving it.
Edited by zulu.tango
updated feature photo
- W.A.Rorie, Doobles57 and Mazer Rackham
-
 3
3
0 Comments
Recommended Comments
There are no comments to display.
Create an account or sign in to comment
You need to be a member in order to leave a comment
Create an account
Sign up for a new account in our community. It's easy!
Register a new accountSign in
Already have an account? Sign in here.
Sign In Now