Death Guard kill team chapter one: getting the sniffles
Entry posted by Antarius in Realm of Chaos
581 views
First off, welcome to the first part of my fall project, which by popular demand has turned out to be a Death Guard kill team (whether it will actually be used for kill team is anyone's guess, but I have a lot of DG laying around and I wanted to paint at least some of them up). The general idea is that I'll be using this blog to keep me motivated through a, historically speaking, difficult time of year where motivation can often ebb. So any comments or suggestions you may want to leave are highly appreciated!
I'm going to do this as part hobby log and part painting "guide" and assorted ramblings. The "guide" part is in quotation marks because, while I have done Death Guard before, I didn't really feel I did them justice the first time around and I really wanted to both up my game a little and also start experimenting with some new techniques and ideas. So while I'm reasonably certain that what I'm doing will work, I'm also learning as I go along. At the same time, I also want to keep things relatively simple and easy as I actually want to finish the project and not get discouraged halfway through, so I'm focusing on techniques and methods that will give me a lot of "bang for the buck", so to speak.
The very first step was creating a poll to see what faction I should start with (with the help of our friendly moderators @Grotsmasha and @Dr_Ruminahui - thanks so much, guys!), but the first step hobby-wise was to do a zenithal prime with two Vallejo rattle cans, "Leather Brown" and "Bone White", which I felt would give me a nice foundation for the off-white armour that I personally prefer for Death Guard. Something I don't usually do is leave the heads off, but this time I did, partly because I wanted the opportunity to give any bare heads a different skin tone, partly because I just wasn't quite sure what heads would look best on what models.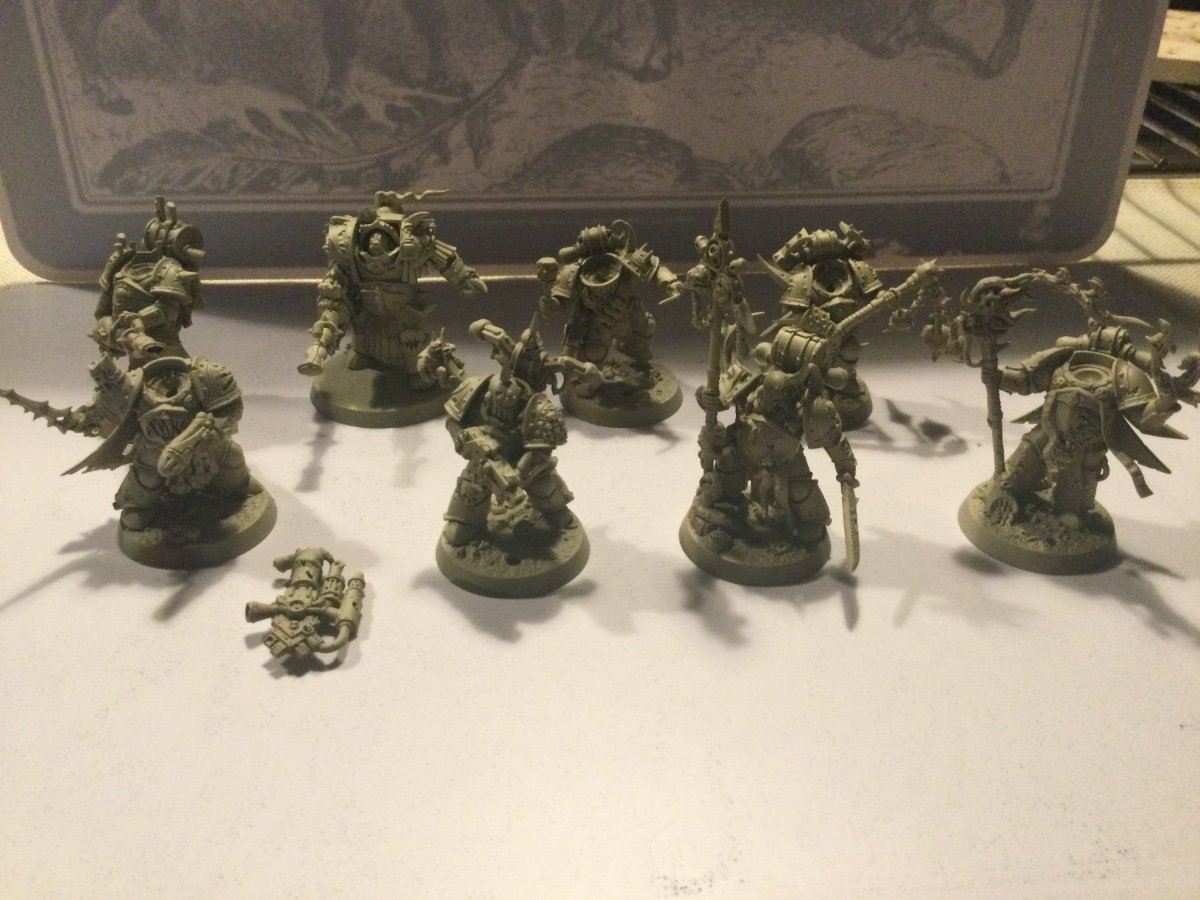
Strangely enough, they looked super greenish in the light of dawn, which is actually a look I'm trying to avoid. I mean, green will obviously show up, but the overall tone I'm going for is a warmish off-white for the armour.
My next step was to give them a heavy overbrush/drybrush/stippling/general mess-around, using quite a big brush loaded with "Pale Sand" (although any warm, mostly white off-white will do), then mostly dried off before being applied to the minis:
I don't worry about being neat at this stage or getting smooth coverage, but I do worry about obscuring too much of the recess colours. as I want them to be quite grimy and battle-worn in the end. If I wanted them "cleaner", I'd probably follow the same procedure but give them more passes with the brush (and perhaps let more paint remain on the brush). As it is now, I just give the areas I want to read as whiter (or that I know I want to paint a transparent colour over later) a second pass with the brush, but like I said, I don't worry too much about coverage as washes and further painting will smoothen out the gradients quite a bit.
That said, the amount of texture on the ridged, corroded, pitted and damaged power armour of the Death Guard is almost ideal for this method and I do think it looks pretty good already. In fact, if I stopped now and painted in all the details, I think the armour itself would work quite well - but I will of course be doing a lot more as we move along, so stay tuned 
Edited by Antarius

4 Comments
Recommended Comments
Create an account or sign in to comment
You need to be a member in order to leave a comment
Create an account
Sign up for a new account in our community. It's easy!
Register a new accountSign in
Already have an account? Sign in here.
Sign In Now