Search the Community
Showing results for tags 'KT'.
-
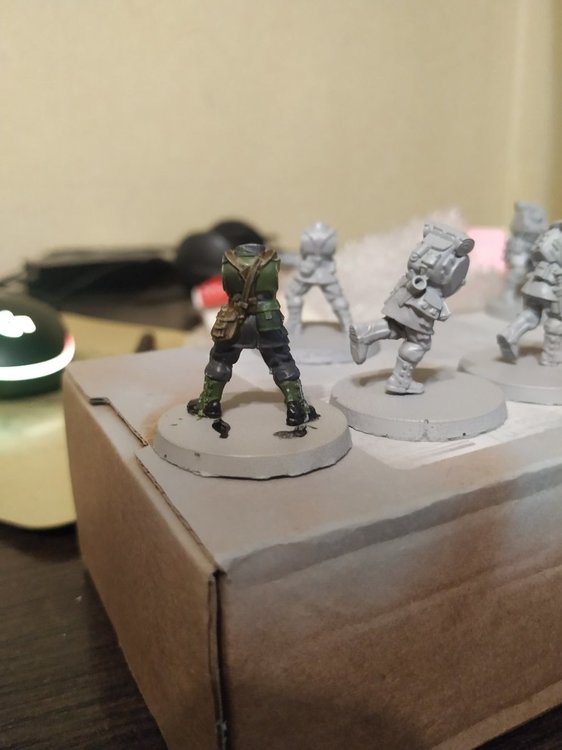
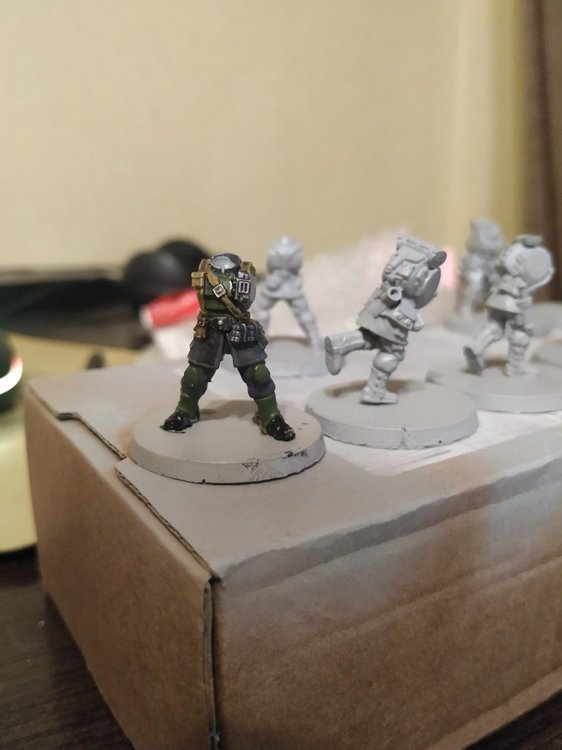
After 6 years break from hobby i found myself in need to return. God Emperor calls for me. Any AM army starts from infantry, so i just take a box and start from scratch. There is first test model. Any critic are welcome.
- 123 replies
-
- Astra Militarum WIP
- Guardsmen
-
(and 4 more)
Tagged with:
-

A personal insight on Slap Chop applied to scenery
Bouargh posted a blog entry in Bouargh´s miniatures´ closet clean-up
Hi folks, I tried in the past to use the Slap Chop technique on Aeldari guardians. It has not been that convincing. Lack of practice? Misunderstanding of the basics of the techniques? Lack of talent? (I personaly vote for the 3 of these). I am anyway a little bit stubborn, so I decided to go back traying to apply it. This time on big models: the KT Plasma Generatorium. Looked like being a fun idea at principle. This is what I´ve learned. 1. You need a precise idea of the targeted result and main colour in order to select wisely the base coat and the drybrush sequences 2. It may render Meeww if you do not properly complete the step 1 3. To avoid the management of anger resulting of step 2, it is advisable getting a test texturized pallet o a test model first 4. On big models it is a very nice way to get some weathering without doing any kind of weathering step - Thanks to transparency of Contrast colours or equivalentyou can reach a table top ready aspect easily. Where are these learnings coming from? Let´s rewind the tape to teh start of this project. The idea was to get a bright red plasma container in order to bring some glit´ & pop´ on the table top. The recipe has been: - Spray coat with what I had available at the moment, a German uniform green-grey spray can - 3 Dry brushes with clearer colours on top to darker on the bottom: Sky grey - A darker grey (Mechanicum)- Eshin Grey - Light coat of Fleshtearer red and then insisiting with a second light coat of the same on top section - As the scaling of colours was not really looking like a camaieu, I dry brushed with a gore red on top, to exhibit better the edges. If you look carefully, or if you really pretend saying you see something, you might note a subtle change from bottom to top. But let´s be frank: the Flesh tearer red is too strong, or the dry brushed based coat is too dark/not contrasted enough, to allow the red to present a clear scaling of hue. I tried to put some dirt by stamping in dry brush mode some brown on the bottom - mud like. So, second attempt with a colour which I know has a high grade of transparency: Bad moon yellow. And I applied the same steps but with a change in the dry brusing sequence: 3 Dry brushes with clearer colours on top an darker on the bottom: white - A darker grey (Mechanicum:Sky grey 50:50)- Eshin Grey. And I made here or there some more extreme stamping with brown and nblack spots. Then I applied the yellow Contrast colour. Result evolved in time, with yellow truning greenish in some areas. But the fina result was more convincing in terms of presenting various scales of yellows and leaving visible sone oxide like spots. Quite good even if quite dirty. But characterful enough to bring some eye catching element on a table top. Rest of the story is detailing coils, metalic parts and pipes; once again, my philosophy for such scenery eleemnets uis not to get a complete painting of all details. Enough to bring depth, but I do not see the point painting all pipes details and cables... The global aspect is globally OK - or at least I eneded up satisfied. I even decided to keep the red container as it is. After painting the yellow one, I used the red one as a test model for the coils, and once done, the overall aspect looked OK. So, I took the decision not to repaint. Thank you for reading and see you next time with other instalement of my CTA24 vow -
Hi Folks, As some may have read in my previous entries (in this Blog or another) I've moved from my previous location to a new one a couple of months ago. It has been a big opportunity to sort out all bitz, spare parts, unassemnblied, unpainted and unboxed stuff I had in my numerous closets and crates. As my journey to clean my Pile of Shame started during Lock down, I sincerly though I had done most of the job already. Most maybe not in reality but a serious part surely. Here is what's left: Lots of tiny Marines and Squats from ooP Epic - I made a aborded attempt at painting some and I should resume it. It is a big part of the job. I may eventually use this as a test terrain for my kid as she looks like interrested into spending time splashing paint on stuff. With a IF coulour scheme selected and the power of Contrast paint, she might do the tiny soldier in series may be? Not GSC. I made a mistake - I ordered twice some GSC kits I palnned to use as a base for kitbashing my own AM Regiment. I've already done some but I still have 30 boyz to do. And as I DO NOT play GSC, what am I going to do with the Magus, the Hybrids and these 10 Metal Spore Mines I recovered from... I do not know where. AdMech - I still have 3 Serberys, 5 Pteraxii and 5 Sicarians waiting for love. But I need to repack paints first. SOme remains of my last Patrol box plus a reinforcment unit. Yet I feel like I might buy more stuff. I am no cured yet. These Skatros and Axiarch models are damned tempting. And I would not spit on a couple of Sydonian Ballistarii or another Dunerider neither. Kill Team - NL CSM. Enough said. This team from the Nightmare set is still on sprue. I bought Dark blue paint but I am not convinced by the colour. So any argument worths for not starting them. I guess these are a very good candidate to be swapped with another hobbyist. I'll have to work on building a local network in my new place. Aeldarii - This is probably the oldest Non-WFB models I have in my pile of shame. Many ooP guardians plus some more recent Scouts, Shroud runners and KT Corsairs. I planned a lagalization of my Saim-Hann army a while ago and these were there in order to expand my gaming capacities with more units, in order to reach a satisfying base for unit selection and a little bit of variety. Yet these are into the Pile for more than 2 years now. I have the plan in mind for a while now. If I made my maths properly, with the spares from the Scouts and deathshrouds + the Voidscarred sniper, I can kit bash a second squad of 5 scouts. Then, the bitz from the special characters included into the Corsair kit might allow a Spirit seer proxy, a Warlock and probably a Skyleaper Autarch. And the rest for Corsair units, which might lead to 3 units, One 10 men strong with carabines and wraithcannon and 2 small of 5 that will go HtH with shredders. Kit bash tanks: a LR and a Carnaudon - Lots of plasticard job to be done on these that are done since first Lockdown. No progress since. Anyway, I do not even remind in which box I set these two... So as you see, there is a lot of work to be done and enough to fill a full hobby year or more. Probably more as I started working on WFB too, resurecting some Dwarves and alterning between Universes. Any excuse to keep some 40k stuff available in fact. Who said procrastination? But, let's be frank, I will probably keep on working on pointy ears, now that I am into this dynamic for a good month... And these tests I did for Scourge wings cannot stay unfinished for too long, can they? See you.
-
- Procrastination
- Epic ooP
- (and 4 more)


