Tinweasel Posted August 18, 2008 Share Posted August 18, 2008 One thing I'm working on right now is the 2008 Games Day figure - I'm painting it up for the local GW Hobby Center, so I basically have free rein to play around with it however I like. There's some conditions, though: the figure needs to be unconverted, he's supposed to be an Ultramarine from 2nd Company, and they want a "snow base." Works out fine for me, as I'd actually like to convert my own GD figure and I've never done a snow base before. With this guy, I'm thinking of playing around with some other stuff I've never tried, like chipped and weathered paint, and overall environmental effects on a figure. The tabula rasa: http://home.wowway.com/~tinweasel/gw_GD2008/gw_GD2008_wip.jpg It's been a few weeks since I've had the figure prepped and primed, and just last night and today I had some time to sit down and actually do some painting. I've got a mid-range color basecoat down over all the armor areas, and I painted some patches up in slightly weathered metallics as part of an experiment I'm trying in order to achieve a "flaking paint" appearance: http://home.wowway.com/~tinweasel/gw_GD2008/gw_GD2008_wip2.jpg I was able this morning to actually try out my "experiment" so far as scratched up paint and exposed metal underneath: http://home.wowway.com/~tinweasel/gw_GD2008/gw_GD2008_wip3.jpg I'll be doing chipping and scratches on the remainder of the figure to greater or lesser degrees, but these are patches where I wanted the paint seriously scuffed up. What do you guys think? Oh, and I also took a stab at painting with strictly glazing on the holster. It could do with a bit of touching up so far as highlights and even coverage goes, but it's an interesting style of painting. (What do you guys think of it so far?) Link to comment https://bolterandchainsword.com/topic/143908-2008-games-day-figure/ Share on other sites More sharing options...
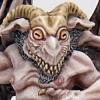
Mr. Nipples Posted August 18, 2008 Share Posted August 18, 2008 Looks good so far, but is it just me or does that model have a huge ass head? Link to comment https://bolterandchainsword.com/topic/143908-2008-games-day-figure/#findComment-1667542 Share on other sites More sharing options...
lord_bunny Posted August 18, 2008 Share Posted August 18, 2008 hmm scratchy! I want to see how that works out, I feel my kleptomanic fingers twitching ;) Link to comment https://bolterandchainsword.com/topic/143908-2008-games-day-figure/#findComment-1667558 Share on other sites More sharing options...
birdie Posted August 18, 2008 Share Posted August 18, 2008 The scratches look really good, you'll need to post a "how to"? Link to comment https://bolterandchainsword.com/topic/143908-2008-games-day-figure/#findComment-1667568 Share on other sites More sharing options...
Skull_Lord Posted August 18, 2008 Share Posted August 18, 2008 nice, congratulations on having the mini, i so much want to get it but i cant go to games day, and i dont want to buy it from ebay. i think the scratches are metal basecoat, then some blue over it, then scratching some of the blue off? Link to comment https://bolterandchainsword.com/topic/143908-2008-games-day-figure/#findComment-1667622 Share on other sites More sharing options...
LunchBox Posted August 18, 2008 Share Posted August 18, 2008 Hey Tin...not much to say yet, but I do notice a couple of things: For one, blue is a fickle color, and your nice and smooth basecoat blue is way too dark. You are now going to have to fight against the paint to highlight up...this is the problem I ran into on the right arm band on that last Ultra I did. *Just something to think about if you twist off and decide to do more Ultras. The battle damage - I hate it...it looks like you basecoated the mini, then dropped it off the car pulling out of the driveway. I'm not saying that to be rude...I think there are other ways of accomplishing battle damage that look better. Just my personal opinion. The holster looks like it's off to a good start, but you'll need to glaze some more shades in, find a suitable transition color, then pull your highlights up. Link to comment https://bolterandchainsword.com/topic/143908-2008-games-day-figure/#findComment-1667873 Share on other sites More sharing options...
Tinweasel Posted August 18, 2008 Author Share Posted August 18, 2008 Looks good so far, but is it just me or does that model have a huge ass head?That's the one thing I dislike about the figure overall. It's not even necessarily the size of the head, as it's relatively proportionate - it's the overly exaggerated screaming expression. When I actually paint MINE up, he'll likely end up with a Chaos helmet and covered in all sorts of spikes and chains. The scratches look really good, you'll need to post a "how to"?It's basically an experiment at this point, but I'll be keeping track of how I progress and likely break it down in terms of steps - assuming it turns out okay, that is. i think the scratches are metal basecoat, then some blue over it, then scratching some of the blue off?To some extent, yeah, but there's a few steps in between and I'm also using translucent paints. Hey Tin...not much to say yet, but I do notice a couple of things: For one, blue is a fickle color, and your nice and smooth basecoat blue is way too dark. You are now going to have to fight against the paint to highlight up...this is the problem I ran into on the right arm band on that last Ultra I did. *Just something to think about if you twist off and decide to do more Ultras. The battle damage - I hate it...it looks like you basecoated the mini, then dropped it off the car pulling out of the driveway. I'm not saying that to be rude...I think there are other ways of accomplishing battle damage that look better. Just my personal opinion. The holster looks like it's off to a good start, but you'll need to glaze some more shades in, find a suitable transition color, then pull your highlights up. Thanks for the analysis thus far. I'm basically trying to color-match him to the "official" GW Ultramarine scheme, and this is the de facto official basecoat color. I'm undecided as to how "realistic" I'm going to do the highlights and shading at this point - I've got a color progression in mind that goes all the way into whitish-grey end on one extreme and down to blue-black and purple-black on the other for exaggerated contrast. I've only done a few Ultras before and I used UM Blue shaded with black and worked up to UM Blue/White highlights - I actually think this one'll turn out a little subtler just because I don't plan on going all the way up to white if I can help it. For comparison's sake, here's my first (and only) finished Ultramarine:http://www.coolminiornot.com/86428 Any suggestions on improving the current paint scraping/weathering? With these particular patches I'm aiming for heavy weathering down to the bare metal underneath, with paint outright flaking off due to heavy trauma. I'll be doing much more subtle stuff like chipped edges, minimal scratches, and the like but I decided I'd go all out with these first few attempts. I'm not really sure whether I want to add rust to the exposed metal, or darken it down, or what - essentially at this point it's all basecoats. (Oh, and some of the mass-damage appearance is due to the blue being translucent - it shows up more in pictures, whereas on the figure there's actually flaking paint and such hanging off of it.) Thanks for the compliments on the holster. Thus far it's simply 5-6 layers of the blackish-brown I used to weather the metallic under-coat prior to painting over it. I figgered I'd try it just for the hell of it to see how it worked. I'm thinking I'd actually like the holster and other leathery items to be a sort of sunbleached/weathery yellowish appearance. Starks pointed me to a painted example of the figure over on another forum and I rather liked the color choice of it. I might even start over completely, I dunno. I would agree that as-is it definitely needs more work, though. Nice to hear I'm starting on the right path, though. Link to comment https://bolterandchainsword.com/topic/143908-2008-games-day-figure/#findComment-1667917 Share on other sites More sharing options...
Tinweasel Posted August 20, 2008 Author Share Posted August 20, 2008 http://home.wowway.com/~tinweasel/gw_GD2008/gw_GD2008_wip4.jpg I think I'm about halfway through the shading - right now this is numerous glazes of Regal Blue and Regal Blue/Scorched Brown/Black worked progressively from just below the light-facing areas into the shade areas. I defined the paint scuffing a bit more with ultra-thinned lining in of Scorched Brown/Black - I figger I can then highlight any light-facing "primer" areas with straight Scorched Brown. I'd like to know what you guys think. I added a bit more color to the holster and tidied things up with a few glazes - Scorched Brown/Black and the Regal/Scorched/Black both applied. At this point I'm still toying around with using glazes entirely for developing color and shading. I'm undecided as to highlights, but I kinda like it right now with the slight hint of blue added. Link to comment https://bolterandchainsword.com/topic/143908-2008-games-day-figure/#findComment-1669930 Share on other sites More sharing options...
Starks333 Posted August 20, 2008 Share Posted August 20, 2008 maybes its your colours lunchie...ive never had a problem highlighting blue, ever menoth white base, bleached bone, bronzed flesh, all look excellent brightening a blue just stay away from greys if you want a powerful blue the trouble is shading, generally speaking i dont think its possible to shade a blue nicely, without delving into the reds for a bold blue that is....flatter duller blues you can, but i think you will definetly need a lot more shading and highlighting, considerably EDIT: skin tone also brightens blue nicely, forgot to add....when you get it turning too green just stop adding yellowish tones, add a bit more blue to re-bluen, then add a beigey tone to brighten or white if you need it Link to comment https://bolterandchainsword.com/topic/143908-2008-games-day-figure/#findComment-1669958 Share on other sites More sharing options...
Tinweasel Posted August 21, 2008 Author Share Posted August 21, 2008 Well, I've had to do an about-face of sorts, since it was pointed out to me that SM armor isn't made of metal but rather ceramite. (I knew that, really, but figgered that ceramite was metallic-ish once past a layer of primer.) For the sake of keeping it true to fluff, seeing as how it's being painted for a GW store and all, I'd gone back and recolored all the scraped metal bits. Whee! Link to comment https://bolterandchainsword.com/topic/143908-2008-games-day-figure/#findComment-1670597 Share on other sites More sharing options...
Skull_Lord Posted August 21, 2008 Share Posted August 21, 2008 I was under the impression that Power Armour was Ceramite AND titanium? Link to comment https://bolterandchainsword.com/topic/143908-2008-games-day-figure/#findComment-1670649 Share on other sites More sharing options...
Tinweasel Posted August 21, 2008 Author Share Posted August 21, 2008 I was under the impression that Power Armour was Ceramite AND titanium?I was told by someone who I figgered would be knowledgeable about that kind of thing that if I wanted to keep to the "fluff," that technically I shouldn't have metallic scuffing as ceramite is generally painted in shades of brown. I went and reworked the damage in ceramic-esque dark browns and I can't say I'm at all happy with the result now. I did a search online after I read your comment and I found this page: http://uk.games-workshop.com/spacemarines/damage/4/ I dunno. I'm not a very happy camper right now, but I guess I'll keep plugging away at the rest of the figure and decide where to go from there. (At least it's not mine? Heh.) Link to comment https://bolterandchainsword.com/topic/143908-2008-games-day-figure/#findComment-1670708 Share on other sites More sharing options...
madscuzzy Posted August 21, 2008 Share Posted August 21, 2008 I think the metal chipping is fine as it is. How ceramite is represented is how you wish to do it, as there isn't any official way to describe it. Don't forget that grey knights are gunmetal grey and are unpainted. A key thing to note about your metal scuffing is the placement of it. Most paint chipping happens in areas of contact, so edges around the feet, the elbows, the knees, the knuckles etc. will be chipped. This, on top of your current chipping will help enhance the battle-damaged look. A nice thing about metal models is that you can actually use the base metal as the chipped material, and that the paint actually as as it should, as the primer and paint create the 'depth'. While this can be considered a way to cheat, if done properly, it can be very effective. A way to control how finished it looks is by using your varnishes. Matt will dull even the base metal down, and gloss or the scrubbed base to make it shiny works too. Link to comment https://bolterandchainsword.com/topic/143908-2008-games-day-figure/#findComment-1670733 Share on other sites More sharing options...
Luther - the fallen Posted August 21, 2008 Share Posted August 21, 2008 wow scuzzy, triple post.. :blink: as for the model: looking good so far. as for the damage/wear and tear, I've never though about it actually being ceramic all the way out, I've always seen it as covered in a layer of metal, for when it was hit. (I believe all ceramics breaks apart when hit, I know the plates in my fragvest is covered in fabric to keep it together if/when hit) my input so far.. Luther.. Link to comment https://bolterandchainsword.com/topic/143908-2008-games-day-figure/#findComment-1670897 Share on other sites More sharing options...
Tinweasel Posted August 21, 2008 Author Share Posted August 21, 2008 Well, I stripped everything down on the worn areas and started from scratch again: http://home.wowway.com/~tinweasel/gw_GD2008/gw_GD2008_wip5.jpg I need to cut into the edging of the patches a bit, maybe with a lighter metallic, I think. It's not quite the same as before, but it's passable. I also added a few small surface chips on his right greave - How do they look? I want to make sure I'm on the right path before I make more. I'll simply state this for emphasis - dark brown irregular patching on a dark blue figure looks like crap. I'm sticking with metallics, fluff (or not) be damned! Link to comment https://bolterandchainsword.com/topic/143908-2008-games-day-figure/#findComment-1670990 Share on other sites More sharing options...
Recommended Posts
Archived
This topic is now archived and is closed to further replies.