madscuzzy Posted October 8, 2008 Author Share Posted October 8, 2008 Erm I'm not too sure about inner/outer diameter... I just know they are around 0.5" or less. I do actually bring the pads down and measure to fit on the spot. Next time I go down I'll check it out...:blush: And yes, abnormal flatness...XD but since they have a black back, I'm not too concerned. Where it becomes really obvious I sculpt some folds in the back. Hope you can see them too someday too shason! Link to comment https://bolterandchainsword.com/topic/148051-guard-honour-stern-van-wip/page/3/#findComment-1721888 Share on other sites More sharing options...
Dezzo Posted October 8, 2008 Share Posted October 8, 2008 thank god you're finally done with them... you guys have no idea that all i see him do for the past few months is filing the shoulder pads or something... top notch stuff as usual, dude. looking forward to see them painted ;) Link to comment https://bolterandchainsword.com/topic/148051-guard-honour-stern-van-wip/page/3/#findComment-1722118 Share on other sites More sharing options...
madscuzzy Posted October 8, 2008 Author Share Posted October 8, 2008 Since when am I done with them?! You will continue to see me fiddling with them mwahahaha Link to comment https://bolterandchainsword.com/topic/148051-guard-honour-stern-van-wip/page/3/#findComment-1722172 Share on other sites More sharing options...
The_Chaplain Posted October 8, 2008 Share Posted October 8, 2008 any idea when we'll see paint wips scuzzy? Link to comment https://bolterandchainsword.com/topic/148051-guard-honour-stern-van-wip/page/3/#findComment-1722197 Share on other sites More sharing options...
madscuzzy Posted October 8, 2008 Author Share Posted October 8, 2008 Quite a while I think... then again... hard to say. I'm itching to paint some of them, but would prefer them to be fully standing before I tackle the painting thing at a go. Link to comment https://bolterandchainsword.com/topic/148051-guard-honour-stern-van-wip/page/3/#findComment-1722319 Share on other sites More sharing options...
Dezzo Posted October 9, 2008 Share Posted October 9, 2008 Since when am I done with them?! You will continue to see me fiddling with them mwahahaha *palmface* but are you occupied with your turbo-fan assault guys now too? Link to comment https://bolterandchainsword.com/topic/148051-guard-honour-stern-van-wip/page/3/#findComment-1723009 Share on other sites More sharing options...
madscuzzy Posted October 9, 2008 Author Share Posted October 9, 2008 Still have 3 more guys to do up and then the fans have to be detailed. Link to comment https://bolterandchainsword.com/topic/148051-guard-honour-stern-van-wip/page/3/#findComment-1723069 Share on other sites More sharing options...
TheOniwaban Posted October 9, 2008 Share Posted October 9, 2008 Uhh... so, you have detailed tutorials for all these models and conversions right? :} Link to comment https://bolterandchainsword.com/topic/148051-guard-honour-stern-van-wip/page/3/#findComment-1723662 Share on other sites More sharing options...
madscuzzy Posted October 9, 2008 Author Share Posted October 9, 2008 like? Link to comment https://bolterandchainsword.com/topic/148051-guard-honour-stern-van-wip/page/3/#findComment-1723835 Share on other sites More sharing options...
Artekus Posted October 9, 2008 Share Posted October 9, 2008 That is awesome in so many ways! Really inspiring stuff! Keep up the awesome work! ...oh, btw, with your concent I would love to steal the "drawing sword" -pose for one of my Relictor veteran sergeants :lol: Do you mind? Link to comment https://bolterandchainsword.com/topic/148051-guard-honour-stern-van-wip/page/3/#findComment-1723845 Share on other sites More sharing options...
Erik Crowbreath Posted October 9, 2008 Share Posted October 9, 2008 wow.. i love them. ..erik Link to comment https://bolterandchainsword.com/topic/148051-guard-honour-stern-van-wip/page/3/#findComment-1723855 Share on other sites More sharing options...
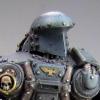
Cpt Ultio Posted October 9, 2008 Share Posted October 9, 2008 like? shoulder pads, vambraces and jump packs jump out at me the most. Link to comment https://bolterandchainsword.com/topic/148051-guard-honour-stern-van-wip/page/3/#findComment-1723911 Share on other sites More sharing options...
Brother Varg Posted October 9, 2008 Share Posted October 9, 2008 Stunning models !!! well done brother!! Link to comment https://bolterandchainsword.com/topic/148051-guard-honour-stern-van-wip/page/3/#findComment-1724040 Share on other sites More sharing options...
madscuzzy Posted October 9, 2008 Author Share Posted October 9, 2008 First off is the shoulder pad. The rod I used here is 6/8" OD. It's a bit smaller but it flexes so no worries there. Just get one to fit. The pad has an OD of 5/8", so ideally your rod's ID shoudl be 5/8" http://scuzworks.com/SL40K/tutorials/pad/1.jpg I chop the rod down at an angle so I can start working from the top. http://scuzworks.com/SL40K/tutorials/pad/2.jpg I cut the back so I can flex the rod and fit the pad in. http://scuzworks.com/SL40K/tutorials/pad/3.jpg With a lot of trial and error, a groove is filed down to match the pad. http://scuzworks.com/SL40K/tutorials/pad/4.jpg http://scuzworks.com/SL40K/tutorials/pad/5.jpg Yay! Dremel! I find dremelling it down after I cut the groove easier for me. http://scuzworks.com/SL40K/tutorials/pad/6.jpg I cut the sides down to the rough shape that I want the curve to start and end. http://scuzworks.com/SL40K/tutorials/pad/8.jpg Whrrrr! http://scuzworks.com/SL40K/tutorials/pad/9.jpg Tada! http://scuzworks.com/SL40K/tutorials/pad/10.jpg And here is a knee pad. I use Tamiya 2-part Quick Type Putty for this. This works for any sandable putty like brown stuff etc. Just place the rough shape and sculpt any curves or angles you want. Don't worry about it looking 'soft'. http://scuzworks.com/SL40K/tutorials/kneeepad/l1.jpg Now just file down the top surface http://scuzworks.com/SL40K/tutorials/kneeepad/l2.jpg And chop down the edges to size. http://scuzworks.com/SL40K/tutorials/kneeepad/l3.jpg Link to comment https://bolterandchainsword.com/topic/148051-guard-honour-stern-van-wip/page/3/#findComment-1724146 Share on other sites More sharing options...
Cpt Ultio Posted October 9, 2008 Share Posted October 9, 2008 Looking good, I'm going to look out for the parts now Link to comment https://bolterandchainsword.com/topic/148051-guard-honour-stern-van-wip/page/3/#findComment-1724160 Share on other sites More sharing options...
Pulse Posted October 9, 2008 Share Posted October 9, 2008 Good little tutorial there mate, i likes. ;) Link to comment https://bolterandchainsword.com/topic/148051-guard-honour-stern-van-wip/page/3/#findComment-1724161 Share on other sites More sharing options...
BrianBlessed Posted October 10, 2008 Share Posted October 10, 2008 Nice tutorial. Did you use that hollow tube stuff for the collars too? Link to comment https://bolterandchainsword.com/topic/148051-guard-honour-stern-van-wip/page/3/#findComment-1724358 Share on other sites More sharing options...
Badaab Posted October 10, 2008 Share Posted October 10, 2008 Hey, nice-looking models there! I have many of the same base models kicking around (the Mk. II Vets in particular) and was after a bit of inspiration to work on them, so thanks for that... I *swear* I won't be stealing any ideas. Keep up the nice work, and keep us posted. I won't ask for tutorials or the like, as pretty much everything seems straightforward- all the best conversions are! The only thing I could ask for would perhaps be a shot of the backs of the Vanguard Vets without the jump packs on. I'm curious to see what you've done with the detailing at the belts, and/or the joining of the metal legs to plastic torsos (I always find the metal parts to be too undersized for plastic torsos). Now, let's see some paint on them! -Joe Link to comment https://bolterandchainsword.com/topic/148051-guard-honour-stern-van-wip/page/3/#findComment-1724458 Share on other sites More sharing options...
madscuzzy Posted October 10, 2008 Author Share Posted October 10, 2008 I like to fit pouches and stuff all around, so the joint is somewhat hidden. But I do build up the metal legs with a ball fit, like how the plastic legs are, using putty. For stability, I pin right through, once I get the angle right. And yep, same for the collars. Go! Steal the ideas! See if I care! :unsure: Link to comment https://bolterandchainsword.com/topic/148051-guard-honour-stern-van-wip/page/3/#findComment-1724658 Share on other sites More sharing options...
Lord Noble Posted October 10, 2008 Share Posted October 10, 2008 Hey Madscuzzy, I'm totally stealing those for some of my Vets. :wub: Any chance I could ask for a tutorial on making collars too? Thanks! -J Link to comment https://bolterandchainsword.com/topic/148051-guard-honour-stern-van-wip/page/3/#findComment-1725332 Share on other sites More sharing options...
Cpt Ultio Posted October 10, 2008 Share Posted October 10, 2008 I'm still wondering about the vambraces, would love to make some with bolters attached. Link to comment https://bolterandchainsword.com/topic/148051-guard-honour-stern-van-wip/page/3/#findComment-1725488 Share on other sites More sharing options...
madscuzzy Posted October 10, 2008 Author Share Posted October 10, 2008 Collar is plastic tube, just cut down to fit. What vambraces? Link to comment https://bolterandchainsword.com/topic/148051-guard-honour-stern-van-wip/page/3/#findComment-1725503 Share on other sites More sharing options...
Cpt Ultio Posted October 10, 2008 Share Posted October 10, 2008 the extended armour on the forearms... I'll circle the arm http://www.gothic-valentine.net/bolter/this.jpg Link to comment https://bolterandchainsword.com/topic/148051-guard-honour-stern-van-wip/page/3/#findComment-1725703 Share on other sites More sharing options...
Hubbynz Posted October 11, 2008 Share Posted October 11, 2008 these guys are amazing defiantely some of the best pose conversions I have ever seen....will look stunning painted. Link to comment https://bolterandchainsword.com/topic/148051-guard-honour-stern-van-wip/page/3/#findComment-1726065 Share on other sites More sharing options...
Hasoroth Posted October 11, 2008 Share Posted October 11, 2008 Scuzzy. These are beautiful, I want to play against them at PI except I'm afraid my armies going to shoot itself because their modeled and painted so crap >.> Link to comment https://bolterandchainsword.com/topic/148051-guard-honour-stern-van-wip/page/3/#findComment-1726178 Share on other sites More sharing options...
Recommended Posts
Archived
This topic is now archived and is closed to further replies.