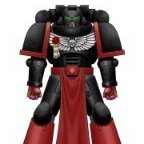
Terminatorinhell Posted November 28, 2008 Share Posted November 28, 2008 well I decided to put some flames on my chaptermaster and I tried a gradient of red to orange, no pure colors (all were mixed with something) were used. Here are the pics and you get to see a sneak peek at my Ironclad dread and Ayame V3 http://i183.photobucket.com/albums/x127/TerminatorOfHellsing/DSC00812.jpg http://i183.photobucket.com/albums/x127/TerminatorOfHellsing/DSC00811.jpg I think his cape was the best.. :D http://i183.photobucket.com/albums/x127/TerminatorOfHellsing/DSC00810.jpg on shoulders i may have messed up :D heres ayame V3 http://i183.photobucket.com/albums/x127/TerminatorOfHellsing/DSC00809.jpg http://i183.photobucket.com/albums/x127/TerminatorOfHellsing/DSC00808.jpg http://i183.photobucket.com/albums/x127/TerminatorOfHellsing/DSC00807.jpg Link to comment https://bolterandchainsword.com/topic/153482-my-attempt-at-flames/ Share on other sites More sharing options...
BOBMAKENZIE Posted November 28, 2008 Share Posted November 28, 2008 Juding from the rest of your work I've seen Im at abit of a loss, these two really dont match up to the rest of your models (Dont take this the wrong way) they just arent as good. Now Im no expert painter but it looks like you are getting abit of chunky paint in places and some bad coverage at times. Do you do a number of thin layers? Cause that could help. The only other thing I can say is that the flames are good for a first try, though I Think you need abit more shape to them (Look at Flame tattoos/Flame detailing on cars to see kinda what I mean, they should be alittle more curvey and patterned.) Though thats my opinion. Not sure what else I can say other then they look like cool models but the paint jobs let em down abit. Link to comment https://bolterandchainsword.com/topic/153482-my-attempt-at-flames/#findComment-1788985 Share on other sites More sharing options...
Terminatorinhell Posted November 28, 2008 Author Share Posted November 28, 2008 i really don't know what is wrong with them the paint always gets messed up... Link to comment https://bolterandchainsword.com/topic/153482-my-attempt-at-flames/#findComment-1789080 Share on other sites More sharing options...
Snozz Posted November 28, 2008 Share Posted November 28, 2008 Your paint is still too thick. That's the problem I keep seeing on your models (No offence intended, the painting is ok, but it can be so much better), try thinning out the paints with water. With the flames, they are good, but you need to make them more solid, they look patchy at the moment, and you need to use more layers. A question for you though, how long do you spend painting each model? I think you need to spend more time tidying up the model, I can see bits where paint has gone where it shouldn't and other places where I can see plastic (or it might be grey paint ;)). Only meant to be helpful here, and remember I still love your conversions. :( Link to comment https://bolterandchainsword.com/topic/153482-my-attempt-at-flames/#findComment-1789097 Share on other sites More sharing options...
Terminatorinhell Posted November 28, 2008 Author Share Posted November 28, 2008 he is in the simple green right now, I think i will start watering down my paints a bit more and i kept the cape of ot the SG ( i cut it off) so I can work on the flames. It may help a bit. Link to comment https://bolterandchainsword.com/topic/153482-my-attempt-at-flames/#findComment-1789099 Share on other sites More sharing options...
Snozz Posted November 28, 2008 Share Posted November 28, 2008 Painting in bits can make it easier, though I never do because I like to see the model assembled before I paint it. :( Good luck with him, soon you're gonna have a really nice Chapter Master. Link to comment https://bolterandchainsword.com/topic/153482-my-attempt-at-flames/#findComment-1789106 Share on other sites More sharing options...
Pig Of Sparta Posted November 28, 2008 Share Posted November 28, 2008 I've only recently started to water down paints and add several layers but it is worht the effort. The flames look pretty good, but I agree with the previous posts that they were a little patchy, that said the colours and blending were pretty spot on. Good luck with the repaint, let us know how it turns out :) Link to comment https://bolterandchainsword.com/topic/153482-my-attempt-at-flames/#findComment-1789225 Share on other sites More sharing options...
RazakelXIII Posted November 28, 2008 Share Posted November 28, 2008 Yeah, once you've got paint on your brush just dip it in water - dunno if everyone else means anything more complicated, but that's what I do and it's worked out well enough so far. Two or three (on very rare occasions four) layers later and at the very least it doesn't have all of that chunky-blotchyness to it. But other than how thick it looks, I like the fire, it looks very firey. Link to comment https://bolterandchainsword.com/topic/153482-my-attempt-at-flames/#findComment-1789323 Share on other sites More sharing options...
Terminatorinhell Posted November 29, 2008 Author Share Posted November 29, 2008 raz thats exactly how I do it! great minds think alike ;) anyways ryoto was stripped, slightly reposed and the gs work touched up slightly. Link to comment https://bolterandchainsword.com/topic/153482-my-attempt-at-flames/#findComment-1789482 Share on other sites More sharing options...
Bloodstone Posted November 30, 2008 Share Posted November 30, 2008 Dipping the brush into the paint first and then into water doesnt give a consistently thinned paint. It just wets it. Get a proper dropper bottle, fill it with water and paint. And properly measure the amount of paint and water together to be MIXED fully. This isnt really canvas painting where u dont or hardly ever water down paints. Link to comment https://bolterandchainsword.com/topic/153482-my-attempt-at-flames/#findComment-1790581 Share on other sites More sharing options...
Pig Of Sparta Posted November 30, 2008 Share Posted November 30, 2008 I usually thin it on a 'pallette' (actually it's a plastic jar lid) I find it comes in handy cause you can match colours if you're using them constantly. Link to comment https://bolterandchainsword.com/topic/153482-my-attempt-at-flames/#findComment-1790627 Share on other sites More sharing options...
Terminatorinhell Posted November 30, 2008 Author Share Posted November 30, 2008 he hast been repainted and reposed, he does look slightly nicer...missing a shoulder pad too pics are kinda bad but later ill give better ones. also his left leg's gs needs a bit of filing to make it smooth, i think theis is as smooth as the paint can get... http://i183.photobucket.com/albums/x127/TerminatorOfHellsing/DSC00813.jpg http://i183.photobucket.com/albums/x127/TerminatorOfHellsing/DSC00814.jpg Link to comment https://bolterandchainsword.com/topic/153482-my-attempt-at-flames/#findComment-1791291 Share on other sites More sharing options...
Shortsonfire79 Posted December 1, 2008 Share Posted December 1, 2008 In my opinion, the fresh attempt is much better than the first! I really like the way you did the flames on his greaves too. very nice. An impressive leap from post 1. Link to comment https://bolterandchainsword.com/topic/153482-my-attempt-at-flames/#findComment-1791765 Share on other sites More sharing options...
Bloodstone Posted December 1, 2008 Share Posted December 1, 2008 And u still need to improve the photography, half the time i cant really see anything. Link to comment https://bolterandchainsword.com/topic/153482-my-attempt-at-flames/#findComment-1791952 Share on other sites More sharing options...
HIMSA Posted December 1, 2008 Share Posted December 1, 2008 Yeah, once you've got paint on your brush just dip it in water! NOOOOOO! NO! NO! Do NOT do this. This will give nothing but terrible results and very little paint control. Your painting will be massively improved if you firstly, find something flat and non-porous. By this I mean something that nothing will soak into. A ceramic tile is often a good bet, most households have a couple lurking in a cupboard or shed somewhere. An old plate will suffice, as will a plastic ice cream tub lid. Once you have your tile/plate/lid, make sure it is spotlessly clean and dry. Next, get a decent sized glass or jar, that's nice and stable, a pint glass is perfect. Fill it with CLEAN cool water. It's important to use cool water as hot water can melt the glue that holds brush bristles in. Grab a few sheets of old newspaper and finally, some toilet tissue or kitchen roll. Once you have got the above shopping list, clear a good space on your desk and wipe it down so no lumps or crud is stuck to it. lay a couple of sheets of newspaper down, and if necessary, add some masking tape at the corners to hold it still. Set out your tile, water and tissue paper in a comfortable arrangement. This set up is as essential to getting a decent finish as a basecoat brush, and it's free, it's probably already in your house. Once your are ready to begin painting, take your desired colour, pop the lid and scoop a little paint on the tip of it. Try not to get paint in the base of your brush, if you do, rinse it off immediately. If paint dries in here, it's good for nothing but drybrushing terrain, as it will splay the bristles. Dab the paint on your clean tile and try to gauge how much you will need. Close your paint pot when you think there is enough. Rinse off the brush before adding another colour to the pallete and adding water and dab your brush on the tissue to soak up extra water. You can usually add 30-40% water to thin the paint, make it as thin as possible before it starts to not cover the palette. Once the paint is adequately mixed with the water, you need to take the excess paint off the brush, I do this by kind of rolling the brush between thumb and finger and dragging it back across the pallete. Only after this should you start putting the paint on the model, and watch the paint on the palette as it will dry and thicken up really quickly. Add more water if this happens. Sorry if you already knew this, but i thought i should go into it... Link to comment https://bolterandchainsword.com/topic/153482-my-attempt-at-flames/#findComment-1792344 Share on other sites More sharing options...
Snozz Posted December 1, 2008 Share Posted December 1, 2008 Wows, he's looking better than before. Can't wait to see those better pictures. Link to comment https://bolterandchainsword.com/topic/153482-my-attempt-at-flames/#findComment-1792381 Share on other sites More sharing options...
Terminatorinhell Posted December 1, 2008 Author Share Posted December 1, 2008 argh what is this dusty crap on him :) look at the pic between his arm and cape, how do i get rid of that :/ Link to comment https://bolterandchainsword.com/topic/153482-my-attempt-at-flames/#findComment-1792423 Share on other sites More sharing options...
RazakelXIII Posted December 2, 2008 Share Posted December 2, 2008 He does look nicer - fire still looks ace. Try sticking a sheet of paper behind him or something, though, and make sure to have a good light source so we can actually see him... :) I seem to get decent, reasonably consistent results with the dipping-in-water method, though I don't mix/blend or anything of that nature... but I have to concede that it's gonna be better to use a palette - just tryin' to be helpful... :) As for the dust... it's probably dust? At least on his cape it looks like dust. Between the arm and the cape it might be plastic showing through the primer...? It's hard to tell with the pic. Link to comment https://bolterandchainsword.com/topic/153482-my-attempt-at-flames/#findComment-1792869 Share on other sites More sharing options...
Terminatorinhell Posted December 2, 2008 Author Share Posted December 2, 2008 well im going to aadd a bit of gs to the dusted areas as i realized it is the defected areas on the armour where the light was caught , cant explain it clearly but it needs to be fixed. Link to comment https://bolterandchainsword.com/topic/153482-my-attempt-at-flames/#findComment-1793857 Share on other sites More sharing options...
Snozz Posted December 2, 2008 Share Posted December 2, 2008 Good lucK. :D Link to comment https://bolterandchainsword.com/topic/153482-my-attempt-at-flames/#findComment-1793861 Share on other sites More sharing options...
ShinyRhino Posted December 3, 2008 Share Posted December 3, 2008 Late arriveing to this thread, but the second attemptis indeed far better, and I think ti has to do with contrast. Your first shot on the shoulderpads was good. The flames were stark against the black of the pads. The first attempt on the cape as not as nice, because the whole cape was red. Now that you have added black on the cape, the flames "pop" more. It's a marked improvement to the eye. Link to comment https://bolterandchainsword.com/topic/153482-my-attempt-at-flames/#findComment-1794832 Share on other sites More sharing options...
Terminatorinhell Posted December 3, 2008 Author Share Posted December 3, 2008 oh, lol theres no black on the cape :D Link to comment https://bolterandchainsword.com/topic/153482-my-attempt-at-flames/#findComment-1795240 Share on other sites More sharing options...
winterdyne Posted December 3, 2008 Share Posted December 3, 2008 Let me introduce you to the blender's friend - the 'wet palette'. You will need: A plastic tub / container / dish. A flat-topped sponge that fits in the container. Some baking parchment - NOT greaseproof paper. Half fill the tub with water. Put the sponge in and squeeze it so it soaks up water. You want the sponge to be totally waterlogged and for the tub to still be about 1/2 full. Cut a sheet of parchment to a size smaller than the top of the sponge. Lower the parchment onto the sponge and smooth it out, getting rid of any air. Get some paper towel and gently 'dry' the parchment (just like putting on a decal). Use this instead of a tile or plate when doing anything other than drybrushing. Why? Well the parchment allows water to pass up through it by wicking, but doesn't allow the larger pigment particles to pass into the water or the sponge. This means your paint dries out a hell of a lot slower and gives you a lot more working time. I only discovered this trick recently (after well over 15 years of mini painting). And it rocks. Link to comment https://bolterandchainsword.com/topic/153482-my-attempt-at-flames/#findComment-1795276 Share on other sites More sharing options...
ShinyRhino Posted December 4, 2008 Share Posted December 4, 2008 oh, lol theres no black on the cape ^_^ Even more convincingly done, then! Is that just very dark red, or a brown? Link to comment https://bolterandchainsword.com/topic/153482-my-attempt-at-flames/#findComment-1796327 Share on other sites More sharing options...
Terminatorinhell Posted December 4, 2008 Author Share Posted December 4, 2008 @winterdyne sounds like a great idea! i ought to try it. @shinyrhino i think it looks black by a lighting effect. Link to comment https://bolterandchainsword.com/topic/153482-my-attempt-at-flames/#findComment-1796370 Share on other sites More sharing options...

Recommended Posts
Archived
This topic is now archived and is closed to further replies.