Kierdale Posted July 25, 2019 Author Share Posted July 25, 2019 Thanks. At first I sprayed them both with Tamiya TS-42 (light gun metal - a little lighter than Leadbelcher) but I thought it would be a bit difficult to weather in a generic way I could have put red dust on so it matched with my Mars-based armies but that would have limited me using it with others). So then sprayed it with a light grey Tamiya primer, figuring that I could do a bit of dry brushing and sponging to weather it and probably get a better result. Since I had my airbrush out I quickly sprayed a little dark grey in recesses and around panels too. Just quickly and not so neatly as you can see. :D They have now been sprayed with gloss varnish and I’ll put some decals on them, then mat them down and weather them. ... but that’s not likely to be for about a month as I’m going to be away for awhile. Link to comment https://bolterandchainsword.com/topic/250400-terrain-and-objectives-necron-building-kit/page/4/#findComment-5352485 Share on other sites More sharing options...
Kierdale Posted August 26, 2019 Author Share Posted August 26, 2019 And they’re done! Stackable too ;) noigrim, Dr_Ruminahui, NightHunters and 3 others 6 Back to top Link to comment https://bolterandchainsword.com/topic/250400-terrain-and-objectives-necron-building-kit/page/4/#findComment-5374559 Share on other sites More sharing options...
Bjorn Firewalker Posted August 26, 2019 Share Posted August 26, 2019 Excellent work on the pillboxes. Kierdale 1 Back to top Link to comment https://bolterandchainsword.com/topic/250400-terrain-and-objectives-necron-building-kit/page/4/#findComment-5374561 Share on other sites More sharing options...
Kierdale Posted September 17, 2019 Author Share Posted September 17, 2019 Thanks! I didn’t end up getting any more of those hex-boxes...yet...but in the same shop last weekend found these: Stackable little metal boxes, with removable lids. I’ll be spraying them, decalling - maybe adding posters and graffiti - and weathering them. With magnets in the bases of minis, they would be a good way to transport a Kill Team :tu: I got a green and a blue one like in the lower pic. Note that the ‘handles’ on the upper ones are just painted on rather than embossed, so would be equally good. Link to comment https://bolterandchainsword.com/topic/250400-terrain-and-objectives-necron-building-kit/page/4/#findComment-5390526 Share on other sites More sharing options...
Brother-Chaplain Kage Posted September 17, 2019 Share Posted September 17, 2019 They would not only make good figure transports but terrain as well! I had to look up what 100 yen converted to, so here's something for all the neighbors: .92 USD .84 Euro .74 GBP 1.35 AUD 1.22 CAD Kierdale 1 Back to top Link to comment https://bolterandchainsword.com/topic/250400-terrain-and-objectives-necron-building-kit/page/4/#findComment-5390559 Share on other sites More sharing options...
Kierdale Posted January 14, 2020 Author Share Posted January 14, 2020 It only took about 3 hours to make and paint (much hairdryer use was involved) but I finished this campaign hex map yesterday for my son and I to use. 40k, AoS, it can be used for pretty much anything. I’m happy with how it turned out so I thought I’d post it and how I made it. And what I’d do differently if I did it again (or when I do another). The aim was to make a small map with varied terrain that would give us the chance to battle in different environments, including if a sector was fought over again and again, we could change the battlefield a bit each time (e.g. a battle in a city might use an urban setting once but a wall siege the next time, a clash in sewers the next). Desert, volcano, mountains (and thus caves/mines), forest/jungle, river, grasslands, varied sizes of settlements, a remote wizard’s tower/comms tower, an island, etc. The paints were, but for a few greens at the end, all cheap craft paints. The materials were all from the 100 yen store (cork, paper clay, photo frame) and some sand. And some sprue. And it is a bit 3D And how it was made: Cork hexes glued in place, sprue for buildings, slathered in PVA. Oh, the mountain range and volcano were built up with a hot glue gun in several passes. Not actually PVA here for the sea but something called ’paper clay’. Any kind of cheap filler or putty would work. Or PVA :) Remote comms tower/missile silo/wizard’s tower in a forest/jungle. Lake The sea done but for gloss varnish Here I applied some old flock to make the forest areas but they turned out far lighter than the grasslands so, as you can see from the finished pics at the top, I reversed the colours. Things I would do differently if I redid it: - Have the river winding and branching. Not just one route to the sea. - A gap between the hex tiles. Just a bit. Llagos_Tyrant, NightHunters, Focslain and 2 others 5 Back to top Link to comment https://bolterandchainsword.com/topic/250400-terrain-and-objectives-necron-building-kit/page/4/#findComment-5461113 Share on other sites More sharing options...
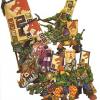
Kierdale Posted May 21, 2020 Author Share Posted May 21, 2020 I made a start on some alien cacti, a throwback to the Rogue Trader and 2nd edition days :) I have two more to make, then blend the stalk in a bit with hot glue, then coat the foam in sand and get ‘em painted. MasterAO, Maschinenpriester, PowerHungryMonkey and 2 others 5 Back to top Link to comment https://bolterandchainsword.com/topic/250400-terrain-and-objectives-necron-building-kit/page/4/#findComment-5524603 Share on other sites More sharing options...
BadgersinHills Posted May 21, 2020 Share Posted May 21, 2020 Nice stuff. The campaign map is looking good, always really cool when one puts in the effort to make one. Kierdale 1 Back to top Link to comment https://bolterandchainsword.com/topic/250400-terrain-and-objectives-necron-building-kit/page/4/#findComment-5524604 Share on other sites More sharing options...
Evil Eye Posted June 2, 2020 Share Posted June 2, 2020 Ooh, I remember that thing from the 3rd(?) edition rulebook I somehow acquired. Always been tempted to do one myself! Kierdale 1 Back to top Link to comment https://bolterandchainsword.com/topic/250400-terrain-and-objectives-necron-building-kit/page/4/#findComment-5534110 Share on other sites More sharing options...
Leonaides Posted June 2, 2020 Share Posted June 2, 2020 I came across my hex base set a couple of weeks ago. Might just have to go back and paint it properly, just did it as ash-waste back then. Looking good there! Kierdale 1 Back to top Link to comment https://bolterandchainsword.com/topic/250400-terrain-and-objectives-necron-building-kit/page/4/#findComment-5534133 Share on other sites More sharing options...
hushrong Posted June 3, 2020 Share Posted June 3, 2020 Went through the log and love what I have been seeing! Link to comment https://bolterandchainsword.com/topic/250400-terrain-and-objectives-necron-building-kit/page/4/#findComment-5534591 Share on other sites More sharing options...
PowerHungryMonkey Posted June 4, 2020 Share Posted June 4, 2020 Man, those cacti, lol. Brings back a lot of memories to my earliest days in the hobby. I remember just going nuts and making a heap of them coz they were the only terrain I could manage. Please say you have a pot of Goblin Green lying around... Kierdale 1 Back to top Link to comment https://bolterandchainsword.com/topic/250400-terrain-and-objectives-necron-building-kit/page/4/#findComment-5535149 Share on other sites More sharing options...
Kierdale Posted June 4, 2020 Author Share Posted June 4, 2020 I came across my hex base set a couple of weeks ago. Might just have to go back and paint it properly, just did it as ash-waste back then. Looking good there!Please do! I’d love to see it. Went through the log and love what I have been seeing! Thanks! Man, those cacti, lol. Brings back a lot of memories to my earliest days in the hobby. I remember just going nuts and making a heap of them coz they were the only terrain I could manage. Please say you have a pot of Goblin Green lying around...I think I have a pot though it may need some rehydrating! I’ll check.I haven’t done any more work on the fungus yet as I want to make two more and texture/paint all three at once. I know that if I do one I’ll never come back and finish the other two :D Oh, one more thing - this thread is rather a rough collection of ideas that pop into my head and are lucky if they get finished, so here’s another one - this idea has been bubbling away in the back of my head for quite some time and late last night when I should’ve been going to bed I had some new thoughts on it so I got started on a prototype... Yes, currently it just looks like a hinged box. Hopefully tonight I can get a bit more done and you’ll get a better idea tomorrow :) Link to comment https://bolterandchainsword.com/topic/250400-terrain-and-objectives-necron-building-kit/page/4/#findComment-5535172 Share on other sites More sharing options...
hushrong Posted June 4, 2020 Share Posted June 4, 2020 A mystery to solve! Kierdale 1 Back to top Link to comment https://bolterandchainsword.com/topic/250400-terrain-and-objectives-necron-building-kit/page/4/#findComment-5535228 Share on other sites More sharing options...
Kierdale Posted June 4, 2020 Author Share Posted June 4, 2020 Mystery revealed! Living in an apartment in Tokyo, storage space is extremely limited, but wargames need terrain...and terrain takes up a fair bit of space. So, some years ago I had an idea -while reading a pop-up book to my son- and this is the prototype. It looks pretty basic now but add floor panels (including some overlapping the diagonal cut in the floor to hide it), cables, wall panels, screens and doors, a ladder between floors... Aaaand the idea is that it’s not just this one 90-degree section. I want to make it essentially four of what you see there, A attached to B, B to C and C to D. A and D will have small magnets in their outer corners so they stick together and the whole thing folds out as kind of an ‘open tower’. That is the plan. I made the above prototype with some leftover thick card but don’t have enough of that to make three more (and will probably change things a bit) so this weekend I’m getting some new materials and will get started on the Real Thing. Bjorn Firewalker, hushrong and Majkhel 3 Back to top Link to comment https://bolterandchainsword.com/topic/250400-terrain-and-objectives-necron-building-kit/page/4/#findComment-5535624 Share on other sites More sharing options...
Bjorn Firewalker Posted June 4, 2020 Share Posted June 4, 2020 Great idea! Kierdale 1 Back to top Link to comment https://bolterandchainsword.com/topic/250400-terrain-and-objectives-necron-building-kit/page/4/#findComment-5535627 Share on other sites More sharing options...
hushrong Posted June 5, 2020 Share Posted June 5, 2020 Man, I’m over here thinking maybe a sweet box for brushes or die and here you are making pop up terrain! Kierdale 1 Back to top Link to comment https://bolterandchainsword.com/topic/250400-terrain-and-objectives-necron-building-kit/page/4/#findComment-5535659 Share on other sites More sharing options...
War Angel Posted June 5, 2020 Share Posted June 5, 2020 That is awesome! If I may, and maybe I’m just not seeing your plan properly, but if you make 4 corners to one building, won’t that make it rather difficult to get to the models on the bottom floor? Kierdale 1 Back to top Link to comment https://bolterandchainsword.com/topic/250400-terrain-and-objectives-necron-building-kit/page/4/#findComment-5535712 Share on other sites More sharing options...
Kierdale Posted June 5, 2020 Author Share Posted June 5, 2020 That is awesome! If I may, and maybe I’m just not seeing your plan properly, but if you make 4 corners to one building, won’t that make it rather difficult to get to the models on the bottom floor? Let this quick, drawn-with-my-thumb-while-I-walk diagram explain :D It’s (somewhat like old Necromunda terrain) open-sided, though internal walls block LOS. That prototype is one quarter. With each of the boxes joined (in fact made) back to back, it folds out from one box into the building. Actually, now I think about it, I have a 40% off voucher to use at the craft store. I may as well do it. It would double the amount of material used for the walls but I might make the doors openable (sliding). hushrong 1 Back to top Link to comment https://bolterandchainsword.com/topic/250400-terrain-and-objectives-necron-building-kit/page/4/#findComment-5535768 Share on other sites More sharing options...
Freakshow668 Posted June 5, 2020 Share Posted June 5, 2020 Amazing idea, you'll be a millionaire by Christmas! Kierdale 1 Back to top Link to comment https://bolterandchainsword.com/topic/250400-terrain-and-objectives-necron-building-kit/page/4/#findComment-5535800 Share on other sites More sharing options...
War Angel Posted June 5, 2020 Share Posted June 5, 2020 Oh, silly me. I thought you were making a box, like the outer walls of a building. You’re making a building with no outer walls. Kierdale 1 Back to top Link to comment https://bolterandchainsword.com/topic/250400-terrain-and-objectives-necron-building-kit/page/4/#findComment-5535897 Share on other sites More sharing options...
hushrong Posted June 5, 2020 Share Posted June 5, 2020 You could flip them around to make an enclosed building right? Just have doors on the bottom and windows on the top for units to move through, if you wish and viola! This thing will be unstoppable. Kierdale 1 Back to top Link to comment https://bolterandchainsword.com/topic/250400-terrain-and-objectives-necron-building-kit/page/4/#findComment-5535918 Share on other sites More sharing options...
Kierdale Posted June 5, 2020 Author Share Posted June 5, 2020 Amazing idea, you'll be a millionaire by Christmas! LOL! If something like this comes up on Kickstarter in a month or two’s time I’ll be well annoyed! :D Oh, silly me. I thought you were making a box, like the outer walls of a building. You’re making a building with no outer walls. Basically, yes. I could make a ‘sheath’ that slips over the unfolded box, to give it an outer wall, though the lower areas would need some holes in the walls in order to make the ground floor accessible. You could flip them around to make an enclosed building right? Just have doors on the bottom and windows on the top for units to move through, if you wish and viola! This thing will be unstoppable. ThanksTrue, if I kept the 90-degree sections separate you could do that. Have magnets in the corners for secure connections, more interchangeable, etc. But for the first one I make I’m going to keep it as one four-section block. Did a bit more “how it’ll look” tinkering on the prototype. Whilst the two cans of Chu-hai did get finished, the prototype was not. Focslain, hushrong, NightHunters and 2 others 5 Back to top Link to comment https://bolterandchainsword.com/topic/250400-terrain-and-objectives-necron-building-kit/page/4/#findComment-5536245 Share on other sites More sharing options...
Kierdale Posted June 17, 2020 Author Share Posted June 17, 2020 I got to work on the model. This is one of the three two-sided walls. Movable doors :tu: It still needs detail adding (cupboards, panels, pipes/wires, screens, etc) but I’ll do that once I’ve got all of these wall-sections done. Hopefully I can get the others done tomorrow. Attaching the floors will come later. hushrong, NightHunters and HUMBY 3 Back to top Link to comment https://bolterandchainsword.com/topic/250400-terrain-and-objectives-necron-building-kit/page/4/#findComment-5543419 Share on other sites More sharing options...
Maschinenpriester Posted June 17, 2020 Share Posted June 17, 2020 Amazing idea! Very inspiring. Keep it up! Kierdale 1 Back to top Link to comment https://bolterandchainsword.com/topic/250400-terrain-and-objectives-necron-building-kit/page/4/#findComment-5543440 Share on other sites More sharing options...
Recommended Posts
Create an account or sign in to comment
You need to be a member in order to leave a comment
Create an account
Sign up for a new account in our community. It's easy!
Register a new accountSign in
Already have an account? Sign in here.
Sign In Now