FinylCut Posted September 11, 2015 Author Share Posted September 11, 2015 Brother Stobz: I posted the following in this thread: ... I took some time to actually read and understand the rules and benefits of formations/detachments in our new codex. Consequently, I've determined my most pressing need is for Sammael and another land speeder. By using magnets, I'll make a single speeder which can function as either. This will allow me to field the Ravenwing Strike Force, while alternatively allowing me to have the numbers for both a Ravenwing Attack Squadron and a Ravenwing Support Squadron by bringing my speeder total to four; however, I will also need a Darkshroud for the latter formation.Now, having a much clearer understanding of the new codex, I can confidently state the upcoming projects are: Sammael (Sableclaw) - magnetized to allow for use as a basic speeder Darkshroud This plan gives me the biggest bang for the effort, provides incentive to finish the big man himself, and rewards that effort with a new kit I've never built. The post ETL lull begins to lift with newfound direction. I've had a concept for Sableclaw planned out in my brain for a few years; it's time to make it a reality. Progress is slow, but steady. Thanks for the work space comment. I figured it would be a little more exciting than a simple photo of a few land speeder bits. FC Link to comment https://bolterandchainsword.com/topic/254660-fcs-dark-angels/page/4/#findComment-4168801 Share on other sites More sharing options...
Epher Posted September 11, 2015 Share Posted September 11, 2015 Work space? Can't be. It is way too clean. ;) Looking forward to the Sableclaw conversion! Be sure to post some progress pics. Link to comment https://bolterandchainsword.com/topic/254660-fcs-dark-angels/page/4/#findComment-4169168 Share on other sites More sharing options...
FinylCut Posted September 13, 2015 Author Share Posted September 13, 2015 Greetings, brothers: A few productive evenings have yielded the following work in progress shots: While I explained the militaristic and modeling goals for choosing Sammael two days prior, I will now share my objectives for painting. First, I want to explore a new manner to paint my remaining Ravenwing forces, the current ones being a relatively codex standard scheme. My Deathwing diverged from the codex and I found it very rewarding. Second, I want to maintain Dark Angels symbolism on the hood area, but this time with a large freehand as opposed to the icons I've used previously. This is why I've smoothed the front of the speeder in the above photo. After assembling the fuselage, I filled the side indentations with plastic card. I then cut pieces for the top indentations, and filled the gaps with green stuff. I sanded the sides flat with 400 grit paper, then with 1000 grit paper. The hood received the same treatment. You can see a reflection of the X-acto on the port side. This should be a large, convenient location to delve further into freehand techniques, something I last explored with my chaplain. Epher, good call on the progress pics. I'm not sure how this will turn out, but with some brotherly support to keep me motivated, I'm excited to continue. Thanks. FC Link to comment https://bolterandchainsword.com/topic/254660-fcs-dark-angels/page/4/#findComment-4170247 Share on other sites More sharing options...
CarbonBased Posted September 13, 2015 Share Posted September 13, 2015 Looking forward to seeing how this turns out. Link to comment https://bolterandchainsword.com/topic/254660-fcs-dark-angels/page/4/#findComment-4170253 Share on other sites More sharing options...
mika_angelus Posted September 13, 2015 Share Posted September 13, 2015 The plan looks very nice, can't wait to see how it turns out! Link to comment https://bolterandchainsword.com/topic/254660-fcs-dark-angels/page/4/#findComment-4170327 Share on other sites More sharing options...
Interrogator Stobz Posted September 13, 2015 Share Posted September 13, 2015 Nice! Keep up the progress pics, they rock! Link to comment https://bolterandchainsword.com/topic/254660-fcs-dark-angels/page/4/#findComment-4170351 Share on other sites More sharing options...
Tygwyn Posted September 13, 2015 Share Posted September 13, 2015 Already given me some inspiration for the Sableclaw I know I need to get round to building! Keep up the pics so I can plagiarise/be inspired by more of your lovely work would you? Link to comment https://bolterandchainsword.com/topic/254660-fcs-dark-angels/page/4/#findComment-4170420 Share on other sites More sharing options...
Epher Posted September 13, 2015 Share Posted September 13, 2015 I really like what you are doing with the plastic card. I would never have thought of doing that. Your cuts look very precise too with no gaps around the edges. Thanks for posting the progress pics! This looks like it is going to be an awesome build! Link to comment https://bolterandchainsword.com/topic/254660-fcs-dark-angels/page/4/#findComment-4170506 Share on other sites More sharing options...
Dark Rage Posted September 14, 2015 Share Posted September 14, 2015 Wow some very nice stuff here, really like the glazing affects on the weapons and the blending on the armour and weapons, a very nice force you got here, also looking forward to the sableclaw progress. Link to comment https://bolterandchainsword.com/topic/254660-fcs-dark-angels/page/4/#findComment-4171440 Share on other sites More sharing options...
FinylCut Posted September 27, 2015 Author Share Posted September 27, 2015 Greetings brothers.Thanks for all the motivating comments.First, a progress pic:I've cleaned everything up; the dual assault cannons felt like a week's effort. I cracked open a box of Black Knights for a few bitz and I was incredibly impressed with the kit. I've selected parts for Sammael and the gunner, but I'm hesitating on a few of the Sammael pieces, namely the sword, right shoulder, and head. I just need to make up my mind and get to painting.Remaining to do before priming: Select and clean crew parts (optional) Bling out the speeder a bit (optional) The other weapons to run it as a stock land speeder Clean and dry Thanks. FC Link to comment https://bolterandchainsword.com/topic/254660-fcs-dark-angels/page/4/#findComment-4181934 Share on other sites More sharing options...
FinylCut Posted December 21, 2015 Author Share Posted December 21, 2015 Greetings brothers.Accomplished:- Blinged out the speeder a bit- Assembled, cleaned, and magnetized other weapon options- Primed everything- Base coated all weapons- Assualt cannon painted- Heavy bolter paintedNow, a progress pic:I've spent some time on the two weapons; I think it shows, but I could spend a few more hours as well. Next, are the crew members: Sammael and gunner. There have been trials with trying to paint to a higher standard with this guy, but motivation is still high.Thanks.FC Link to comment https://bolterandchainsword.com/topic/254660-fcs-dark-angels/page/4/#findComment-4257475 Share on other sites More sharing options...
Epher Posted December 21, 2015 Share Posted December 21, 2015 The detailing and shading looks great! It makes me want to start on my own Sableclaw! Looking forward to more WIP pics! Link to comment https://bolterandchainsword.com/topic/254660-fcs-dark-angels/page/4/#findComment-4257735 Share on other sites More sharing options...
Tygwyn Posted December 23, 2015 Share Posted December 23, 2015 I am also loving that shading - what's the recipe? Looks like a lovely oil wash...? Link to comment https://bolterandchainsword.com/topic/254660-fcs-dark-angels/page/4/#findComment-4259191 Share on other sites More sharing options...
FinylCut Posted December 27, 2015 Author Share Posted December 27, 2015 Thanks, brothers Epher and Tygwyn. The red is a black base coat on which I airbrushed a light coat of Game Color Scar Red. Then, I brought the highlights up to Model Color Vermillion, and the shadows down to black/scar red - both using thin glazes. No oil wash was used on this one, but I have used oil washes on my Deathwing. Metals are Game Color Gunmetal base coat brought up to Air Color Chrome, and down to almost black. Admittedly, the metals didn't appear as well in the photo. The gunner is underway. No progress pics, as I think the OSL attempt might warrant a bath in simple green if I'm unable to fix it. Slow and steady. Thanks. Link to comment https://bolterandchainsword.com/topic/254660-fcs-dark-angels/page/4/#findComment-4261948 Share on other sites More sharing options...
FinylCut Posted September 5, 2016 Author Share Posted September 5, 2016 Greetings, Brothers.Sammael has been suspended. I lacked the skills to complete him as I envisioned. This took me in several directions, a few being outside the scope of 40K.Two recent projects which have been 40K related: - Librarian Terminator - Darkshroud, more pics, etc.I considered the librarian's armor to be a total failure. It was so far from what I wanted, but I didn't know at the time how to achieve it. I believe I learned what I needed from painting a single Infinity model. I then returned to the Librarian for redemption. Here he is, updated (and washed out a bit):I've learned a lot on this guy - again! I entered him, as seen above, in a FLGS painting contest. The feedback I received was the base was lame, because it didn't blend in with or feel a part of the model, even though I'd gone the extra mile with a bit of cork; however, I took this to heart. The right shoulder's freehand was not completed, because of the contest's deadline.The Darkshroud was a complete success - in a very short amount of time. Painting was less than six hours. I've updated my basing (which needs more refinement), and am trying to learn some new techniques, while experimenting with colors. My favorite part is the green in the Icon. I am very comfortable with this as a table top standard for myself.However, I'm not ready for Sammael yet. I need to quickly iterate a on few new techniques. The best way to prepare for Sammael is to paint more Ravenwing. Despite having 2000 points of mostly unpainted Deathwing scattered about, they've always been a side project; picking them up as cheaply as I did made it an easy side project to start.Next up are three Ravenwing Black Knights. A lack of Knights is a hole in my force. Luckily, I haven't played a single 7th edition game, so this hole isn't very exploitable. My goals were simple: - Improve on the Darkshroud's scheme - Bases must be considered up front - Paint as quickly as possible (5 hours max) - Keep things dark, but contrastingWatching elmo during the ETL has inspired me to quicken my work. I'm 95% collector/modeler at this point, but I still want a larger force, or at least less gray plastic. Lots of us state we're "slow painters", but I'm working to accelerate my processes.I made bases up front, for the first time ever. I primed everything at once, saving time. I skipped a base coat to save time, but won't do this again. Colors were not a triad, but a duo: shade and highlight - done to save time and maximize contrast from arm's length. Everything was to maximize contrast on what appears, at arm's length, to be black. Oh, and five hours total painting time... which I only missed by four hours, but I can live with three hours a piece on these guys.I forced myself to move quickly, yet precisely by setting a stop watch. For instance, line highlights can be completed in under 20 minutes per bike/rider, but sacrifces must be made; start picking out the most prominent ones as neatly as possible - the most bang for the buck. All items of a given color are done together in an assembly line manner. Nothing gets a unique color, all red gets the same red. This lends itself to a partially limited palette, which I like.Here are a few photos:Center bike frosted during the varnish step. I've got some more cleanup to doBlack Knights appear from the shadows of the DarkshroudHere cometh the beat downThese three turned out incredibly well. Despite having blown the time limit, it was a good first step towards speed painting. As with the Darkshroud, I am very comfortable with this as a table top standard for myself. Unfortunately, I think my entire force feels outdated now, minus this year's work. Next up: three more Knights?FC Link to comment https://bolterandchainsword.com/topic/254660-fcs-dark-angels/page/4/#findComment-4490773 Share on other sites More sharing options...
Major_Gilbear Posted September 5, 2016 Share Posted September 5, 2016 Your Librarian has turned our very, very well indeed - I'm glad you persevered with him! :D As an aside, I think you might benefit a fair bit from watching this series of video tutorials by Ben Komets at Painting Buddha. It produces a blue not unlike your Librarian's, but the details and techniques are just very well explained and produce an especially polished result. Similarly, I think that applying similar focus to your bikes will improve them even further (even though they look very good as they are!). Finally, I have to agree that the sand on the base just looks a bit unfinished. The colour is fine I think, but I would paint it because it looks strange to have unpainted materials against painted ones. Painting it also allows you to add in a little subtle colour variation, which would really help to set off the models nicely. Link to comment https://bolterandchainsword.com/topic/254660-fcs-dark-angels/page/4/#findComment-4490813 Share on other sites More sharing options...
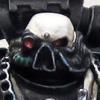
Guest Posted September 5, 2016 Share Posted September 5, 2016 Can't believe I have not seen this, very nice work... My only criticism is the Chaplain helmet, but thats more me than you :P Link to comment https://bolterandchainsword.com/topic/254660-fcs-dark-angels/page/4/#findComment-4490843 Share on other sites More sharing options...
FinylCut Posted September 16, 2016 Author Share Posted September 16, 2016 Thanks, brothers.I've started assembling a Nephilim Jetfighter. It's a great model thus far.Major_Gilbear, I support Painting Buddha via Patreon. It was that very series which convinced me to support them. I certainly did not do their work justice, but I learned a lot from the exercise. Hopefully, they'll start producing again soon.I agree with you on the older bases; they all need some additional attention. I did a terminator as a quick test, but it certainly didn't turn out as well as taking the base into consideration up front. I'll need to try a a few more things.FC Link to comment https://bolterandchainsword.com/topic/254660-fcs-dark-angels/page/4/#findComment-4504799 Share on other sites More sharing options...
Interrogator Stobz Posted September 16, 2016 Share Posted September 16, 2016 Sweet Ravenwing Brother :tu: I can't wait to see your plane :D stobz Link to comment https://bolterandchainsword.com/topic/254660-fcs-dark-angels/page/4/#findComment-4504822 Share on other sites More sharing options...
Chaplain Raeven Posted September 17, 2016 Share Posted September 17, 2016 Wow, your work is beautifull. I can't believe I haven't placed a comment here yet. Keep up the good work! Link to comment https://bolterandchainsword.com/topic/254660-fcs-dark-angels/page/4/#findComment-4505195 Share on other sites More sharing options...
FinylCut Posted October 2, 2016 Author Share Posted October 2, 2016 Thanks, brothers. With a new painting event on the horizon, I'm stopping work on the Nephilim. I primed today, so the timing couldn't have been better. I have three more Black Knights I can assemble in the mean time, the first which I've started this evening. Thanks. FC Link to comment https://bolterandchainsword.com/topic/254660-fcs-dark-angels/page/4/#findComment-4517784 Share on other sites More sharing options...
FinylCut Posted December 12, 2016 Author Share Posted December 12, 2016 Brothers: I've completed assembly and priming of my Ravenwing Command: Here is my squad entry into my local store's painting competition. I was lucky to win the judging rubric against some very strong opposition. Here are some better photos of the Nephilim as promised. Finally, my Ravenwing HQ got a base-lift, making them fit the new style quite well. Thanks. FC Link to comment https://bolterandchainsword.com/topic/254660-fcs-dark-angels/page/4/#findComment-4590106 Share on other sites More sharing options...
Interrogator Stobz Posted December 12, 2016 Share Posted December 12, 2016 Very Nice! Link to comment https://bolterandchainsword.com/topic/254660-fcs-dark-angels/page/4/#findComment-4590118 Share on other sites More sharing options...
Chaplain Raeven Posted December 12, 2016 Share Posted December 12, 2016 Your models are gorgeous brother! Your dark colours are menacing and your bright colours very vibrant. And dem blendwork Link to comment https://bolterandchainsword.com/topic/254660-fcs-dark-angels/page/4/#findComment-4590367 Share on other sites More sharing options...
Guest Posted December 12, 2016 Share Posted December 12, 2016 Love it, how the hell did you do the canopy on the flyer? :) Link to comment https://bolterandchainsword.com/topic/254660-fcs-dark-angels/page/4/#findComment-4590387 Share on other sites More sharing options...
Recommended Posts
Archived
This topic is now archived and is closed to further replies.