Nusquam Posted December 26, 2013 Share Posted December 26, 2013 As soon as I saw what those new technical paints could do I had to go to town with them. What better way to experiment with them on fortifications! Thoughts? Link to comment https://bolterandchainsword.com/topic/284943-haunted-wastes-fortifications-11314-update/ Share on other sites More sharing options...
GrandMagnus Posted December 26, 2013 Share Posted December 26, 2013 Maybe it could use a bit more of drybrushed metal. Link to comment https://bolterandchainsword.com/topic/284943-haunted-wastes-fortifications-11314-update/#findComment-3554310 Share on other sites More sharing options...
Nusquam Posted December 28, 2013 Author Share Posted December 28, 2013 More rust for the rust god! http://1.bp.blogspot.com/-anIYsmU8Wgs/Ur60Gl9cAfI/AAAAAAAAAX0/7qc1dguT_TY/s1600/IMAG1016.jpghttp://4.bp.blogspot.com/-fcndQlqyDSg/Ur60GumwbZI/AAAAAAAAAX4/eb7yzE5gxI8/s1600/IMAG1017.jpghttp://2.bp.blogspot.com/-6mxjpAHak_M/Ur60GlKVmyI/AAAAAAAAAX8/fOY12oH3XmY/s1600/IMAG1014.jpg Also I got the firestorm redoubt. It was a [[NUMEROUS CHOICE WORDS REDACTED]] to assemble. Warped and glue wouldn't cure. But it loos awesome. Link to comment https://bolterandchainsword.com/topic/284943-haunted-wastes-fortifications-11314-update/#findComment-3555540 Share on other sites More sharing options...
deathspectersgt7 Posted December 28, 2013 Share Posted December 28, 2013 Great job like the rust effects. Link to comment https://bolterandchainsword.com/topic/284943-haunted-wastes-fortifications-11314-update/#findComment-3555730 Share on other sites More sharing options...
Nusquam Posted December 29, 2013 Author Share Posted December 29, 2013 Thanks! Finished rusted ADL: And now I'm experimenting with wet mud, like it rains frequently on the area. Thoughts on the following? Oh and I almost forgot, next up! Link to comment https://bolterandchainsword.com/topic/284943-haunted-wastes-fortifications-11314-update/#findComment-3556579 Share on other sites More sharing options...
Hand of Sigismund Posted December 29, 2013 Share Posted December 29, 2013 It's going great can't wait to fight em. Link to comment https://bolterandchainsword.com/topic/284943-haunted-wastes-fortifications-11314-update/#findComment-3556593 Share on other sites More sharing options...
Molokai Posted December 30, 2013 Share Posted December 30, 2013 This effect looks awesome. Would you mind giving a quick rundown of how you achieved it? The adl sections in particular are very impressive. Realistic man. Link to comment https://bolterandchainsword.com/topic/284943-haunted-wastes-fortifications-11314-update/#findComment-3556746 Share on other sites More sharing options...
Nusquam Posted December 30, 2013 Author Share Posted December 30, 2013 This effect looks awesome. Would you mind giving a quick rundown of how you achieved it? The adl sections in particular are very impressive. Realistic man. Thanks and no problem! Take a look at the image that has the silver, brownish and rusted sections of the ADL above. After priming black I took a large dry brush and Iron Breaker and just went to town on it(I didn't wipe the excess of the brush, I just took a bit from the pot and scribbled all over the piece, so it wasn't "dry" brushing so much as "brushing") to produce the far left piece. Then I "washed" it with Typhus Corrosion. Then I used a large dry brush and brushed over the corrosion with Ryza Rust. That took two dry brush "coats". After it was all nice and rusted I went back in with an old small detail brush and sort of "filled" in the some spaces under ledges and bolts and painted fake drip/run lines. If there was a recessed corner I painted a sort of triangle using the two inner sides of the recess. If the line seemed too thick I wiped it down with my finger which gave some sections that downward "encroaching" corrosion look as opposed to runny corrosion. Using Iron Breaker and a small dry brush I went in and hit the edges, brushed softly over some panels for the small silver flecks and and "scribbled" some spots to add in spots that look not rusty. Also I hit the impact craters with some Iron Breaker as well. Then in the one pic above and the following pics, I gratuitously added Stirland Mud to the bottom, gloss varnished it and glossed the runny/built up corrosion and mud splatter. Oh hey another update!: http://2.bp.blogspot.com/-YowcF45e9wM/UsEBE7c3UTI/AAAAAAAAAYc/paj14sKVokg/s1600/IMAG1027.jpghttp://4.bp.blogspot.com/-inIQZr1pvAM/UsEBDytmPLI/AAAAAAAAAYI/zOr3tv5lKvg/s1600/IMAG1026.jpghttp://2.bp.blogspot.com/-L6cpLigjV2E/UsEBD3zIjtI/AAAAAAAAAYQ/yIOfEyoSjnI/s1600/IMAG1025.jpghttp://4.bp.blogspot.com/-m4KhD6s_F1g/UsEBD3NwFXI/AAAAAAAAAYM/tdMZKSZ4qxs/s1600/IMAG1024.jpg Link to comment https://bolterandchainsword.com/topic/284943-haunted-wastes-fortifications-11314-update/#findComment-3556783 Share on other sites More sharing options...
Molokai Posted December 31, 2013 Share Posted December 31, 2013 Cheers for the tutorial Nusquam! I wasn't too sure about fortifications, but now I'm inspired to paint one up for the hell of it! Cheers Link to comment https://bolterandchainsword.com/topic/284943-haunted-wastes-fortifications-11314-update/#findComment-3557384 Share on other sites More sharing options...
Forté Posted December 31, 2013 Share Posted December 31, 2013 Look really good but I'm not too sure on the verdigris. Looks a bit heavy to me. Link to comment https://bolterandchainsword.com/topic/284943-haunted-wastes-fortifications-11314-update/#findComment-3557450 Share on other sites More sharing options...
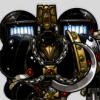
Nusquam Posted December 31, 2013 Author Share Posted December 31, 2013 Ooohhh gold star for the use of "verdigris" ha. I want these to be ancient looking. Heres some more WIP shots http://2.bp.blogspot.com/-cmgKo3Isr0M/UsNM6xanYaI/AAAAAAAAAZc/gdTuG7vYhQg/s1600/IMAG1035.jpghttp://4.bp.blogspot.com/-83zDK_QxJ_s/UsNM5cmTOoI/AAAAAAAAAZQ/hN9ZIzh7BWA/s1600/IMAG1034.jpg And I bought all the parts I want on sale today! So heres everything that will be painted for this project: http://3.bp.blogspot.com/-c_IjJXqrXg0/UsNM64KbI6I/AAAAAAAAAZg/3TLNy2JKTTs/s1600/IMAG1036.jpg Link to comment https://bolterandchainsword.com/topic/284943-haunted-wastes-fortifications-11314-update/#findComment-3557936 Share on other sites More sharing options...
deathspectersgt7 Posted January 1, 2014 Share Posted January 1, 2014 Looking Good Link to comment https://bolterandchainsword.com/topic/284943-haunted-wastes-fortifications-11314-update/#findComment-3557973 Share on other sites More sharing options...
Kierdale Posted January 1, 2014 Share Posted January 1, 2014 Dirty as hell! Fantastic work! Link to comment https://bolterandchainsword.com/topic/284943-haunted-wastes-fortifications-11314-update/#findComment-3558110 Share on other sites More sharing options...
Nusquam Posted January 7, 2014 Author Share Posted January 7, 2014 Thanks everyone! Here are some more Firestorm WIP pics, slow and steady. I got distracted by starting a Raptors Chapter force... When it's all done I'll use a real camera ha. http://3.bp.blogspot.com/-KK_fjFP_880/Usu9Wm0CRHI/AAAAAAAAAb4/m3hqiZTDmGI/s1600/IMAG1071.jpg Link to comment https://bolterandchainsword.com/topic/284943-haunted-wastes-fortifications-11314-update/#findComment-3562524 Share on other sites More sharing options...
Daevyll Posted January 7, 2014 Share Posted January 7, 2014 I love this. This is the reason we still play with toy soldiers :) Link to comment https://bolterandchainsword.com/topic/284943-haunted-wastes-fortifications-11314-update/#findComment-3562548 Share on other sites More sharing options...
Natanael Posted January 7, 2014 Share Posted January 7, 2014 Very nice stuff. I like the ADL the most, still, but that Collection of fortifications is impressive. I guess I need to start buying my own now. Link to comment https://bolterandchainsword.com/topic/284943-haunted-wastes-fortifications-11314-update/#findComment-3562973 Share on other sites More sharing options...
Kierdale Posted January 8, 2014 Share Posted January 8, 2014 Very good indeed. What paints are you using for the brass? Link to comment https://bolterandchainsword.com/topic/284943-haunted-wastes-fortifications-11314-update/#findComment-3563103 Share on other sites More sharing options...
Nusquam Posted January 8, 2014 Author Share Posted January 8, 2014 Very good indeed. What paints are you using for the brass? I'm using Balthazar Gold, Nuln Oil and Nihilikh Oxide. More specifically base Balthazard, shade Nuln, light drybrush Balthazar, then Oxide in some crevasses/run marks. I watched the GW video where the guy smothered stuff with the oxide, I feel it works better in smaller amounts. Less is more type thing. Very nice stuff. I like the ADL the most, still, but that Collection of fortifications is impressive. I guess I need to start buying my own now. The ADL was a lot of fun. Can't beat year end sales haha. They are quite daunting when you look at them from across the table. I put the Wall extending to objectives and my scouts scooted up and nabbed them late game. I love this. This is the reason we still play with toy soldiers +1 Should finish the Redoubt by the end of the week and then start on the Bunker and walls. Heres my progress and distraction haha http://2.bp.blogspot.com/-kLYCQtwDe6Q/Us0yT24UbLI/AAAAAAAAAcY/Bq6eEaCmqKI/s1600/IMAG1080.jpg Link to comment https://bolterandchainsword.com/topic/284943-haunted-wastes-fortifications-11314-update/#findComment-3563463 Share on other sites More sharing options...
Smurfben Posted January 8, 2014 Share Posted January 8, 2014 I need to get me a redoubt!! Great looking fortifications. They'll look really really nice when they're all together....just take care not to hide your soldiers behind the rusty sections, that's a -1 cover save right there :p Link to comment https://bolterandchainsword.com/topic/284943-haunted-wastes-fortifications-11314-update/#findComment-3563495 Share on other sites More sharing options...
Natanael Posted January 8, 2014 Share Posted January 8, 2014 Very nice. I agree with Smurfben that they look great when all together. I never use forts in games, but I think they look awesome as scenery. =) Link to comment https://bolterandchainsword.com/topic/284943-haunted-wastes-fortifications-11314-update/#findComment-3563538 Share on other sites More sharing options...
deathspectersgt7 Posted January 9, 2014 Share Posted January 9, 2014 Raptors Great job on this project Link to comment https://bolterandchainsword.com/topic/284943-haunted-wastes-fortifications-11314-update/#findComment-3564028 Share on other sites More sharing options...
Nusquam Posted January 10, 2014 Author Share Posted January 10, 2014 Here's the Redoubt nearing completion! http://2.bp.blogspot.com/-UX2jTDhokIs/UtArDIe5N8I/AAAAAAAAAc0/7LhSaay5tYc/s1600/IMAG1084.jpghttp://2.bp.blogspot.com/-YYmrfAcz9qU/UtArDtLdyPI/AAAAAAAAAc4/MSU6BrFkcvA/s1600/IMAG1085.jpghttp://4.bp.blogspot.com/-bVOKAbpom-o/UtArET8zx_I/AAAAAAAAAdE/EYPbwbjDLgI/s1600/IMAG1087.jpg Link to comment https://bolterandchainsword.com/topic/284943-haunted-wastes-fortifications-11314-update/#findComment-3565592 Share on other sites More sharing options...
Natanael Posted January 10, 2014 Share Posted January 10, 2014 I love the rusty floor and the overall worn look you have going here. I really feel like I need to get my hands on a big bag of fortifications for my tables. Link to comment https://bolterandchainsword.com/topic/284943-haunted-wastes-fortifications-11314-update/#findComment-3565652 Share on other sites More sharing options...
Nusquam Posted January 13, 2014 Author Share Posted January 13, 2014 Here's the completed Redoubt bunker sections! Up next are the Icarus cannons. http://4.bp.blogspot.com/-kYEyhKGG-tY/UtPRbA8-ozI/AAAAAAAAAdc/CXS5KW_cM-0/s1600/IMAG1091.jpghttp://2.bp.blogspot.com/-cW0FyrB-Z3k/UtPRbCsZFRI/AAAAAAAAAdY/p99bY8T5eMA/s1600/IMAG1092.jpghttp://2.bp.blogspot.com/-BYqJVO4pDSs/UtPRbA7_LVI/AAAAAAAAAdg/CPJK_yyeC84/s1600/IMAG1094.jpghttp://3.bp.blogspot.com/-xh4XFECOuS0/UtPRc7HWlMI/AAAAAAAAAdw/orNVx-FZgHY/s1600/IMAG1095.jpg Link to comment https://bolterandchainsword.com/topic/284943-haunted-wastes-fortifications-11314-update/#findComment-3567820 Share on other sites More sharing options...
Recommended Posts
Archived
This topic is now archived and is closed to further replies.