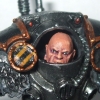
Khrangar Posted July 17, 2006 Share Posted July 17, 2006 Greetings all, You may or may not have noticed that I have several threads floating around the B&C lately. This is because I have started work on my Chapter Master for the Sons of Guilliman. I have taken some pics of the WIP model so far. If I had blue-tac, I'd have put the model together to give you an idea of what he'll look like, but since I don't, he's in pieces. The pics show the modifications to the model that I've made. The Terminator Armour: added vent to chest plate and some gs to where the winged skull was on the right leg. It now resembles the chapter badge. http://img.photobucket.com/albums/v334/Khrangar/Chapter%20Master/CM.jpg Head: Removed mohawk and added a scar on the face http://img.photobucket.com/albums/v334/Khrangar/Chapter%20Master/CMHead.jpg Shoulder Pad: Removed Red Scorpions iconography http://img.photobucket.com/albums/v334/Khrangar/Chapter%20Master/CMSP.jpg Storm Bolter: Removed Red Scorpions iconography http://img.photobucket.com/albums/v334/Khrangar/Chapter%20Master/CMSB.jpg There he is so far. I hope to have more pics of him up soon when I finish gsing the model and find a suitable replacement for the stock sword. On an off note, I've never primed resin before and I've heard that GW Primer flakes off eventually. If this is true, which primer should I use? Automotive perhaps? Anyway, more on topic, Enjoy. C&C always welcome. Khrangar Link to comment https://bolterandchainsword.com/topic/91956-sons-of-guilliman-chapter-master/ Share on other sites More sharing options...
millest Posted July 17, 2006 Share Posted July 17, 2006 looks like a pretty clean conversion so far, might have to pinch the head idea. where did the vent on the chet come from? cheers millest Link to comment https://bolterandchainsword.com/topic/91956-sons-of-guilliman-chapter-master/#findComment-1056954 Share on other sites More sharing options...
Khrangar Posted July 17, 2006 Author Share Posted July 17, 2006 It's from the Mk5 Chest that comes in the tactical squad box. Link to comment https://bolterandchainsword.com/topic/91956-sons-of-guilliman-chapter-master/#findComment-1056956 Share on other sites More sharing options...
Shinobi_soldier Posted July 17, 2006 Share Posted July 17, 2006 Looking good. The conversion is very neat, get some heraldry onto him, and smooth up the circle on his leg and it'll turn out nice. do you have any plans for banners, cloaks, tabards, ect. Link to comment https://bolterandchainsword.com/topic/91956-sons-of-guilliman-chapter-master/#findComment-1056990 Share on other sites More sharing options...
Khrangar Posted July 17, 2006 Author Share Posted July 17, 2006 I thought of adding a cloak, but my GS skills are rather mediocre and I figured that while it would fit a Chapter Master in their base or whatever, it would be rather impractical in a battle as it would get stuck on things and tattered and the like and I figure the cloak would be one of the symbols of the CM and so wouldn't want it to get wrecked. I thought of him more as a combat CM so he'd leave most of his bling at home and be more concentrated on getting stuck into combat than fashion. At the most I'll add a back banner and perhaps a half cloak, but right now I don't know. I think I can do most of the heraldry in the painting stage as there is a heraldry shield on his crotch, for lack of a better word. If I can find one, I'll add a shoulder tabard on the bare shoulder pad and maybe a few more purity seals, again if I can find them. I may GS the chapter badge onto the shoulder pad, but I don't know how I could go about making the wings. If anyone knows how I can do this, please let me know. Thanks, Khrangar Link to comment https://bolterandchainsword.com/topic/91956-sons-of-guilliman-chapter-master/#findComment-1056999 Share on other sites More sharing options...
-Q- Posted July 17, 2006 Share Posted July 17, 2006 That head was absolutely the right choice. Sweet sweet! Link to comment https://bolterandchainsword.com/topic/91956-sons-of-guilliman-chapter-master/#findComment-1057048 Share on other sites More sharing options...
Deus Ex Mortis Posted July 17, 2006 Share Posted July 17, 2006 im planning to do a simmilar conversion for my black templars and i want to know where the vent is off of. Link to comment https://bolterandchainsword.com/topic/91956-sons-of-guilliman-chapter-master/#findComment-1057049 Share on other sites More sharing options...
HellChyld Posted July 17, 2006 Share Posted July 17, 2006 It's from the Mk5 Chest that comes in the tactical squad box. as he says in the above qoute Link to comment https://bolterandchainsword.com/topic/91956-sons-of-guilliman-chapter-master/#findComment-1057051 Share on other sites More sharing options...
-Q- Posted July 17, 2006 Share Posted July 17, 2006 The SoG wings will actually be pretty easy to Greenstuff. Let the Greenstuff sit a while, maybe half an hour, experiment with what works for you. Flatten out a rectangular area to fit the pad, this will be the outer line of both wings. Flatten out a second piece, any shape on any spare anything, extra base, disposable plastic cup, whatever. Use this as your test bed for the workability at any time. Use your GW sculpting tool (or whichever you prefer) to cut a notch into the top to represent the separation of the wings. You can do this as a simple triangle if you'd like since the circle U will cover the 'point' of the triangle where they meet. So two strokes, just push down with your tool. Be sure it's wet first. (I just lick it... yes yes get your jokes out) (There's another thread for debating the safety of licking metal that's contacted GS, Search it up if you want to debate it) Carefully drag out the triangle you just cut out. Be slow, scrape it all out, after each stroke put the removed GS onto a paper towel. Ensure your tool is clean and clean a little more. Repeat until it's clear. Don't worry about being perfect on the tip area where the circle U will cover. Next cut out the bottom void. This time you want to just cut up to edges of the triangle you just made, since the circle U will cover the join B) Like the above it's just slow steady strokes, mostly just pressing down rather than 'cutting' and then scraping away. Always wet the tool before you touch the Greenstuff. You can sort of slide your sculpting tool up to the edges to tighten them up and make them sharp. If it's not wet you will grab the GS and pull it away, doing more damage than good. Now I'd let it set for a while longer. You don't want the Greenstuff too gooey but you don't want it to go more than an hour and a half. Use your test area and press with your tool, not quite straight down. Basically you are going to indent the Greenstuff to separate the three feathers on each side. This should be one press down, slow and smooth, you can pull down and away from the Icon. If the test Greenstuff feels too gooey still then wait a little longer and try again. Once you're ready it's just two strokes on each wing to separate the feathers. Now... walk away. Then just Greenstuff the circle over the center for the circle U the next day. Let the wings harden *overnight* before you do the circle =) I see a circle on the leg so I know you can do that part ;) http://www.invasiongames.com/graphics/Q-SoG-01.gif Link to comment https://bolterandchainsword.com/topic/91956-sons-of-guilliman-chapter-master/#findComment-1057059 Share on other sites More sharing options...
Khrangar Posted July 18, 2006 Author Share Posted July 18, 2006 Thanks for that Q, I'll have to do a test pad before I do the one for the CM but I'll certainly give it a shot. Link to comment https://bolterandchainsword.com/topic/91956-sons-of-guilliman-chapter-master/#findComment-1057085 Share on other sites More sharing options...
Khrangar Posted July 18, 2006 Author Share Posted July 18, 2006 I've figured out what I'm going to do for the sword! It'll be a combination of the Company Champion's Sword and the greatsword that comes on the Mordheim equipment sprue. http://img.photobucket.com/albums/v334/Khrangar/sword.jpg The colours are just there so you can see the different areas of the sword. Link to comment https://bolterandchainsword.com/topic/91956-sons-of-guilliman-chapter-master/#findComment-1057872 Share on other sites More sharing options...
Recommended Posts
Archived
This topic is now archived and is closed to further replies.