Death Guard kill team, Chapter three: Starting to feel faint
Entry posted by Antarius in Realm of Chaos
526 views
So, I got slightly sidetracked today by a Civilization Halloween scenario involving zombies (who can say no to that kind of thing?). On top of that, the Queen of the Blackened Moon has been struck down by Grandfather Nurgle's blessing, so a lot of yesterday and today went with bringing her tea, preparing food and making "aww!" noises. Still, it's not all bad as I've managed to remember my old "heavy rust" recipe, which I decided I'd better apply at least the first couple of steps of before bringing in the oils (I just keep putting it off  ).
).
I figured some of you might be interested in the recipe, as it's both easy, simple, quite effective and doesn't involve any strange products, other than an old brush and some acrylics you probably already have lying around. It's great for batch painting too, so I really think it's worth having in your toolbox, if you do Death Guard, ruined terrain or other projects including heavily rusted parts. As a final bonus, I just find it very satisfying for some reason, so maybe you will too 
The recipe basically has 4 easy steps, but you can probably leave one out if you really want to speed things up (I do find that it works best with all of them though). It might seem kinda counterintuitive that you're not covering the metal colour with rust, but doing it the other way around, but I think this works better,
Step 1: Give the entire part that's supposed to be rusted metal a Rhinox Hide basecoat (don't bother painting it metal first; this is a recipe for very rusty stuff)
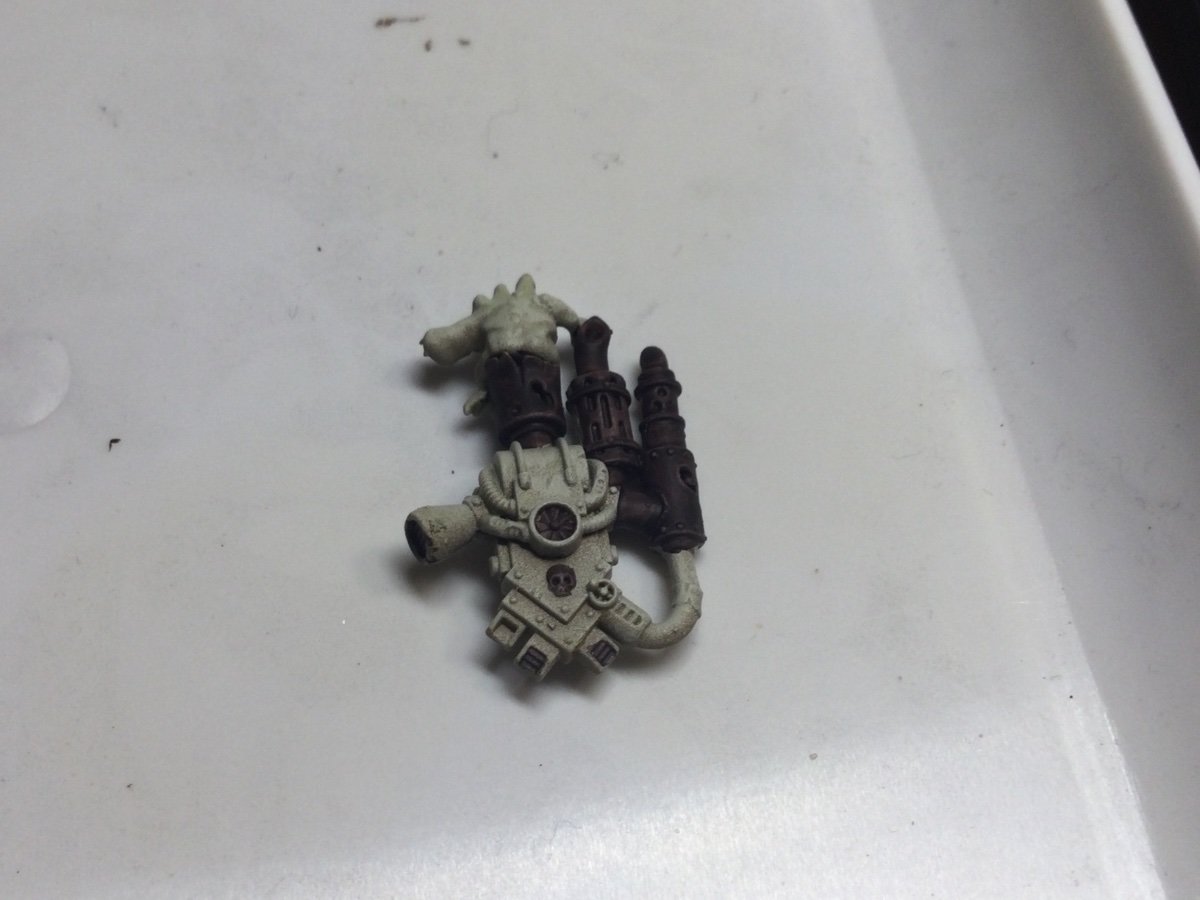
Step 2: Stipple or sponge the part heavily with Doombull Brown (or, if you can find it, the old "Vermin Fur" which was even better as it was slightly more reddish, but I find Doombull Brown does the trick just fine and it's what I use these days, as my Vermin Fur has run dry). The trick here is that you shouldn't be afraid to overdo it - you basically can't. The only real trick here is that the splotches of paint you sponge/stipple on leaves the illusion of texture, which actually (imho) looks more real than most rust products do at this scale.

Step 3: Stipple the part slightly less heavily with Ryza Rust or Jokaero Orange (I prefer Ryza Rust; it looks like it'll be way to bright and OTT, but it dries to a considerably less garish colour). Once again, you can't really overdo it, as it's just personal taste how orangey you like your rust.
Step 4: Give the part a much less heavy handed drybrush/stippling highlight (you might benefit from not using an old brush here, depending on your preferences). The trick here is to focus on areas that would probably be scraped and worn free of rust, which coincides nicely with the edges and details that are easiest to catch with a brush
This is the only part where I think you need to be slightly wary of overdoing it, as the metal can "overwrite" the rust texture if you're not careful. But again, it's a matter of personal taste how much you want the metal to show "through".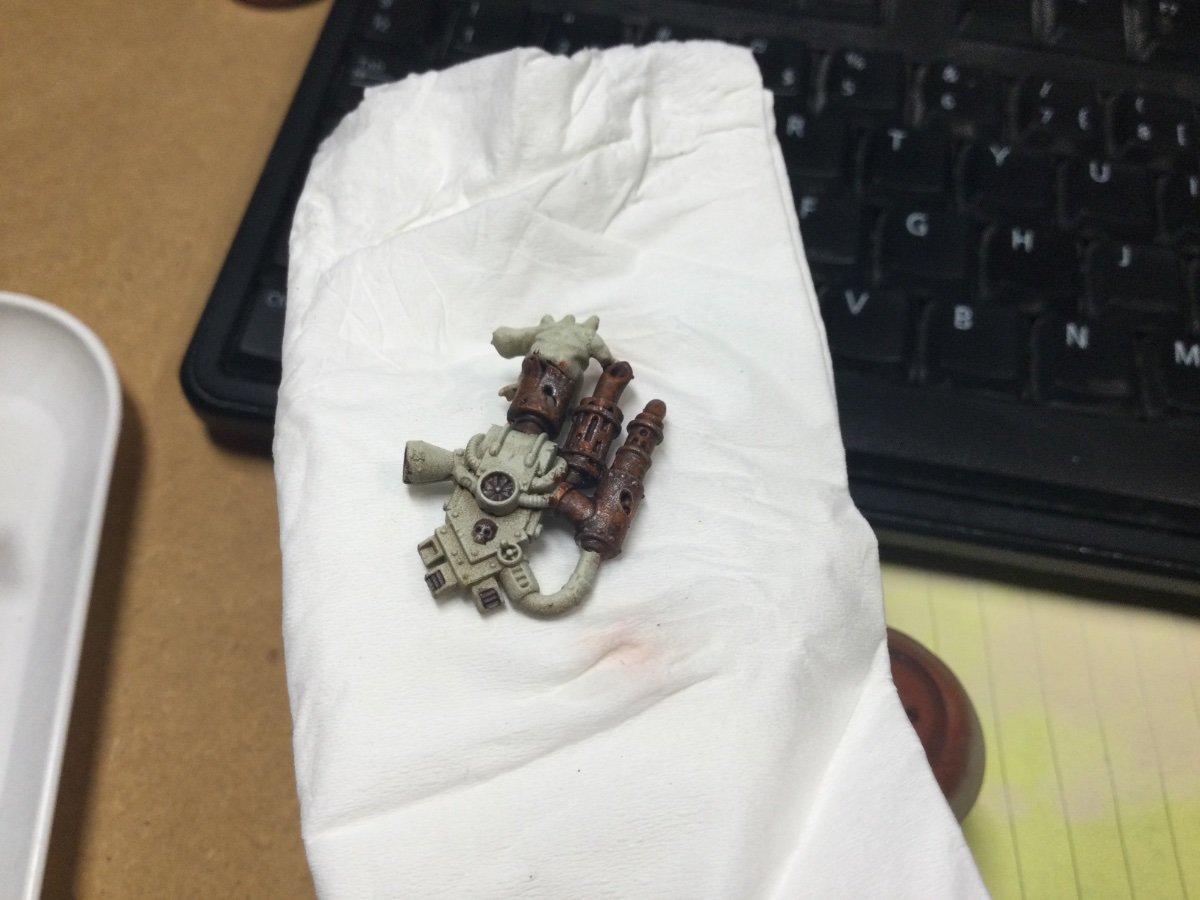
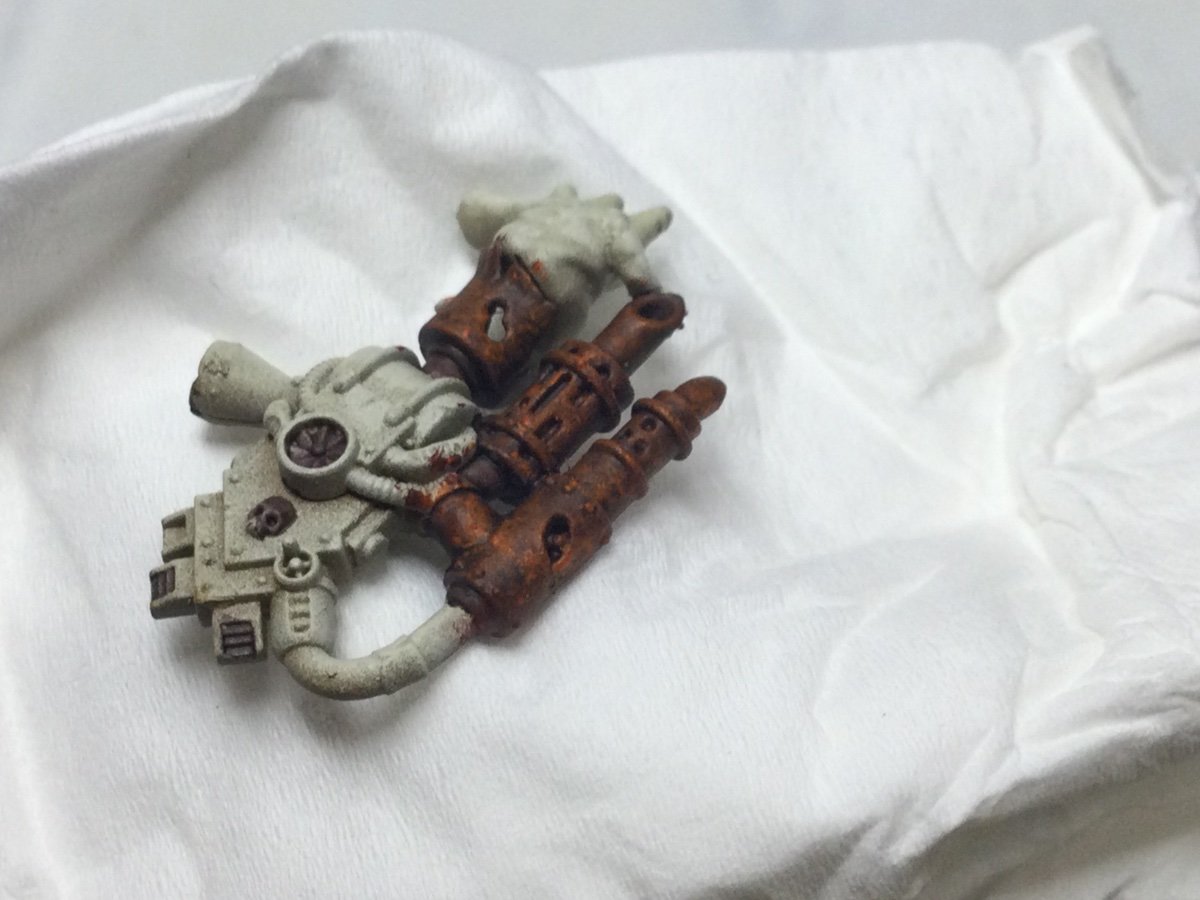
I actually think I might have overdone it a little with the metal in this example. I've reached the picture limit, so I'll upload my terminator guy to the comments, so you can see another example on his weapon and how it very much "reads" as metal, even at a distance.
I've almost finished this step on the entire kill team by now, so there's very little left I can convince myself that I need to do before I "have" to get to grips with the oil washes
Edited by Antarius

1 Comment
Recommended Comments
Create an account or sign in to comment
You need to be a member in order to leave a comment
Create an account
Sign up for a new account in our community. It's easy!
Register a new accountSign in
Already have an account? Sign in here.
Sign In Now