Blackcadian Posted December 2, 2015 Share Posted December 2, 2015 Thanks a lot for the cool batreps! I enjoyed them very much just like the pics (moar plz)! Good luck in the campaign! Link to comment https://bolterandchainsword.com/topic/316227-uveron%E2%80%99s-renegade-and-heretics-battle-reports/page/2/#findComment-4241323 Share on other sites More sharing options...
Warsmith Uveron Posted December 3, 2015 Author Share Posted December 3, 2015 So in a few hours I will be playing my first game against a Haemonculus Covens. His list is quite small composed of two formations: Scalpel Squadron - 2 Units of 5 Wracks - each with a dedicated Venom Transport Dark Artisan - 1 Haemonculus, 1x Cronos, 1x Talos Quite the scary little list. To units of Wracks that will drop in on the first turn and shoot me up, then 2 Monsterus Creatures that with the Homunculus are going to be quite difficult to kill. This list is going to be able to scythe though my infantry, but pose little to scare my tanks. Taking out the Venoms will require S4 or higher weapons. Thankfully both the Chimera should have the Heavy Bolter shots to be able to bring them down, and once they are down the Wracks can be targeted by the S3 Small Arms fire. Now the Dark Artisan unit… this is going to be tricky, with a majority Toughness of 7, the unit is immune to the Small Arms fire in my army that in the past I have used to wound MC’s. Even the Heavy Bolters is only hurting it on 6+’s which will be a problem. But saying that I have one weapon that will cause easy damage to the Unit. The Medusa! And given that this unit has to move across the table I should have a few turns to lob pie-plates of death at the squad, now one perfect hit could do 3 wounds which can get rid of one of the Monsters in one shot. If this doesn’t work then it’s going to be along game... I just not need to get to worried and concentrate on shooting up the Wracks and grabbing objectives. I am in a quandary when it comes to Warlord Traits… One side of me thinks it will be good to keep on with my standard push for the Tactical Traits, but I think the chance of getting Master of Ambush or Conqueror of Cities from the Strategic Traits makes me think I should use them… If I infiltrate then I will have my infantry outflank and appear in the Opponents Deployment zone and give me lots of space and table control against the Monsters.. Stealth in Ruins will help me keep my infantry hidden and alive against the Venoms. Looking forward to this game, always have a great time playing this opponent. He normally plays an Imperial Guard Force so I suspect he has the edge when it comes to understanding each other’s armys. Going to be a difficult game! Link to comment https://bolterandchainsword.com/topic/316227-uveron%E2%80%99s-renegade-and-heretics-battle-reports/page/2/#findComment-4242381 Share on other sites More sharing options...
RolandTHTG Posted December 3, 2015 Share Posted December 3, 2015 Ooof. That is a nasty list. I never use the book Traits, so I can't help you with that, but Good Luck! Link to comment https://bolterandchainsword.com/topic/316227-uveron%E2%80%99s-renegade-and-heretics-battle-reports/page/2/#findComment-4242486 Share on other sites More sharing options...
Thedarkprincesnun Posted December 3, 2015 Share Posted December 3, 2015 One thing I will tell you is the cronos in the dark artisen formation boosts the units feel no pain by 1 so the talon has a 4+ fnp which has the potential to be very annoying Link to comment https://bolterandchainsword.com/topic/316227-uveron%E2%80%99s-renegade-and-heretics-battle-reports/page/2/#findComment-4242500 Share on other sites More sharing options...
Warsmith Uveron Posted December 4, 2015 Author Share Posted December 4, 2015 Overview, I Won, Game was great fun. Haemonculus Covens were great fun to play against... I had some great luck, but more unfortunately my opponent had some very poor dice-rolls on key turns. Game Set-Up. We played Maelstrom of War ‘Cleanse and Control’. We played again on a on a 4’ by 4’ table as it is a 500pt game. (The Custom in our Gaming Club). For my Force, I rolled the ‘Master of Ambush’ General Trait, and my Mutants got ‘Horns, Claws and Fangs’. So they would have to charge if an opponent was within 12, but did Hammer of Wrath hits when they charge (and +1 S at that as well). The Game. I won the roll of and deployed first with my Command Squad in a Ruin with an objective, the Tanks around the Ruin. And then infiltrated the mutants and Platoon Command Squad on to of two objectives on the left hand side of the table. In an attempt to force the deep striking units to stay quite a distance away. My opponent deployed his Dark Artisan formation in some woods on the edge of his zone. Turn one, had my tanks move slightly to get in LOS of the Dark Artisan unit. And then I shot the Medusa gun and the heavy bolters at the unit, and did one wound. As I was holding 3 objectives and my opponent had none I was able to score the Supremacy objective, and secure objective giving me 3 victory points. On my Opponent Deep striked his Venoms in they both landed perfectly around the mutant unit, the Wraks got out, but in a turn of bad luck that was repeated throughout the game the Dark Artisan squad only managed to move though cover 3” (and then ran 1”). His venoms shot the mutants and he killed 4 of them, they passed their moral check and that was the turn. I cannot recall what tactical objective he achieved but he scored a victory point. Turn two, one of my Chimera moved forward to secure an objective, The Platoon Command Squad moved closer to a unit of Wraks to bring all the lasguns into Rapid Fire Range. In my shooting phase the Madusa shot the Dark Artisans and was able to destroy the Talos engine. The Heavy Bolters on the Chimeras shot at one of the Venoms and was able to take a hull point of it, Lasgun fire then killed a Wrak in one squad squads, and a Frag Grenade thrown at a Venom killed a Wrak in the other squad. The Plasma gun in the Command squad exploded killing the Disciple. My Mutants then charged the Venom attempting to kill it with Hammer of Wrath hits, but they did nothing. In the Covens turn the Dark Artisans moved up the table but again only rolled a 2’ for their run. There advance was very slow. In the shooting phase the venoms shoot up the mutants killing all but one, who promptly started to run away. The Wraks then charged the Platoon Command Squad, overwatch killed nothing. The Wraks killed 8 Renegades.. The Renegades then killed one Wrak and the First Mate (the Demagogue that is) killed another Wrak. Thankfully the Icon of Chaos saved me from taking the moral check. He was able to score 2 victory points for securing an objective and causing me to fail a moral check. Turn 3, the Mutant failed to rally. Everything stayed still, in the shooting phase the Medusa missed. The Chimeras shot at the Venoms and was able to destroy one of them. The other missed completely. In the Assault phase the Wraks killed all but one of the Renegades, who promptly killed a Wrak as did the First Mate. I lost the combat again, but again the Icon stopped me from running. I then was able to score Big Game Hunter and Overwhelming firepower. The Coven then advanced again the Dark Artisans moved closer, the Venoms shot at the command squad and killed all but the Arch-Demagogue. The Dark Artisans assaulted one of the Chimeras and wrecked it, and the Wrakes finished off the Platoon Command Squad. Turn 4, The Mutants ran off the table. The Renegades from the wrecked Chimera advanced on where the wraks were following there consolidation. The Medusa fired at the Dark Artisans and did two wounds to the Homunculus. Tried to finish it off with the heavy bolters but it failed. Lasgun fire into one of the wraks squad killed another.. (Leaving a squad of 2, and squad of 3). I wasn’t able to score any victory points. The remaining members of the Coven then move towards the Renedages who were in the open. The Venom tried to finish off the Arc-Demagogue, he took two wounds but was ok. In the Assault Phase the Dark Artisans failed to charge the Renegades, and one of the 2 remaining wraks was killed by overwatch fire… he then killed to renegades, but then they killed the remaining Wrak. Turn 5, The remaining Renegades got out of the surviving Chimera and positioned themselves to shoot at the remaining 3 Wraks, the other Renegades moves towards that squad. The Medusa fired at the Dark Artisans and missed, the heavybolters on the Chimera did nothing to the Vemon. (Making its saves), and the lasgun fire killed the last 3 Wraks. I was able to ern the No Prisoners objective. In the Covens turn the Dark Artisans advanced on the remaining renegades and destroyed them in assault. The Venom failed to kill the Arc-Demagogue. Post-Game thoughts: End of Game, I had scored 11 against the 4 of the Homunculus Coven. Major Victory, but I was very very lucky. The Dark Artisans never made a good move though cover roll, as such they moved slowly up the table, failed charges twice when needed and because of this the largest section of his army did nothing but soak bullets. Even with that his venoms and Wraks did work destroying my squads, and if I had been less luck with the tactical objectives it would have been his game. Worth a special mention today was the Demagogue in the Platoon Command Squad. Sure he has 1 wound but he does have 3 attacks on his profile and WS 3 as standard. Not sure about spending the points on Carapace Amour, I think a power weapon will be fun.. But may be just the Covent of the Khorne would help. I also want to mention the Medusa. It’s a very scary gun. But BS 2 makes it miss a lot, so I think I may have to face the fact that it cannot be relied upon to destroy Monsters. They are small targets, but saying that there is a reason the Medusa is cheaper than the Basilisk and it does basically the same job. Link to comment https://bolterandchainsword.com/topic/316227-uveron%E2%80%99s-renegade-and-heretics-battle-reports/page/2/#findComment-4242916 Share on other sites More sharing options...
K0rtmer Posted December 4, 2015 Share Posted December 4, 2015 Well done, Uveron. I'm enjoying your battle reports a lot. And good on you for winning all of your first three games! Link to comment https://bolterandchainsword.com/topic/316227-uveron%E2%80%99s-renegade-and-heretics-battle-reports/page/2/#findComment-4243043 Share on other sites More sharing options...
Thedarkprincesnun Posted December 4, 2015 Share Posted December 4, 2015 Nice victory over the DE. Must admit I've always struggled vs them with csm Link to comment https://bolterandchainsword.com/topic/316227-uveron%E2%80%99s-renegade-and-heretics-battle-reports/page/2/#findComment-4243125 Share on other sites More sharing options...
Warsmith Uveron Posted December 4, 2015 Author Share Posted December 4, 2015 Thanks everyone for the Kind words, I hope that everyone building some realistic views on this force. I know the Renegades and Heretics is a little used army, and a lot of the tactical guides out there are based on theoryhammer not actual games. Today I should be playing a game against some Orks, against a veteran Ork Player. His list is composed of: 1 Pain Boy, 5 Burna Boys 2 units of 10 Shoota Boys in Trukks. 12 Grots 1 Promethium Relay Pipe. It’s quite a list, has a MSU quality that is matched by my force, and the Burnas with the relay pipes will be very aggressive on our typical 4’ by 4’ table that we use at this point level. Unlike the last three games I don’t have a single unit that I can point at and say ‘that’s a problem’, but in an odd turn of events (esp for ORKs) every unit is of a better quality than mine. The Shoota Boys are quite the threat. They will be racing up the table and the humble shoota itself is going to be quite a scary weapon against my tanks and infantry. 20 Shoota shots should put about 2.5 glancing hits on the side armor of my Chimeras or Medusa. So I could be very unlucky and lose both Chimeras early in the game to an aggressive truck rush, and then my infantry will be easily gunned down with his other weapons. Ork Weapons are just about perfect to be very scary to this list, they are not built to take out MEQ’s so are not ‘wasting points’ in ability’s they do not need. But on my side, once the Trukks are out of the way, there isn’t a unit that my standard troops cannot hurt. So removing them will be a top priority, so if I can I will have the Heavy Bolters target the Trukks, and then the Medusa can initial shoot at the Truckks, but as soon as it can I will get more benefit shooting up the Burnas who with torrent will be a pain. For General Traits, I think that it’s going to have to be Tactical Traits, the campaign is based on Victory Points so if it gives me an edge. And against another MSU style list, I think I will need play smart. Now there is a chance I will get a second game in with the other dark elder player in the league who is running a Wych Cult, not sure what’s in the list I think its some Jet-Bikes, a pair of Venoms with some Wych’s riding inside. The Game plan for this list is about the same as yesterday, but without the worry of Monsters. Not going to spend a huge amount of time thinking about that game as I expect not to play this game today. Link to comment https://bolterandchainsword.com/topic/316227-uveron%E2%80%99s-renegade-and-heretics-battle-reports/page/2/#findComment-4243364 Share on other sites More sharing options...
Thedarkprincesnun Posted December 4, 2015 Share Posted December 4, 2015 Good look vs Orks in my experiance they really hate taking Leadership tests so make them take them. I've faced them quite a bit with my csm and I've found if you can hit them hard enough and back it up with some decent close combat they fall pretty quickly. I know what you mean by Renegades being a rarely used army. I actually consider them much better than guard after all with Master of the horde out of 2 troop choices we can get 300 guys lol Link to comment https://bolterandchainsword.com/topic/316227-uveron%E2%80%99s-renegade-and-heretics-battle-reports/page/2/#findComment-4243461 Share on other sites More sharing options...
Warsmith Uveron Posted December 5, 2015 Author Share Posted December 5, 2015 Overview, Another great Game, once again because of some good luck at the correct moments I was able to get a win; although Victory Points made it appear like a huge win the game did turn on a number of key points. Game Set-Up We Played Maelstrom of War ‘Contact Lost’, we played again on a on a 4’ by 4’ table as it is a 500pt game. For my Force, I rolled the ‘Master of Fate’ General Trait, and my Mutants got ‘Horrific Disfiguration’, so they caused Fear but caused all friendly units within 6” of the Unit to have -1 Leadership. The Orks were using the Ork Horde Detachment, and had the ‘Might is Right’ warlord trait, (+1 Strength). I have no photos of this game as I forgot, but we played on a Realm of battle table, with a set of ruins in the center of the table with some fortifications around them. Objectives were placed in a 5 pointed star around the ruined factory with one in the center of the table. The Game For the first time this league I failed to win the roll of, my opponent deployed his truckks on either side of the Promethean pipes that he put against the front edge of his deployment zone. I placed my two Chimeria in front of the Medusa to ensure its safety in the first turn, the Mutants sat on one flank and the Platoon command squad on the other. The Command Squad started between the two Chimeras. In the first turn the Ork player pushed both his Trucks forward, the rest of his army hid behind the Pipelines. The Shoota Boys and the trucks shot at the Mutants on one flack, and the Platoon Command Squad on the other. 3 Mutants died and 2 from the Platoon Command squad, the Mutants made there LD check. His only tactical objective was to secure the location in the center of the table. Then in my turn the Mutants and Platoon Command Squad moved forward to secure two objectives and hide behind some barricades. The Chimeras moved forward to move closer to center objective (which also was my only tactical objective as well). The Medusa fired at one of the trucks and missed. Each Chimeras targeted a truck, and I immobilized and glanced one, and glanced the other. The Plasma Gun from the command squad then immobilized the other truck. Turn 2, The Ork shoota boys moved out of the trucks, the squad on the mutants side moved to secure the central objective, the other group moved to get close to the Platoon Command squad. The Trukks shot at one of the Chimera and scored a glancing hit. The shoota’s from the central group shot the Command Squad killing two of the disciples. The other shooters shot at the Platoon Command squad, they killed two renegades then charged in. In overwatch the Platoon Command Squad killed two Orks. In Close Combat the Renegades having the Initiative over the Orks were able to kill 2 more, they then killed 6 renegades who did not run away because of the Chaos Icon. He was able to score 2 victory points by securing objectives. In my Turn I kept both of the Chimeras Still, pivoting them slightly to get the lasgun arrays in LOS to the squad of Orks who had taken the central objective. In the shooting Phase the Madusa shot at the burner boys who were hiding behind the Promethean pipes. It hit two burners and killed one. Next the Chimeras shot the trukks. And did nothing. The Lasguns arrays and two guys from the top-hatch shot at the Orks in the center of the table. 5 Orks were killed in the hail of small arms fire, they failed there moral check and ran back to the Promethean pipes, the command squad then started to ran to secure objective at the center of the table. Not wanting to put my warlord in range of the burners the Arch-Demagogue ran in a different direction and hid out of range of the Orks. In close combat I was able to kill two Orks. He killed 4 renegades; 3 Renegades were left the flamer, one with the Chaos Icon and the Demagogue. I scored 2 victory points for securing two objectives. Turn 3, the fleeing Ork shootas Rallied finding comfort in the Promethean pipes. The wartrukks shot again at the Chimeras and did nothing (Marking the start of a long and useless shooting war between these two units). The Burna Boyz used there torrent burners to wipe out the command squad. In Close Combat the Orks killed the last two Renegades and I killed an Ork. Two Orks Remain, and the Demagogue. In my Turn I moved on Chimera up the table to secure an objective. It then shot at the wartruck on the left flank and wrecked it finally. The Other Chimera shot at the other Wartuckk but missed. The Arch-Demagogue shot from the top-hatch and killed a grot. The medusa Fired at the Burners and missed. Because I destroyed the Wartuckk I was able to score two tactical objectives, as well as the one it secured. Turn 4, The Orks didn’t move the Burnas tried to cause some glancing hits on my forward Chimera, thankfully they failed to do any damage. The remaining Wartruckk fired at the Chimera and did nothing. In the Assault phase the Orks landed 2 wounds on the Demagogue who made both his saves. He was unable to kill an Ork. In my turn the Chimera on the right flank moved up to 1’ away from the remaining Wartruckk. At the top of the shooting phase the medusa finally landed a hit on the Burners and scored 4 wounds, 3 died the other passed his cover save which caused the Promethean pipes to explode. Killing the last 2 Burners. Leaving the Painboy alone. (I have to say I love the visual of the Shell landing on the pipe and exploding in a larger than normal blast) anyway, I shot at the painboy with the Heavy Bolters on the Chimera and some small-arms but didn’t manage to put a wound on him that he didn’t save. The other Chimera shot up the Wartrukk for no effect, and then some small-arms from the Chimera killed 3 grots. In the assault phase the battle between the Orks and the Demagogue carried on with no result. I scored two victory points for objectives held. Turn 5. The Pain boy moved towards one of the Chimeras, the Wartrukk shot at the Chimera and didn’t cause any damage. In the assault Phase the Painboy charged the Chimera and it was able to cause two glancing hits. And finally in the other combat the Demagogue killed a Ork boy, the remaining Ork failed his moral check and the Demagogue ran him down. In my turn he moved up the table, the Medusa shot the grots, and along with small-arms fire from the Chimera all but one of them were killed. The Chimeras missed the Wartrukk, and then the Demagogue charged the Painboy, who in a great instantaneous combat resulted in every dyeing. I was able to secure another objective, and pick up Kingslayer (along with slay the warlord) And at this point the game ended. I scored 10 Victory Points to 4 on the Ork side. Post-Game thoughts: It was a very fun game. I was lucky, but my army had the edge on this one. Having 2 extra units to hold objectives with this mission is a huge boon. I was very scared of the Shoots at the start of the game but I forgot that they only had an 18” range which I didn’t count on and it did let me get the Chimeras into range to cause some problems. Once again the star unit for me was the Demagogue. I think yesterday’s question about the Carapace amour has resolved itself, yes it’s worth it. But still think the power weapon is bad idea. Does anyone have any questions about how key things with this army have been working out? Does anyone want me to focus some time talking on a part of the game or anything? Will most like have a post here in a few days about how I am expanding the list? Not sure when the next game will be, got to try and finish arrange games with some of the other players in the league. Link to comment https://bolterandchainsword.com/topic/316227-uveron%E2%80%99s-renegade-and-heretics-battle-reports/page/2/#findComment-4243893 Share on other sites More sharing options...
RolandTHTG Posted December 5, 2015 Share Posted December 5, 2015 Congratulations on the win! Which power weapon do you have on the Demagogue? I think with the measly Strength of regular humans and your meta that he should get a powermaul if he doesn't have one already. Link to comment https://bolterandchainsword.com/topic/316227-uveron%E2%80%99s-renegade-and-heretics-battle-reports/page/2/#findComment-4244107 Share on other sites More sharing options...
Warsmith Uveron Posted December 5, 2015 Author Share Posted December 5, 2015 Congratulations on the win! Which power weapon do you have on the Demagogue? I think with the measly Strength of regular humans and your meta that he should get a powermaul if he doesn't have one already. I don't run a power weapon on him at the moment, was thinking of a Powermaul. But I think I will not worry about it. Its not worth the extra cost on a 1W guy. Link to comment https://bolterandchainsword.com/topic/316227-uveron%E2%80%99s-renegade-and-heretics-battle-reports/page/2/#findComment-4244337 Share on other sites More sharing options...
Thedarkprincesnun Posted December 5, 2015 Share Posted December 5, 2015 Nice battle report good job on slaying the foolish xenos scum. May the Dark Gods continue to bless you with victory Link to comment https://bolterandchainsword.com/topic/316227-uveron%E2%80%99s-renegade-and-heretics-battle-reports/page/2/#findComment-4244403 Share on other sites More sharing options...
Warsmith Uveron Posted December 8, 2015 Author Share Posted December 8, 2015 Well I should be playing a game tomorrow against a Blood Angels Player. He is a newer player, so not going to have a pre-game planning post, I will try and have a write up shortly after the game with the usual talk about how units did.EDIT: Because of work, the game has been pushed back to Thursday, trying to organise a two more games before the end of the league round. Link to comment https://bolterandchainsword.com/topic/316227-uveron%E2%80%99s-renegade-and-heretics-battle-reports/page/2/#findComment-4246318 Share on other sites More sharing options...
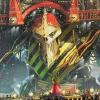
Warsmith Uveron Posted December 11, 2015 Author Share Posted December 11, 2015 As I mentioned on my last post, today I played the Blood Angels player in our League. I believe that this was his 3rd ever Warhammer 40K game so I will not run though this as a close tactical analyses of my list. But will try and write up the game all the same. My opponent was playing a Blood Angels list that looked basically like this:Techmarine 5 Death Company with Jump Packs 5 Scouts with Sniper Rifles 5 Tactical Marines, One with Flamer.+ Razorback with Twin Linked Lascannons Baal Predator: Flamestorm Cannon. Game Set-UP. We played Maelstrom of War ‘Cleanse and Control’. We played again on a on a 4’ by 4’ table as it is a 500pt game. (The Custom in our Gaming Club). For my Force, I rolled the ‘Master of Fate’ General Trait, and my Mutants got ‘Horrific Disfiguration’, so they caused Fear but caused all friendly units within 6” of the Unit to have -1 Leadership. The Blood Angels were using the Baal Strike Force, he rolled up the ‘Heroic Bearing’ warlord Trait giving everyone within 12” would have Fearless. You can see the photo of how the table was set-up. I deployed first and set up aggressively to rush the center of the table and secure the objectives in the towers. The Medusa on one flank, the Chimeras in the center, the Command Squad with the hid between the Chimeras. The Comand Platoon spread out on the other flank, and the mutants hid back in the woods on an objective. He deployed out of line of sight of most my army, his scouts took up a sniper nest in the further away of the two towers. Turn 1: the Blood Angels managed to seize the Initiative and ran both his tanks towards me. The Baal Predator stopped 1’ away from my Command Platoon. His lascannon shot one of the Chimeras and glanced it, the snipers shot at the Command Squad but they passed all the saves they needed to make. In my Turn the Medusa moved into line of sight of razor back, the Chimeras stayed still, and the command Platoon spread out to minimize the chance of a template wiping them out, and to secure an objective I needed. The mutants also needed to stay still to secure an objective. In the shooting phase the Medusa hit the razorback destroying the lascannons. The heavy bolters from the Chimeras blasted the side armor of the Predator taking a hull point from it. The Plasma gun from the command squad immobilized the tank. All the small arms that could fire shot at the scouts in the tower killing one of them (I scored two victory points for holding two objectives). Turn 2: The Blood Angels moved forward again, the Razerback RAMED my Chimera shaking it. The Death Company Arrived from reserve landing right next to my medusa. In the shooting phase the death company shoot the side armour of the Medusa with bolt pistols (5 shots) and take of 2 hull points! The snippers shoot at the command squad and kill the plasma gun and the shot gun guy. The Predator kills 5 renegades. (He secures a victory point for holding an objective). Top of my 2nd turn, I draw the same tactical objective twice, secure the objective 6 that was in the tower closest to my army. As such the squad of renegade’s in the shaken Chimera jumps out and grabs Objective 6. The Medusa spins on the spot to face the Death Company, and the Platoon Command Squad moves up the table to get closer to the scouts. In the Shooting Phase the Medusa shoots the Death Company with the Heavy Flamer, and a Breacher Round, and kill 3 of them. The Heavy Bolters from the Chimera shoot the Razor back for no effect. All the small arms open up on the scouts again and kill another scout. I also kill the Predator but cannot recall with what (Hope I did not make a mistake). (I score 2 more victory points for objective 6, twice). Turn 3: The Tactical Marines get out of Razor back, than moves to block LOS to the squad and fires up its smoke launchers. The Tactical Marines shoot at the Renegades who got out of the chimera last turn, and kill all but 2 of them who then break and run away. The scouts shoot at the command squad and kill the banner bearer. The Death Company charge the Medusa and destroy it. (He scores 2 victory points for making one of my units run away and securing an objective). In my turn, I rally the fleeing renegades who run back up the hill. The Mutants push forward and surround the wreck of the Medusa. The Platoon Command moves up the hill to one of the barricades. In the shooting phase every gun that can shoots at the tactical marines killing 1 of them. The others shoot at the scouts for no effect. The Heavy Bolters shoot at the Razor back with no effect, and then the mutants shoot and charge the Death Company. They kill one of the pair, but then the remaining one kills 3 mutants, they faile there moral check and runs away and are ran down by the reaming member of the death company. I score another victory point as the renegades were able to re-secure objective 6. Turn 4: The Tactical Marine move to get in flamer range of the Platoon Command squad, the razor back moves to keep them out of LOS of the Heavy Bolters. The Death Company jumps into the woods holding an objective, almost kills itself but makes the Feel no pain check. The Tactical Marines shoot at the Platoon Command squad and kill 5 of them. The Chaos Icon stops them needing a moral check. The Scouts shoot at the Command Squad, and put a wound on the Arch-Demagogue. (He scores 1 point for securing the objective in the woods with the death company) In my turn, the 2 renegades that last turn ran back up the hill to re-secure the objective got back into the Chimera, and the Arch-Demagogue jumps in the other Chimera. All other units stayed still. The Heavy bolters on one chimera shot at the Death Company and killed him. The second pair of heavy bolter finally killed the razorback. Small arms fire killed 2 tactical marines, and a scout. I secure one victory point for assassinating the squad sergeant of the tactical marines. Turn 5: The Blood Angels retreat into the towers and secure objective 6. The bolters from the tactical squad and the Techmarine open up on the Chimera and take another hull point of it. The Scouts try and finish it off and they do nothing. He scores a final victory point for securing an objective. In my turn I draw the Ascendency tactical objective, I move one of the chimeras to grab an objective the platoon command squad moves to grab the objective the scouts have been holding all game. The heavy Bolters open up on the Tactical squad in the tower and kill all the tactical marines (the Techmarine is still alive). I assault the scouts with the Command Squad, the Scouts kill 2 renegade’s, I killed a scout the Icon of Chaos keeps the unit from taking a moral check. (I score 2 victory points from the Ascendency objective) Which gives me game. For 8 VP’s to 6. Post-Game Thoughts: Once again the army impressed me. Having so many guys on the table gives me a great sense of control. But it appears to be fun to play against as I am removing lots of models. I saw the first use of the Alternate Ammo on the Medusa today, with it being heavy it could fire it and still use the heavy flamer. But it has to be one of the most risky shots I have ever taken, given the fact it could scatter and well destroy me. Overall I am most impressed with the Chimera, with its lasgun arrays it can shoot at a lot of targets, and the pair of them have been the work-horses of the recent games. Going to have to fight the urge to spam them. Anyway, tomorrow I should be getting in a game with the Eldar Corsairs, it’s a list I have no idea about at all. He is still use the old list, but it should be a very fun game. Expect an update in the next few days. Link to comment https://bolterandchainsword.com/topic/316227-uveron%E2%80%99s-renegade-and-heretics-battle-reports/page/2/#findComment-4249207 Share on other sites More sharing options...
Blackcadian Posted December 11, 2015 Share Posted December 11, 2015 Awesome bat rep and great pictures! Looks like your opponent did quite well for his 3rd game of 40K! Your boards also look quite nice, I'm starting to like the chaos towers! Clever use of the Medusa by the way, I hadn't thought of that before. Link to comment https://bolterandchainsword.com/topic/316227-uveron%E2%80%99s-renegade-and-heretics-battle-reports/page/2/#findComment-4249276 Share on other sites More sharing options...
Warsmith Uveron Posted December 11, 2015 Author Share Posted December 11, 2015 Awesome bat rep and great pictures! Looks like your opponent did quite well for his 3rd game of 40K! Your boards also look quite nice, I'm starting to like the chaos towers! Clever use of the Medusa by the way, I hadn't thought of that before. The Medusa is a very versatile unit, I have been using it very aggressively like a Tank Destroyer. Its just a little Unreliable.... I also like the Chaos Towers, The ones at the store haven't been glued together so having units on the mutlipul levels is great!. The only issue is the windows are slightly high so its hard to draw LOS to and from the Towers. Link to comment https://bolterandchainsword.com/topic/316227-uveron%E2%80%99s-renegade-and-heretics-battle-reports/page/2/#findComment-4249572 Share on other sites More sharing options...
Khornestar Posted December 12, 2015 Share Posted December 12, 2015 How many degrees is a blood angle? Link to comment https://bolterandchainsword.com/topic/316227-uveron%E2%80%99s-renegade-and-heretics-battle-reports/page/2/#findComment-4250004 Share on other sites More sharing options...
Warsmith Uveron Posted December 12, 2015 Author Share Posted December 12, 2015 How many degrees is a blood angle? I have No idear what you are talking about Anyway.. Today I played a game against the new Eldar Corsairs list. It was quite the Game, the Eldar Corsairs list my opponent was using was based on units picked one the old list. Which did mean that it was a very scary list at 500pts. His list was the following. 5 Corsairs. In a Falcon with a Shuriken Cannon Turret. 1 Warp Hunter, with a Shuriken Cannon (It also has a D Weapon, that rocks D3 D blasts, Barrage. Or a D Flamer) 6 Windriders. 6 Scatter Lasers (with the Champion being the Warlord) Game Set-Up. We Played Eternal War: The Relic, with Vanguard Strike Deployment. For my Force, I rolled the ‘Master of Ambush’ General Trait, and my Mutants got ‘Horrific Disfiguration’, so they caused Fear but caused all friendly units within 6” of the Unit to have -1 Leadership. The Elder Rolled up Night Attacker. The Relic was at the center of the table with a Chaos Tower one side and a scattering of other AOS stuff around the table. The Game I won the roll of a deployed first, I put my chimeras 12” apart on my deployment line, and placed the Medusa back in a ruin. The Eldar player placed his falcon behind the Chaos Tower. For Infiltration I placed the Command squad on the other side of the Tower. The Platoon Command Squad on the Relic, and the mutants in some woods in the elder deployment zone. In the first turn I moved the Chimeras forward and the Platoon Command Squad back towards my deployment zone. The command squad moved around the tower and then shot it with the plasma gun and a krak Grenade. I scored a pen and shaked the transport. In the Eldar turn the Falcon unloaded and moved away from my command squad. The Corsairs then shot the command squad with a Plasma Grenade and some small arms. He killed the Plasma Gun and the shot-gun guy. Turn 2. The Chimeras pivoted to shoot at targets, (One without targets popped its smoke launchers), the Platoon command Squad moved back again with the Relic. Mutants advanced deeper in to the Eldar Deployment zone. The Command squad hid in the tower. In the shooting phase the first Chimera shot at the Corsairs and killed all but 2 of them. The Medusa shot a Breacher shell at the Flacon hitting it and destroying the Shuriken Cannon. In the Elder Turn the Windriders arrived on one flank, the Warp hunter Deepstriked. In the shooting phase the D cannon killed the Medusa, the Corsairs shot at the command squad and killed the banner bearer, the Windriders shot at the mutants and killed all but one of them, they failed the moral check. Turn 3. One Chimera moved to try and get shots at the rear armor of the Warp Hunter. The other moved to shoot at the Windriders, the Platoon Command Squad fell back and brought the relic into my deployment zone. The Arch-Demagogue went after the last 2 Corsairs. In the shooting phase he though a grenade and killed one of them. All other shooting was ineffective, in the assault phase the Arch-Demagogue assaulted the remaining Corsair and killed him. The Eldar then moved the Warp Hunter up to the Platoon Command Squad, and were joined by the Windriders. The flacon moved to shoot at the Arch-Demagogue. In the shooting phase they wiped out the Platoon Command Squad and the Wind Riders moved to secure the relic. Turn 4. The Two Chimera attempted Rams and Tankshocks. One tried to Ram the rear armor of the Warp Hunter, but I rolled armor pen. The other pushed the wind riders of the relic. In the shooting phase I didn’t hurt any of the windriders, or the Warp-Hunter; but the Arch-Demagogue threw and Krak Grenade and destroyed the Falcon. The Chimera behind the Warp-hunter managed to shake it. In the Elder turn the Warp-Hunter moved, the windriders destroyed the Chimera on the Relic the guys pilled out. Turn 5. The remaining Chimera Pivoted, the Renegades got out the Transport and moved forward. The other Renegades moved around the wreck of the old Chimera. In the shooting phase they all shot at windriders and killed one of them. In the Elder Turn they shot and wiped out the Renegades closest to the objective. Turn 6. I once again tried to kill any Windriders and failed, the elder moved the relic closer to their deployment zone, but didn’t get it there. Game ended with the Eldar having two victory points (Line Breaker & First Blood), I had one (Line Breaker). Post-Game Thoughts: A crazy game, was not expecting the Destroyer Weapon, and it kind of ate my army, and all flavors of Eldar do a lot better at the Eternal War missions. Otherwise not sure what I would have done much differently in this game. At some point in the next few days I will have a much deeper review of this month’s games. Link to comment https://bolterandchainsword.com/topic/316227-uveron%E2%80%99s-renegade-and-heretics-battle-reports/page/2/#findComment-4250013 Share on other sites More sharing options...
Warsmith Uveron Posted December 12, 2015 Author Share Posted December 12, 2015 As I mentioned in yesterday’s post I was going to do a more detailed review of each unit I used. With 6 games under my belt I hope that I can approach this in a way that minimizes the effects of luck. I have given each unit a Grade, this is based both on my feelings of potential, -- Renegade Command Squad Overall rating: B- For reference I was running: Renegade Command Squad (120pts) [Carapace Armour, Frag and Krak Grenades, Lasguns, Banner of Hate, Command Net Vox, Plasma Gun] For the first 3 games I was using them as a holder of objectives in my deployment zone. And to bring the Banner and Command Vox into the best use. This worked well against the Grey Knights, but mostly because they stayed out of the way of the Plasma Gun. In the Game against Tau they had a bit more use but again were mostly used to keep the moral of the rest of the army in check. Then against the Dark Elder they were almost totally wiped out. From this point on I used them in a much more aggressive fashion, which got the plasma gun into a place to make an impact in the last 3 games. Going forward I need to find the balance between these two styles. Next month this unit is going in a Chimera for some extra protection. Renegade Infantry Platoon- Command Squad Overall rating: C+ For Reference I was running: Platoon Command Squad: 15 Renegades, [No-Armour, Lasguns, Frag Grenades, Chaos Sigil, Flamer] Demagogue [Carapace Armor] This Squad was a very powerful little unit, in most games they took a long of causality’s. But were normally the ‘core’ of my battle line. From securing objectives to producing a mass amount of small-arms fire or tying up units in close combat. They never really won the battle alone but with the amount of bodies on the table they were very resistant. I am not sure how I could get more out of the unit, but I expect more familiarity with this unit next month will see improvements in its use. Renegade Infantry Platoon- Infantry Squad Overall rating: C For Reference I was running: 10x Renegade w/ Lasgun [Frag Grenades, Lasgun] I ran two of these squads. They did exactly as I expected. 10 bodies with small-arms can put out a lot of shots but with BS2, these shots do not do a huge amount alone. But for 30 points, they score victory points in a very efficient way. Renegade Infantry Platoon- Chimeras Overall rating: A- For Reference I was running: [Heavy Bolter, Heavy Bolter, 2x Lasgun Arrays, Searchlight, Smoke Launchers] I ran two of these along with the Infantry Squads. Now to face facts, I made a mistake with the 2 Heavy Bolter set-up. I was missing high Strength Firepower, and the Multi-Laser would have been nice to have. That being said there were a few times that the Heavy Bolter with its AP4 helped, and I do not think given the Xenos heavy Meta of this league that I will be getting rid of them just yet. But I am going to try and get some spare turrets with Auto-Cannons for Multi-Lasers on them. Otherwise these units were the workhorse of the list, they put out a lot of firepower, were mobile when I needed it to be, and they survived very well. Renegade Mutant Rabble Overall rating: C For Reference I was running: 10x Mutant w/ Autopistol About the same as the Renegade Infantry Platoon, I felt I had to run them as a CC variant to prepare myself for the days they just want to rush forward madly. And because of that, that’s kind a how I used them. But other than that they run about the same as the Infantry squads. They had their moments but mostly they just held objectives and died in close combat. When the squad gets bigger they will start to develop the ability to become more of a problem. Renegade Medusa Overall rating: C+ The unit that I had the highest hopes for, in the first game when it was destroyed my moral sank, but I still did very well without it. That was the story of the whole month, it was a huge threat and was targeted with much priority that just let the Chimeras get the job done. -- At some point soon I will create a post about my 800pt list. Link to comment https://bolterandchainsword.com/topic/316227-uveron%E2%80%99s-renegade-and-heretics-battle-reports/page/2/#findComment-4250321 Share on other sites More sharing options...
Serrated_Sun Posted December 12, 2015 Share Posted December 12, 2015 Have to say I've really enjoyed following this thread so far Uveron. It's nice to see how renegades actual fair on the table top as opposed to a tacticia that's all theory. Really tempted to collect a small allied detachment just because after reading your reports they seem an absolute blast to play , can't wait to see how the army evolves over the coming months. Link to comment https://bolterandchainsword.com/topic/316227-uveron%E2%80%99s-renegade-and-heretics-battle-reports/page/2/#findComment-4250534 Share on other sites More sharing options...
Warsmith Uveron Posted December 13, 2015 Author Share Posted December 13, 2015 Have to say I've really enjoyed following this thread so far Uveron. It's nice to see how renegades actual fair on the table top as opposed to a tacticia that's all theory. Really tempted to collect a small allied detachment just because after reading your reports they seem an absolute blast to play , can't wait to see how the army evolves over the coming months. Thanks! I will do my best to keep this thread up. Its my intent to create a full tacticia based on these games after this, but it may be years in the making as I slowly build a collection to let me use all the units.. Link to comment https://bolterandchainsword.com/topic/316227-uveron%E2%80%99s-renegade-and-heretics-battle-reports/page/2/#findComment-4250956 Share on other sites More sharing options...
Khornestar Posted December 13, 2015 Share Posted December 13, 2015 Considering how few players are even using R&H, let alone posting quality battle reports, it's definitely a great resource and fun as hell to check out your battles. Thanks for taking the time! Link to comment https://bolterandchainsword.com/topic/316227-uveron%E2%80%99s-renegade-and-heretics-battle-reports/page/2/#findComment-4250961 Share on other sites More sharing options...
Excessus Posted December 13, 2015 Share Posted December 13, 2015 Indeed! Keep up the good work! :) Link to comment https://bolterandchainsword.com/topic/316227-uveron%E2%80%99s-renegade-and-heretics-battle-reports/page/2/#findComment-4251021 Share on other sites More sharing options...
K0rtmer Posted December 14, 2015 Share Posted December 14, 2015 I second that. Thanks for taking the effort and updating so regularly. Hearing from you is both informative and entertaining. Link to comment https://bolterandchainsword.com/topic/316227-uveron%E2%80%99s-renegade-and-heretics-battle-reports/page/2/#findComment-4251592 Share on other sites More sharing options...
Recommended Posts
Archived
This topic is now archived and is closed to further replies.