Search the Community
Showing results for tags 'Scenery'.
-
Two out of One – something for my plodding along
Bouargh posted a blog entry in Bouargh´s miniatures´ closet clean-up
Hi Folks, This year my 12 MoH pledge includes a plodding along pledge again. Last year was too busy and frantic to consider any possible commitment in a long-term project. But 2026 is (so far) allowing projecting oneself in a (relative) stability. From there come the idea of an excavation site as a series of scenery elements. My Plodding along vow is structured around the MTO scenery ordered last Xmas: Tectonic Drill (oh yeah) and Mechanicum crane (Servohaulers). In order to set these elements in a more global context I have decided to expand my scenery for my Ashland table. Why? Well, first because I am a little bit fed up with City of Death style ruins and I want something a tad different. (While I claim I will do something different I try to forget about the fact that grey ruins and grey ashes are all grey…) Anyway, the Fragdrill will still be a piece of scenery able to jump the gap between the 2 settings. But my second objective has a more “game impacting” purpose: my Ashland is very flat and I want to give some altitude. The drill is a 3-story element, and for balancing it some extra structures such as hills or rock formation will be a good add-on. And I have all this pink Styfoam panels left from the fixing works in the new (rented) home…My third (cherryest on the cupcakest) excuse is to resume a politic of bitz box management too… So, what is the dream scope? - My excavation site will come with the 2 MTO boxed sets - Then I need a mine entrance on the side of a big rocky hill (Mesa type), eventually half buried under grey sands. I aim at a colour shift with some cream rocks in an ocean of ashes - Styfoam - A shanty town for the miners (now disappeared à la “Ghost of Mars”) – some cut Containers will be OK + lots of bitz - A power generator (plasticard and lots of bitz too) - A watch tower, or rather an illumination pole with a watch tower platform (based, here again, mainly on heavy bitz management) - Deposits for fuel, drums and crates - Extra rock formations and/or dunes – Styfoam again So far MTO is still somewhere in a pipe. I have therefore started working on some of the Styfoam elements, essentially for training purposes. Rocky structure and a fairy chimney were produced first. But this is not today’s topic as it has already been show previously. 12 MoH - Cliffhanger - Bouargh´s miniatures´ closet clean-up - The Bolter and Chainsword Today’s topic is starting to work on the dumps. First with Containers. The technique will then be applied to drums and crates later. The first element for the dump is there to break the perspective and offer and half story elevation. A container has been glued and then sawed in 2. Such a barbarity… the missing half is then suggested with polystyrene block just to fit the width x length x height and average silhouette. It is not that relevant all that part will be covered by a tarpaulin made out of medicinal gauze soaked with glue and plaster... The Modus Operandi and many recipes can be found on Youtube, as I do not own the paternity of the idea… The main hesitation came from questioning myself if it was better to set a base of Ashland or a concrete slab (similar to the Killzone Munitorum hub)… I went for the Ashland not because I wanted to fit to the theme and not because I am lazy, but because I am short of plasticard and I want to save it for the PowerGenerator… Therefore, this is not going to look like this The various stages of the assembly can be seen below: - Primed base and halved containers - Polystyrene silhouette glued latter (as spray can paint and solvent melt that stuff) - Slapshop inspired painting of the containers (see Plasma Generators post: A personal insight on Slap Chop applied to scenery - Bouargh´s miniatures´ closet clean-up - The Bolter and Chainsword) - Covering with soaked medicinal gauze - Final painting and small details on the base (spotlights and crates plus drums of various origins) Et Voilà! Of course there is a little miss (I am still on the learning curve I I have burnt some checking steps) : my filler was not exactly cut at the correct size for the back of the containers and I had to cheat a little bit to fill the gaps. I though the gauze would have added more thickness than it does truly. You can still see the difference in height but it used to be worse before parching. Unfortunatly I have soaked the gauze with such a lot of enthusiam that it is almost impossible to remove without breaking something. I'll live with that as I prefer this imperfection to resuming all the cutting and texturing. I am a long way from the goal for this plodding along but this is already my third scenery element for this project, so I would say that so far it is on good tracks. Next steps will probably be a series of parallel projects with the rest of the dumps and starting work on the mine entrance… which already starts growing up from Styfoam: See you later. -
Hi folks. Within my now routinary activity of alternate modelling (one batch Space Opera followed by one batch heroic fantasy), I am in that period of time where Night gobs get the priority over any 30/40k related stuff. There is anyhow an activity that can gather both aspects of the GW universes: Scenery making. Shall my purpose by ultimatly a 40k excavation site, I took the opportunity for practising my techniques of styfoam carving for a piece of scenery that can be used in both setting: a rocky structure. Last week pics where showing something very early in the process, and I have progressed a little bit: The first rocky structure has been completed and plastered. This is a pre sanding view. I will then add texture with another plastering loaded with sand and another layer even more oaded for deposits. Then painting. I have also worked on a fairy chimney that is even closer of the painting step as it received already the first sand (dispersed). And as 40k is never too far away, in the background a first work on my plodding along scenery elements with an early work of an armoured container sawed in 2: how to make 2 out of 1. But this will be for a future contribution. Have a nice week.
-
12 MoH 2026 - a plodding along project
Bouargh posted a blog entry in Bouargh´s miniatures´ closet clean-up
Hi Folks, Last Xmas I did something I never thought I would: I have ordered some MTO stuff, with the Tectonic drill and some Machinery (crane and so on). FOMO drived me. Now that this is comited as a purchase, it is time to plan doing something from that materiel. I have bet the delivery will not be so soon, so it leaves time for planning. And the plan that came to my mind was to increase seriously my terrain collection with some elements to define a mining camp/excavation site. I plan doing a mine entrance on a rocky hill side, some custom power generator using left over bitz, ruins, more rocky concretions and a fuel dump or crates. For ruins I have seized on ebay 1,3 box of Ryza pattern ruins, plus some power fences. I also ahve some Armoured containers from the Hachette collection somewhere. It will help for the fuel dump and more shanty town stuff. For the hill, concretions and mine entry, I have started doing some experiments on the mater last week, with left over styfoam. It is just starting and once dry, some sculpting will start. I have made my first plastering tests on flat hills for the WOrld that WAs and it went OK. So, what could go bad? I have also recoverd my blue stuff to mold pillars and reinforcements for the mine entrance. Still drying though: The next challenge will be the power gen, as it should be largely made out of plasticard. But the real challenge is to keep the project under control: I was already thinking about adding a Necromunda Stronghold or a Necromunda STC habhub... The idea is not to spend much more. So, I have to keep head cool. See you. -
Hi folks. It has been a while since I completed the first 2 buildings of the Volkus Sceney pack. I prepared these 2 repackaged quick fit buildings as my entry for january into 12 MoH 2025. In general I am already owning 2 sets alike, which came with the Vertigus boxed set. It was 9th Ed., correct? When I painted these, I set a more or less stadard PlastCrete colour scheme that I had oportunities to disclose in some early entries of this BLog series. Nothing rocket science: mostly a marked dry brushing with SW grey over Basilicanum grey plus some whithish light dry brush on the edges. Then detailling brass pipes, red doors, cables and skulls... This is what it looked like in this initial iteration, years ago As I own a big amount of terrain now, enough to cover a city fght table probably, I did not wanted to change radically the overall painting feature. I do like homogeneity for my tables, and getting stuff too far away from the main contribution may be too eye catching. But some changes are sometmes welcome. With this in mind I adjusted the distribution of colours only: - instead of going with reinforcing bars in boltgun metal (see pic bellow), I have gone brass - and in order to balance the colours, all brass pipes have went dark boltgun metal. Looks like nothing but it is enough to get these Volkus building giving a hue and a small variation to the overall picture. As I have a moving planned soon, I did not glued these building - these are just snap fitted and will be dismounted before being stored for their big journey. But here nbellow you can see what is the result of this quick and dirty painting for the new iteration of these Volkus sprues: Not the best of my work but considering how busy the current period is, the most finished I could have afforded so far. And as a finishing note, my fav detail of the whole kit: The Volkus scenery bought from Ebay is now complete. time to shift to another project: an Harlequin KT... Read you soon.
-
- 1
-

-
- Scenery
- Sector Imperialis
- (and 1 more)
-
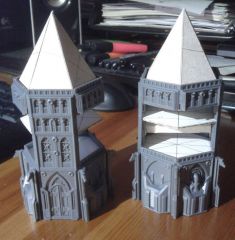
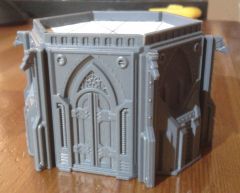
Hi folks. Why Part 1.2? No, you did not miss anything; it is just ythat, as the first building was painted as part of the 12 Months of Hobby Challenge, this blog entry is not really Volkus Part 1. But starting at Part 2 directly woulmd have looked odd. And as Part 1.2 is an intringuing title... It might boost the reader counter! As all the Volkus pieces or terrain this one is no exception to the rule: low to zero custom assembly. It is somehow a very different design mind set vs. old Sector Imperialis sprues. Even if modularity as its pros and cons. It the present case the footprint is the one of a square; not too big though. As an area terrain it make sit well defined. As an above ground struture I am a little bit disappointed by the limited amount of space to set models on the upper parts. less than 20 percent of the floor space potentially available as been traslated to the upper storeys. It might be enough for KT, but, for 40k setting, I am less convinced. I tried this time a slightly different recipe: instead of dry brushing with SW grey, I used Russ grey. The result is a tad clearer than my usual ruins. A tad only as, frankly speaking, the colour difference is not that obvious. Probably due to the final Uµlthuan grey dry brushing that is unifying everything and contributes to dillute the chromatic difference between the 2 fenrisiqn named colour pots. The assembly as been less comfortable then for the first building: the sprue came bended and although I recoverd part of it after a gentle heating, I did not fully recovered a good planar shape for the main side of the building. as a consequence, glue did not fit well when setting the floor and the overall stuff was too flexible. I has to glue the whole " sides to get enough stiffness and avoid the scenery to dismantle once and again. How does it looks now? Well, see by yourself: It is not obvious on the pic bellow, but the floor is not touching the wall from the right of the door to the right corner. Well, now it is, more or less, as I filled the gap with hot glue. But it is not because hot glue has glu in its name that it really glues anything... The most puzzeling stuff in this building? this door that leads to nowhere on first floor: I may eventually fantasy that it will be an achoring point for a balcony or a gantry bridge in a future Volkus environment expansion... But I guess I am conting myself fairy tales... That's it for today. Next will be... I do not know yet. I kit bashed an Archon and I am waiting for some Corsairs and scourges to expand my Ynnari force, so; may be. On the other ahnd I also primed some mysterious sprues that goes with the remaining mysterious base I disclosed a few post ago... See you.
-
- 4
-
-
- Scenery
- Sector Imperialis
- (and 1 more)
-
12 Months of Hobby - November Pledge Completion
Bouargh posted a blog entry in Bouargh´s miniatures´ closet clean-up
Hi Folks, The week has been a productive one and I finally managed to complete all the pledged items and even a little bit more. The 2 henchmen could have been enlisted in a éh painting challenge as they were sorted out very fast. The enlisted Volkus building has also been painted fast. Getting a painrt scheme already well established makes things faster: benefits of being trained upstream I guess. The scheme remains the same as the one I used in most/all my ruined buildings. something very related to the way the building were painted in SW blue at a time the official buildings were card board made and provided in WD magazine. What differ from my previous buildings? Details such as Bolguun metal bitz are vvery limited - being short of paint is also a good reason for this. More gold and copper on windows frames. As skulls are bigger I treated them as architectural items rather than as imperium leal servant skulls embedded in niches... I did not glue the whole building; it makes it easier to store. But fragile. The barricqdes and rumbles were also painted fast. And the little bit more I mentioned is made out of the 2 collapsed florr tiles from the seconf Volkus genuine building; the ones with the AdMech symbol on it. The second building is out of the pledge. But I have it just primed. It will be my occupqtion with Old World's dwarves for the rest of the month. See you.-
- 2
-
-
- Scenery
- Imperial agents
- (and 2 more)
-
Call to arms - Week 10 Progress Report
Bouargh posted a blog entry in Bouargh´s miniatures´ closet clean-up
As a matter of fact, we are rather going to talk of resuming activity rather than progressing at anything. After a 2 weeks break, mainly because I was hoping receiving some purchases of mine (which by the way did not showed off yet...), it is time to activate a contingency plan. There are only 3 and a half weeks left and it would be too short (far too short) to pretend painting a whole AdMech extermination maniple... At least at my current rythm and considering my availability for hobby stuff in Sept. So, let´s activate the plan B. I will basically field as a second vow in the Imperium Strongold the kit bached Scions and the scrap terrain I published in my previous blog entry. And to boost point levels, I will repaint some old stuff. It will gives us: - 3 medium scrap piles at 2 pts each - sub total 6 pts - 1 small scrap pile at 1 pt - 1 unit of 10 Scions at 10 pts - 2 ooP razorbacks (on of these being a proxy) at 5 pts each - subtotal 10 pts - 1 ooP rhino at 5 pts - 1 Leman Russ Exterminator (the first kit) that I used in my SW army under 3rd Ed rules at 6 pts. So a total of 38 pts if I did not misevaluate the point costs. The old LR is a nice kit in fact; really better looking that the current one in my opinion. the turret and accessories gave it a je ne sais quoi that make him more appealing. This or it is nostalgia...-
- 1
-

-
- Call to Arms 2023
- Imperium Stronghold
- (and 3 more)
-
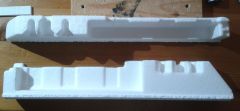
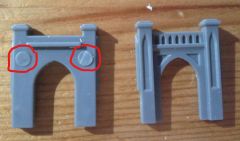
Hi Folks, I lately received a copy of the Bheta-Decima terrain boxed-set. I mainly bought it in order to complete my collection of Sector mechanicus Terrain, adding a fourth Ferromantic Furnace with a big platform and setting more gantries, but this time at intermediate height. Let´s see what comes into the box and how I have ambivalent feelings about the content. 1. What do we have inside? The GW website is exhaustive enough so no need to give too much details. I will focus on what looks like "oddities" to me: - First, the molding quality is uneven between sprues: the straight platforms are clearly aligned (Staright/aligned.. you get it ?) with the older models. No change there. But the round platform looks odd. details may appear being less developped and bottom side is... More about that latter on. - Second, the change of look for the pillars: it is not really rocket design. Clearly it looks like a lazy work here. However one cannot really say that there are less details than on the former pillars. So why this feeling? I guess, at least for me, that it is related to the lack of void areas. These have been filled as pannels and pillars are resulting bulky (I guess on puerpose). But not getting any hollow area leaves a curious outlook to the whole stuff. While the Boarding action terrain had treated these plain areas in a very good looking fashion, here it is not the case. Additionally all accessories have disappeared: so no handrails, not freed cables hanging around or ladders... Instead you have some square add-ons to represent entry points. In the end it is not really a big deal. I found that mounting the handrails has been a painful process both for storage and gaming ergonomy in general. But it looks better on pics for sure. - Third, the Furnace. No change; the same sprue as before. Nothing to add. - Fourth, the specific "objective markers" sprue. You get a substancial amoount of objective markers. They are large, bulky, and may eventually be used as LoS blocking terrain. It is once again less subtle in design than previous Objective markers designed by GW. I will personaly try not to use them as such, rather putting them on other pieces of terrain to give more volume (for example as hatches on STC Ryza bunkers). Shall you look for Objetcive markers, better buy the Hachette "Imperial Objective" spure on ebay or some Gallowdark terrain (Shadowvault is nice for that). They will look better. - Finally, the mat. We saw the head side. Tail side is in the same mood but eventually with less "open sea" area. Here too, more about that latter. 2. Is it the molding quality or the molding philosophy? The uneasy discrepancy between the sprues is not necesary an issue. But as it sorts out obvious because it comes in the same box. Well, you can´t hide the forest behind the tree, right? There is IMHO a clear and deliberate will of slimming the plastic chunks. The round platform is globally OK on the gaming side but bellow, it is made at the economy. To get less plastic. The consequence is something lighter in terms of weight (which may end up being a benefit as mounting a stable paltforms on the Furnace looks like being a Perious Hike in Perious Environement. I will see when the time will come to paint and glue). But looks by yourself, comparing a "old design platform" with this "new design plaform": The drastic sliming is eventually relevant as the round platform looks like not being design for another purpose than fitting on the furnace. Do not look for any kind of modularity here. It is done to go there, on top of the cylinder, and that´s all. Period. Click Bait design. This is a little bit of a deception, especially if you look at the pillars´ design that may hide something in plain sight. 3. The Pillars. OK, they look odd. But this is secondary. After all, the older ones looked better but once set bellow a platform, you do not really take any benefit of the amount of details available. So More is eventually not Better. What is puzzeling with the Pillars is the poptential purpose behind the design features. You have 2 types of pilars. One type molded into a single piece whilethe another type molded in 2 parts: a Piedestal and the main structure to be set on top. They can be stacked in order to reach twice the height and equalize the old Sector Mechanicus pillars. But for that you need one type of each. This is not anyway making the diffrent design necesary, isn´t it? So, what is the purpose there? Shall we foresee another (future) set using these 2 types of pillars in a distinct manner? Something that may jsutify not using the piedestal? Questions, questions... 4. The mat There is no need to talk about the colours... This is a very personal judgment. But liking it or not there is something striking with this mat: at the moment it is useful only for Kill Team. This is a very important evolution in the design philosophy I feel. And it reached its climax with this set. Initial Kill zones released had a 2 side mat with one side uniformized to be used in conjunction to other kill zone mats (more or less). Thank you WarCom: This is over. This is over for a while some may tell me. Sure, but at least the previous zones were not too marked and still usable in 40k too. Here, a plain sea area and only that on the mat may start to be problematic as you cannot match it with anything. With anything, yet (?). I guess this is one key feature of the "Seasonality" of KT: get the future mats along this one to be able getting a combined area worth playing a 2k pts games of 40k maybe.... 5. Conclusions Well, it is a set that serves its purpose: getting an environement for KT under Perious Environement zones´ rules. The associated "fog of war" rules affecting LoS make useless most of other LoS blocking elements. So why bother putting some into the set? The simplified rules for terrain from 10th also looks like they imprinted their influence: get rid of too much details such as handrails as anyway stuff on gantries will benefit of cover. So there is no need of handrails, isn´t it? Price wise, it is not badly priced. 2 sets of gantries, one ferratonic furnace and its large platform and a mat plus objective markers. If you can get it under discount from a FLGS you might get it for the same price as past edition kill zone environements. And the quantity of stuff is higher that in some past killzones. So, no rant there. This set is not cheap but it ain´t overpriced neither (only if compared with other GW internal references of course...). But the overall impression it left me is the one of a product designed to be temporal, fast consumed and fast forgotten. If it does not cut the heredity bound with past Mechanicus Sector, it does not however looks like it is meant to be a installed in perenity. Said that, I see value in 2 cases mainly: 1. for people like me, already owning some terrain and wishing to have some punctual additions that give something not already included (half height gantries mainly) 2. for pure KT players that do not necesarily need more than that to get a gaming arena But as a base for starting a collection of terrain for 40k... I would advise passing. What do you think? PS: Ohh, and BTW, as a side note: my set came labelled "made in UK", if it is of any relevancy.
-
- 1
-
-
- Bheta-Decima
- Scenery
- (and 2 more)
-
Greetings all. I thought I would share my progress on my Necromunda box set - so far I've only done anything with House Goliath, I'll be working on the Escher when they're finished, and then try my hand at sorting some terrain out. The gang so far. I'd say these guys are about 90% done at the moment, I keep finding new details to pick out. Some close ups; I'll be building the last set of Goliath's soon, hopefully today but we will see how things go. C&C welcome
-
From the album: Adeptus Titanicus by Mendi Warrior
-
From the album: Adeptus Titanicus by Mendi Warrior
-
From the album: Adeptus Titanicus by Mendi Warrior
-
From the album: Adeptus Titanicus by Mendi Warrior
-
From the album: Adeptus Titanicus by Mendi Warrior
-
From the album: Adeptus Titanicus by Mendi Warrior
-
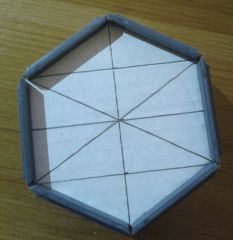
From the album: Adeptus Titanicus by Mendi Warrior
-
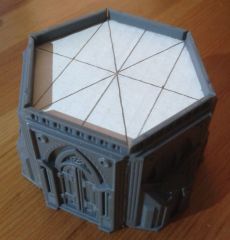
From the album: Adeptus Titanicus by Mendi Warrior
-
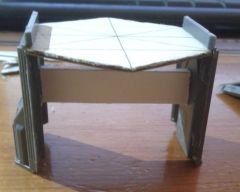
From the album: Adeptus Titanicus by Mendi Warrior
-
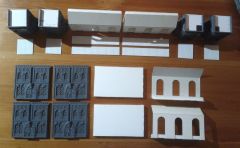
From the album: Adeptus Titanicus by Mendi Warrior
-
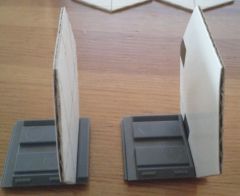
From the album: Adeptus Titanicus by Mendi Warrior
-
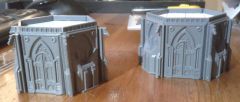
From the album: Adeptus Titanicus by Mendi Warrior
-
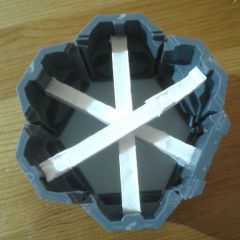
From the album: Adeptus Titanicus by Mendi Warrior
-
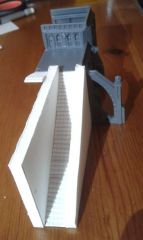
From the album: Adeptus Titanicus by Mendi Warrior
-
From the album: Adeptus Titanicus by Mendi Warrior
-
From the album: Adeptus Titanicus by Mendi Warrior