Isiah Posted May 12, 2012 Share Posted May 12, 2012 I have to say this topic continues to surprise and delight. Can't wait to read and see more of your creativity. Cheers I Link to comment https://bolterandchainsword.com/topic/246565-angels-of-redemption-no-weapon-so-savage/page/5/#findComment-3059593 Share on other sites More sharing options...
Akatriel Posted May 12, 2012 Share Posted May 12, 2012 Awesome work, Candleshoes. I love the paint and conversion, but the background is just amazing, really inspiring. As others have said, absolutely grimdark, a call back to the John Blanche-esque feel of early times. Link to comment https://bolterandchainsword.com/topic/246565-angels-of-redemption-no-weapon-so-savage/page/5/#findComment-3059648 Share on other sites More sharing options...
Brother-Chaplain Nemiel Posted June 1, 2012 Share Posted June 1, 2012 http://i126.photobucket.com/albums/p113/Darkbeastman/IMG_3965-2.jpg The helmet from the guy with the 2H sword in the middle-back was from Company Master, right? Cant rem the mini and its bits atm^^ But most important; the wings on the helmet from the brother at the right side? You said something, that it was from Grey Knights? In what box/sprue?!?!...Sry, but i HAVE to "steal" your idea xD But beside all this, very good job on your stuff there esp the AoR MK2 brother, really like him!! Link to comment https://bolterandchainsword.com/topic/246565-angels-of-redemption-no-weapon-so-savage/page/5/#findComment-3075052 Share on other sites More sharing options...
37cee Posted June 1, 2012 Share Posted June 1, 2012 But most important; the wings on the helmet from the brother at the right side? You said something, that it was from Grey Knights? In what box/sprue?!?!...Sry, but i HAVE to "steal" your idea xD my guess GK helmet + 2 ravenwing symbols (the sword is cut off) fixed the quote Link to comment https://bolterandchainsword.com/topic/246565-angels-of-redemption-no-weapon-so-savage/page/5/#findComment-3075064 Share on other sites More sharing options...
Candleshoes Posted June 1, 2012 Author Share Posted June 1, 2012 http://i126.photobucket.com/albums/p113/Darkbeastman/angelhelm.jpg With my final Forgeworld order finally in, I can start my WIP on my 875 point E Tenebrae Lux vow.As a re-cap, my final choices of what to paint up before August 15th are:10 Tactical Marines - Plasma Gun, Lascannon1 Deimos Pattern Rhino with extra storm bolter1 Deimos Pattern Predator5 Tartaros Pattern Terminators with 2 chainfists and heavy flamer1 Interrogator Chaplain - plasma pistol1 Command squad - Apothecary, Sacred Standard, Power Weapon, Power Weapon, Plasma Pistol/CCW (had to change from power weapon storm shield, as there actually is no option for a 3rd power weapon or any storm shields) I thought I would at least put the writing portion at work today and will get all my WIP starter shots up this evening for the weekend.Some interesting tidbits, I went by my local GW store to purchase one of the new finecast chaplains to use for my vow, the one with knight feet and the very DA like chestplate. Apparently, they are mail order only for the majority of the new space marine releases. I decided to make my own interrogator-chaplain instead. Looking at a few photos of interrogator-chaplain Asmodai, I decided to make something very similair, using pieces of my Terror Mask brother, the sheathed sword that I was going to use for the company champion, a home-brewed crozius and a few other goodies. When everything was said and done, I am actually glad that the finecast model was not in, as this deffinetly has that Asmodai look, but it is different enough. The real question ringing at the moment looking at him is, with the black armour, would dark red, bone white, or jet black robes be better?The new apothecary models that forgeworld put out are immaculate, and after a hard choice, I decded on the Mk2 model over the Mk4 (as you get both in the package) for the command squad. For the rest of the command squad, I decided that for the 2 power sword wielders, to go as over the top as possible. I will use the model that was going to be a veteran Sgt. (with the Company Master crested helm), as well as this model, unpainted of course, holding a crested helm in the crook of his arm, leaning on his sword. Altogether with the chaplain, it is one unique looking bunch of unforgiven.http://i126.photobucket.com/albums/p113/Darkbeastman/IMGP9910.jpg I finally also got the brass etchings and the tracks on the rhino and predator, they are ready to be primed and I am very excited to weather the "f" out of them.The pre-heresy heavy weapons will make an appearance in the vow as well, the shoulder lascannon being used by a Mk3 marine. The tactical squad I think will ultimately only have 2... maybe 3 robed marines, that way I can show off the halved scheme better than hiding it under the robes. Finally, the Tartaros terminators are all together... man are they skinnier than you'd think. Not to say that that is a bad thing, but a Mk2 or Mk3 marine is taller than them. However, the more I worked on them, the more I decided that I loved the different feel that the terminator armour brought, which will contrast nicely to the hulking suits of Indomitus pattern armour the normal terminators wear. @Brother-Chaplain NemielThank you for your kind words. The huge crest is the company master helm available in finecast - you also get a nice detailed bare head as well in the pack. The smaller winged helms like 37cee mentioned are from cut up ravenwing symbols from the ravenwing sprue. I have seen people put the wings directly back and swept, but I really wanted it to look like a popping out crest, so I put them head on towards the front. The left most guy has a knight like helm from the Death Company sprues and the right guy is a Grey Knight helm. Link to comment https://bolterandchainsword.com/topic/246565-angels-of-redemption-no-weapon-so-savage/page/5/#findComment-3075256 Share on other sites More sharing options...
EPK Posted June 1, 2012 Share Posted June 1, 2012 Can't wait to see more Candleshoes, that forge world order makes me uber jealous. Those apothecaries are top notch. I definitely like the simple conversion you did with the GK + RW wing helmet. I'll have to steal that. I'm curious what you did for the Chaplain's head? Link to comment https://bolterandchainsword.com/topic/246565-angels-of-redemption-no-weapon-so-savage/page/5/#findComment-3075265 Share on other sites More sharing options...
Bryan Blaire Posted June 1, 2012 Share Posted June 1, 2012 Candleshoes, your kit-bashing is definitely inspirational. I definitely see a couple ideas I want to yoink for my own forces. Looking' forward to seeing your ETl project come together. Link to comment https://bolterandchainsword.com/topic/246565-angels-of-redemption-no-weapon-so-savage/page/5/#findComment-3075279 Share on other sites More sharing options...
Candleshoes Posted June 1, 2012 Author Share Posted June 1, 2012 http://i126.photobucket.com/albums/p113/Darkbeastman/ANGEL.jpg I only have an older photo, but it will be this head, but with the tubes entering the mouth. Link to comment https://bolterandchainsword.com/topic/246565-angels-of-redemption-no-weapon-so-savage/page/5/#findComment-3075291 Share on other sites More sharing options...
Captain Semper Posted June 1, 2012 Share Posted June 1, 2012 The real question ringing at the moment looking at him is, with the black armour, would dark red, bone white, or jet black robes be better? Hmmm... Not black. White with red lining? Better yet, green lining? Totally red has very strong GotC connotations... I say leave it to them - it's their trademark. Can't wait for the apothecary, and all the Deimos goodness! Finally, the Tartaros terminators are all together... man are they skinnier than you'd think. Not to say that that is a bad thing, but a Mk2 or Mk3 marine is taller than them. However, the more I worked on them, the more I decided that I loved the different feel that the terminator armour brought, which will contrast nicely to the hulking suits of Indomitus pattern armour the normal terminators wear. Tartaros... The Indomitus are bulkier but not taller. It's what you said: Skinnier!!! :) Frankly I was also taken aback by how small The Red Wake looked in his Mk5-ish Termie armour looked... But now he looks Belial enough to lead Tartaros into battle! These I really look fwd to see painted in halved pattern... Any chance you start with them? Please? :D Link to comment https://bolterandchainsword.com/topic/246565-angels-of-redemption-no-weapon-so-savage/page/5/#findComment-3075389 Share on other sites More sharing options...
Candleshoes Posted June 2, 2012 Author Share Posted June 2, 2012 All right, as promised, the WIP photos for my vow! The two vehicles: http://i126.photobucket.com/albums/p113/Darkbeastman/IMG_4071.jpg http://i126.photobucket.com/albums/p113/Darkbeastman/IMG_4075.jpg Two of the Indomitus pattern termies I was working on before I got the Tartaros patterns. http://i126.photobucket.com/albums/p113/Darkbeastman/IMG_4078.jpg http://i126.photobucket.com/albums/p113/Darkbeastman/IMG_4084.jpg My command squad, some members I still need to build: http://i126.photobucket.com/albums/p113/Darkbeastman/IMG_4102.jpg http://i126.photobucket.com/albums/p113/Darkbeastman/IMG_4091.jpg http://i126.photobucket.com/albums/p113/Darkbeastman/IMG_4113.jpg http://i126.photobucket.com/albums/p113/Darkbeastman/IMG_4096.jpg The Tartaros patterns, some are missing pieces and also waiting to be built: http://i126.photobucket.com/albums/p113/Darkbeastman/IMG_4106.jpg The tactical squad: http://i126.photobucket.com/albums/p113/Darkbeastman/IMG_4112.jpg http://i126.photobucket.com/albums/p113/Darkbeastman/IMG_4108.jpg http://i126.photobucket.com/albums/p113/Darkbeastman/IMG_4110.jpg Link to comment https://bolterandchainsword.com/topic/246565-angels-of-redemption-no-weapon-so-savage/page/5/#findComment-3076199 Share on other sites More sharing options...
Interrogator Stobz Posted June 2, 2012 Share Posted June 2, 2012 Crazy good Gothic styles there Candleshoes, good things take time, I'm prepared to wait. :tu: stobz Link to comment https://bolterandchainsword.com/topic/246565-angels-of-redemption-no-weapon-so-savage/page/5/#findComment-3076212 Share on other sites More sharing options...
Darmor Posted June 2, 2012 Share Posted June 2, 2012 Great minis, Candleshoes, just great. Good luck with your vow! Can't wait to see the termies painted/ Link to comment https://bolterandchainsword.com/topic/246565-angels-of-redemption-no-weapon-so-savage/page/5/#findComment-3076226 Share on other sites More sharing options...
Captain Semper Posted June 2, 2012 Share Posted June 2, 2012 Candleshoes this looks extremely promising!!! You just sold me the Pred! I hope FW gives you commission on this sale because when it first came out I was indifferent at best! Now I just want it!!! :) The red armed Indomitus Termie is pure win! You sure have an eye for gothic!!! Btw the "creamy" white really works on the squad - suffice to say I'll be following this closely. :( Link to comment https://bolterandchainsword.com/topic/246565-angels-of-redemption-no-weapon-so-savage/page/5/#findComment-3076305 Share on other sites More sharing options...
Candleshoes Posted June 2, 2012 Author Share Posted June 2, 2012 Thanks, its been fun hacking and slashing bits from everywhere to stick in nooks and crannies. The tactical squad's robes are the only thing done on them, the green and white only have 2 colours on it at the moment, still a long way to go. Here is a list of colours that I use for stuff, all the paint is just normal GW, with black primer, everything is watered down. I might use some of the old paint names, but there is a conversion chart on the GW chart I think: Green Armour: Orkhide Shade Dark Angels Green 1/2 Dark Angels Green 1/2 Snot Green Snot Green 1/2 Snot Green 1/2 Scorpion Green Thraka Green Wash Devlan Mud Wash White Armour: Dheneb Stone Bleach Bone 1/2 Bleach Bone 1/2 Skull White 2 parts Grephonne Sepia 1 part Water Heavily watered down Bleached Bone and Skull White Heavily watered down Skull White highlights 1/1/1 Devlan Mud, Grephonne Sepia, Water Heavily watered down Nuln Oil wash Heavily watered down Skull White highlights Wash 3 parts Water 1 part Nuln Oil Touch up with heavily watered Skull White Base: Very wet Khemri Brown Drybrush Calthan Brown Drybrush Dheneb Stone Heavy wash Devlan Mud (I use a soot like weathering powder mixed with some vodka and water to weather stuff, consistency like a wash, and you can use a q tip to wipe off anything you don't want on a surface). Static Grass: 1/2 GW Dead Grass 1/2 GW Burnt Grass for a salt and pepper mix. Robes: 1/2 Mournfang Brown 1/2 Steel Legion Drab Steel Legion Drab Devlan Mud wash Highlight with 1/2 Mournfang Brown 1/2 Steel Legion Drab Nuln Oil Wash Gold: Boltgun Metal 2 coats of Grephonne Sepia Silver: Boltgun Metal Devlan Mud Nuln Oil Boltgun Metal Red: Mechrite Red Blood Red Wash Baal Red Blood Red highlight This all will get you: http://i126.photobucket.com/albums/p113/Darkbeastman/IMG_3992.jpg Link to comment https://bolterandchainsword.com/topic/246565-angels-of-redemption-no-weapon-so-savage/page/5/#findComment-3076343 Share on other sites More sharing options...
Marshal Rohr Posted June 3, 2012 Share Posted June 3, 2012 My God, man. Thats an update! Link to comment https://bolterandchainsword.com/topic/246565-angels-of-redemption-no-weapon-so-savage/page/5/#findComment-3076347 Share on other sites More sharing options...
Midnightmare Posted June 3, 2012 Share Posted June 3, 2012 Excellent log you have here, really atmospheric presentation - you knows I loves a bit fluff! As for the models themselves, some top notch kit-bashing conversions with a lot of thought put into them and they are well painted, especially the new AoR guys with their great colour scheme :wink: Link to comment https://bolterandchainsword.com/topic/246565-angels-of-redemption-no-weapon-so-savage/page/5/#findComment-3076554 Share on other sites More sharing options...
Brother Immolator Posted June 4, 2012 Share Posted June 4, 2012 Tactical squads must be epic sauce.CAnt w8 to see them complete! Link to comment https://bolterandchainsword.com/topic/246565-angels-of-redemption-no-weapon-so-savage/page/5/#findComment-3077423 Share on other sites More sharing options...
Candleshoes Posted June 8, 2012 Author Share Posted June 8, 2012 Hello there, I have a few small battle reports to be shared. So, in a panicked frenzy, I decided to get as much of my army cleaned and primed, in order to play a few games at our local GW store, mostly to shake off the caked on rust that covers my 40k gaming experience (last time I remember playing solid games was 3rd). My goal was 1500 points, but I could only realistically get 1250 together, which included: Chaplain - plasma pistol Mortis Pattern Dreadnaught (Contemptor) - Twin Autocannons 5 Deathwing Terminators (Tartaros) - Heavy Flamer, 2 Chainfists 5 Deathwing Terminators (Indomitus) - Cyclone Missle Launcher, Chainfist, Thunderhammer/Stormshield, Powersword Predator (Deimos) - Autocannon, Heavy Bolters 10 Tactical Marines - Flamer, Plasma Cannon, power sword, Melta Bomb 10 Tactical Marines - Plasma Gun, Lascannon Rhino (Deimos) - extra storm bolter I was introduced to a Necron player, who just finished painting up the new flyer and who was relatively new to the army himself. His list included a special character, a lord with an orb, 2 units of warriors, one unit of the large shield guard necrons, 1 unit of the heavy weapon toting guard, 2 smaller new vehicles with large guns, a unit of scarabs, and the new flyer. We rolled a 3 objective mission and I won first turn. The heavy flamer terminators came down right on target and was able to take out 6 necron warriors in one go, most of my shooting was limited otherwise by los or range. His turn 1 saw the necron flyer move and shoot the randomly generated distance gun/ability, which ran across 2 combat squads and my Mortis, killing 8 marines and stunning the dread (strength 10 ap1). Every other necron unit shot into the deathwing and over 20 armour saves were made. In turn, they were charged by the warriors and combat ground down with poor rolling on both sides. Turn 2 saw the second deathwing unit enter and immobilize the flyer with its missles. The lascannon marine was able to wreck one of the vehicles and the chaplain’s rhino moved up towards the shield guard and special character, hoped out and was able to shoot, killing one. The predator also was able to kill 3 from the unit. The Necron flyer used it’s cannon again, catching bases in 1 distanced roll to kill all 5 of the chaplain’s retinue, wrecked his rhino, and destroyed the Mortis. The chaplain was charged by the character and the shield guard, failed his mind scarab test and attacked himself, though the emperor protects and no wounds were dealt to him. The Lord and the warriors attacked the second deathwing unit and lost combat, but stuck around. Turn 3 saw the death of the necron warriors the heavy flamer terminators were engaged with, and were able to move, support and destroy the lord and his warrior squad with the other deathwing. This, of course left them vulnerable to the immobilized necron flyer, which even though facing forward, shot directly behind it and killed all 8 remaining terminators. The Chaplain attacked himself again, failing his test and was cut down by the shield guard. The scarabs were able through some extraordinary gymnastics, to reach and eat the predator, destroying it. Turn 4 Saw the death of the remaining 2 members of the combat squads, and the game was called. I forgot to ask to look at the rules for the flyer so I would know how to avoid it better in the future, it sure seems like the damage potential is far greater than that of the Stormtalon or the Ork jets. Game 2 was against my friend’s Word Bearers, an annihilation game. He took 5 raptors, 8 Khorne bezerkers with Khârn in a rhino, 8 Plaugemarines in a rhino, 6 chaos marines, 10 chaos marines, and a dread with a lascannon. We only got a few turns in, but some highlights were the plasma cannon blowing off the lascannon arm of the dreadnaught, the heavy flamer deathwing making it in first turn and frying the raptors, only to be rapid fired to a man by the chaos lines and even getting Khârn and the crew out of their rhino, only to be hit in the rear and immobilized by the Mortis. Due to the time it took for the 2 of us to foot slog it to one another, we had to call the game just before the juicy bits started to occur. I certainly learnt a lot about what should and shouldn’t be done, as well, how important it is to play less on impulse and more with a plan to follow. There were also quite a few times where rules rust came into effect, and I just had to take the word of my opponent, rather than have the confidence to say “Isn’t this supposed to happen?” Something that gave me some perspective was just how awkward deepstriking the 2 units of deathwing was, and to get them to perform. I am going to really have to rethink their application and use. All in all, great fun getting to throw some dice around, and man o man do I need that extra 250 points. The models were also a big hit, and that really motivated me to put my nose to the grindstone and get more painting done. Next on the block I think, will be my Chaplain and the rhino/pred. Link to comment https://bolterandchainsword.com/topic/246565-angels-of-redemption-no-weapon-so-savage/page/5/#findComment-3081012 Share on other sites More sharing options...
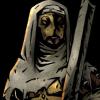
Candleshoes Posted June 9, 2012 Author Share Posted June 9, 2012 Started work on the Deimos rhino's "Antiqued" freehand. The end result is an almost medieval and ancient looking faded picture. Here is just the first part, the rough grays, before the antiquing process: http://i126.photobucket.com/albums/p113/Darkbeastman/IMG_4119.jpg The idea for the freehand sprung from: http://i126.photobucket.com/albums/p113/Darkbeastman/5598761-abstract-vector-illustration-of-grim-reaper.jpg Link to comment https://bolterandchainsword.com/topic/246565-angels-of-redemption-no-weapon-so-savage/page/5/#findComment-3081285 Share on other sites More sharing options...
Interrogator Stobz Posted June 9, 2012 Share Posted June 9, 2012 Cool freehand CS, your version looks a little like an Edvard Munch's- Scream in robes ;) Excellent work, maybe you could add some Munch'in background to it, hehe. :( stobz Link to comment https://bolterandchainsword.com/topic/246565-angels-of-redemption-no-weapon-so-savage/page/5/#findComment-3081319 Share on other sites More sharing options...
Candleshoes Posted June 9, 2012 Author Share Posted June 9, 2012 Thanks Stobz. I finished up the antiquing, here is what it looks like: http://i126.photobucket.com/albums/p113/Darkbeastman/IMG_4125.jpg When the Rhino gets a little closer to completion, I will go in and add silver paint chips along the edges, but for now, I'm happy with how it turned out. I think I found my image for the next one as well. Link to comment https://bolterandchainsword.com/topic/246565-angels-of-redemption-no-weapon-so-savage/page/5/#findComment-3081347 Share on other sites More sharing options...
Interrogator Stobz Posted June 9, 2012 Share Posted June 9, 2012 Awesome, what's that antiquing technique? Link to comment https://bolterandchainsword.com/topic/246565-angels-of-redemption-no-weapon-so-savage/page/5/#findComment-3081365 Share on other sites More sharing options...
elmo Posted June 9, 2012 Share Posted June 9, 2012 http://www.easyfreesmileys.com/smileys/free-scared-smileys-306.gif OMG - same question as Stobz! Link to comment https://bolterandchainsword.com/topic/246565-angels-of-redemption-no-weapon-so-savage/page/5/#findComment-3081390 Share on other sites More sharing options...
Brother-Chaplain Nemiel Posted June 9, 2012 Share Posted June 9, 2012 If the ETL would be about quality instead of quantity, your stuff alone would bring us on majorly Candleshoes...those grey dogs would start running away,howling in defeat! Im running outta words...w8 got some: IM JEALOUS! :unsure: And it was you with them cool converted helmets :D Link to comment https://bolterandchainsword.com/topic/246565-angels-of-redemption-no-weapon-so-savage/page/5/#findComment-3081428 Share on other sites More sharing options...
Candleshoes Posted June 9, 2012 Author Share Posted June 9, 2012 Thanks Brothers! The "antiquing" looks complicated, but it is very simple and very eye catching. For people who don't want to freehand or aren't confident, use your printer, find a image you like, shrink it down, cut it out, and trace the line in pencil step 1: Paint your background grey or dheneb stone, pick something nice and light / off white. step 2: Use a darker gray, I used Adeptus battle gray, water it down, and draw out your outline of your image, just the important parts. On the above image, it is things like the outline of the sword, the inside of his hood, everything you want to look almost black. For people who don't want to freehand or aren't confident, use your printer, find a image you like, shrink it down, cut it out, and trace the lines in pencil. Do your best to then "fill in the blanks" with pencil, this is why using a simple image like a clipart works very well, the simpler the better, and never worry about it looking messy or making mistakes. step 3: Fill in you image with your details. Be rough, be messy, and try and use lots of "shades" or mix your dark grey a few times with your base lighter colour. There is no right or wrong way to do this, just experiment and use your guide picture as a reference. This way, it gives the illusion that there is a very finely detailed image under the antique. You must make sure you paint some details in an almost white look, to contrast and stand out, example the bone hands and the sword. It may look weird in real life, but the antique will wash it out, so don't worry. step 4: The fun and terrifying part. You are at the stage where post #119 left off. You then need to do a HEAVY... HEAVY devlan mud wash, straight from the pot. Don't paint it on like normal, just dab it on with a larger brush, this will allow the wash to clump up, rather than streaking with the brush. Do this quickly and messy, because then you need to dry your brush, and then "paint" nothing over image, and your image only, to soak up the majority of the wash on your freehand work. You want it to stain the image, but not to obscure the details. This is very important, the edges and outline can handle the wash in full, the image needs to be left slightly wiped off and visible. All this needs to be done when it is wet of course as this is the best time you can add or remove the wash if you feel you have made mistakes. step 5: put your model at a 45 degree angle, to allow the run off wash to settle and run down. Step 6: Leave it alone until it dries fully, and NEVER touch it! Step 7: The same as step 4, but using Nuln oil, or a black wash. This may make you panic, as you will obscure your image completely. Don't worry, just make sure you dry your brush, and carefully paint over the freehand and soak up the majority of the excess wash so you can still see most of the details. Again, make sure when originally applying the heavy wash, not to "paint" it on with strokes, but to dab it on, as though you are touching a marker to a peice of paper again and again, it will look like dots. step 8: put your model at a 45 degree angle, to allow the run off wash to settle and run down. Step 9: Leave it alone until it dries fully, and NEVER touch it! Step 10: The same as step 4, but using Gryphonne Sepia, or the equivalent wash. This will be what makes it almost gold like or bronzed. Make sure you dab lots of wash around the perimeter, even on the bottom of your image, and with this one, you can leave a bit on the image itself - like it has been tarnished. step 11: put your model at a 45 degree angle, to allow the run off wash to settle and run down. Step 12: Leave it alone until it dries fully, and NEVER touch it! You then have a fantastic and vaunted relic relief for the side of your land raider, rhino, or drop pod, which it works the best for. Link to comment https://bolterandchainsword.com/topic/246565-angels-of-redemption-no-weapon-so-savage/page/5/#findComment-3081524 Share on other sites More sharing options...

Recommended Posts
Archived
This topic is now archived and is closed to further replies.