Honda Posted March 27, 2013 Author Share Posted March 27, 2013 Well, I'm glad they meet with your approval Brothers! I'm looking forward to getting them to the next step. This will end up being my Marshal's ride eventually, though for the time being, he will probably transport a crusader squad with the Emperor's Champion. ...and Firepower, keep at it, airbrushing has revolutionized my painting even though I fought the urge initially. Cheers, Link to comment https://bolterandchainsword.com/topic/253019-the-albigensian-crusade/page/4/#findComment-3336488 Share on other sites More sharing options...
Krikey Posted March 27, 2013 Share Posted March 27, 2013 I missed a lot of your updates. Those caestuses (plural caesti?) look brutal, and you've done a great job repainting your ravens. I really like the white wings on the dark body -- it's a good look and meshes nicely with the white pauldrons of the BT infantry scheme. I'd like to see a pic of all your flyers together when you're done. ~K Link to comment https://bolterandchainsword.com/topic/253019-the-albigensian-crusade/page/4/#findComment-3337053 Share on other sites More sharing options...
Firepower Posted March 27, 2013 Share Posted March 27, 2013 I suppose it's a bit late to say as much now, but I think black wings with white crosses would look much better, partially because they would help counter the brightness of a solid gold chassis... Link to comment https://bolterandchainsword.com/topic/253019-the-albigensian-crusade/page/4/#findComment-3337055 Share on other sites More sharing options...
Honda Posted March 28, 2013 Author Share Posted March 28, 2013 I suppose it's a bit late to say as much now, but I think black wings with white crosses would look much better, partially because they would help counter the brightness of a solid gold chassis... Yeah, it sort of is a little late and to be frank, once I figured out the black body and white wings, it didn't even occur to me to consider that combination. Very interesting idea and I do appreciate the feedback. Who knows what may happen in the future, though if a plastic Thunderhawk should ever arise, I'm pretty sure it will have a black body and white wings. I suppose I can take consolation in the fact they (and the Caestus) will at least look like they belong together. Cheers, Link to comment https://bolterandchainsword.com/topic/253019-the-albigensian-crusade/page/4/#findComment-3337876 Share on other sites More sharing options...
Dark Scipio Posted March 28, 2013 Share Posted March 28, 2013 I really like your painting on all that flyers. I think I will copy that look for my flyers. What kind of thing is that blus sticker you used for the crosses? Link to comment https://bolterandchainsword.com/topic/253019-the-albigensian-crusade/page/4/#findComment-3337920 Share on other sites More sharing options...
Honda Posted March 29, 2013 Author Share Posted March 29, 2013 @DS: I'm glad you like the look. I really struggled to find something that within seconds, looked Templar. As somebody pointed out, and it was my intent, the fuselage of the aircraft as black and the white wings definitely align with the Templar livery. Regarding the blue stuff, that is painters masking tape which should be available from any home improvement center. There is a green version that works just as well. The typical white masking tape is a little thicker than this stuff and consequently can create gaps which would cause some of the spray to bleed in. I should also point out that it is a good idea to run your fingers on the edges of the masked area to ensure that you get a good seal, otherwise there could be some bleed over. Although it takes a little extra time, I do like the effect of spraying a black layer down, then masking over it and spraying white. The converse could also look interesting, but I haven't attempted that yet. In case you want the measurements: 1. The tape I have is 2.5cm wide. So I marked off 2.5cm squares, then found the mid point of those squares and that became the center point of the cross. 2. I then marked 2mm in (up?) on each of the cross legs. That becomes the top of the indent. 3. At the base of each leg, I marked a point 3mm out on each side of the cross, so that would be 8 marks total for each cross. 4. From the point marked in #3, I drew a straight line up to the center point of each cross. So there's 8 of those lines for each cross. 5. At the base of each leg, you will then draw a line from the point in #3, to the point in #2. There are 8 of these lines for each cross. Then just cut them out. I tend to remove the extraneous material first, then pick up the individual legs and place them where they should go. When applying to the model, know exactly where you want the center point of the cross to be first. Line up some guide points so that your crosses are in the same place on each side. You won't like it if one of them is off by a small, but noticeable bit. It's kind of like applying a decal, except if you don't get the placement exactly where you want, you can lift the tape and move it to the right spot. Do be careful if you have to move it though because you don't want to scratch the base black layer below. Also, you should be able to scale up the cross to larger proportions fairly easily. I haven't tried going smaller yet. For me, it sure beats hand painting large crosses. Anyway, I hope that helps and may you have many happy days applying the Templar cross every place you can! :D Cheers, Link to comment https://bolterandchainsword.com/topic/253019-the-albigensian-crusade/page/4/#findComment-3338173 Share on other sites More sharing options...
tvih Posted March 29, 2013 Share Posted March 29, 2013 I just got some masking tape as well. Mostly I got it for making some WW2 models, but I was also thinking of trying to make a big Templar cross on top of a Rhino or something. Probably gonna try it on the one that I've only basecoated and not painted otherwise, as not to risk messing up the one that is "finished" already! Though one problem with the plan is that those Rhinos serve as Razorbacks too, so if the cross isn't just on the hatches but on the hull as well... uh oh. Even making the cross's center on the Razorback roof part, it wouldn't be a full cross with the turret. Anyway, the wings do look nice that way. I wish my airbrush didn't refuse to work even with diluted GW paints! It'd make shading etc so much easier, and perhaps could do the vehicles in a very dark grey - to get the shading effects - instead of pure black if I could airbush. Link to comment https://bolterandchainsword.com/topic/253019-the-albigensian-crusade/page/4/#findComment-3338222 Share on other sites More sharing options...
Honda Posted April 9, 2013 Author Share Posted April 9, 2013 Sneak preview... As it turns out, photos from this distance don't show up the weathering very well, but I'll get some better shots when I finish their bases. Cheers, Link to comment https://bolterandchainsword.com/topic/253019-the-albigensian-crusade/page/4/#findComment-3345881 Share on other sites More sharing options...
Honda Posted April 22, 2013 Author Share Posted April 22, 2013 Well, Templar Air is finally finished. Overall, I like the general idea of an air assault version of the Templars and think we can make that work, especially with how effective our termies are. Before too long, I'm hoping to get some games in to validate a list built around 2 x Storm Ravens and 1 Caestus at 2000 pts, escorted by a couple Typhoons. I'm not sure what bodies I'll be carrying in the flyers yet, so that will be the variable bits. Also, if I can get a dreadnought or two in there that would be nice...well, for me, perhaps not for the heretics. :) Anyway, here are some closer shots of the flight in formation during their most recent flyby. C&C greatly appreciated. Cheers, Link to comment https://bolterandchainsword.com/topic/253019-the-albigensian-crusade/page/4/#findComment-3354611 Share on other sites More sharing options...
Krikey Posted April 22, 2013 Share Posted April 22, 2013 Damn. Those look great together, Honda! ~K Link to comment https://bolterandchainsword.com/topic/253019-the-albigensian-crusade/page/4/#findComment-3354637 Share on other sites More sharing options...
Sir_Isenhar Posted April 22, 2013 Share Posted April 22, 2013 Outstanding job! I like the weathering on the assault rams! can you tell us what colors you used and a tiny guide? Seems like a nice way to weather black... The Templar Air Cav is awesome and tell us how it fares for you in the battlefield Link to comment https://bolterandchainsword.com/topic/253019-the-albigensian-crusade/page/4/#findComment-3354649 Share on other sites More sharing options...
Honda Posted April 22, 2013 Author Share Posted April 22, 2013 I like the weathering on the assault rams! can you tell us what colors you used and a tiny guide? Seems like a nice way to weather black... I'm glad you like it and it works for a lot of schemes. So to summarize: 1. Paint your model as you normally would, whether it be a vehicle, dread, or infantry. You will have noted that I prefer a more subdued contrast on my figures, so I use Vallejo 995 German Grey for my black and a 50/50 mix of 995 and 990 Light Grey, thinned for the broad highlights. For vehicles, I find that this is enough of a contrast to give me what I am looking for. It would also be possible to add a very thin layer of say 25/75 995 and 990 for an additional level of high light if you like. I think it would tend to turn the grey too light and prevent the German Grey from looking like a light black. 2. Use Badab Black/Nuln Oil/Army Painter Strong tone in the recesses you'd like to darken. That's one of the advantages of using the German Grey, you can actually darken the recesses without jumping through hoops. 3. First layer of weathering: Get some foam and cut it into a column approximately 1 cm x 1 cm. The exact proportions are not critical. Then using your fingers or tweezers, pull "tufts" out of bottom of one end of the foam column. When you have an irregular shape you like, you are now ready to apply the first layer of chips. 4. I used the old GW Terra Cotta color for my base. It's a bit of a cool color for a red, in that it has a blue component to it, which I like. You might want to use another color. Anyway, dip just the tip of the "shape" you made into the paint pot. Then dab most of the paint onto a paper towel. You want the sponge to be a tad dry so that it doesn't create smears on your model. 5. Apply the sponge to areas where you think paint will rub off for whatever reason. There is a really good discussion in Krikey's Exeter Crusade thread that talks about how he visualized the damage his Caestus would incur and how it affected the painting of his model. It's worth the read. So dab around sharp edges, places where things might bounce, etc. to get the scratched up effect you are after. 6. <this is the fun bit> Use a metallic silver color and with a small detail brush, apply scratches inside the red (or your first color of choice). Work the scratches from different angles sort of like this # to get an interesting effect. What is interesting about this technique is that depending on the angle that you are viewing the model, the damage changes color, shifting from bare metal to the base red. It's an entirely unplanned effect, but since I discovered this many years ago, I have continued to use this technique on all my PA figures and vehicles. I hope this was helpful and I'd love to see how you implement it in your own forces. Thanx for the kind words all. Cheers, Link to comment https://bolterandchainsword.com/topic/253019-the-albigensian-crusade/page/4/#findComment-3355234 Share on other sites More sharing options...
Kierdale Posted April 23, 2013 Share Posted April 23, 2013 Oh boy! Those looks great! Please tell us how they do once they've been fielded. Link to comment https://bolterandchainsword.com/topic/253019-the-albigensian-crusade/page/4/#findComment-3355288 Share on other sites More sharing options...
Honda Posted June 15, 2013 Author Share Posted June 15, 2013 Ok, a quick WIP shot of half my vow. Each will be different. All the scripting on the hull represents Blessed Armor. Once I get the painting details finished on the other LRC, I'll move to the weathering phase. Onwards Brothers! Link to comment https://bolterandchainsword.com/topic/253019-the-albigensian-crusade/page/4/#findComment-3394730 Share on other sites More sharing options...
Captain Semper Posted June 16, 2013 Share Posted June 16, 2013 :o This is just too awesome for words... As is the "Templar Air" you've made... Amazing work Honda, just too good for words! :tu: Link to comment https://bolterandchainsword.com/topic/253019-the-albigensian-crusade/page/4/#findComment-3394993 Share on other sites More sharing options...
Dark Scipio Posted June 16, 2013 Share Posted June 16, 2013 Everything looks so great. Link to comment https://bolterandchainsword.com/topic/253019-the-albigensian-crusade/page/4/#findComment-3395024 Share on other sites More sharing options...
Firepower Posted June 16, 2013 Share Posted June 16, 2013 Very cool :tu: Not sure if I lack the relative lack of BT bitz, but the excessive scripture may have suffered without all that empty space...hm. Link to comment https://bolterandchainsword.com/topic/253019-the-albigensian-crusade/page/4/#findComment-3395250 Share on other sites More sharing options...
Dennis Posted June 16, 2013 Share Posted June 16, 2013 I like the shot of those flyers.. one can only drool on these, nicely done! Even though I like the idea on the LRC, and that it's done very well, I'm not too fond about it. IMHO it's a bit too much. I'll hold my judgement untill its finished, maybe your artistic mind will show us an awesome LRC when it's finished (weathered and all). Will look with anticipation to the end result! Link to comment https://bolterandchainsword.com/topic/253019-the-albigensian-crusade/page/4/#findComment-3395256 Share on other sites More sharing options...
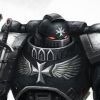
Andhil Posted June 16, 2013 Share Posted June 16, 2013 I love that Land Raider. It's a simple idea, that works really well. How long did it take you to get all those scriptures on that there? That Air force you got there is scary. I'm not too fond of the one with the gold hull, but it is fit for a Marshal. Looking forward to seeing more of your work, Brother Honda! Link to comment https://bolterandchainsword.com/topic/253019-the-albigensian-crusade/page/4/#findComment-3395273 Share on other sites More sharing options...
Honda Posted June 16, 2013 Author Share Posted June 16, 2013 I love that Land Raider. It's a simple idea, that works really well. How long did it take you to get all those scriptures on that there? I'm going to say on the order of 2.5 hours. I realized about 25% into it that all that scripting was going to take a lot longer than I thought, but since I was there and that I figured that I'd only do one of these...well, I just..."Templared" it out. That Air force you got there is scary. I'm not too fond of the one with the gold hull, but it is fit for a Marshal. I go back and forth on him as well. Since it was easy enough to mask those guys, I've considered painting the fuselage white-ish to match the wings, which I also think would look appropriate for a Marshal. I just need to do the wash on the recesses and the LRCs will be done. Now I'm thinking of what my next vow will be. Thanx for all the feedback everyone! Onwards Brothers! Link to comment https://bolterandchainsword.com/topic/253019-the-albigensian-crusade/page/4/#findComment-3395331 Share on other sites More sharing options...
Krikey Posted June 19, 2013 Share Posted June 19, 2013 I thought I had already posted about your LRC, but I must have dreamed it. I love the script work. I've been avoiding doing small Templar script on a lot of my models, but I think I'm going to have to bite the bullet and work through it -- your work is just too impressive and inspiring. ~K Link to comment https://bolterandchainsword.com/topic/253019-the-albigensian-crusade/page/4/#findComment-3397424 Share on other sites More sharing options...
Aegir_Einarsson Posted June 19, 2013 Share Posted June 19, 2013 Realy nice work:) especially scripts for blessed hull:) very nice idea indeed:). I have question. How you painted assault cannon, nad hurricane bolters.. they look very nice and if it's not a secret can you tell me:). Once again great job. I'm inspired now:) Link to comment https://bolterandchainsword.com/topic/253019-the-albigensian-crusade/page/4/#findComment-3397466 Share on other sites More sharing options...
Honda Posted June 19, 2013 Author Share Posted June 19, 2013 I thought I had already posted about your LRC, but I must have dreamed it. I love the script work. I've been avoiding doing small Templar script on a lot of my models, but I think I'm going to have to bite the bullet and work through it -- your work is just too impressive and inspiring. The only reason I am doing this is because I don't have half of your skills. I LOVE your scripting. It looks like nobody else's stuff, it's that unique. It's what I would consider "signature" work. You can't stop your style now, you have an obligation to Dorn. I have question. How you painted assault cannon, nad hurricane bolters.. they look very nice and if it's not a secret can you tell me:). When I am shading, I tend to use more than one color of wash mixed together for bulk application. So in this case (using the old names), I'd shade with the Badab Black + Devlan Mud. What I like about doing things this way is that I can make a brown-ish black or a black-ish brown depending on what effect I'm looking for. In this case, it is a brown-ish black (i.e. more black than brown). I also like to use thinned mixes and apply multiple coats. Since the change over in GW paints, I have moved to Army Painter's Dark and Strong tones. This is not the "dip" mixture, but water based inks and they are as close to the original Badab Black and Devlan Mud as you can get. I like that they come in eye dropper bottles as that helps facilitate mixing. I highly recommend them as a product. Many thanx Brothers for the feedback. Cheers, Link to comment https://bolterandchainsword.com/topic/253019-the-albigensian-crusade/page/4/#findComment-3397615 Share on other sites More sharing options...
Honda Posted July 4, 2013 Author Share Posted July 4, 2013 Happy Fourth everyone! Link to comment https://bolterandchainsword.com/topic/253019-the-albigensian-crusade/page/4/#findComment-3406615 Share on other sites More sharing options...
Honda Posted August 18, 2013 Author Share Posted August 18, 2013 The crusade continues... This is another ebay reclamation project. It was pretty messed up and apparently was a White Scar, then Space Wolf Land Raider before coming home with a very thick coat of black paint. So it took some pretty heavy modeling mojo, including some liquid green stuff on some gaps. I starting to really appreciate this stuff, though I've only used it to fill gaps, then smooth everything down with a clay shaper. Still, it seems to work fairly well. I also decided to build this as a "Krieg" variant, using depleted adamantium armed assault cannons on the outboard mounting. Looks kind of cool to me. So this is the next raider on the docket I'll work on while my Dirty Ares continues to soak. After this I have a scratch build Achilles lined up before starting on an assault squad and another terminator squad. These guys will be transported by my two Caestus. Onwards! Link to comment https://bolterandchainsword.com/topic/253019-the-albigensian-crusade/page/4/#findComment-3426653 Share on other sites More sharing options...
Recommended Posts
Archived
This topic is now archived and is closed to further replies.