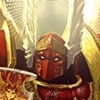
Corvus_Danseur Posted July 31, 2014 Share Posted July 31, 2014 Strike Force Aurelian and the Silent Dream I have been playing a mini campaign with a friend I met at the small local tournament I attended some time ago. Idea was just to give some theme and meaning to the battles we fought. Been a bit on and off in terms of when we manage to play, but now halfway through I thought it was about time I wrote it up! I haven't put this in my main batrep and WiP thread as its turned into a bit of an epic one... apologies for the length and word spam! Hope that it is at least a little enjoyable. All goes well I will continue to write up the battles and story as it evolves here. Background: A derelict space-hulk showing signs of xenos life has been spotted in sector LV-223. This is a cause for great alarm as an artefact of unknown xenos origin that shows signs of an ability to nullify the powers of the warp has recently found on the heavily urbanised planet X245 by an Inquisition team lead by Inquisitor Ediva. A nearby Blood Angels strike force, consisting of the 4th Company supported by elements of the 1st Company returning from the conflict on Armageddon, is diverted to investigate the space-hulk and assist in the recovery of the artefact by Inquisitorial request. Events to date: close range scans from the battle barge Blade of Vengeance have revealed that the hulk is infested with Tyranid life forms. To make matters worse it has become clear that some malign intelligence is directing the hulk into an geostationary orbit of X245. With the hulk a vast and unstable agglomeration of vessels a bombardment of it this close to the densely populated planet is unthinkable (Flesh Tearers this ain't). A terminator interdiction team is rapidly dispatched by boarding torpedo with a mission to disable the drive units and prevent the hulk from taking up its position above the world. As the team lands on the hulk a shadow in the warp starts to fall across the system... A desperate battle in the close, twisting confines of the space hulk follows. The terminators are swiftly surrounded by a much larger than expected swarm of genestealers who appear to have developed some form of ranged attack in addition to their usual lethal claws. Less than halfway to the objective the team is ripped apart, the sergeant making an (in)glorious last stand surrounded on all sides (-look, its been a while since I played Space Hulk ok... my tactics where a little shoddy to say the least -). Following the failure to disable to the drive units of the hulk the xenos quickly dispatch a small, elite, team to the surface in order to strike at the central control of the planetary defence shields. Responding to this threat the Blood Angels direct an already emplaced scout sniper team to defend the facility whilst an assault squad is hurriedly deployed from a swooping Thunderhawk to assist. Unfortunately the genestealers, supported by a biovore and two tyranid warriors, have infiltrated the facility before the Blood Angels can arrive in any form of strength. The scouts do their best, falling with the honour of the chapter intact and their faces to the foe. But unable to delay the genestealers long enough to prevent the destruction of critical power nodes the assault marines land with the facility already in ruins. (-My first game of kill team... turns out its not a great idea to put your strongest models in reserve and deepstrike them turn 2 when there are infiltrators around. In my defence I was panicking about the biovore...-). Strike Force Aurelian: following the less than stellar performance thus far the forces of the Imperium cannot afford any more losses if they are to stand any chance of recovering the artefact. To make matters worse the shadow in the warp has resolved its' self as an approaching tendril of Hive Fleet Purgatory. With the entire population of the planet now at risk there is a race against time to fortify the central population zone of Ort Majoris and restore the planetary shields in order to prevent a full scale xenos infestation and landing. Fully aware of the success of its genestealer advance force the Hive Fleet dispatches its swiftest elements to surface of the planet in suicide delivery organisms. Their bloated capsules delivering a rapidly moving brood to the outskirts of Ort Majoris the Blood Angels rush to the defence of city with the dispatch of an equally rapid reconnaissance-in-force. The mission of Strike Force Aurelian led by Reclusiarch Theliel is find, intercept and destroy the xenos filth before it can disrupt the defensive preparations and planetary shield repairs. Catching up with the Tyranids in the ruins of an outer settlement the two forces run into one another with headlong speed... Mission 3: Wrath of the Hive Fleet As pictured above Strike Force Aurelian consists of the following; Stormwing Dataslate Formation, Baal Predator with assault cannons and heavy bolters, Sternguard veterans x6 with bolters and one combi-melta, two full squads of assault marines with two meltas each, two sanguinary priests of which one has a jump pack. The force is led by Reclusiarch with a jump pack, crozius arcanum and a plasma pistol. The tyranid force was composed (roughly) of; two winged hive tyrants with twin linked devourers, one harpy, three carinfexes with twin linked devourers, three warriors with the large template weapons, three units of eight genestealers and two units of ten gargoyles with toxin sacs. The mission was a modified BoA mission 4. The Scouring, 1500 points, minimum 2 units from the fast (troop in case of BA) section. Using tactical objectives instead of the BoA table. Primary mission for 4 points was to control more objective points than your opponent (each person places three objectives worth 1,2 and 3. 1pt in your own zone, 2pt in middle and 3pt in opponent zone). Secondary mission for 2 points was to achieve more tactical objectives than your opponent. Slay the Warlord, Linebreaker and First Blood also in effect. I will say right now that I was super-tired and didn't quite get the whole primary/secondary objective thing until turn 4, and was playing thinking that each tactical objective was 1vp... tactical cogitators have been given a good kicking subsequently! Deployment: Blood Angels deploy first to go first. Two combat squad assault squads are deployed in the backfield, one holding my 1pt objective. The other positioned out of LoS to jump forward and either grab his 3pt objective out in the open of my table half or my 2pt objective by the large cluster of rocks on the right. The Baal is place forward to also be able to move on my 2pt objective and to turn the right hand of the table into a fire lane... Only one assault squad gets the Red Thirst. The rest is in reserve. My Warlord Trait is to -1 to opponent reserve rolls. Tyranids deploy all their forces on the table. Genestelers infiltrating forwards and taking positions behind the right of centre rocks and the left of centre hill. With the last brood hanging out in the far right hand ruins on my 3pt objective. Gargoyles form a screen for the FMC and carnifexes. 'Nids fail to seize the initiative and the game commences... Turn 1 Blood Angels: Tac Obj for the turn: Linebreaker and destroy unit through shooting. The Sternguard drop pod arrives right behind the genestealers hiding behind the rocks (already dead in picture!). And just far enough away from the big gribblys so as to avoid being charged by them on turn 1. With not much else to do the Baal inches forwards a little to draw a good LoS on the right hand gargoyle brood (as an aside, I have a new camera, new camera takes sexy pictures... mostly... until the light fades and I have not learn't where the ISO settings are yet...). In the shooting phase the Baal kills five gargoyles. Not bad for its first ever run out for me. Meanwhile the Sternguard do their usual excellent job and easily delete the genestealer brood behind the rocks with poisen rounds. Earning me 1 tactical objective. Sadly I had miss-calculated the pod positioning and did not get the linebreaker. Tyranids: Tac obj: issue a challenege and uh something else he didn't get. The tyranids generally move forward, the two 'stealer broods sitting tight on the objectives that they had infiltrated onto. The carinifexes move into position to get a shot on the sternguard through the drop pod. However the FMC stay at home in their corner- clearly afraid of coming out to play with a Stormwing due to arrive... Physic phase results in catalyst and dominion cast. Shooting- the carnifexes unleash 18 twin linked s6 shots on the sternguard. But the boys are made of sternstuff () and thanks to some epic armour and FnP rolls only one dies! Nowt else happens Turn 1 ends looking something like this-> Turn 2 Blood Angels: Tac objs: hold obj 1 and linebreaker again. Reserves rolls take place... and its a massive failure of communication as only the 'command' assault squad with Reclusiarch Theliel and Sanguinary Priest Zazriel come in! That is a lot of firepower not available to me... The squad that made it makes a pinpoint drop deep behind the enemy lines to support the right flank and target the warrior brood. Movement- the Sternguard swing around their drop pod to target the carnifexs that are looking hungrily in their direction having failed so spectacularly to remove them with shooting. The Baal moves onto the objective in front of it and draws LoS to the last of the gargoyle brood. Both ASM in the backfield hold firm. Shooting- the Sternguard do well again, taking the carnifex down to 1 wound. Sadly he saves the one wound that is inflicted by the stormbolter on the pod. The Baal puts two wounds on the central carnifex, mmmmmmm lovely dakka! Finally the deep striking squad opens up on the warriors, the melta one shots one warrior and much to my delight and the outrage of the 'nids the bolt pistols take two wounds off another! Reclusiarch Theliel lines up with his plasma pistol.... and manages not kill himself with it, glorious! Another warrior goes down leaving only one alive and synapse coverage suddenly a little thin. I achieve line breaker tac obj but with his 'stealer brood on obj 1 in the ruins I have no chance of getting the second one. Tyranids: Tac objs: hold two objectives that he already is sitting on. He gets it funnily enough. Movement- the FMC move out, one tyrant flapping over the right flank along with the harpy to eye up the new arrivals. The other moving to the centre of board to provide some synapse... or so he thought. Turns out the gargoyles on the left flank are just out of range of it now. Woops! Next turn will be interesting for them! The rest sit firm on their objectives. Psychic- forgotten by both players! Shooting- again the carifexes unleash hell on the Sternguard and once again only one dies. The dice gods where truly smiling upon this unit today- the Emperor protects! Sadly however he wasn't paying attention to the ASM squad. As the dust cleared from the attentions of the harpy, warrior and flyrant only the Zazriel and Reclusiarch Theliel remain. Which is not actually a bad result for the Blood Angels considering how many points worth of 'Nids had just fired at them. Close combat- the Carinfex closest to the Sternguard makes a charge... an overwatch hit is saved and he makes it into combat. Two veterans fall to hammer of wrath attacks and another to the monster's vicious talons. No wounds are inflicted in return as the toughness of 6 makes life difficult. Blood Angels lose the combat but pass morale. Turn 2 ends looking like this -> Turn 3 Blood Angels: Tac obj: hold objective 4 and 2. I hold 4 and the Baal will move up to take 2. After much praying to Sanguinius the rest of the reserves finally turn up! The Stormwing powers down the left flank to encourage him to split is slower moving forces in half. Meanwhile the ASM squad executes a perfect drop on the right flank, between the Sternguard and remains of the previous squad with a view to targeting the genestealers sitting in the ruins (turns out this was a bad idea... ah well). Movement- the Baal moves up to the edge of the right hand rocks. Zazriel and Thelial activate their jump packs and zoom over the deepstriking ASM to land just behind the Sternguard combat. Thelial fancies laying some hurt down with his beatstick... In the backfield one ASM squad sits firm on its objective whilst the second one jumps forward to support the Baal in claiming objective 2. Shooting- the Stormwing open fire, *NOISE*, the right hand genestelers evaporate under the fire of the Storm Talons and the Stormraven puts two wounds on the Harpy and one shots the remaining warrior with a PotMS lascannon. Oh I missed you boys last turn! The Baal finished off the gargoyles that it had fired at in turn 1. The ASM open fire on the 'stealers in the ruin. But some poor rolling and the 4+ cover save meant that only one died. All of a sudden they didn't feel so happy about sitting there while the 'stealers drooled in the dark... Assault- both Zazriel and Thelial make it into combat. And with a mighty swing of his stick the carnifex is splattered across the landscape! Chalk up 1 for the man in black! Maybe his name should be Will... Sternguard and all consolidate 2" and spread out. Tyranids: Tac obj: destroy and unit through shooting and issue a challenge. Neither will be achieved. Movement- the Harpy moves up to the centre of the field. One carnifex moves towards to the Sternguard. Gargoyles fail their leadershp check for instinctive behaviour but end up just moving around a little bit with no ill effect. The flyrants start to make their presence felt, one moving down the left flank and another down the right. True to the high-speed nature of these armies looks like both will zoom past one another spraying death as they go. Just remains to be seen what is left in the aftermath! Psychic- Sternguard lose one man to physic shriek and the other flyrant gets catalyst. Shooting- the ASM that had moved to assist the Baal loose three men to the flyrant on that flank. The harpy takes a hull point off the Raven. One of the Carnifexes fires at the sternguard (again!!) and the other takes some potshots at the raven. The Sternguard once again prove that they are most manly of men and pass all their saves and FnP. At this point my opponent is almost in tears of frustration at just how little this unit is dying! The other carnifex rolls 5 sixes when aiming at the raven... with the pilot's heart in his mouth as he holds his course without jinking the dice are rolled... and no more 6s! Nervous moments all round.The Harpy fires two of its tentaclids at the 'Raven, but only inflicts one glancing hit. Assault- the genestealers burst from the ruins and assault the ASM squad. In a flurry of chitin and screaming the ASM are no more. Allowing the 'stealers to consolidate back into their ruin. Suddenly the remains of the Sternguard and my Warlord are looking a little exposed on that right flank. Turn 3 ends looking like this -> (sun had gone down by now and the lighting problems/blurring problems begin sorry!). Turn 4 Blood Angels: Tac Objs: my memory starts to fail me here. But I think get one point this turn. Movement- the Stormraven moves forward and turns 90deg as does the lascannon Stormtalon. Meanwhile the Skyhammer 'talon goes into hover mode over the objective on the hill that the 'stelaers had been wiped from the previous turn. My depleted backfield ASM squad moves towards the central objective in open as I realise what 'primary' and 'secondary' actually mean... Sternguard et al. hold their position with the hope of taking some of the genestealers in the ruins out. The Baal backs up a little away from the advancing Carnifexes. Shooting- the Baal only manages to take two wounds off one of the remaning carnifexes, leaving it with 3(2?). The Stormtalons delete the remains of the last gargoyle brood. Whilst the Stormraven wiffs pretty badly, only putting one would on the other remaining carnifex. The Sternguard open fire and kill two of the 'stealers in the ruins. Once again the cover save preventing me from doing more damage. At this point really start wishing that I had had the points to bring along a heavy flamer... Assault- seeing as Sternguard are not great in assault I choose not to assault the 'stealers. In retrospect considering that at this point I still had two SangPriests and a Reclusiarch with them, I probably should have. Tyranids: Tac objs: get one point for holding objective. Movement- the second flyrant moves over to the right flank whilst the first continues to push down the table and towards my reduced ASM squad in the centre. The carinifex with two wounds off moves towards the Sternguard with a view to assaulting them. Meanwhile the other one moves towards the Baal. The Harpy wheels to the left flank and vector strikes the Stormtalon hovering over the objective. Boom. One dead 'talon. Sad face. Both sides are starting to run out of models... its been a bloodbath. Physic- catalyst is passed on his warlord flyrant with a double 6 perils! Sadly he only takes a wound. The ASM out in the open are pinned. Shooting- the flyrant over the Sternguard manages to get a rear shot on my Baal's rear armour (massive fail by me, but damm those FMC are manoeuvrable!!) and blows it sky high. The approaching carnifex kill another veteran and the Sternguard's Sanguinary Priest with its' devourers. Once again FnP rolls are epic, I don't see myself ever NOT taking Sanguinary Priests after this game. The second carnifex takes aim at the zooming Stormraven and fail to even scratch the paint. The second flyrant kills the two remaining ASM in the middle. Assault- the wounded carinfex makes its charge into the remains of the Sternguard and kills one with Hammer of Wrath. Attacking first, the Blood Angels fail to put a single wound on him due to some excellent armour save rolls. Thinks don't look good as another veteran falls along with Sanguinary Priest Zazriel (noooooooooooooooooo!). Leaving one veteran and Thelial to face the beast alone. Turn 5 Blood Angels: Tac Objs: think one was a challenge and one was kill an FMC or flyer with shooting. Movement- my final ASM squad breaks cover from the ruins in the backfield and manages to get two marines into contest range of the 2pt objective out in the middle that his flyrant was aiming for. The Stormraven and the remaining Stormtalon manouver to get a shot at the Warlord flyrant who had just destroyed the Baal. Nothing else left! Shooting- the 'Raven and 'Talon open fire on the Warlord flyrant in a blaze of glory. And manage precisely zero wounds. Zero. From two twin linked assault cannons, three skyhammer missiles, two linked lascannons and a twin linked multimetla. Why I hear you cry? Well the hits and wounds were all about average, but he passed every single thrice dammed FnP from catalyst. So it seems taking a wound from perils whilst casting it was worth it. Assault- Theliel puts a good number of wounds on the carnifex, but only one gets through the armour, leaving it on two wounds. In return the last veteran is killed and Theliel takes a wound. Morale is passed but its not looking good. Tyranids: Tac Objcs: he gets one (again!!) for the genestealers sitting in the ruins. Movement- the Warlord flyrant swoops over the objective previously held by the Baal, the second flyrant moves close to the ASM squad that is attempting to deny him the central objective. The Harpy flaps over to my backfield objective. The genestealers sit tight on their objective in the ruins. Psychic- four ASM marines are lost to a shriek and catalyst and dominion are passed. With the loss of the ASM any chance I had for a draw are gone. Shooting- the last ASM on the table is removed by the devourers on the flyrant. Any remaining fire-power aims at the Stormraven but fails to do anything. Assault- Theliel puts another wound on the Carnifex and take none in return. Sadly the best is fearless and refuses to run and die! So at the end of turn 5 the Tyranids have won the primary objective and we are drawing on secondary objectives. Blood Angels have first blood and line breaker (the remaining Stormtalon is hovering). The Tyranids have line breaker. So a solid win for the 'Nids if the game ends here but not a total loss for the Angels.... ... And the game continues Turn 6 With so little left on the table I once again fire everything at the Warlord flyrant. And this time manage to do some wounds... but the filthy xenos survives my last lascannon shot and lives on one wound. In the assault phase I fail to kill the carnifex and he puts another wound on me. At this point with the last bus home approaching I conceded the game. He would have destroyed the hovering Stormtalon and the flyrant would join the carnifex in killed Theliel. Resulting in a crushing victory. The Echoing Silence of Failure: with Strike Force Aurelian crushed the Stormraven zooms down to scoop up Theliel and the grievously wounded Zazriel just before the monstrous creatures close in to finish them. Looking out through the rear ramp as thrusters scream in defiance at the pursuing flying xenos, Thelial bowed his head in sorrow at the battle brothers lost and the failure to stop the Tyranid advance. Whilst the xenos advance forces had been depleted to such an extent they could not seriously threaten the main defences, the shield generator complex was still vulnerable and would be over-run before more forces could be deployed. With the outer-environs lost the Imperial forces must now make haste to fortify Ort Majoris and prepare for evacuation of as many civilians as possible before the bio-horde swarmed over them... Meanwhile Inquisitor Ediva is taking an increasingly dim view of the Blood Angel operations and may soon make moves to secure her own objective. The relic. To be continued... Link to comment https://bolterandchainsword.com/topic/294482-strike-force-aurelian-and-the-silent-dream/ Share on other sites More sharing options...
Klazien Posted July 31, 2014 Share Posted July 31, 2014 Very enjoying read. Can't wait to here how the campaign plays out. Also some nice looking models. Link to comment https://bolterandchainsword.com/topic/294482-strike-force-aurelian-and-the-silent-dream/#findComment-3761681 Share on other sites More sharing options...
Natanael Posted August 2, 2014 Share Posted August 2, 2014 Good read. Sounds like a fun game, even if there was too much flying stuff for my liking ;) Link to comment https://bolterandchainsword.com/topic/294482-strike-force-aurelian-and-the-silent-dream/#findComment-3763575 Share on other sites More sharing options...
Midnightmare Posted August 2, 2014 Share Posted August 2, 2014 I like the fluff, makes battles more meaningful. Enjoyed the batrep too. Nice armies btw :) Link to comment https://bolterandchainsword.com/topic/294482-strike-force-aurelian-and-the-silent-dream/#findComment-3763852 Share on other sites More sharing options...
Corvus_Danseur Posted August 2, 2014 Author Share Posted August 2, 2014 Thanks all- much appreciated :). I can only take credit for the Blood Angels army ;). Next battle is next week! Link to comment https://bolterandchainsword.com/topic/294482-strike-force-aurelian-and-the-silent-dream/#findComment-3763934 Share on other sites More sharing options...
Corvus_Danseur Posted August 30, 2014 Author Share Posted August 30, 2014 Part 2 - The Capture of the Silent Dream A few weeks later due to fieldwork and real life- the next battle in the series has taken place. Hope you enjoy. Background: with the defeat of Strike Force Aurelian, Inquisitor Edvia has taken command of all military forces in the system. Her investigations have revealed the location of the artefact known as the Silent Dream. Located in a now ruined, outlying suburb of the planetary capital, the artefact is in a quiescent state- emitting a background level of psychic dampening. Enough to give nearby psykers the jitters, and seemingly enough to hide its presence from the broods of Tyranids prowling the outskirts of the city as they wait for reinforcements from the main hive fleet to punch through the final line of Imperial defenders protecting the still evacuating citizens. With several indicators that the Silent Dream has its origins in the ancient Interex civilisation, Ediva considers the successful recovery of the Silent Dream more important the lives of both Blood Angel and local citizen alike... Capture the Relic: 1750 points, battle-forged. Standard deployment. Slay the warlord, line breaker and first blood are worth 1VP each. Capturing the relic is worth 3VP. Secondary objective worth 1VP are tactical objectives with three objective points across the centre line of the board as points to capture in order to full-fill the taskings. Tyranid forces: As seen in the photo below- two flyrants, one unit of genestealers, large brood of garygoyles, two units of warriors, three carnifex in a biobomb(?!) formation and a tervigon. And finally a burrowing Mawloc in reserve. Blood Angels forces: Ordo Xenos Inquisitor with power armour, rad grenades, force sword (mastery level 1), psykok grenades, psykotroke grenades, needle pistol and two servoskulls. Accompanied by two bare-bones henchmen, a priest and two death cultist assassins all riding in a Valkyrie upgraded with heavy bolters and missile pods. The Inquisitor is the Warlord and rolled orbital bombardment trait. Using divination powers. The Blood Angels consist of; an assault cannon Baal Predator with heavy bolter sponsons, Storm Raven with assault cannon and multi melta, 10 man ASM with two meltas and twin inferno-pistol wielding sergeant, 8 man death company with thunder hammer and bolters, bare-bones death company dreadnought and a 5 man Vanguard veteran squad with power weapon and lightning claw. And finally... my semi-death star Sternguard Veteran squad; 7 veterans with combi-plasma, sergeant, bare-bone Sanguinary Priest and Lvl2 Epistolary rolling with Telepathic skills (yes I got invisibility). Only the Death Company get the red thirst. Deployment: The Baal takes up a position on the left of centre field in order to have a clear field of fire to the relic in the centre of the board, whilst a combat squad of ASM sits in the ruins in the middle of my deployment zone. Awaiting the chance to jump forward and seize the relic. Rest of the army is in reserves. The Tyranids fully deploy apart from the big tunnelling bug. The carnifexs, warriors and tervigon on the left flank with one flyrant. The genestealers more warriors and warlord flyrant on the right flank (as viewed from my side). With the gargoyle brood in the centre. Turn 1 Blood Angels: Movement: The drop-pod arrives on the right flank (from my perspective) of the Tyranids, the Warlord flyrant is sitting in gliding mode and whilst is in the ruins to provide cover he is vulnerable (not actually in ruins in picture due to balancing issues). The rest of the deployed Blood Angel forces sit tight and await the Sternguard light show... Psychic: invisibility is successfully cast on the Sternguard. Shooting: opening fire with all the combi-plasma and poisoned rounds from the sergeant the Warlord flyrant is perforated by glowing balls of white hot plasma and explodes in a gory shower of ectoplasma and chitin. A good start, gaining me first blood and slay the warlord! Meanwhile the Baal kills four gargoyles. Tyranids: Movement: the remaining flyrant swoops over to the Baal and takes aim at its side armour... Carnifexs advance towards the relic and gargoyles towards the Sternguard. The warriors on the flank with the Sternguard take note of what happened to the flyrant and move into the cover of the ruins. The rest remain in cover/place awaiting the arrival of Blood Angel flyers to see where they shall attack. Psychic: I deny all of his attempts to cast powers, the dice gods are with the Sons of Sanguinius today! Shooting: the flyrant glances to death the Baal Preadator, the Sternguard suffer no casualties due to invisibility and FnP. Assault: the Gargoyles attempt to assault the Sternguard in order to tie them up for at least two turns. However as five gargoyles die due to poisoned overwatch shots they fail to make the charge distance and the veterans are left to continue causing havoc deep in the Tyranid deployment zone. Turn 2 Blood Angels: (apologies for decreasing photo quality, was having light issues). Movement: all Blood Angels reserves are reading from the same page this game and turn up as one! Vanguard marines and melta ASM combat squad both perform pinpoint deep strikes to the rear of the tervigon, whilst the Raven zooms up that flank to provide them with some fire support. The ASM squad already on the table jump forward to claim the relic. The Inquisitoral Valkeryie moves on the table, lining up on the Tyranid warriors that had taken shelter in the ruins. Psychic: invisibility is once again cast on the Sternguard, but Epistolary Nanil perils on a double 6! Fortunately he rolls a 6 and becomes a raging figure of divine retribution as the power of warp courses through him... charge me now 'nids! Shooting: the Sternguard open fire on the Warriors who had moved in the ruins last turn, however a series of excellent cover saves and equal distance from my unit for two of his warriors means that all three are left standing, but with two of the gribblies on one wound each. The Valkyrie tries to finish them off but only succeeds in stripping two wounds of the warrior closest to it, leaving it on one wound as well! Meanwhile on the other flank all forces open fire on the tervigon, his flamers cannot be allowed to attack the deep striking marines! As the smoke clears from the guns of all three newly arrived units the tervigon is a smouldering mess smeared over the ferracrete of the landscape. Cheekily the ASM with the bolt pistols put one wound on the carnifex closest to them... in retrospect it would have been a much better idea for them to run in the opposite direction from said carnifex with the relic... a very Blood Angel rush of blood to the head! Assault: as the vanguard veterans had shot at the Tervigon before it then died to the Raven they were not able to make a charge this turn, woops. The situation at the end of the BA turn two is pictured below > Tyranids: Movement: his deep striking Mawloc fails to arrive. One carinfex moves towards the ASM with the relic whilst the other two turn around and look hungrily at the deepstriking squads behind them. The gargoyles move close to the Sternguard, determined to tie them up this turn. The flyrant moves to grab the third objective, and therefore secure all three for him and score a massive about of secondary tactial objective points. The result of this is that I know it will be virtually impossible to catch on these. Therefore with the Blood Angels having first blood and slay the warlord and the Tyranids the secondary objective. The game will be decided by control of the relic... the Silent Dream is the key to victory. The rest of his forces sit still. Psychic: once again I deny his onslaught cast on the Carnifex, but he does get dominion off. Shooting: the carnifexs, flyrant and warriors brutally open fire on the vanguard veterans and both squads of ASM. With that much dakka coming their way and no FnP it was always going to be messy... a short while later the relic ASM where dead as where the vanguard veterans, the melta ASM had three marines left but a carnifex within 6", never a good place to be! Not good for the Blood Angels. All of their fast moving relic-grabbing troops had just been wiped out to a man. (Before photo above and after photo below!). Assault: the gargoyles manage to charge the Sternguard, who kill two with overwatch as they arrive. In combat not a single veteran falls as the invisibility/FnP combo proves incredibly hard to crack. In return souped up Naniel and Sanguinary Priest Zazriel, along with the veterans, kill six more gargoyles, doesn't look like this tar-pit will last long... Sadly things are not going so well on the other flank as the carnifex makes its charge onto the ASM, who whilst they succeed in putting one wound on him through overwatch- proceed to die in short order. Turn 2 ends looking something like this > Turn 3 Blood Angles: Movement: The raven goes into hover mode and deploys the Death Company in the fray... the crazed maniacs desperate to seek revenge for their fallen brothers. The Valkyrie makes a 90deg turn to the left and flies over the relic... but Inquisitor Ediva doesn't fancy taking on two carnifex on her own and therefore chooses not to avail herself of the grav-chutes. Not much else left on the table, Sternguard are still locked in combat. Psychic: Naniel fails to cast invisibility, but does manage to cast shrouded on the sternguard. Shooting: the Stormraven puts two wounds on the closest carnifex that had just killed the ASM but the bolters of the DC fail to do anything. Meanwhile the DC dread puts two wounds on the nearest warrior to it with its flamer and storm bolter. The Valerie fires on the flyrant and manages to put one wound on it. Assault: The Sternguard easily finish off the four gargoyles for no loss and consolidate 3" into a more spread out formation in case the Mawloc comes-a-calling. The DC make their charge into the carnifex and the DC dread slams into the warriors hiding in the ruins. The DC dread does what it does best and gets blending! Two warriors are killed and the final one left on one wound, the warriors cannot harm him and remain stuck in combat. The DC take one casualty from the carnifex they charged, before the thunder hammer wielding marine steps up and pulverises the brain of the beast. They consolidate 4" to form a line between the hovering raven and the two remaining carnifex. Tyranids: Movement: the flyrant swoops around to the flank of the Valkyrie with a few to taking down Ediva's transport and the Blood Angel's one real hope of securing the relic. The two remaining carnfex move away from the relic(!!) and towards the Death Company... is this the right choice for the 'nids? Only time will tell. The badly wounded warriors near the Sternguard stay in place, but the genestealers start to make a move out of cover towards the relic. The Mawloc arrives, targeting the sternguard. This could be vital, a good hit and my most dangerous unit is going to take a lot of casualties. However the dice gods are not kind and he scatters off the table and suffers a deep strike mishap!! Fortunately for the 'nids he is placed into ongoing reserve and may yet still effect the outcome of the battle... Psychic: only dominion is successfully cast. Really not been a strong physic game for the 'nids this time. The early loss of the flyrant warlord hurt them very badly in this department. Shooting: the warriors manage to kill one Sternguard veteran, the first casualty the unit has taken all game. The flyrant gets a good number of hits on the jinking Valkyrie, however the pilots evasive manoeuvres succeed in avoiding the majority of the glances and it is left smoking but alive on two hull points. Assault: the closest carnifex smashes in to the DC dread that was busy blending the warriors. S10 hammer of wrath... penetrates... but only succeeds in shaking the mad-machine! At this point my opponent makes a massive mistake and thinks that he only has S6 normal CC attacks. No idea why and I didn't know any better either. The end result of this is a dead carnifex and a dead warrior. My opponent comments that he had never seen a Blood Talon DC dread before, and assumed that it was not much of a threat. Oh how wrong he was...! DC dread consolidates towards the one remaining carnifex on two wounds... Turn 4 Blood Angels: Movement: The Raven goes back into zoom mode and flies over to near the Sternguard. The Sternguard advance to meet the Raven The DC and DC dread make a general advance towards the last remaining carinfex who is sitting on two wounds. The Valkerie goes into hover mode and swoops down to the relic, depositing the Inquisitor and her retinue right on top of it. Junior Naval Lieutenant Horace eagerly starts to attach anti-grav globes to the device in order to get in into the transport... Psychic: the Sternguard are once again invisible. Shooting: DC dread and two remaining DC manage to take one wound of the last carnifex, leaving it with 1 wound. Meanwhile Ediva calls down an orbital strike on the genestealers advancing towards the relic. Unfortunately it scatters and nearly hits the relic and Inquisitorial party as well!! One 'stealer dies and the acolytes need a change of underwear... Ediva's needle pistol and snap firing from the Valkyrie kill three more 'stealers, taking them down to four and pushing them completely back into the ruins. Lastly the sternguard fire on the wounded warriors left in the ruins near them and finally kill them all. Assault: The DC dread charges the carnifex , who fails to do any damage with his snap shooting or close combat attacks and is promptly put down by Mr Blend. Total kills for the DC dread are now three warriors and two carnifex. The DC had tried to join him in this endeavour and get closer to the relic in the process, but failed the charge distance. At this point the only 'nid forces left are one wounded flyrant, three 'stealers and a Mawloc who can't seem to hit the side of a barn door. Tyranids: Movement: the Mawloc arrives! Targeting the Inquisitorial group the beast powers towards the surface, churning earth and ferrocrete upwards in an explosive flurry of claws... . ... and misses. In desperation the flyrant glides down to the ground and readies his devourers. The 'stealers advance forwards around the hapless Mawloc. Shooting: The flyrant unloads into Ediva, her retinue takes the brunt of the assault, but still two wounds make it through to her. But the Emperor's most holy agents are not so easily slain. With her comrades fallen around her Ediva readies her sword and challenges the flyrant to do its worst... Assault: the flyrant chooses not to assault the Inquisitor! Instead it wraps its greedy claws around the Silent Dream relic and prepares to take to the air... Instead the 'stealers come piling through and make an 8" charge into the Inquisitor. Despite their ferocious attack she is too skilled, her blade turning aside blow after blow, only one wound slipping past her guard. However the foul xenos are too tough for her to kill any in return, combat is lost but leadership passed. Turn 4 ends looking something like this > Turn 5 Blood Angels: Movement: the Raven goes into hover mode, allowing the Sternguard to leap aboard- and then moves into position lined up on the flyrant. The Valkerie remains in hover mode and scoots round to the rear of the flyrant. DC and DC dread rush to the aid of Ediva. Shooting: both flyers unload all they have into the flyrant as it tries to grasp the relic so recently revealed to the hive mInd- and so desperately wanted by the humancreatures. Its wings pierced by heavy bolter fire, it dies with a cry of rage and frustration as the multi-melta of the Raven burns a hole through its thorax. The beast is dead. Assault: the DC dread makes its charge whilst the DC does not. The 'stealers attempt to claw the last hull-point from the raging machine, but fail. Three snips later and the Inquisitor is saved. Wasting no time Ediva activates the anti-grav globes as she moves into contact with the relic. Ignoring the dullness that clouds her mind as she comes within close proximity of the Silent Dream, the artefact is finally in her possession. And with that the Tyranids concede defeat! Just the Mawloc left and late at night the result was not in any real doubt with the Sternguard ready to deploy next turn should the game continue. The Imperium has won a costly victory. Battlefield Analysis: I should have moved the ASM squad in the ruins on the first turn, therefore moving the relic away from the carnifex second turn. Not sure they would have lived still, but definitely the safer way to do it. The DC where once again a unit to be feared, if you let them rampage in your lines then things are going to die. But stand-out winner has to be the invisible Sternguard, a little cheesy yes, but they destroyed the entire right flank of the Tyranid army all on their own, for one casualty. Freeing the rest of my forces to deal with the other half. The Story Continues: With the Silent Dream safely locked into the rear of the Valkyrie Edvia slumped against the empty jump seats, so many empty jump seats. Horace... the rest... slain. As she stared at the complex, unworkable, workings of the relic she silently vowed to herself that their deaths, and those of the valiant Blood Angels would not be in vain. The Silent Dream would reach the space-port, and be taken to a safe place in order that its warp dampening abilities may be studied and harnessed... TBC! Link to comment https://bolterandchainsword.com/topic/294482-strike-force-aurelian-and-the-silent-dream/#findComment-3795371 Share on other sites More sharing options...
Shaezus Posted August 30, 2014 Share Posted August 30, 2014 Nice report, was a pleasure to read. Glad to see that old napoleonic 'never interrupt your enemy when he is making a mistake' adage in action, there's another player who will never forget the blender! Congrats on the deserved win (even if you did use invis :p) Here..a little something to remind you of that near-miss with the orbital bombardment Link to comment https://bolterandchainsword.com/topic/294482-strike-force-aurelian-and-the-silent-dream/#findComment-3795428 Share on other sites More sharing options...
Nicodemus Doloroso Posted August 31, 2014 Share Posted August 31, 2014 Great reports and a beautiful army. Thanks for sharing. Glad to see an imperial victory in the most recent battle. Any chance of some close-up shots? I'd especially like to see the inquisitor, the Stern Guard (who look like they have some nice conversions), and the Death Company (who I couldn't make out in any shots). Link to comment https://bolterandchainsword.com/topic/294482-strike-force-aurelian-and-the-silent-dream/#findComment-3795564 Share on other sites More sharing options...
Corvus_Danseur Posted August 31, 2014 Author Share Posted August 31, 2014 @Shaezus Hehehe many thanks! Great video that, gotta love the Anglians! And yeah I know invisibility... I've promised that I won't use it every-time. But really needed a win here so went for it . @Nicodemus Dolorosus- thanks . I'm proud of my Sternguard who as you say are quite heavily converted/kitbashed. The Death Company where amongst some of the first models I painted when getting back into the hobby almost a year ago... you can see the difference when close up between them and my latest work, Inquisitor/Baal/Sternguard. Can see larger photos of all my models on my general WiP thread that is linked in my signature.( It's the: WIP, battle reports and finished items). If you want to seeing something more just send me a PM and I will take some decent photos for you. Link to comment https://bolterandchainsword.com/topic/294482-strike-force-aurelian-and-the-silent-dream/#findComment-3796122 Share on other sites More sharing options...
Nicodemus Doloroso Posted August 31, 2014 Share Posted August 31, 2014 Great, thanks Corvus ... I had a look at that thread, lots of great conversions there. It shall be a source of inspiration to me. Link to comment https://bolterandchainsword.com/topic/294482-strike-force-aurelian-and-the-silent-dream/#findComment-3796144 Share on other sites More sharing options...
Recommended Posts
Archived
This topic is now archived and is closed to further replies.