Cloud Runner Posted July 3, 2015 Share Posted July 3, 2015 The last pose, looking in the direction of the blade is great. Just need to carefully slice the gun hand off, and rotate it in towards the body a bit more, as he still looks slightly off balance IMO :D Link to comment https://bolterandchainsword.com/topic/310150-azraelhe-just-doesnt-cut-it-quite-pic-heavy/page/3/#findComment-4112074 Share on other sites More sharing options...
Teetengee Posted July 7, 2015 Share Posted July 7, 2015 Pose 4-5 look best, although I would need to see more angles to decide between them myself. The watcher plus hooded helm idea sounds great by the way. Link to comment https://bolterandchainsword.com/topic/310150-azraelhe-just-doesnt-cut-it-quite-pic-heavy/page/3/#findComment-4116484 Share on other sites More sharing options...
Hm74 Posted July 7, 2015 Author Share Posted July 7, 2015 No further progress this week I'm afraid :(...been trying to get my terminators & DWK's finished as they've been sat patiently waiting to be painting for a while now. On top of that I have a delivery due of tactical, assault, veteran & devestator squads...so really need to get my finger out..lol Link to comment https://bolterandchainsword.com/topic/310150-azraelhe-just-doesnt-cut-it-quite-pic-heavy/page/3/#findComment-4116532 Share on other sites More sharing options...
Hm74 Posted July 16, 2015 Author Share Posted July 16, 2015 So.. This is where we got up to last time. some fantastic suggestions and advise which is always appreciated :) finished magnetizing the left arm and the head opening, magnetized both heads and test for fit....all good and it allows for different head poses (Bonus!) Decided i liked the idea of the greave (think that's how its spelt) emblem just not the one id test fitted. found something more appropriate in my bits jar and chopped, shaved 7 filed until it was the adequate. Filed away the existing greave eagle emblem and removed an area on the greave to allow the new emblem to sit more flush. once happy i then tidied with green stuff. Once this was completed i realised the base + figure may be awkward when transporting so magnetized figure and base...its solid!! As well as my Azrael and DWT/DWK projects i wanted to make a start on my Demi company and so ive taken delivery of a 1x tactical, 2 x assault, 2 x Vets & 1 x Dev squads and have made a start on building the tac squad imparticular the sergeant. decided i wanted all load-out options and magnetized the shizzle out of it! I realised al the options are swappable between the sergeant and Azrael and so had a play! Azrael is pretty much done now, i'm happy with how the builds gone and so bring on the painting updates ;) Link to comment https://bolterandchainsword.com/topic/310150-azraelhe-just-doesnt-cut-it-quite-pic-heavy/page/3/#findComment-4124074 Share on other sites More sharing options...
Stormxlr Posted July 16, 2015 Share Posted July 16, 2015 amazing conversion, but I got to ask about your paints, how did you get them in those nice Valejo like bottles? Link to comment https://bolterandchainsword.com/topic/310150-azraelhe-just-doesnt-cut-it-quite-pic-heavy/page/3/#findComment-4124090 Share on other sites More sharing options...
Vel'Cona Posted July 16, 2015 Share Posted July 16, 2015 I'm psyched to see the first few coats of paint go up! That Azrael is going to look awesome. Link to comment https://bolterandchainsword.com/topic/310150-azraelhe-just-doesnt-cut-it-quite-pic-heavy/page/3/#findComment-4124153 Share on other sites More sharing options...
Hm74 Posted July 16, 2015 Author Share Posted July 16, 2015 amazing conversion, but I got to ask about your paints, how did you get them in those nice Valejo like bottles?Bought the 10ml "eye dropper" bottles off of evil bay, think I paid about £6 for 100 (included delivery) Delivery took a while as they're from Korea but I wasn't in any rush. Once arrived I simply used one of the bottles for water and added The necessary drops of water to each pot, shook well and then poured into new dropper bottles. I used an adapted pair of eye brow tweezers to scoop out the last remaining paint from the pots. You won't get all the paint but I found the amount left in the pots was very minimal. When adding water to the pots I found the amount needed does differ between it being a "base" and "layer" and the colour. I found that all of the Browns are very thick and needed the most water to get to the correct consistency....trial and error really. A good starter paint is Mephiston red, this only needs approx 15-18 drops to get to the correct consistency. Once you've seen the consistency it's just a case of adding additional drops to the other paints as needed. The labels can be cut off the existing pots using your craft knife and simply stuck on the new pots as the label still has enough glue. I had some very small non corrosive self tapping screws which I added to each dropper which helps when shaking to mix the paint. As long as it's non corrosive and small enough you can anything really as long as it's heavy enough to move through the paint All I'd say is be patient, don't rush and take your time..it helps that I suffer from mild OCD, have no friends and class my self as a geek ;) Let me know how you get on. Also, YouTube is very good to see how it's done. Link to comment https://bolterandchainsword.com/topic/310150-azraelhe-just-doesnt-cut-it-quite-pic-heavy/page/3/#findComment-4124349 Share on other sites More sharing options...
Rhetoricus Posted July 16, 2015 Share Posted July 16, 2015 Hahaha thats completely bonkers!!! Hat's off to you sir, I love it. With that amount of dedication, and determination, before you've even got a brush wet, this is one i'll be keeping an eye on I think. Link to comment https://bolterandchainsword.com/topic/310150-azraelhe-just-doesnt-cut-it-quite-pic-heavy/page/3/#findComment-4124381 Share on other sites More sharing options...
Ratboy1664 Posted July 16, 2015 Share Posted July 16, 2015 exceptional kitbash, congrats Link to comment https://bolterandchainsword.com/topic/310150-azraelhe-just-doesnt-cut-it-quite-pic-heavy/page/3/#findComment-4124423 Share on other sites More sharing options...
dogfender Posted July 16, 2015 Share Posted July 16, 2015 great job! Though I would find away to give the HQ a chest plate that isn't so generic with the tassel. Link to comment https://bolterandchainsword.com/topic/310150-azraelhe-just-doesnt-cut-it-quite-pic-heavy/page/3/#findComment-4124427 Share on other sites More sharing options...
Hm74 Posted July 17, 2015 Author Share Posted July 17, 2015 great job! Though I would find away to give the HQ a chest plate that isn't so generic with the tassel. I personally like the tassels and was the main draw to the figure. I've tried to make him more DA and hopefully I can do him justice when it comes to paint time Thank you all for the positive comments ;) Link to comment https://bolterandchainsword.com/topic/310150-azraelhe-just-doesnt-cut-it-quite-pic-heavy/page/3/#findComment-4124626 Share on other sites More sharing options...
Hm74 Posted July 17, 2015 Author Share Posted July 17, 2015 Hahaha thats completely bonkers!!! Hat's off to you sir, I love it. With that amount of dedication, and determination, before you've even got a brush wet, this is one i'll be keeping an eye on I think. hey Rhetoricus, thanks for the comments and just noticed you're located in Hull, i'm also located in Hull...such a small world..lol Link to comment https://bolterandchainsword.com/topic/310150-azraelhe-just-doesnt-cut-it-quite-pic-heavy/page/3/#findComment-4124693 Share on other sites More sharing options...
DanforthLaertes Posted July 17, 2015 Share Posted July 17, 2015 Absolutely lovely model - really, really very nice. Link to comment https://bolterandchainsword.com/topic/310150-azraelhe-just-doesnt-cut-it-quite-pic-heavy/page/3/#findComment-4124781 Share on other sites More sharing options...
Vel'Cona Posted July 17, 2015 Share Posted July 17, 2015 Man, I love the idea but I can't imagine re-potting all of my GW paints. That's some serious dedication! Link to comment https://bolterandchainsword.com/topic/310150-azraelhe-just-doesnt-cut-it-quite-pic-heavy/page/3/#findComment-4124937 Share on other sites More sharing options...
Hm74 Posted July 17, 2015 Author Share Posted July 17, 2015 Man, I love the idea but I can't imagine re-potting all of my GW paints. That's some serious dedication! To be honest I don't think it took that long, probably an afternoon at the most ;).....after reading about the amount of paint that's wasted and the damage done to brushes when using the Citadel pots it's just made sense to do it..and once you've done it the once you just keep topping them up. Link to comment https://bolterandchainsword.com/topic/310150-azraelhe-just-doesnt-cut-it-quite-pic-heavy/page/3/#findComment-4125104 Share on other sites More sharing options...
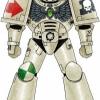
Hm74 Posted November 16, 2015 Author Share Posted November 16, 2015 Finally got my finger out and managed to finish my Azrial. I'm gutted as he didn't come out as well as i'd hoped. First time using Army Painter Angel Green and with hindsight i should have run a test miniature first to see how it applied Stupidly of me i assumed it would apply the same way as the other sprays i tend to use. I found the Army painter goes on very "thickly" even when sprayed from quite a distance from the miniture. As such some of the detail has been lost (especially on the left shoulder)...I'm usually very careful when applying sprays and tend to apply using multiple thin layers but i really struggled with this stuff...needless to say i wont be using again ;( On the plus side i do like how his banner came out. Well let me know your thoughts and feedback is always appreciated to try and improve. Link to comment https://bolterandchainsword.com/topic/310150-azraelhe-just-doesnt-cut-it-quite-pic-heavy/page/3/#findComment-4226143 Share on other sites More sharing options...
Corswain Posted November 16, 2015 Share Posted November 16, 2015 He looks fantastic! So much better than the official model. I really like the way you have incorporated parts of he original model though. Link to comment https://bolterandchainsword.com/topic/310150-azraelhe-just-doesnt-cut-it-quite-pic-heavy/page/3/#findComment-4226153 Share on other sites More sharing options...
marvmoogy Posted November 16, 2015 Share Posted November 16, 2015 I'm really impressed with your vision and dedication to this project. AS has been said before, you have sold yourself short re: your skills - this is a very impressive piece of work for someone of your experience! You have got no reason to be 'hacked off' with yourself! The green is exactly like the DAs should be (for me) - non of this moot green / warpstone psychedelic glow or whatever it is called highlighting! I love the bronze on the weapons and the conversion work is sublime. Only 3 things for me: 1) The greenstuff coils you have added don't look as neat as everything else on the model 2) The plasma part of the combi-bolter needs something....maybe some highlighting / contrasting colour....just something but I can't put my finger on it! 3) I'd put an OSL style glow around the eye lenses...I think this would add some drama to the mini! Feel free to ignore me though - this is a fantastic piece of work! Link to comment https://bolterandchainsword.com/topic/310150-azraelhe-just-doesnt-cut-it-quite-pic-heavy/page/3/#findComment-4226203 Share on other sites More sharing options...
Teetengee Posted November 16, 2015 Share Posted November 16, 2015 looks pretty good! Link to comment https://bolterandchainsword.com/topic/310150-azraelhe-just-doesnt-cut-it-quite-pic-heavy/page/3/#findComment-4226278 Share on other sites More sharing options...
Grizzly_bear Posted November 16, 2015 Share Posted November 16, 2015 Now that's s stunning model Link to comment https://bolterandchainsword.com/topic/310150-azraelhe-just-doesnt-cut-it-quite-pic-heavy/page/3/#findComment-4226287 Share on other sites More sharing options...
furstyferret Posted November 16, 2015 Share Posted November 16, 2015 Great job on your version of Azrael. He's just one of a few models that were made 'back in the day' which (for some reason) have never had an update of any kind. You've made a far more impressive commander model and brought him up-to-date. Link to comment https://bolterandchainsword.com/topic/310150-azraelhe-just-doesnt-cut-it-quite-pic-heavy/page/3/#findComment-4226313 Share on other sites More sharing options...
That Guy Matt Posted November 16, 2015 Share Posted November 16, 2015 I want to say first that I really like your conversion. He's a great commander and you've done a good job painting him too. He doesn't scream Azrael at me though. Maybe that's a good thing though because, yes, he really needs updating. Link to comment https://bolterandchainsword.com/topic/310150-azraelhe-just-doesnt-cut-it-quite-pic-heavy/page/3/#findComment-4226735 Share on other sites More sharing options...
deathspectersgt7 Posted November 16, 2015 Share Posted November 16, 2015 For the Lion!!!!! Xcellant Link to comment https://bolterandchainsword.com/topic/310150-azraelhe-just-doesnt-cut-it-quite-pic-heavy/page/3/#findComment-4226860 Share on other sites More sharing options...
Col.hertford Posted November 16, 2015 Share Posted November 16, 2015 Well played brother. A truly excellent conversion. Link to comment https://bolterandchainsword.com/topic/310150-azraelhe-just-doesnt-cut-it-quite-pic-heavy/page/3/#findComment-4226867 Share on other sites More sharing options...
Cyrox Posted November 17, 2015 Share Posted November 17, 2015 Very nice conversion, although i feel he could do with a little more highlighting and something small under his left foot to level him off and stop the slight lean forward. Maybe a piece of slate from the basing kit or something? The head looking in the direction of the blade looks great, and its a great mini Link to comment https://bolterandchainsword.com/topic/310150-azraelhe-just-doesnt-cut-it-quite-pic-heavy/page/3/#findComment-4227134 Share on other sites More sharing options...
Recommended Posts
Archived
This topic is now archived and is closed to further replies.