Allied Freeblade - Part 3
Hi Folks,
Asmall update as a third installment of this WIP series of posts.
The upper part of the Styrix is now close to completion. Paultrons have been painted and I only have left their mounting into place, or rather their glueing as they can be fairly easily be mounted "dry".
The wepons, carapace... are alredy assemblied and fixed.
I planned getting this torso unglued to the legs, in order to get transport easier, but it will not happen: the mini is too heavy to set in place without superglue.
I am starting thinking about more details through decals. I have some extensive amount of decals and I will rpobably get enough to personalize at a sufficient level, yet both paultrons and armoured legs of this model have "unusual" dimensions that makes that most decals are too big to fit. And I do not want to go free hand. I do not have the minimun required talent for that.
It might be the moment to try printing my own decals finally. I have all the material for 2 or 3 years, just waiting for an opportunity...
While I am thinking about it, here are some pics:
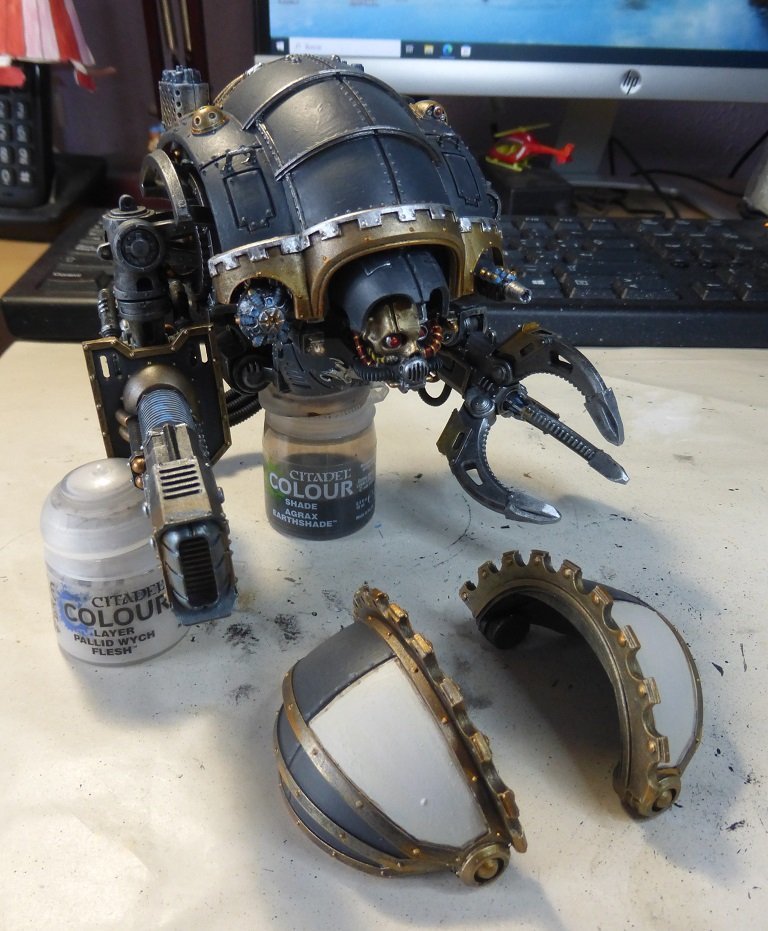
The big boy´s upper torso in dangerous position...
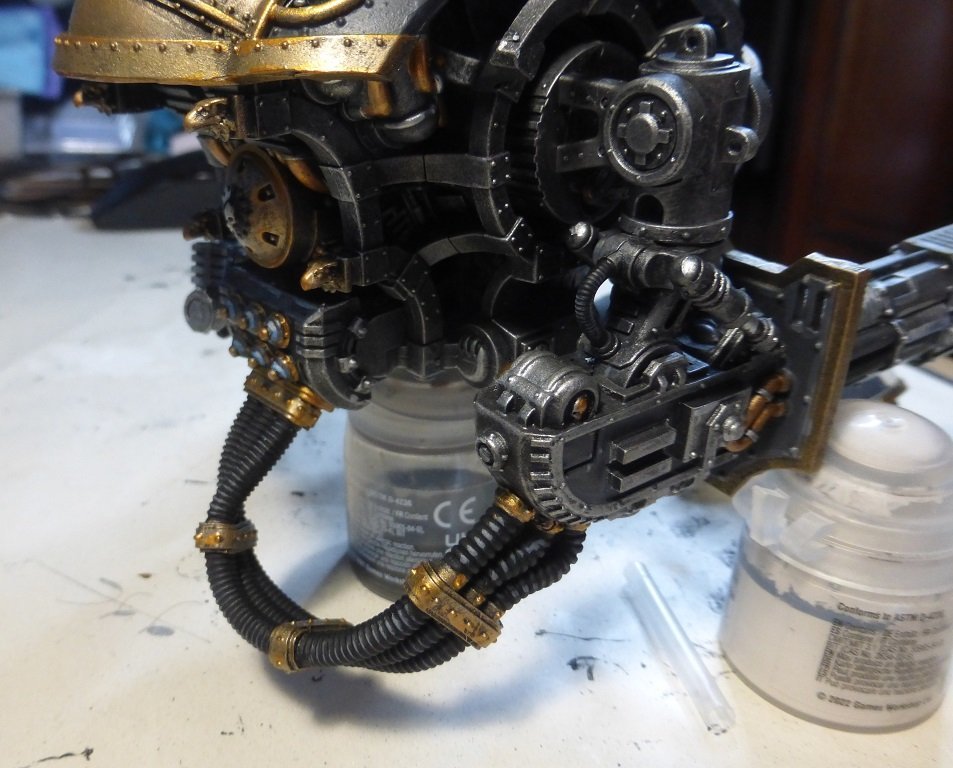
Detail of the bended power cable - my wife´s hair dryer proved to be a very valuable tool to recover the proper bending angle.
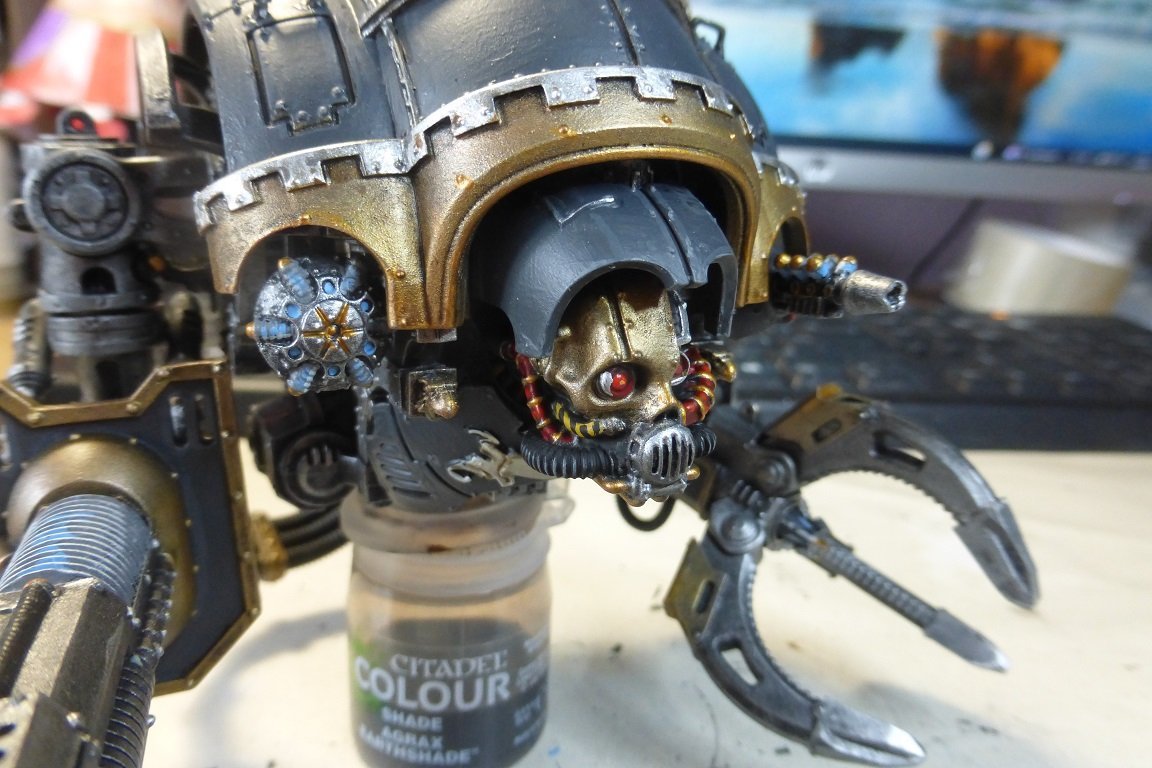
Another close up of the knight´s front view
More to come soon, with lower part maybe?
Cheers.

0 Comments
Recommended Comments
There are no comments to display.
Create an account or sign in to comment
You need to be a member in order to leave a comment
Create an account
Sign up for a new account in our community. It's easy!
Register a new accountSign in
Already have an account? Sign in here.
Sign In Now