Search the Community
Showing results for tags 'knight'.
-
From the album: Knights
-
From the album: Knights
-
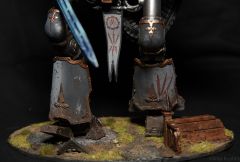
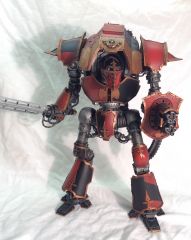
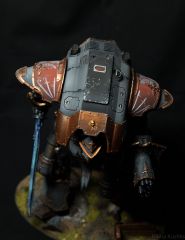
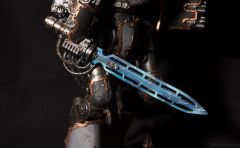
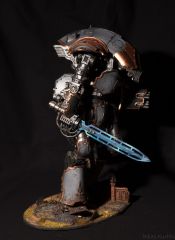
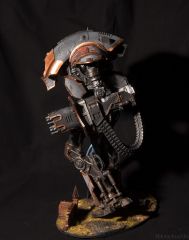
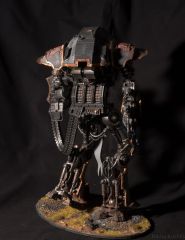
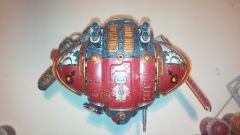
From the album: Castigator Knight
-
From the album: Castigator Knight
-
From the album: Castigator Knight
-
From the album: Castigator Knight
-
From the album: Castigator Knight
-
From the album: Castigator Knight
-
From the album: Castigator Knight
-
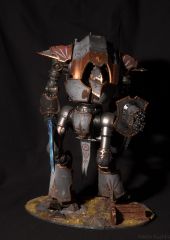
From the album: The Knight
-
I'd like the opinions of those who dwell in this sub-forum, I'm thinking of making some knight paladins and after researching for the past while I'm left wondering which style is more popular with AM fans? I'm partial to most aspects of the early Knight design by Jes Goodwin but certain aspects of the Dave Andrews plastics appeal to me as well, namely the more sculpted industrial looking upper torsos. I'd love to hear some thoughts on this, as well as any on the different Knight versions as well (wardens, lancers etc.)
-
The revolution will be magnetized. Buckle in for a very pic heavy tute on getting the 100% correct representation of both weapons. Of course, the amount of time this took might make an eBay purchase seem worth it. I've used three different sizes of magnets on this, plus some magnetic strips (they come with a sticky back, purchased at Wal-Mart for very cheap, and are not terribly strong). Unfortunately, I don't know the actual size of the magnets as they've been collected over time and as gifts. Let's start with a look around where the magnets have been placed in the main gun body. First up, take a look at this weird black thing where the ammo bits attach. That's a piece of low-strength magnet strip that I got at, of all places, Wal-Mart. It's basically magnetized sheet plastic. It's super easy to cut to shape and it's dirt cheap. I could have used little rare earth magnets here, but honestly the pieces stay on with just the tension of the plastic because the bits are so well cut. I love this kit. Anyway, this is just a base that's been cut to fit so it works for both of the ammo bits. The white around it is ghosting from superglue fumes. Flipping it around, you can see the small magnet I sunk into the area where the heavy stubber ammo and body will attach. I'll cover the gap with some liquid green stuff later. Since the main body is not (and will never be) glued, you don't have to worry about getting this step in early or missing it. You can also see the magnet housing on the front of the gun. Speaking of which: Here's the front, where the main weapon barrels will attach. I've built this out of bit of sprue that has the cylinder of extra plastic sticking up. It's nice to be able to sink the magnet into something so the superglue has more to attach to, and prevent it popping out. You can also see a bit of sprue that I've jammed on one side just to give the plastic center sprue to glue to. This is only glued on ONE SIDE of the main gun body. The part touching the left is not glued, as you need to be able to take the main body of the weapon apart. Now flip it to the back. And here's the back. There's a cap that fits over this (the one with the AdMech cog) and this is really important. The only thing holding the two halves of the main gun body together are this cap, and the barrels on the front. These magnets have to be pretty strong to give you a sturdy base. I'll show another angle of this in a little while, as there's a little plastic spacer under it as well. Now that we've taken a tour around it, let's take a look at the bits. Here's the back cap I was just talking about. You can see I've simply glued a piece of T-shaped sprue down here to give it the right length. Here you can see the two halves joined. They are literally touching. Note the tiny bit of sprue spacer under the one attached to the main gun body. I just kept filing it down little by little til it allowed them to just touch and glued it in place. Also note the bit of sprue by my finger, with another magnet sunk into it. This is where the tubes for the ammo bits will snap into place. Here's another angle of the spacer for the back cap and the magnet on the bottom. Okay, let's look at putting together the melta bits, piece by piece. First things first, you have to open the body up and pop the fuel manifold inside it. You can see now that one of the hoses has a magnet in it, which snaps quite nicely in place with the one in bottom of the gun. This will not be visible in the final build as it's recessed. This is the back of the melta fuel cans. You can see more of the black magnet strip. Behind this are a couple pieces of sprue glued together and trimmed down so this fits nice and flush with the one on the body. Also, note the bits of sprue that are glued on the bottom. Those are staging the housing for a small magnet on the other side to nest in there. Flip that bit over and this is what you see. The other side of the cans. Now you can see the little magnet in there. This bit was a little fiddly, and I'll have to do a spot of green stuff around it as some detail was lost in the drilling. Now simply pop fuel cans on and attach the end of the tube, which also has a magnet on it, into place. I had to rebuild half the tip of this hose out of GS again, as the plastic was split 50/50 with the can bit and I had to cut away the other half to drill out the magnet hole. You'll see what I mean when you look at the plastic part. Now here comes the business end. This is the inside of the melta barrels. As you can see, I used yet more sprue bits and dropped them into the barrels themselves to build up the space for the magnet to attach to. There are three spans in there, and then I drilled just a shallow hole and mounted the magnet there. The back of the sprue bits are resting on a cross beam between the barrels, so it's quite sturdy. Pop the back cap on, and the barrel, and you're done. There are magnets on the tips of both hoses, the cap and barrel, and the strips on the body and the cans. It's sturdy as heck. I can shake it around and it stays together. Now for the cannon. Back of the ammo can. Once again, a strip of the black magnet, supported by sprue bits behind for spacing, and superglued in place plus a small magnet sunk into the tip of the tube. Attached to the body so you can see how the magnets in the tubes match up, this time from the front of the gun istead of the back. And from the front. Tight fit. Notice how the back of the gun is empty, to allow for the recoil mechanism and breach to operate (in my imagination). Again, this is the step I've seen people are skipping but I think it makes the cannon very distinctive when fully assembled. If I didn't care about this hollow chamber, this tutorial wouldn't exist because the rest of the job would be SO much easier. Turn it over and get your heavy stubber bit ready. This one has a very small magnet, and another VERY small spacer made out of scrap sprue that was filed into shape and glued down. I used a pencil to mark the right spot on the gun body so these would match up. NOTE: I thought at first that I'd be able to simply glue the back of the gun to the front plate of the cannon. It looks like it fits and would be super easy if it worked. YOU CANNOT DO THIS and keep it intact when you take the barrel and plate off. There is molding on this stubber bit that fits right around detailing on the gun body, so you can't slip the half of the gun straight back if this is glued in place. If you try to twist it sideways, it puts too much sideways stress on the back of the heavy stubber. I had it glued in place at first but I noticed the problem before the glue dried. Glad I didn't have to cut it. Now pop it on the gun body. It fits around some molding so it slides into the correct position and it's held in place with the magnet. Just need the barrel now. Here's the inside of the cannon, showing the magnet. I had to cut this little sprue bit down just right. It's got a lip on it, so it sits down into the barrel about halfway but is seated on the rim there. This allowed the glue more surface area and added stability. Slap the magnet on there (just glued right to the surface this time) and she's ready to rock. Pop that on the front. And that's it! Notice the empty rear chamber. The two guns really do look distinctive. And from the back. Again, it's really pretty sturdy. In this build, there are magnets in the barrel and cap, on the stubber and body, on the ammo can power tube and body, and then the black strips on the body and ammo can itself. Again, since most of these pieces hold together pretty well even without the magnets, this is all very flush and pretty tough to budge or mess up. Note how the stubber looks nice, like it's built right into and through the shield plate. I've seen a fair few builds that didn't even have the back of the stubber. For shame… So, that's that. A lot of work, but I think it's worth it. The thing is all sprue bits and too much glue, but better safe than sorry. As always when working with magnets, be careful to get the polarity right BEFORE you glue it. Also, since most of your tools are probably metal, keep some toothpicks (cocktail sticks) or plastic tweezers around to fudge with the position of magnets while the glue sets. If they flip up and attach to your tweezers, take the time to check the polarity again. It's not a fun mistake to discover. Also, there were many times where I could have fudged the spacing. Magnets this strong work pretty well even when they're not actually touching, but as the main gun body wasn't glued or even magnetized, the ones on the back cap and front of the gun had to be as strong as I could make them. I spent a lot of time cutting, filing and glueing the sprue spacers to get them just right. I also spent quite a bit of time with the drill to get the magnets sunken in the way I like. I usually like to leave them sticking out just a tiny bit, but most people like them flush. I'm sure if you're reading this you have your own preference. As long as they're invisible once it's painted, you're fine. Hit me up with any questions you have.
- 5 replies
-
- 5
-

-
- knight
- conversion
- (and 3 more)
-
 Making an Adeptus Mechanicus army is a complex task, normally involving lots of converting & kitbashing. It's helpful to see what other people have done, to get inspiration. This thread aims to help with one specific part of the Adeptus Mechanicus: the Knights. Knights are giant one-man warmachines, that bridge the gap between Dreadnoughts and Titans. Whilst they're a long-established piece of Adeptus Mechanicus fluff, until 2014 they had only seen official models in Epic scale. But lots of people have made 40k scale models of them, and in this thread we'll showcase these. FLUFF & EPIC MODELS Origins & Allegiance (NB: Based on pre-2014 fluff, needs to be edited) The Knights have their origins during the Age of Strife. The Priests of Mars sent out teams settling new worlds, establishing Forge Worlds and so on. They gave technology to the feudal worlds near the Forge Worlds - these feudal worlds became the Knight Worlds. The most popular piece of technology was the Knight, a heavy one-man walker. Using these vehicles the Knights could compete with Eldar Exodites on dragons, Eldar Knights, Ork Stompas and other such threats. Knights are often called up to serve alongside the Mechanicus or the Titan Legions. Some Knights also work directly for the Mechanicus - in the Horus Heresy 'Mechanicum' book there are 3 knights called the 'Knights of Taranis' based on Mars. Knights mostly belong to Knightly Houses. Details of all the official ones can be found here. Physical Description Knights are one-man heavy walkers. They are taller than dreadnoughts (6m tall) and smaller than warhound titans (14 or 15m tall) - the Horus Heresy 'Mechanicum' book describes one 9m tall, whereas some Epic models were as tall as a Warhound although much less bulky. They are mostly bipedal and roughly humanoid, and feature a cockpit resembling a helmet. There are a variety of types, but typically Knights are armed with 2 main armaments (on their 2 arms). Typology & Epic Models Knight Paladins are the most common Knights, armed with gigantic weapons (often chainswords) and a battle cannon. 1991 Catalogue 1995-96 Catalogue (metal) 1995-96 Catalogue (plastic) Knight Errants are a version of Paladins with weaponry better suited to attacking large vehicles - a large melta-based thermal cannon and a power fist. In the 2014 reboot, they just have a thermal cannon and a chainsword.1994 CatalogueKnight Lancers are more high-speed, specialising in flanking enemy positions. They often have very long legs, and are armed with a power lance.1991 CatalogueKnight Crusaders and Knight Castellans are heavier Knights, without combat weapons. Both feature a small quake cannon as their primary weapon. Their secondary weapon varies: Crusaders are anti-vehicle and have twin lascannons; Castellans are anti-infantry and have multi-barrelled autocannons.Crusaders: 1994 Catalogue Castellans: 1995-96 Catalogue Knight Wardens are another type of heavy Knight lacking close combat weapons. They have distinctive for their overlapping armour plates and are armed with two multi-barrelled autocannons and a carapace-mounted missile launcher.1991 CatalogueBarons are the head of feudal households, with personalised and individualised suits. The standard model had a battlecannon and a power lance.1995-96 CatalogueNon-Imperial Knights There are also Chaos Knights, twisted versions of the proud Imperial Knights. GW have only released models for Slaaneshi Knights, pictured here in the 1995-96 Catalogue. The Chaos Daemon Engines like the Defiler (GW website), Decimator (Forgeworld), Forgefiend/Maulerfiend (GW website) and Lord of Skulls (GW website) are all vaguely similar in scale to Knights, but are controlled by bound Daemons rather than people. The Grey Knight Nemesis Dreadknight is a very similar concept, although the Grey Knight isn't in an enclosed cockpit: GW website The Eldar also had Knights, which looked similar to their wraithlords but larger - the humanoid Fire Gale, four-armed Towering Destroyer, and four-legged Bright Stallion: 1991 Catalogue. In 2013 GW released the Eldar Wraithknight - a one-man walker that's almost the size of a titan: GW website The Ork Stompa is broadly similar (a mini-titan), but is a bit larger and not one-man: GW website The Necron Triarch Stalker is a large one-man walker, so roughly analagous: GW website The Tau XV104 Riptide Battlesuit is a similar concept to a Knight, a large 1-man walker: GW website GW'S 40k IMPERIAL KNIGHT MODEL In 2014, Games Workshop answered all our prayers and released an Imperial Knight model. It's huge (6 or 7 inches tall), and bulky, and so beautiful. A proper updating of the Epic model into 40k scale, which fits in beautifully with the Forgeworld Mars Pattern titans. Lots of people have brough them. In this section we'll look at some notable conversions, not at standard builds. We'll examine scratch-builds and alternative kits (and all models made pre-2014!) in the section below. Re-posed Knights Some people have re-posed their Knights, to have them running or climbing scenary. The GW model comes with one-piece legs, but these can be modified: Quindia Studios blog - A mini-tutorial on reposing the front leg to stand on things. JeffTibbetts on B&C - Fully reposed legs and heavy battle damage. Nusquam on B&C - made the legs more upright, less straight. Also cut the helm in half to make a cool gorget-style faceplate. Extra Detailing For some people, a plain GW kit just isn't enough. They have to add extra details... 40k Hobby Blog - with added interior detailing. SpartacusBob on DakkaDakka - a standard build, but with lights! isotope99 at BoLS - a knight being prepared for battle, with full interior decorating and a techmarine busy repairing armour plates. Knight Errants with Power Fists In Epic, Knight Errants had Power Fists. Forgegworld is rumoured to be making one, or some people think that Defiler claws are the way forward, or others are are trying to scratch-build them. Golem Painting Studios on Fb - a full tutorial, using spoons (genius idea!) Koran on B&C - A thread dedicated to scratch-building a powerfist. Knight Lancers/Barons with Power Lances In Epic, Knight Lancers and Knight Barons had battlecannons and power lances. Miteyheroes on B&C - The Baron of House Nordcote has a scratch-built Power Lance (and the head swapped with a sentinel cockpit).Knight Wardens In Epic, Knight Wardens had distinctive overlapping armour plates, twin multi-barrelled autocannons on stubby arms, and carapace-mounted missile launchers. Quindia on BoLS - A standard knight torso rotated more to the front gives a beetle-backed look reminiscent of the old Epic model.Chaos / Dark Mechanicus Knights Although according to the rules Chaos can't ally with Knights, people are making Chaos Knights anyway. Two such houses are mentioned in the background section of the Codex, House Devine (Slaanesh, fell during the Horus Heresy) and House Drakon (Dark Mechanicus, fell more recently). GuitaRasmus on B&C - An evil spikey knight, with a truely terrifying head. GW Metro Centre on Facebook - a bright pink Slaaneshi knight. I love the weapon-tail, just like old Epic Chaos Titans! Andy at GW Oxford on Facebook - two corroded and evil Dark Mechanicus knights. One with a Forgeworld Renegade Psyker instead of a head, another with a Blight Drone head and lots of tentacles! Unknown - a walking Lord of Skulls using Imperial Knight legs. More Unusual Conversions Conversions that don't really fit into any of the other categories. What even is this? Unknown - an Imperial Knight torso on Lord of Skulls tracks... Looks a bit like a Kaban Machine, I guess? And if you've made a walking Lord of Skulls, this is the obvious next step! Brian Slifka on Facebook - a looted knight. Orks will loot anything! SCRATCH-BUILT 40k MODELS Until 2014, GW only made Mechanicus Knight models for Epic, although they made similar models for Grey Knights, Eldar, Tau, Chaos and so on. But they did produce many kits that people converted to make into Knights for 40k - I've collected some of my favourite conversions below! Size-wise, the conversions varied between 4 and 8 inches tall (whilst the official model is between 6 and 7 inches tall). Compare it to other 40k models: dreadnoughts and sentinels are 2 1/2 to 3 inches tall (contemplators are 3); dreadknights, decimators and forgefiends/maulerfiends are 4 inches; the riptide is 6 inches; monoliths are 8 inches to the very top; wraithknights are 9 inches; warhounds are about 10 to 11 inches. The Upright Defiler Probably the most widely-done technique, and for a long time the only one apart from Full Scratchbuilding that was available to someone not wanting to stray beyond GW-only bits. Personally I find them a bit too lanky - they tend to be overly skinny? But they're the best way to get a good amount of height. Hortwerth on Warseer - let's face it, you have to mention Hortwerth! I don't particularly like the angle of his legs/hips though, they look odd. The Damned Artificer on Warseer - another of the great sources of inspiration! I really like his Knight, particularly the curved torso armour. The Hoff on Warseer - the third of the Great Inspirational Trilogy, Hoff's Knight features legs built more like a sentinel (with forward and rear joints) and an excellent beaked head. Loki on Work In Progress - a really scary Chaos Knight! Major Buzzmore here - cool models, dramatically re-posed legs and lovely weathering on the paint scheme. Bad Buddha here - less lanky than many Defiler-Knights, very brutal. Jonathan Willingham on WhiteScars blog - really matches the Forgeworld Mars-pattern Titans. Beautiful work! xeniusascendant on CoolMiniOrNot - A massive beast! An upright defiler with most of a land raider on top, standing 14 inches tall (bigger than a Warhound!) Xanthos on DakkaDakka - Really dynamic model with a sentinel head and Whirlwind missile pods as fists! CommissarKhaine on DakkaDakka - A very tall model, combining defiler and manufactorum bits. Miteyheroes on B&C - The Crusader uses a defiler torso and a sentinel cockpit head. Smaller than most Defiler-Knights. The Blood Slaughterer The torso of a Blood Slaughterer does make a very cool Knight-Titan. Of course, you need to make legs (scratchbuilt or from Defilers or whatever), but it's a great base! King Fluff on the Great Crusade - scratchbuilt legs and lots of great other components. The complete Knight Titan household at the end? Gorgeous. The whole thread is just so inspiring. I love how he rotates the torso round to make a Warden. Miteyheroes on B&C - The Lancer uses the Blood Slaughter torso with defiler legs and a sentinel cockpit for a head. The Dreadknight As soon as Grey Knights came out people seemed to grasp the possibilities of this kit! It needs the least conversion - give it a cool head instead of the stupid baby-walker and you've got a great Knight model! It's on the small end of the scale though. Miteyheroes on B&C - The Paladin is a Dreadknight with a sentinel cockpit for a head. NineBreaker's on DakkaDakka - the cockpit is a bit too Eldar / anime for my liking, but it's very well-done. Xanthos' on DakkaDakka - a Valkyrie cockpit and some massive guns! Brother-Captain Basilus on The Great Crusade - a whole household, 'House Katchar', with great modifications, very dynamic posing and some beautiful battle-damage painting. A baron, 2 paladins and 2 wardens. Pendragon38 on BoLS - interestingly uses a Storm Raven top-turret as the cockpit. Adir on B&C - sentinel cockpit head and massive chainsword arms... Vforvendetta1 on Wikia - a very nicely painted dreadknight, with the babywalker turned into a cockpit. Dave Taylor Miniatures - lovely brass paint-scheme, wonderful lance & gatling gun conversions. But how does it see? The Decimator Forgeworld's Large Chaos Walker. With a slightly larger head it'd be a perfect Chaos Knight Titan. It's gorgeous! It does take quite a lot of sanding to make it plain and suitable for loyalist AdMech, but for the renegade AdMech it's a (machine)godsend. Again, it's a little on the small end of the scale. Forgeworld Chaos Decimator Daemon Engine - the official model on Forgeworld's site. So pretty! Miteyheroes on B&C - The Baron is a sanded-down Decimator, with a sentinel cockpit for a head. The Dreadnought Dreadnoughts are really too small to be Knights, standing 2 1/2 to 3 inches tall rather than 4 to 8 inches. But using sentinel legs can help, and the sentinel cab also then provides a nice cockpit. Magc8Ball on DakkaDakka - a dreadnought/sentinel kit bash. Certainly gives interesting ideas about what could be done! Alexander the Alchemist - a short-and-stout heavy Knight with a sentinel cockpit, dreadnought body, and legs made from bastion lascannon mounts. The Lord of Skulls The Lord of Skulls is a Chaos Super-Heavy, with a humanoid torso on a tank lower body. Some people have added legs to it: Isotope99 on BoLS - a flying Lord of Skulls, with defiler claws as legs and helldrake wings. Agis on Blogspot - another attempt at a flying Lord of Skulls, with legs a combination of scratchbuilding and defiler claws. Quickfuze on DakkaDakka - a walking Lord of Skulls using Leviathan legs. Unknown - a walking Lord of Skulls using Imperial Knight legs. Full Scratchbuilds & Resin Kits Not the easiest route, but several people have made full scratchbuilds or extensive kit-bashes. Some have even made casts of their work, and these turn up for sale occassionally (and normally only briefly before GW takes them down!) Frowbakk on Warseer - barricades and IG tank track guards combine, somehow... Tebrey on Photobucket - a Lancer, Baron and Warden, entirely made from plasticard. Great updatings of the classic models, made to fit in with the Lucius pattern style of titan. See also his Knight Warden on Work In Progress and his Knight Lancer on Work In Progress. Big Daddy on DakkaDakka - seriously old-school, really close reproductions of the old Epic models. See also his French blog Kouzes' paladin - Totally stunning conversion & paintscheme of a Big Daddy Knight. In French. Lordokaos on Livejournal - An old-school resin kit off ebay. AdeptusCustodes on B&C - a very cool scratch-built model, mixing old-school and an almost Contemptor type feel. Cold Moon - several different models here, all closely based on the classic Epic models. http://www.tanksandtrolls.co.uk/40KPaladinTanks & Trolls[/url] - card templates for a Paladin. At 30cm high it's a bit too tall, IMHO, but you could resize the templates? Isotope99 on BoLS Lounge - a hulking beast, built in a warhound/warlord style. All GW parts, including a Shadowsword gun housing as the main body and a land speeder as the cockpit. Painted pictures here. Vitruvian XVII on DakkaDakka - a squat and tough hulking figure. Non-GW Models There are lots of Mecha models out there that can be given a GW gloss and called Knight Titans! Here are some that I like: Musing of a Metal Mind's Warden - a great updating of the overlapping plates and hunched form of the Warden Knight Titan. It's massive though! Zealot Miniatures - clearly meant to be a dreadKnight replacement, but with it's helmet and everything it looks rather Knight titany. There's also a varient with a more robotic head. Warmachine - there are many models in the Warmachine range that look quite AdMechy, and some of the Colossals are pretty good for Knights? DreamForge-Games - their "Leviathan" is a great Knight. They've made him in 15mm scale, 4.5" high, and in 28mm scale, 8.5" high. Which should make people who like their Knights smaller <em>or</em> larger happy! Originally in resin, thanks to a Kickstarter he's now available in plastic and much much cheaper.
 -
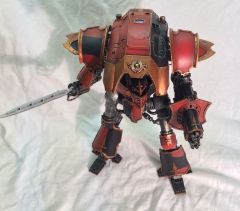
I'm currently preparing my Adeptus Mechanicus army (see http://admech.blogspot.com/ for more details) for Armies on Parade. And I wanted some big impressive eye-catching centrepieces - I wanted Knights! Step 1 was to do some research (you can tell I'm a librarian in real life, right?) So I devoured the original fluff and scoured the internet to see how other people had converted their Knights, and gathered all my findings and links into the uber-post here: http://www.bolterandchainsword.com/index.p...howtopic=248882 My plan is to make a complete feudal Knightly household - House Nordcote (named after my mother's family, using their heraldry). In the original fluff there were 7 different types of Knights. For now I'm making 4 of the 7: the basic Paladin, with battlecannon and chainsword the scout Lancer, with battlecannon and power lance the heavy Warden, with carapace-mounted missile launcher and twin gatling guns the anti-tank Crusader, with mini-quake cannon and twin-linked lascannon If I get time I'll add an Errant (meltacannon & powerfist) and a Baron (individualised & fancy suit), but this current list covers a nice spread of styles. I want each type to be clearly distinct, made from very different parts (and stealing ideas from all the coolest Knight models I found on the internet!) But I also want them to share common unifying elements - sentinel-cockpit-heads, loin-cloth-banners displaying matching family heraldry and a matching half-and-half colour scheme. My first challenge was the Paladin, the basic Knight. Here's the Epic models: http://farm8.staticflickr.com/7080/7197290158_7b3b393e5d_z.jpg I made a non-specific Knight model from a Grey Knights dreadknight at the start of this year. With a bit of work, this became my Paladin. Here it is before any changes: http://farm8.staticflickr.com/7065/6946505093_dfeb7be645_z.jpg To update it into a Paladin it needed to have a battlecannon and a chainsword. Later I'll also repaint it slightly, and add the loin-cloth. http://farm6.staticflickr.com/5454/7197290564_33373200db_z.jpg After testing out a few options for the battlecannon I decided that having it fire solid shells is hugely impractical - it'd need an absolutely massive magazine! So I made it into a sort of las-battlecannon instead, firing massive bolts of energy at the enemy. Much more AdMech. The gun is made from a Tau Ion Cannon's rear end and 3 sizes of plastruct tubing. The chainsword was another difficult choice. The giant chainswords people put on their conversions always look a bit unwieldy to me, and cutting out all those individual teeth did not sound tempting... So I went for a spare Ork Killa Kan buzz-saw instead. It's still got teeth, and is clearly different to a powerfist or lance? Everything's magnetised so that I can change it's armament for gaming purposes, but this is what it'll have in my Armies on Parade entry.
-
Allied Freeblade - Part 2
Bouargh posted a blog entry in AM Not-Stygies - A Blog about building a new Army
Hi Folks, As a second installment of this WIP journey, let´s talk paint scheme a little bit. I planned to use this Freeblade mainly as a boost for my Skitarii. From here comes the selection of the model, based on its look and not on its rules. I wanted something AdMechiest to be integrated into the overall vibe of the force. The Styrix had a better touch to my taste, even if I find its head a little bit disapointing - the Maegara one is better. While thinking AdMech affiliated knight, red patrons tend to prevail. Yet I did not like these too much. Sure it would contrast with my mostly grey Skitarii, but, no, I wasn´t convinced. Then I saw this: Ok, it is an heretic, but its link to the Raven Household (Questoris Mechanicum) made its journey in my mind. And came the idea of a Reignited or reforged knight from the remain of a fallen machine, looking to restore its honour in a frantic and individual crusade, fighting along not to regarding Imperium forces... Ok, fuzzy stuff. But I like the balance of colours and the contrast of these whitish panels with red stripes on a mostly dark grey beast. So, here we go, trying to adapt this to a mostly imperial knight. So far I made carapace and some parts of the armour, plus main weapons: Some more detailed views inc a prepositioning of the head: The contrast will be brought, I hope, by the paultrons and the armoured legs. Main colour is Eshin Grey with panel lining in Mechanicus Standard Grey and some Dawnstone very very light edge ligthning. Rest is dry brushed of brass scorpion and retributor gold at various levels of pressure and on selected zones. almos no shading, even if recess were painted black at the beginning, paying attention not to fill them with grey. Let´s see you in a few days if there is some progress worth being reported. Cheers,-
- 1
-
-
- Questoris Mechanicum
- Styrix
- (and 1 more)
-
Allied Freeblade - Part 5
Bouargh posted a blog entry in AM Not-Stygies - A Blog about building a new Army
Hi Folks, With torso done and legs done, it was only a matter of (little) time for these to part to be united in the holy forges of Mars. The big boy is now standing, only missing some finiching touches. While heraldry guide for Freeblades (or Dreadblades) leave a lot of room to the pilot to customize its steed, some stuffs can be seen as usual features: - No or low amout Imperium marks - the 2 headed eagle is seldom in general - No household marks, of course, and instead a persomnal heraldy usually repeated on both leg and front paultrons - No or little battle honours - except on Canis Rex which bears a lot Issues: - Never notices up to now than there is not so much Imperium symbol on decals... - I do not have much decals at the correct size(s) to be repeated as a distinctive Freeblade icon. And most are anyway SM chapters icons and, frankly it would be a shame... - Mechanicum decals are msotly Skitarii and, let´s say, not especifically opus mechanicum tainted. There are cogs but... So, what to do? I tried painting some decals with a freeware mimicking .pptx and paint softwares. Awful experience. Preparing my own decals requires a dedication I cannot afford these days. Let´s see what I can do with my pile of decals. - ooP Cadian sheet gave some nice skulls for kill marks, numbers and a codebar. Just like on the example of the banner. - SM (BA) decal sheet have an imperial eagle spitting lighting and ready to be parted in 2. - Skitarii decals gets skuls in cogs, both white and black. let´s cut and use them on paultrons. And here is the result: It will be enough atm. Shall I (finally) one day draw some own decals, I have enough spare place to add some extra customized stuff. Such as a personal freeblade icon. But it will have to wait. Cheers.-
- 4
-
-
- Questoris Mechanicum
- Styrix
- (and 1 more)
-
Allied Freeblade - Part 3
Bouargh posted a blog entry in AM Not-Stygies - A Blog about building a new Army
Hi Folks, Asmall update as a third installment of this WIP series of posts. The upper part of the Styrix is now close to completion. Paultrons have been painted and I only have left their mounting into place, or rather their glueing as they can be fairly easily be mounted "dry". The wepons, carapace... are alredy assemblied and fixed. I planned getting this torso unglued to the legs, in order to get transport easier, but it will not happen: the mini is too heavy to set in place without superglue. I am starting thinking about more details through decals. I have some extensive amount of decals and I will rpobably get enough to personalize at a sufficient level, yet both paultrons and armoured legs of this model have "unusual" dimensions that makes that most decals are too big to fit. And I do not want to go free hand. I do not have the minimun required talent for that. It might be the moment to try printing my own decals finally. I have all the material for 2 or 3 years, just waiting for an opportunity... While I am thinking about it, here are some pics: The big boy´s upper torso in dangerous position... Detail of the bended power cable - my wife´s hair dryer proved to be a very valuable tool to recover the proper bending angle. Another close up of the knight´s front view More to come soon, with lower part maybe? Cheers.-
- 1
-
-
- Questoris Mechanicum
- Styrix
- (and 1 more)
-
After a many-year hiatus, I've (mostly) put my hobby bench back together, and am ready to start getting dirty. For my Loyalist Legio, I've created Legio Lupos, the Wolf Pack. ...and for the Traitors, Legio Erinyes. For Loyalist Knights, House LowenKralle ...and lastly for today, a WIP of my Questoris Scion. Clearly I also need a lesson in how to properly post images to the forums! All of the pics are here:
- 118 replies
-
- 4
-
-
- adeptus titanicus
- titan
- (and 2 more)
-
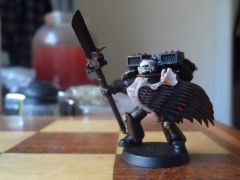
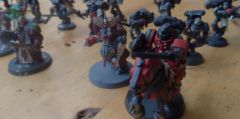
From the album: WIP blood angels knights
my vanguard vets, kitbashed from death company, grey knights and sanguinary guard, -
From the album: WIP blood angels knights
my vanguard vets, kitbashed from death company, grey knights and sanguinary guard, -
From the album: WIP blood angels knights
my vanguard vets, kitbashed from death company, grey knights and sanguinary guard, -
From the album: WIP blood angels knights
Adonai, errant of the blood -
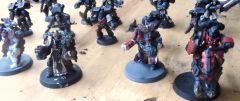
From the album: WIP blood angels knights
the Council of Knights -
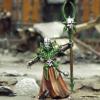
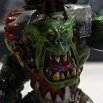
From the album: Misc. Stuff
-
From the album: Misc. Stuff