Search the Community
Showing results for tags 'Space Wolves Legion'.
Found 4 results
-
View File VIth Legion Legion sigils from 30k Submitter WhoMeYesYou Submitted 06/11/25 Category Space Wolves & Successors
-
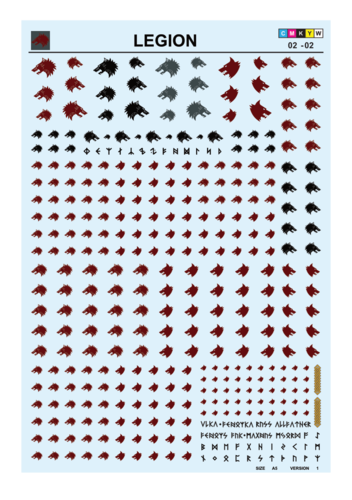
Version 1.0.0
124 downloads
Legion sigils from 30k -
Hello denizens of BnC, this is the start of a thread to chronicle my 30k journey building an army of Thousand Sons, as well as a few allied detachments from different factions. I've been meaning to start 30k for a long time and the Thousand Sons always appealed to me, and with the release of the limited Praetor Tribune last year I bit the bullet and began collecting, starting off by converting the tribune into a librarian. Since the release of Burning of Prospero, my collection of 30k era warriors has grown and I've decided to start this thread to document my process. So today I have my Varagyr terminators, which is what everybody expected when they opened a thread titled 'Thousand Sons': http://i1347.photobucket.com/albums/p713/k0nahrik/BAFE46A9-6359-4E09-89F4-779B99E996CF_zpsk8ycy418.jpg http://i1347.photobucket.com/albums/p713/k0nahrik/E6E8FE6B-D970-4385-9049-8A6FCF8440B6_zpsvnjbbxzn.jpg And number 2, who's fur tabard is still WIP. http://i1347.photobucket.com/albums/p713/k0nahrik/CB4CF1AE-8C77-421A-A0E5-1CDB313C8135_zpsrxi245xv.jpg http://i1347.photobucket.com/albums/p713/k0nahrik/74161F3C-00D6-4474-A58F-D063166AA450_zpslrcj9id2.jpg The Varagyr here are set to run as an allied attachment to my thousand sons (the irony is not lost on me) along with a Space Wolves centurion, because of storyline reasons based around my homebrew character for the Thousand Sons. Hopefully the squad of five will be finished in the next two weeks or so, and in between then I'll actually photograph my Thousand Sons and this thread will start looking like you'd expect from the title, haha. C+C encouraged and appreciated! I hope to see some of you taking an interest, cheerio for now
- 16 replies
-
- 2
-

-
- conversion
- kitbashing
- (and 4 more)
-
 Hey they! This is mostly a repost i've done on another forum but with infero landing, hopefully you can find some use for it! You could probably do a few base and just cast them but i'm way too lazy for that http://heresy30k.invisionzone.com/public/style_emoticons/default/sleep.png you'll need: some milliput a cutter clipper ruler pencile rolling pin cork sheet vallejo dark earth (or something similar) super glue and white glue Optionnal: some juweela bricks (i'm using size 1/35 and 1/48) some sands, differents size some bits and pieces from your favorite enemy (*ies) Some leftover from milliput tiles tamiya scrapper 1. you need to mix the milliput and flatten it quickly with your hand. Now put it between to sheets of baking paper to avoid having it stick to your workplace and flatten it to the thickness you like with a rolling pine, to have smoother finish (i use two plastic guide on each side to have the thickness i want). http://i.imgur.com/rIEdyzQ.jpg 2. Then it's time to mark your tiles with a ruler and a pencil, i'm doing 1cm tiles. Then with the backside of your cutter (mind your finger!), mark the line, if you use the normal side you'll just cut through. Don't push to hard, it's better to go a few time lightly than marking it to much or cutting through. http://i.imgur.com/OyXDPyh.jpg 3. Now take a piece of cork, and rip it to the size of your mini (or the size you like), in this case, a tartaros termite. When your satisfied with the placing, just glue it down with superglue (or white glue but it will take longer). http://i.imgur.com/LNvGJWW.jpg 4. Take your milliput tiles and with your clipper cut it roughly to the size of your cork, don't forget to choose the orientation of your tile to go with your mini!. (if you break with your finger, there's a strong chance the crack will follow your tiles markings). When your happy with it glue it down with milliput. http://i.imgur.com/BNR1p3O.jpg 5. Now it's time for wear and tear the tiles to properly fit the cork. With a clipper, a pince and cutter clip some piece, or just tear them away until you have something your satisfied with, you can use the cutter to cut properly some piece of just cut away the first layer of the milliput. You can also draw some cracks in the middle with a cutter or a metal pointer. http://i.imgur.com/ztvTMnR.jpg 6. Use the vallejo dark earth to fill the all base, you can create some volume with this paste to make it more interesting, otherwise you can just use sand but you'll have finish a bit flat. http://i.imgur.com/dxI0tiO.jpg 7. When you dark earth is still wet, push in some broken bricks, broken tiles, somes bits and pieces from your favorite enemy to break the monoty of the sand and make it more interesting. You don't have to do this step but i add quite a lot of depth to your mini and represent well the idea of a battlefield. http://i.imgur.com/NJXvK4Y.jpg 8. Optionnal: To finish it, i put some white glue on a few spot around the dark earth on the base and sprinkle some differents sized sands (the dark earth is to uniform for my taste). Second part on how to paint it http://i.imgur.com/bp9Mlwj.jpg 1. Primer black, light white primer on top, to go faster since i had a few bases layings around, i've done the tiles with an airbrush with an off white, in this case Scalecolor Nacar http://i.imgur.com/Ep8Nim4.jpg 2. I then black the line between the tiles with Armypainter strong tone, and i make a heavy wash with gw Rhinox hide on the soil http://i.imgur.com/H9TYhlz.jpg 3. I blackened some more the lines between tiles with rhinox hide mixed with black (still quite diluted), then drybrush the soil with a lighter brown (Sc Dubai brown) http://i.imgur.com/gLi36L4.jpg 4. I've made three more drybrush on the soil with Sc Walnut first then Sc Thar brown to finish with Sc White sand, going lighter and lighter (you could probably have less color i'm not sure the first on is really needed..) http://i.imgur.com/DweWVY0.jpg 5. Then i start defining the tiles, to do this i shade the back of the tiles with AP strong tone diluted (agrax earthshade), you don't need to blend everything we'll come back on that latter, i've also blackened the rime in a few diluted coat. http://i.imgur.com/6DsDVUf.jpg 6. I do the same with my previous mix of rhinox hide and black but very lightly http://i.imgur.com/QMy0GXj.jpg 7. I drawning the marbles effect with Vallejo dark sea blue (amazeball color!) heavily diluted, since i have some dark sea blue, i also add a few "patch" of this mix on random spot on the soil to make it more interesting and tie it with my mini (same colour i use for the black). http://i.imgur.com/X9PJUvN.jpg 8.It's time to tie everything together! I glaze my base color which is Nacar on the tile to blend the shade and the marble effect and make it lighter and more subtle. I've also continued making some "spot" on the soil with the red is use on the eye, Sc mayhem red and some with violet ink. http://i.imgur.com/8E2e407.jpg 9. I lighten the tiles with nacar and primacryl titanium white as glaze just on the front part of the tiles, and still make some spot on the soil with Sc kalamari orange which is my rust colour. I also redefine the cracks and separation on the tiles with my black and rhinox hide mix. http://i.imgur.com/JZbf5nd.jpg 10. I finish the finish the tiles by edge highlightint the front part with pure white and the bottom part of the cracks. Sometimes i also really lightly drybrush some white sand on the sand to retrieve the top highlight if i've been to heavy on the glaze Enjoy!
- 13 replies
-
- 21
-
-
- Prospero
- Space Wolves Legion
- (and 3 more)