Search the Community
Showing results for tags 'conversion'.
-
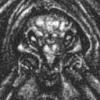
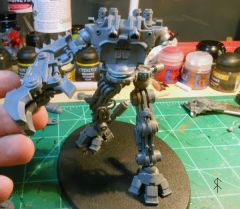
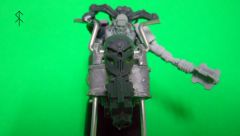
 Hi, long time lurker. I'm currently building and playing an emperor's children army - I've got about 2700 points painted, and about 500 more that I've built and have yet to paint. I've recently run into a bit of a wall painting, so I've turned my eye to what I might build. Recently, as I've been waiting for the bits for my second unit of noise marines to come (just got them today), I looked to what models I had unbuilt - which was basically the minis from my 2nd Dark Vengence box. Given that I already had a set painted up "as is" without conversions (for the most part) I decided to convert up the second box so that I didn't have any identical models (well, except for the bolter guy that comes twice in a box). Despite still having trouble getting decent pictures (one reason I haven't shared more here - my photos have been awful), I thought that I would take and share some pictures of my latest work. First is my converted hellbrute, here with his unconverted (mostly - I gave him a fist mounted heavy flamer) pal. And here he is on his own. Anyway, let me know what you think and I'll share some more soon.
- 564 replies
-
- 12
-

-
- conversion
- dark vengence
- (and 1 more)
-
Conversion Tutorial: Ghetto Stranglewebs for Termagants
Xenith posted a blog entry in Xenith's Hobby Hangout
Did you buy a load of Leviathan Termagants and are missing out on the strangleweb frame that came out later? Or are you unwilling to drop a load more cash to get some one per unit weapons? I have your solution (as long as you can scrounge a few spare devourers)! With a sharp knife, a bunch of plastic glue and a little dry fitting, you too can have a funnel-web shooter for your numberless hordes! STEP 1 Get yourself a termagant and make 2 cuts like this - one basically along the line of the bottom of the fist to chop off the ammo magazine, and the other in between the chitin muzzle protector and the ridge. STEP 2 Take a sacrificial devourer and make the following cuts. If you cut the 'heel' off the hand grip first, it makes other cuts easier. Use a sharp knife for this. They key bits you need to keep intact are the middle of the gun and the widest part of the barrel - the others can be scrapped to get these out intact. You're looking to cut the barrel in half at a point just wider than the mid-section of the gun as we'll be flipping this around. If in doubt, make the cut towards the narrower part and trim as necessary - you can always cut more off, but you can never cut more on! Step 3 Using a load of plastic cement to weld the parts together, attach the devourer mid-section to the fleshborer mid section as so, and weld the devourer tubes to the grip and magazine of the fleshborer to make it more gribbly. wait until this has set, then flip the barrel section around so it's wide part out, dry fit, shaving more off if required, then slam that glue on there and weld it to the devourer midsection. When you're done it should look like this, and hey presto, you have some wide flamer like stranglewebs that look more like imperial webbers that horse phalluses. STEP 4 (BONUS GRIBBLE) You can see my efforts below - I chose two gaunts that had fleshborers raised and seemed to be in more stable firing positions to it would be easy to pick them out in-game. If you look closely, I added a simple green stuff...barrel hole...to the conversion to reinforce the effect rather than a flat plate which can be painted on - I'll get some close up photos of this soon.- 2 comments
-
- 4
-
-

-
- conversion
- tyranids
- (and 1 more)
-
From the album: Inquisition
© FJA
-
From the album: Inquisition
© FJA
-
From the album: Inquisition
© FJA
-
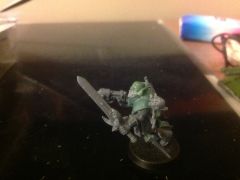
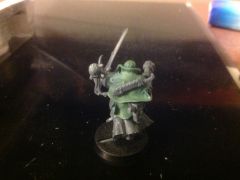
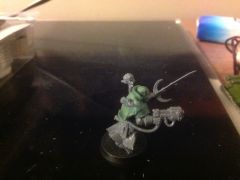
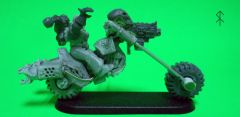
 hey everyone, i am quite new to the whole converting and painting models thing (doing it for about a year and half now) and i wanted to share one of my models i am working on atm with you guys. PS: sry if the pics are a bit blurry or overlighted. i am still trying to figure out a way to make a good photobox. critics are welcome and wanted unfortunatly i cant post pictures here for some reason, so here a just the links: http://www.flickr.com/photos/101115243@N07/9647068767/ http://www.flickr.com/photos/101115243@N07/9650309620/ http://www.flickr.com/photos/101115243@N07/9650320520/ http://www.flickr.com/photos/101115243@N07/9650331690/
 -
 http://www.forgeworld.co.uk/resources/catalog/product/600x620/99550101406_ImperialFistLegionTemplarBrethrenUpgradeSet01.jpg Hello Brothers, I'm trying to find a way to kit up Sword brethren. I found this beautiful upgrade kits for HH IF Templar brethren from FW. How do you think about using those kits to Black Templars? I'm slight concerned of those small 'fists' icons, though. In fluffywise, I think it also make sense if those sword brethren have managed to keep those 'relic' armour for about 10,000 years...
 -
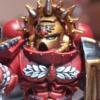
Hi guys, Following the recent tendancy toward Nurgle, I've dust off my old Death Guards and gave them a decent base. Here they are, painted back in 2006 and only really finished in 2017 ! Maybe some day I'll make a plasma champ to lead the squad, but that's all for the moment.
-
From the album: Postcards from Wælheim
-

From the album: Postcards from Wælheim
-
Space Marine Scout w/helmet inspired by Firepower
Bitz_Addict posted a gallery image in Miscellaneous
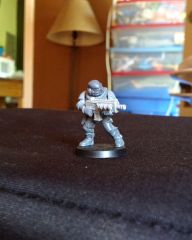
From the album: My WIPs
Using Firepower's simple helmet conversion and a custome bolter from Anvil Industry. Swapped magazine for drum (not pictured). More to come. -
From the album: Postcards from Wælheim
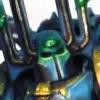
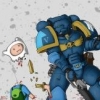
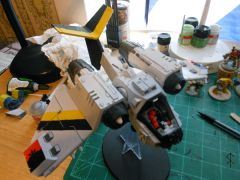
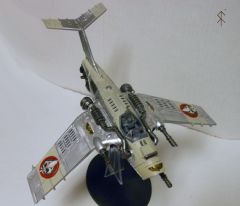
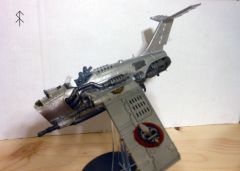
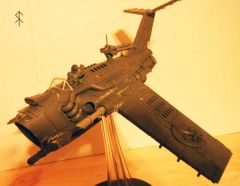
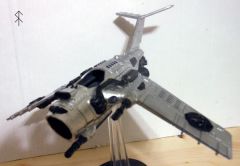
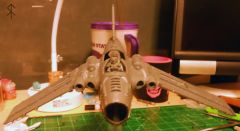
No Daemons Allowed! My Heldrake is a fighter, and I'm calling it a "Hellstorm". -
From the album: Conversion Ideas
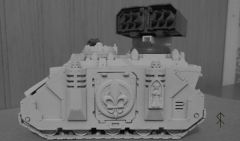
Rough Photoshop of what I'm Planning. -
From the album: Postcards from Wælheim
-
From the album: Postcards from Wælheim
-

From the album: Postcards from Wælheim
SHINY! -
From the album: Postcards from Wælheim
-
From the album: Postcards from Wælheim
-
From the album: Postcards from Wælheim
-
From the album: Postcards from Wælheim
-

From the album: Postcards from Wælheim
-
From the album: Postcards from Wælheim
-

From the album: Postcards from Wælheim
-
From the album: Postcards from Wælheim
-

From the album: Postcards from Wælheim