GhostMalone Posted December 3, 2015 Share Posted December 3, 2015 Boy get back on track we have etl coming soon and I need your help Link to comment https://bolterandchainsword.com/topic/248163-mordent-hexs-workshopcurrently-fw-knight-wip-pg11-12/page/11/#findComment-4242146 Share on other sites More sharing options...
MordentHex Posted June 11, 2016 Author Share Posted June 11, 2016 Hey guys! It's been a while since I've posted anything. i got two contemptor dreadnaughts done since I last posted. my big project at the moment is my World Eater Fellblade. some of you may remember that hanging out in a few pictures. I'm on my phone at the moment and I can't seem to load pictures to my gallery so i'll edit this post or just post again with the pictures. I have learned a few new techniques that I used painting them. It really helped speed up painting especially the super heavy. well you can't see it at the moment but you will. haha. It's good to see some of the old names posting stuff still and also nice to see some of the new peeps working on their own hobby stuff as well. well just letting people know i'm alive and i'll get those pictures up asap. cheers! Link to comment https://bolterandchainsword.com/topic/248163-mordent-hexs-workshopcurrently-fw-knight-wip-pg11-12/page/11/#findComment-4417259 Share on other sites More sharing options...
GhostMalone Posted June 12, 2016 Share Posted June 12, 2016 Damn straight your alive! You think you can dissappear and I wouldn't notice! Link to comment https://bolterandchainsword.com/topic/248163-mordent-hexs-workshopcurrently-fw-knight-wip-pg11-12/page/11/#findComment-4417620 Share on other sites More sharing options...
MordentHex Posted June 12, 2016 Author Share Posted June 12, 2016 (edited) So here are some of the picts I said i would post. I dont have any yet of the Fellblade. I'll try to get some maybe tonight. SOH Contemptor Edit: The base of the DG dread isn't finished. FYI DeathGuard Mortis Partern Contemptor Edited June 12, 2016 by MordentHex GhostMalone 1 Back to top Link to comment https://bolterandchainsword.com/topic/248163-mordent-hexs-workshopcurrently-fw-knight-wip-pg11-12/page/11/#findComment-4417816 Share on other sites More sharing options...
MordentHex Posted June 12, 2016 Author Share Posted June 12, 2016 (edited) Fellblade WIP I got greenstuff that has set on the back right side of the hull. A problem with the mold. Nice fat gap in two connecting plates. really bad molding spot on my model. I may have to clean it out and just fill it in with plastic card. I hand painted all the white and blue. No air brush, I'm old school. I cant get the smoothness of an air brush but i figured out a way to do things in a similar fashion although perhaps reversed. No i'm not sharing it, not at least until I can work on it a bit more and perfect it. It also comes to mind some of you may be wondering why im still not working on my scratch build Reaver Titan. It's because it got damaged last year when I moved and I haven't been bothered to repair it and get working on it again. So there ya go. After this beast is done I will probably paint up another Contemptor Mortis Dread or two. I'm feeling the call of the machine as I ease back into my hobby. Right Side Left Side Font/top Blue for the Blue god! Until Next post! (Just noticed that very very rough highlighting above the turret cannon! That will be rectified! I was doing that work in bad lighting, adding touch ups to the list of things to do to it.) Edited June 12, 2016 by MordentHex Pearson73, DuskRaider and Marqol 3 Back to top Link to comment https://bolterandchainsword.com/topic/248163-mordent-hexs-workshopcurrently-fw-knight-wip-pg11-12/page/11/#findComment-4417985 Share on other sites More sharing options...
MordentHex Posted July 23, 2016 Author Share Posted July 23, 2016 Hello again. I traded my buddy a Contemptor for this bad boy a few weeks ago. As soon as i seen it i was like..mmmhmm Deathguard! So i put dumped my Fellblade(I'm glad we don't date, I dump her all the time for something new) and started to painted it. Last night I was all like "YAAA its finished!!" and of course took some pictures. Well damned those pictures because it shows all the little imperfections and little things that are wrong. Soooooo..Now I got 4 pictures of one model that's NOT finished. But he has a name! Dardan Skendar! Terran-born, Dusk Raider, and often insubordinate and opinionated. The guy on the ground bleeding to death has no name, but I'm sure I'll think of something for his fluff story. I was going to write up a fluffy little intro to him and all, but with the model not to my liking at its current state I'll write is later. anyways, Here i my work so far. I also realized I will have to go back and touch up most of my older work to match my newer models. They don't fit together visually anymore. C&C welcome as usual. Marqol and infyrana 2 Back to top Link to comment https://bolterandchainsword.com/topic/248163-mordent-hexs-workshopcurrently-fw-knight-wip-pg11-12/page/11/#findComment-4449341 Share on other sites More sharing options...
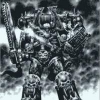
MordentHex Posted October 10, 2016 Author Share Posted October 10, 2016 Been a while. Real life and my laziness conspire against me. With that said. I got a tutorial. Granted i'm not the greatest painter on the B&C but I got my ways and tricks too. For those that are air brushing fanatics, Stop here. Ye shall find no such shenanigans. All old school with a brush and one humble felt pin. With that said! How Hex paints his World Eaters! Tools and Paints You will need an alcohol based black 0.1 felt pin and cotton tips/q tips. These paints below which I use or their equivalent from your own range of paints. My advice is to use both alcohol and water based paints because of the different advantages both bring to your painting table. But that is totally up to you. many of these paints are now OOP. sorry, but I love them while they last. Note on the Brush cleaner, its basically alcohol. If you can buy a small bottle of rubbing alcohol it would be much cheaper and work better but this is all I had at the time of painting/picture. NOW! Prime your Model WHITE! YES WHITE! several small thin coats are better than a big glob coating. Everyone says it and its true. If your pressed for time and or just don't want to wait too long, 2 or three passes are usually good enough. Let it dry! Next! Grey wash which is not in the paint picture! damn it! So i used Vallejo Grey wash, thinned down and applied all over the model. Its good stuff to take off that bright as the sun white primer finish. When it dries it will look a bit like this. (I started filling in some other other area's with black primer, you can do that before or after, I was just kinda screwing around at the time I would advise blacking in the hard to reach area's on the model first though.) He doesn't look like much at the moment, wait. Now! Grab your alcohol and your Vallejo rust and crud builder. I use Vallejo Model wash Light rust(70.505) and model wash brown (76.513) and mix them together and dilute them at a 50/50 ratio. Apply generously!! don't worry about it, go nuts, your going to clean much of it off after it dries. (it will dye the white undercoat a little even when its removed. so don't worry its not going totally to waste. (sorry i forgot to take a picture of how it looks at this stage. (A rusted hulk, but its all good) Take your cotton q tips and dip them in the alcohol. on a towel remove some of the alcohol, you don't want it completely wiping away your dried wash. Rub away the wash starting at the higher parts where the light hits the model and work your way down towards cracks and places that naturally would hold dirt or corrosion. TAKE YOUR TIME change your cotton swabs as you feel you need to. If you take too much off don't sweat it, you can repair the damage doing exactly the same thing over again or by using a dirty swab to rub some of that wash back into where you took too much off. Rule of thumb, if you can't get the wash out of a hard to reach spot chances are you should leave it there. My result: Notice any grey patchiness from the grey wash is now gone and has been subsumed by the shading wash I just did. two birds, 1 stone. At this point its rather good dirty white for table top quality. You can go further if you wish, I do, but i like my models looking like they walked through hell a few times and are going back for more. Next is my World Eater Blue. Its very simple for table top quality 1. Shade coat: Dark Prusia Blue(70.899) 2. Base Coat: Foundation Mordian Blue( if you don't have this color sorry, im sure there is a new gw equivilent) 3. + Enchanted Blue (again OOP) 4. + White 5. very thin wash of step 1. 6. Done Will look like this: Go forth and mangle something! all you got to do after that is paint your metallic parts, odds and ends on the model, your base and then your done. I don't stop here, that multiple tours of hell thing has to be expressed. Battle damage time! With the last of your highlight paint make small quick fine strokes where you want your scratch's and holes in the armor to show. don't get too carried away or your work you just finished will be mostly gone. next, with your felt pin draw a black line under your highlight line. you don't have to do it perfect but the cleaner the better. mine in these examples below are not as clean as i would have liked, but it will be ok. (blurry, sorry) Ok, so that's done, time to clean it up and well..make things more filthy at the same time. Back to the Vallejo shade I use, and mix in a good amount of alcohol too to create a wash. Apply this carefully on the blue. When going over your black pen marks draw the brush in the direction of the marks you made and then If you wish to have rust marks coming off of them down at the lowest corner of your battle damage. Bullet holes should always be washed with a stroke going down, not up. If you don't want it all rusty, take a q tip with some alcohol and gently remove what you don't want. Example of this step finished: looking good right? but you should touch up your bullet holes and any spot that become a bit dull with your pen. Now I use GW foundation orange(its got some ridiculous long name, OOP) Water it down to a good 30/70 ratio and create a line of orange rust under each cut/ scratch and bullet hole. do this a few times until your happy with the result. At this point you could stop. Of course I'm not but thats me! Example: Hope you enjoy. This big boy isn't done being painted. This just what i have done last while the wife was gone last night. Movie time and the potential for serious Wife aggro interrupted any further progress. After work tonight i will work on him some more and pick up where this left off hopefully with better pictures and such. Cheers. Luna707, DuskRaider and foamy248 3 Back to top Link to comment https://bolterandchainsword.com/topic/248163-mordent-hexs-workshopcurrently-fw-knight-wip-pg11-12/page/11/#findComment-4525824 Share on other sites More sharing options...
GhostMalone Posted October 10, 2016 Share Posted October 10, 2016 Dude wowza Link to comment https://bolterandchainsword.com/topic/248163-mordent-hexs-workshopcurrently-fw-knight-wip-pg11-12/page/11/#findComment-4526406 Share on other sites More sharing options...
MordentHex Posted October 11, 2016 Author Share Posted October 11, 2016 Dude wowza Whut? lol Its not a complete yet. :) Link to comment https://bolterandchainsword.com/topic/248163-mordent-hexs-workshopcurrently-fw-knight-wip-pg11-12/page/11/#findComment-4527048 Share on other sites More sharing options...
GhostMalone Posted October 11, 2016 Share Posted October 11, 2016 Exactly my point it's already looking great Link to comment https://bolterandchainsword.com/topic/248163-mordent-hexs-workshopcurrently-fw-knight-wip-pg11-12/page/11/#findComment-4527147 Share on other sites More sharing options...
MordentHex Posted October 12, 2016 Author Share Posted October 12, 2016 Hello again! Picking up from where I left off! First off! you will need minthril silver or its Equivalence and Dwarf bronze/equivalent. If you have not painted your silver area's black yet do so. It doesn't have to be perfect, just try not to make to many mistakes on your nice blue and white armor plates. Now.....Paint all those area's Silver. any area that will also be bronze go ahead and paint silver as well. It will help with the bronze that you will be painting on over it. now paint your bronze. mine: Now you can fill in your extra little details on the model, all the random little bits and such. I chose Red for the purity seals and Blue for the Shields. I used blood red and Mordian Blue. Notice I got a bit carried away and got some silver on the arm casing on the picture above. That will be paint battle damage later. So it will not matter. besides its close to a working joint and there is bound to be a good amount of paint damage in that area. If you happen to do the same, don't worry about it. Next: Mix you up a good black wash. I use Vallejo black primer and Smoke mentioned before. The primer is great for a black wash. its really helps pull into the cracks and stay there. Anywho, wash your metallic areas with it. Make sure to get into the cracks and such so it looks natural. It will dry and greatly dull your bright shiny metal. The smoke in combination with the black will take the hard edge off the pure black and also bring out the color in the bronze. While your at it, use any extra to help darken up random spots like under rivets and portions or the white armor that are already looking dirty. sense its Vallejo paint, you can use alcohol to remove any that gets a bit to heavy for your liking. After this, use a wash of smoke on your bronze to help deepen the color further. Mine: Now your metallic bits are shaded, lets do some color distortion on our guns and power plant exhaust vents. I used Dark Prusia Blue as a wash to shade the end of the barrels. After that I used Yellow ink and then Sepia ink and then another less diluted wash of Dark Prusia Blue. It sounds like a lot of steps but its rather fast. While your at it, If you like yellow chest eagles use the ink on the chest eagle. With your pre shading it will be work. Mine: The yellow is a bit over powering on the chest at the moment but it will look ok in the end. No worries. After this I painted the World Eater Icons on the chest and on the left Leg. I used Scorpion green for the earth elements and then Mordian blue over the green and for the ocean element. Shining gold for the teeth. Silver for the Legion Number. It looks very basic but it will as i said before be ok in the end. Mine: (sorry its a bit blury but you get the idea. no going back.) Ok now Paint the Vision slit. 1. Blood Red 2. + Golden Yellow 3. + White 4. White 5. Wash of blood red. Paint the whole area Blood red, you don't have to be to neat about it. Its ok, we are doing a kinda light glow to the vision slit. So any extra will be covered up. Now add your yellow to get a nice medium orange. Highlight leaving the red in the edges on the inside of both sides of the visor. highlight the outer edges around the visor slit as well. Add White. Highlight again towards the center of the visor also highlight over the outer edges of the slit and the inner rim of the neck seal. Now with White only go over your already made highlights for a final harsh highlight. also do so as you did to the other areas as well. Last but not least, make a red wash, you can use blood red as I did, or red Ink. dilute and apply. Your harsh highlight of white will no longer look so harsh. Again, if its not perfect at this point you can touch it up if you want or wait to see if the final steps will help to make it look better. Mine is far from perfect at this stage but is still table top quality. Mine: while your at is you can touch up some of your rust marks and such on the armor as I have done. lots of small imperfections are present, but that's ok to me because as I said before My guys take multiple tours to hell and back and love every minute of it. armor will be blacked, crude accumulates, rust gathers and BLOOD FOR THE ...wait....what...what just happened..that's not right at all. Dunno where that came from, For the Emperor! anywho. This is part 2 of three. Enjoy. foamy248 1 Back to top Link to comment https://bolterandchainsword.com/topic/248163-mordent-hexs-workshopcurrently-fw-knight-wip-pg11-12/page/11/#findComment-4528855 Share on other sites More sharing options...
MordentHex Posted October 17, 2016 Author Share Posted October 17, 2016 PAINTING A WORLDEATER. Part 3. Typhoon special edition! Hello, well i got a Typhoon sitting outside my house waiting to smack the Jesus out of us. So this is a special post. Today your going to need 3 things! so simple right! A Brush Water Colors(Colours for your non Americans) more Q Tips! I use Umber, Burnt Umber, and Black. Now, before you freak right out on me, Yes, water is non permanent. I know this. Glad you do too, makes things easier later! In fact, that's the point. (note: I based my model Between these steps. You may or may not want to that first. totally up to you.) So Mix you up a nice portion of black mixed with Burnt Umber. 50/50 Is what i try to use. Add in copious amounts of water until it looks like..well..Water color. This will be your wash. Some models i use a heavier wash, like on my Deathguard which love to get funky, and not in the good way. So apply this all over the model. If you don't Like the first wash layer after it dries, apply another. The more you add, the dirtier he will be. This is your shadow shading basically. The Burnt Umber takes the edge off the black. You should get something like this. Now don't panic, you didn't just ruin your paint job. It doesn't stain or at the very least very very little. So your cool. Now take your Umber and mix up another wash. I like to make this a little thicker than the first wash. Apply to all area's. This wash will blend some with the first wash when it dries. Also it allows you to pull the wash's together in those really dirty spots and makes a good "sludge" effect. Example: Looking filthy right? like he has been fighting or something? Ok now get some CLEAN water and grab your Q tips. Bunk that qtip in your clean water and then roll it a bit on some tissue to get all the extra out of the cotton. Then start cleaning away from highlights and working your way out from there. Be sure to clean up your Blue a lot. Its cool and all, but the result just looks very muddy and where not going after a muddy paint job, just a dirty effect. The white and metallic area's convey that effect rather nicely already. Tidy up any area's where the paint has blobbed or streaked the armor working back towards your shading. At this point I also highlighted My Chest eagle using sunburst Yellow +white. Gave it a nice faded appeal to it. If you didn't go with a yellow chest Eagle, then ignore this. Hopefully you get a result like this or better. If not, try it again. That's the great thing about it, you CAN remove your screw ups! Pay attention to the helmet lens especially. you don't want it full of crud making him look effectively blind. Last step: spray Matte Varnish. DO NOT HAND PANT YOUR VARNISH ON! It will ruin your paint job. You will have water color flowing all over the place with your brush. Example of Mine: At this point you Like what you got and don't want to do anymore, your solid with a battle busting World Eater Dread. Your Chest eagle is a bit faded, your purity seals looks very fades and waxy, your metallic and White area's got plenty of rust and wear on them and your blue has some battle damage and rust as well. Solid above table top paint job. Congrats to you. Now go kill something with it. However, A world Eater isn't A world Eater unless its got some blood on it for me. Plus in these pictures you may have noticed a few missed area's and I want that Visor to look a bit deeper red. Also I need to finish the base. So Next issue "Post Typhoon" will be about that and how i deal with it. Cheers! Hope you enjoyed. C&C welcome. Link to comment https://bolterandchainsword.com/topic/248163-mordent-hexs-workshopcurrently-fw-knight-wip-pg11-12/page/11/#findComment-4534703 Share on other sites More sharing options...
MordentHex Posted May 4, 2017 Author Share Posted May 4, 2017 (edited) I've been gone a while. real life and all that, mostly lurking around commenting here and there. Got to play two "7th" edition games of 40k. It was fun but the game is lifeless to me. I'm hoping the new 8th edition brings that back. got some new stuff to post soon. mostly dreadnoughts. "leviathan! just finished it today in all its death guard glory. Edited May 4, 2017 by MordentHex Link to comment https://bolterandchainsword.com/topic/248163-mordent-hexs-workshopcurrently-fw-knight-wip-pg11-12/page/11/#findComment-4729736 Share on other sites More sharing options...
MordentHex Posted June 2, 2017 Author Share Posted June 2, 2017 (edited) It's been a month and i didn't even realize it. sorry. I meant to get some stuff on here before now. Anyways. First is my Death guard BIG L Dread! I got a bit carried away with the gore on the powerclaw but well..all my models are splattered in gore and dirt so it won't look out of place. I did a throw back to rogue trader and 2nd edition by adding some q-tip heads to each of the melta barrels. some extra little bits here and there from the rear view but i didn't want to take another photo. Next: true scale Smurf veteran squad I'm happy with my ability to make them and the ofer all paint job for painting ultramarines for the first time in ah...20+ years. but i really am not happy with the helmets. I thought i would like them when i got them but they turned out to be an absolute nightmare to paint. I wont be getting anymore. The serg's head likewise was horrid. i ended up driling out one eye socket so he didn't look like a space marine version of Popeye. they other eye was actually way to small for me to even get my paint brush in to do it. after several attempts to do so i finally said " it" likewise i hated the normal marines eyes and did and after several attempts I ended up with the same feeling as the serg head. Thank you forge world for adding untold hours of frustration to my painting experince. Lesson learned. The bases where made with some miliputty and flocking. Each model in the squad is roughly 37mm tall not including the base. these are not my best paint jobs by far but i did learn a good amount and my first attempt at truescale. i'll do better next time. A warm thank you to "The Observer" for insperation and "torealis" for the basic technique i used . Rock on dudes. NEXT! Edited June 2, 2017 by MordentHex GhostMalone 1 Back to top Link to comment https://bolterandchainsword.com/topic/248163-mordent-hexs-workshopcurrently-fw-knight-wip-pg11-12/page/11/#findComment-4767270 Share on other sites More sharing options...
MordentHex Posted June 6, 2017 Author Share Posted June 6, 2017 I went back and touched up the squad and changed the face of the helmet and went back to my old method of making the eyes glow. It works better on other styles of helmets but at least it does not look like garbage now. (i still hate these helmets and wont buy anymore.) Next I think i'm going to finish a Knight titan, also I got my brothers second Warhound Titan here at the house and i will be working on that from time to time. C&C welcome Cheers. GhostMalone, Grotsmasha, Luna707 and 1 other 4 Back to top Link to comment https://bolterandchainsword.com/topic/248163-mordent-hexs-workshopcurrently-fw-knight-wip-pg11-12/page/11/#findComment-4773277 Share on other sites More sharing options...
Vairocanum Posted June 7, 2017 Share Posted June 7, 2017 Great looking squad! The helmets definitely look better now, looking forward to seeing the titans. Link to comment https://bolterandchainsword.com/topic/248163-mordent-hexs-workshopcurrently-fw-knight-wip-pg11-12/page/11/#findComment-4774502 Share on other sites More sharing options...
MordentHex Posted June 7, 2017 Author Share Posted June 7, 2017 Great looking squad! The helmets definitely look better now, looking forward to seeing the titans. yeah, of everything i did with these guys the helmets gave me the most trouble. I'm a bit butt-hurt about it. I thought they looked so cool until i had to paint them and then i was crying. Link to comment https://bolterandchainsword.com/topic/248163-mordent-hexs-workshopcurrently-fw-knight-wip-pg11-12/page/11/#findComment-4774673 Share on other sites More sharing options...
MordentHex Posted June 14, 2017 Author Share Posted June 14, 2017 So, this is what i got for ya today. PURPLE and pre yellow/orange stage before glazing on a knight titan. I did this by starting off with a burnt umber and when straight to a umber mixed with a little yellow and then adding white all the way up to almost pure white.In total about 5 layers with a air brush. I plan on using a very thin GW yellow glaze to make the color come back up and pop and then a bit of shading with a very very..i mean super thin GW orange glaze. hopefully this doesn't blow up in my face. me and gw paints have a on going love hate relationship. my icy purple. Started with dark Persian blue then to a dark purple(naggaroth night) base paint(OOP) then up to Xereus purple then genestealer purple and then added white. I didn't like how muted it became after that so i went back in and did a wash of Liche purple(OOP) to make it pop more. final step is an air brush on some gloss varnish( which actually came out more of a high satin shine) to enrich the colors. after i matte varnish the model i will need to do that again but for now it protects the paint. Thats all for now. C&C welcome. Later Link to comment https://bolterandchainsword.com/topic/248163-mordent-hexs-workshopcurrently-fw-knight-wip-pg11-12/page/11/#findComment-4782543 Share on other sites More sharing options...
MordentHex Posted June 16, 2017 Author Share Posted June 16, 2017 I got the yellow done which i am very happy with. (sorry crappy pic) And i make my engine big time Icy OSL blue. This was a lot of fun to do, i may do it again with another color sometime in the future. I will also be transfering this effect over to a few other area's where i think core engine energy is bleeding through. I have not varnished it yet, after a varnish it should look even better. That's all or now. C&C welcome. Later Grotsmasha 1 Back to top Link to comment https://bolterandchainsword.com/topic/248163-mordent-hexs-workshopcurrently-fw-knight-wip-pg11-12/page/11/#findComment-4784749 Share on other sites More sharing options...
foamy248 Posted June 16, 2017 Share Posted June 16, 2017 The yellow/purple scheme + OSL is looking awesome! Keep it up! :) MordentHex 1 Back to top Link to comment https://bolterandchainsword.com/topic/248163-mordent-hexs-workshopcurrently-fw-knight-wip-pg11-12/page/11/#findComment-4784762 Share on other sites More sharing options...
Sagentus Posted June 16, 2017 Share Posted June 16, 2017 Really liking this paint scheme. That osl looks great on the reactor MordentHex 1 Back to top Link to comment https://bolterandchainsword.com/topic/248163-mordent-hexs-workshopcurrently-fw-knight-wip-pg11-12/page/11/#findComment-4784821 Share on other sites More sharing options...
MordentHex Posted June 16, 2017 Author Share Posted June 16, 2017 The yellow/purple scheme + OSL is looking awesome! Keep it up! Thank you, i've been trying to step up my painting skills lately. I got a small cheapo air brush and im putting that to good use and watching some very useful stuff on Youtube. Almost all of it I already know except the air brushing stuff and with out those video's i would have probably thrown the thing away by now. Kenny your my Hero. It doesn't replace my good old fashion paint brush's. Really liking this paint scheme. That osl looks great on the reactor Thank you very much. Your Khorne stuff is really kick ass too. It makes me miss my World Eater army back home. Khorne terminators! nuff said. :) foamy248 and Sagentus 2 Back to top Link to comment https://bolterandchainsword.com/topic/248163-mordent-hexs-workshopcurrently-fw-knight-wip-pg11-12/page/11/#findComment-4785068 Share on other sites More sharing options...
MordentHex Posted June 17, 2017 Author Share Posted June 17, 2017 The eyes are going to be icy blue like the reactor BUT..... I'm a bit stuck on something, the trim of the armor plates. Most the model is already steal metal and I was going to go with a bronze/gold gilded trim...but i'm worried it may mute down the yellows or just look silly. What do you guys think? Gold Bronze dark steal bright steal Platinum? C&C/ advice/ warm suggestions/demands welcome. Vairocanum 1 Back to top Link to comment https://bolterandchainsword.com/topic/248163-mordent-hexs-workshopcurrently-fw-knight-wip-pg11-12/page/11/#findComment-4786131 Share on other sites More sharing options...
MordentHex Posted June 18, 2017 Author Share Posted June 18, 2017 Going with Bright Steal/Platinum. I got to paint up an iron warriors squad anyways, this way I get two birds with 1 stone. Link to comment https://bolterandchainsword.com/topic/248163-mordent-hexs-workshopcurrently-fw-knight-wip-pg11-12/page/11/#findComment-4787099 Share on other sites More sharing options...
Sagentus Posted June 19, 2017 Share Posted June 19, 2017 I recon the steel/platinum would pop out nicely Link to comment https://bolterandchainsword.com/topic/248163-mordent-hexs-workshopcurrently-fw-knight-wip-pg11-12/page/11/#findComment-4789016 Share on other sites More sharing options...
Recommended Posts
Create an account or sign in to comment
You need to be a member in order to leave a comment
Create an account
Sign up for a new account in our community. It's easy!
Register a new accountSign in
Already have an account? Sign in here.
Sign In Now