Terminatorinhell Posted January 21, 2024 Author Share Posted January 21, 2024 Basecoated my chapter master, it's good to see him come together now that he has a head. Firedrake Cordova 1 Back to top Link to comment https://bolterandchainsword.com/topic/379949-terminatorinhells-wips/page/7/#findComment-6017689 Share on other sites More sharing options...
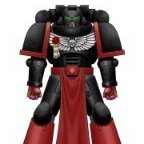
Terminatorinhell Posted January 22, 2024 Author Share Posted January 22, 2024 (edited) I got more parts in too! Did a quick mockup of my chapter master in regular armor. Actually it looks like an older version of him too! Edited January 24, 2024 by Terminatorinhell Firedrake Cordova 1 Back to top Link to comment https://bolterandchainsword.com/topic/379949-terminatorinhells-wips/page/7/#findComment-6018070 Share on other sites More sharing options...
Blindhamster Posted January 23, 2024 Share Posted January 23, 2024 looks pretty cool, the body/legs look a little small though? Relative the the arms Link to comment https://bolterandchainsword.com/topic/379949-terminatorinhells-wips/page/7/#findComment-6018077 Share on other sites More sharing options...
Terminatorinhell Posted January 23, 2024 Author Share Posted January 23, 2024 (edited) Hmm I'm not sure? I think that the printed torso and legs will need a little bit of greenstuff to blend because different makers. The only real difference I saw otherwise was that maybe the knee armor itself was a little smaller. The sword arm is from the Bladeguard kit and looks a bit bigger because of the extra armor so idk. Edit: blended in the waist more and I think it looks better proportionally Edited January 24, 2024 by Terminatorinhell ZeroWolf and phandaal 1 1 Back to top Link to comment https://bolterandchainsword.com/topic/379949-terminatorinhells-wips/page/7/#findComment-6018175 Share on other sites More sharing options...
Terminatorinhell Posted January 26, 2024 Author Share Posted January 26, 2024 Sneak peek of my Chapter Master paint in progress ZeroWolf, Firedrake Cordova and LameBeard 2 1 Back to top Link to comment https://bolterandchainsword.com/topic/379949-terminatorinhells-wips/page/7/#findComment-6019031 Share on other sites More sharing options...
ZeroWolf Posted January 26, 2024 Share Posted January 26, 2024 He's coming together quite well I think Firedrake Cordova 1 Back to top Link to comment https://bolterandchainsword.com/topic/379949-terminatorinhells-wips/page/7/#findComment-6019096 Share on other sites More sharing options...
Terminatorinhell Posted January 27, 2024 Author Share Posted January 27, 2024 More work done on the chapter master, I think he's about 90%? But pretty pleased with the direction. phandaal, ZeroWolf, LameBeard and 2 others 5 Back to top Link to comment https://bolterandchainsword.com/topic/379949-terminatorinhells-wips/page/7/#findComment-6019188 Share on other sites More sharing options...
Firedrake Cordova Posted January 27, 2024 Share Posted January 27, 2024 I like how the cloak came out. The trim on the shield is quite striking in that gold. The silver on the shield looks a lot darker than in other pictures - did it get knocked back a lot, or is it just a quirk of the camera angle? Link to comment https://bolterandchainsword.com/topic/379949-terminatorinhells-wips/page/7/#findComment-6019230 Share on other sites More sharing options...
Terminatorinhell Posted January 27, 2024 Author Share Posted January 27, 2024 (edited) I gave it a glaze of black Templar contrast to give it some more depth and like a colder look. I might pick out some highlights on it. Edited January 27, 2024 by Terminatorinhell Firedrake Cordova and ZeroWolf 1 1 Back to top Link to comment https://bolterandchainsword.com/topic/379949-terminatorinhells-wips/page/7/#findComment-6019239 Share on other sites More sharing options...
Terminatorinhell Posted January 29, 2024 Author Share Posted January 29, 2024 Bonus plague doctor mini I fell in love with the design when I saw it. I think he can be an Astra militarum medic or something. Or something in necromunda? I also kitbashed a librarian and tried making GS cables ZeroWolf, Rusted Boltgun, Firedrake Cordova and 1 other 4 Back to top Link to comment https://bolterandchainsword.com/topic/379949-terminatorinhells-wips/page/7/#findComment-6019507 Share on other sites More sharing options...
Firedrake Cordova Posted January 29, 2024 Share Posted January 29, 2024 I really like the "plague doc" ... it definitely has a Necromunda feel to me! ZeroWolf 1 Back to top Link to comment https://bolterandchainsword.com/topic/379949-terminatorinhells-wips/page/7/#findComment-6019525 Share on other sites More sharing options...
ZeroWolf Posted January 29, 2024 Share Posted January 29, 2024 Yeah that plague doctor would look right at home in the underhive sterling work. Link to comment https://bolterandchainsword.com/topic/379949-terminatorinhells-wips/page/7/#findComment-6019657 Share on other sites More sharing options...
Terminatorinhell Posted January 30, 2024 Author Share Posted January 30, 2024 Not as nice work but I guess they're fine. Sill some work on the chaplain... Like a backpack lol. Firedrake Cordova and phandaal 2 Back to top Link to comment https://bolterandchainsword.com/topic/379949-terminatorinhells-wips/page/7/#findComment-6019784 Share on other sites More sharing options...
Brother Christopher Posted January 30, 2024 Share Posted January 30, 2024 I've just popped in to say this: I've been following your thread for some time now and I'm liking everything here. The mix of the old and the new. Your army, your style is an excellent blend of old and new. You have some amazing conversions, very oldschool in nature, but you freely mix in modern stuff, like 3D prints. The Chapter Master is properly over-the-top. I imagine he's a tough nut to crack with the heavy armour and shield. Firedrake Cordova and Terminatorinhell 1 1 Back to top Link to comment https://bolterandchainsword.com/topic/379949-terminatorinhells-wips/page/7/#findComment-6019813 Share on other sites More sharing options...
Terminatorinhell Posted January 30, 2024 Author Share Posted January 30, 2024 What a compliment , I've been following your stuff a while and it's just great to see your Templars and distinctive style. Firedrake Cordova 1 Back to top Link to comment https://bolterandchainsword.com/topic/379949-terminatorinhells-wips/page/7/#findComment-6019838 Share on other sites More sharing options...
Terminatorinhell Posted January 31, 2024 Author Share Posted January 31, 2024 Experiments in sculpting capes for eliminators... Maybe I'm only please with the first one in the Pic. The second is utter . The good one I figured out but laying the putty on a trapezoid shaped piece of plastic (the bottom of a paint well flipped upside down) and I let it cure a bit then draped it on the marine. The other two were more free form made and peeled off a strip of plastic. Not pictured, I completely failed at rolling cables with a comb. Couldn't get anything so I just had putty sausages to donate to my bag of putty. Mildly frustrating night and I might buy one of those stupid GS rollers. Firedrake Cordova and phandaal 2 Back to top Link to comment https://bolterandchainsword.com/topic/379949-terminatorinhells-wips/page/7/#findComment-6020083 Share on other sites More sharing options...
Brother Christopher Posted January 31, 2024 Share Posted January 31, 2024 The putty looks like Milliput and it's difficult to work with, at least with my skills. I think it's best for sculpting when it has a similar consistency to green stuff, which means you should mix the putty and leave it for some time (40-60 minutes?) and only then start sculpting. The cape on the guy on the left is excellent, mind you. The shape is well-defined and it's nice and smooth (I wish I could achieve such a ting). I'd just add another layer of detail to it: add 'rolls' of putty and then work it to add some folds and it should be perfect. I also know the feeling of frustration of wasting an entire evening (or whatever other amount of time) and getting nowhere or, worse, having to undo something. However, the bad taste should go away quickly. Terminatorinhell and Firedrake Cordova 2 Back to top Link to comment https://bolterandchainsword.com/topic/379949-terminatorinhells-wips/page/7/#findComment-6020102 Share on other sites More sharing options...
Terminatorinhell Posted January 31, 2024 Author Share Posted January 31, 2024 I think I might use more green stuff in the next batch. The other part I'm worried about is if I would add another layer like how the eliminator capes have. Link to comment https://bolterandchainsword.com/topic/379949-terminatorinhells-wips/page/7/#findComment-6020131 Share on other sites More sharing options...
Terminatorinhell Posted February 1, 2024 Author Share Posted February 1, 2024 This is the redo, I'm happier with it and it came out better. But I may have rolled it too thin. I might add another layer on top, as well as the folds but I'm gonna let it dry overnight and see how it is. I tore one on accident but managed to put it back together. I found that if I was gonna walk away for a bit I could toss it in the freezer. ZeroWolf, Firedrake Cordova and phandaal 2 1 Back to top Link to comment https://bolterandchainsword.com/topic/379949-terminatorinhells-wips/page/7/#findComment-6020307 Share on other sites More sharing options...
Terminatorinhell Posted February 3, 2024 Author Share Posted February 3, 2024 Little more done with the capes. I added the second layer. Then I'm going to see if I can add some fabric rolls and the little trapezoid and strap things. Firedrake Cordova, Grotsmasha, ZeroWolf and 2 others 4 1 Back to top Link to comment https://bolterandchainsword.com/topic/379949-terminatorinhells-wips/page/7/#findComment-6020714 Share on other sites More sharing options...
Terminatorinhell Posted February 3, 2024 Author Share Posted February 3, 2024 Didn't do much but I added some more folds and little buckles. They're kind of rough but hopefully a dark paint scheme will make them look ok ZeroWolf, Rusted Boltgun, LameBeard and 1 other 3 1 Back to top Link to comment https://bolterandchainsword.com/topic/379949-terminatorinhells-wips/page/7/#findComment-6020761 Share on other sites More sharing options...
ZeroWolf Posted February 3, 2024 Share Posted February 3, 2024 Those are looking great, love the little details you've added to the cloaks Firedrake Cordova 1 Back to top Link to comment https://bolterandchainsword.com/topic/379949-terminatorinhells-wips/page/7/#findComment-6020766 Share on other sites More sharing options...
Firedrake Cordova Posted February 3, 2024 Share Posted February 3, 2024 I like the trim decoration you did around the hem of the cloaks ZeroWolf 1 Back to top Link to comment https://bolterandchainsword.com/topic/379949-terminatorinhells-wips/page/7/#findComment-6020771 Share on other sites More sharing options...
Terminatorinhell Posted February 6, 2024 Author Share Posted February 6, 2024 Oooh segue! Decided to start painting some Sororitas. As today was kinda crap. Rusted Boltgun and Firedrake Cordova 2 Back to top Link to comment https://bolterandchainsword.com/topic/379949-terminatorinhells-wips/page/7/#findComment-6021199 Share on other sites More sharing options...
Firedrake Cordova Posted February 6, 2024 Share Posted February 6, 2024 I like the colour scheme on those Sisters of Battle Link to comment https://bolterandchainsword.com/topic/379949-terminatorinhells-wips/page/7/#findComment-6021264 Share on other sites More sharing options...
Recommended Posts
Create an account or sign in to comment
You need to be a member in order to leave a comment
Create an account
Sign up for a new account in our community. It's easy!
Register a new accountSign in
Already have an account? Sign in here.
Sign In Now