Search the Community
Showing results for tags 'Batrep'.
-
From the album: Kill Team
-
From the album: Kill Team
-
From the album: Kill Team
-
From the album: Kill Team
-
From the album: Kill Team
-
- Kill Team
- Lysimachus
-
(and 1 more)
Tagged with:
-
From the album: Kill Team
-
- Kill Team
- Lysimachus
-
(and 1 more)
Tagged with:
-
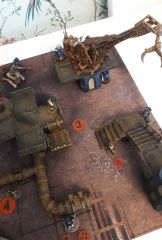
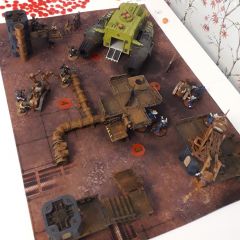
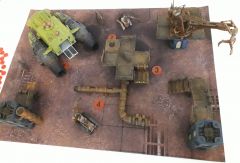
I got in another game this weekend with Tyriks and remembered to take pictures this time. We decided to play 1000 points again because we're still getting back into 40k since a long pause during 9th and a shorter break between the start of 10th and now due to life being chaotic. The lists are in the comments below this Batrep Post to keep the clutter down. Tyriks graciously set up the table for us after drawing a random deployment card, which was Crucible Of Battle or diagonal deployment zones on the short sides of the board edges. 1. Initial Board State For the mission and rules, we drew Take And Hold with Minefields modifying the overall mission. Minefields causes 6's on advance roles to cause the unit damage and the mission overall is just attempting to keep objectives under your control, capping at 15 points per turn for 3 held. For our secondarys, the Necrons opted for Bring it Down and Engage on All Fronts and the Tau selected Storm Hostile Objective and Engage on All Fronts. 2. Mission rules Deployment We both had a generous amount of cover to deploy into and I elected to place my pathfinders in my large center ruin while the rest of my army, which could mostly not benefit from cover anyway, deployed evenly to either side of the main ruin. My rail rifle Broadsides and one squad of Breachers in their devilfish deployed to the left side of the ruin, lining up for a supported drive towards the center objective with an eye at having the rail rifles neutralize the heavy destroyers. On the right side, my tetras posted up on my objective with my high yield missile broadsides and the other unit of Breachers in their Devilfish. Finally, I placed my stealth team on the left no-man's-land objective behind the large rock so they could spot into the other objective zones. 3. Tau Deployment My opponent placed his warriors on the first floor of his central ruin and his heavy destroyers on the second level, overlooking the battlefield. The ophidians hid behind the small ruin opposite of my tetras eyeing the other mid-field objective behind the rock closer to his deployment zone. His Canoptek Stalker and Hexmark Destroyer lurked in deep Strike waiting to jump into action where they could do the most damage. 4. Necron Deployment Turn 1 Tyrik's won first turn and decided that discretion was the better part of valor and mostly remained for the first turn of movement after seeing a disappointing advance roll for his warriors, commenting that in prior games rash early movement had gotten him into trouble. Instead, he shuffled his warriors back to hold his home objective and instructed his Heavy Destroyers to take out the pathfinders from their second story overwatch position. A withering barrage of enmitic exterminator fire quickly yielded exactly 10 unsaved wounds for the poor pathfinders, taking the Tau's primary spotter unit out of action before a single Markerlight had illuminated an enemy of the Greater Good. Ending his turn, the Necrons scored 0 secondary points but dealt a major blow to the Tau's spotting network. In response, Tau shuffled the Tetras over to get a fix on the Heavy Destroyer's with their High Intensity Markerlights and instructed the rail rifle Broadsides to remain stationary, anchoring their battlesuits into the ground to get every bit of stability. The stealth suit hopped out to also gain a spotting angle while the nearby Devilfish jetted onto the objective they had left. The missile-equipped broadsides strode forward and barely got one suit into range of the destroyers as well. 5. Tau Turn 1 Movement Once movement had ceased, the broadside teams opened fire on the Heavy Destroyers and their attached Lord, leading to one wound from the missile barrage and four wounding hits from the heavy rail rifles. Two wounding hits from the heavy rail rifles were absorbed by the Locust Lord, who failed both invulnerable saves but managed to save the unit from potential destruction. The remaining two wounding hits killed off two whole Locust destroyers, leaving a single, minorly damaged survivor amongst the wreckage of his comrades. 6. The lone survivor Turn 2 The necron warriors with their attached Overlord managed to roll a respectable 3" for their advance roll this round and struck out through the ruin's windows and out onto the center of the battlefield, making a straight line for the middle objective. The living metal of one of the scrapped Heavy Destroyers crept to life and mended the clean, precise rail rifle shot that had put it out of commission only moments before, allowing it and its now-full-health compatriot to jet out of the ruin and down to the objective behind the ruin. The squad of Ophidians slithered to the nearby neutral objective and took it. At the end of all the shuffling movement, the two deep striking units emerged, hopping together on the center objective after failing to find a good backfield area to invade. 7. Necron Movement The Necron warriors and the newly-arrived Hexmark fired into the stealth suits, managing to down one and put a wound on another despite their powerful obscuring fields. The canoptek stalker fired into the broadsides to its front and then attempted to charge, but only managed to take a wound from overwatch fire before the failed charge roll. The necrons again scored 0 secondary points but scored a single objective: 5-0, Necrons Seeing the enemy advance into the open, the inexperienced Tau commander decided that they had waited long enough and sent forth all forces for their strikes. Both Devilfish screamed forward and delivered their breachers, sending the Gue'Vesa to confront the Necron warriors and their tau comrades to face down the Ophidians. Both broadside pairs shuffled to get better lines of sight to their chosen quarry. The stealth team jumped back to their original position to mark the Ophidians using the corridor through the the center rocks. 8. Tau Movement (Messed up framing and cut off the bottom of the board :/ ) Starting off the shooting, the Gue'Vesa in the middle of the board fired their full salvo of Pulse Blaster fire, aided by the high intensity markerlights of the Tetras and their Fireblade, and managed to down a little more than half of the block of warriors. The warriors used a strategem to return fire, felling 3 of the human auxiliaries. The Heavy Rail Rifle broadsides threaded a needle through their side of the board and wiped out the heavy destroyers over the heads of their vulnerable human allies. In an error, the Tau breachers fired before the missile broadsides, killing off the two Ophidian Destroyers that their support fire could see. This left their fire going into the Canoptek Stalker, which took no damage from the weak but plentiful missiles. Two objectives and Engage on All fronts were scored: 5-12 Tau 9. Breachers Confront the Ophidian Destroyers 10. Gue'Vesa breachers pouring fire into the Advancing Necron Warriors Turn 3 Resurrection returned several warriors and one ophidian, leaving both units near full strength ad they advanced forward towards the breachers that had fired into them. The stalker scurried towards the broadside that it had been dueling with since it arrived from deep striking into the center. The Hexmark remained stationary to target the stealth suits. 11. Necron Movement The Necron warriors fired into the breachers and killed six more breachers with the rapid fire gauss fire, leaving only one of the squad living alongside their attached Fireblade. The Hexmark Destroyer fired into the stealth team and easily felled the remaining two members. The stalker again fired at the missile broadsides but their armor proved fit to handle all the hits, taking no wounds. The other breachers managed to avoid any casualties to fire from the Ophidians and were subsequently charged. In response, they used Emergency Embarkation and jumped back into their transport. The Devilfish was then retargeted for the charge and took 8 wounds of damage from the vicious machines. The stalker charged into the missile broadsides, taking one damage from overwatch, and proceeded to do no damage. Starting with two objectives and scoring no secondaries again, they gained 10 points: 15-12 Necrons Feeling the overwhelming onslaught of the Necrons turn the tide in basically a single turn, the Tau began to withdraw as much as they could. The remaining Gue'Vesa piled into their devilfish which jetted down the top board edge towards the enemies deployment zone. The other Devilfish followed suit and fell back over the Ophidians. (I misread the rule at first and disembarked my breachers, but we double checked after the picture was taken and reembarked them.) The missile broadsides fell back in hopes that their counterparts with the rail rifles could swing back around the ruin and fell the T9 stalker for them. Unfortunately, the rail rifle broadsides who had been crack shots up until now failed to wound at all. With only one objective scored and not enough table quarters, the Tau only gained 5 points: 15 - 17 Tau 12. Tau Movement Turn 4 With a large majority of the Tau force dead and fleeing and with time short (Dang afternoon weddings), the game was conceded by the Tau after running through possibilities for scoring with so few troops left on the board. Necron Victory. Conclusion Saracen: I am still learning Tau and I think I made plenty of mistakes this game. It is weird coming from GK and other former armies where 3+ was the standard across the board for shooting and fighting. Tau really need to rely on having spotters available and also need to coordinate to take opponent's down together. I thought a single breacher squad with minimal support would be enough to handle large threats and they really needed to be deployed together rather than on their own. If I would have rushed the center and shot the warriors off the board, Tyriks would have had less of an easy time figuring out how to fight back even though I would have left the Ophidians to move freely. Some lessons were learned and fun was had, though, so I think the game was a success overall.
-
The Flesh is Weak "Logic is the key to victory. It guides us, forms our thoughts. To think otherwise is heresy." - Iron Chaplain Josphuus Naehr Hey everyone! Going to be editing this in the future with batreps, list concepts, build & paint jobs as well as my random thoughts on Iron Hands. I will also have separate links here that spread out to other important topics throughout B&C and other websites as I gather them to keep them located in one place. As I said I'll be doing a lot of editing to get this post up to Iron Hands standards over the next few weeks/months. I hope to share my journey towards the machine with all of my friends and brothers, and even some xenos, in the future. Iron Hands List Ideas Blue Steel Paint Guide (Deathwatch Steel) - GW Paint Series Painting Black - By Darren Latham (Units) Painting Black - By Darren Latham (Characters) Painting Faces - By Darren Latham (Characters) Painting Ice Bases - By MarcoFrisoniNJM
- 35 replies
-
- Iron Hands
- WIP
-
(and 1 more)
Tagged with:
-
Meant to get this up over a week ago. This was my first game of 8th Ed. Playing against my buddy's Necrons. Learned a lot, but ultimately got destroyed. These lists are from memory, so might not be 100% accurate. Raven Guard 2k Points (Outrider and Battalion - 7 CP) Battalion Shrike Chaplain - Jump Pack, Combi-Plasma Contemptor - Kheres Venerable Dread - Twin Las/Missle Launcher Venerable Dread - Twin Las/Dread CCW 3 x 5 Man Scout Squads (4 Snipers, 1 Missle Launcher, Camo Cloaks) 1 x 5 Man Scout Squad (4 Bolters, Sarge with Twin Lightning Claws) Land Speeder Storm - Assault Cannon Outrider Librarian - Jump Pack, Force Staff, Combi-Plasma 3 x 10 Man Assault Squad (2 Plasma Pistols) 3 x Sarge w/ Combi Plasma & Thunder Hammer Necrons - 2k - Battalion Overlord - Scythe Cryptek Triarch Stalker 3 x 10 Immortals (Tesla) 3 x 10 Deathmarks 3 x Heavy Destroyers 5 x Tomb Blades 2 x Annihilation Barges Deployment: - We drew tactical escalation and the new slanted long board edge map I deployed my 3 dreads midfield in the open with good firing lanes. I had high hopes for the contemptor. I deployed all my scouts in area cover, midfield, near objectives (except the storm and boltgun scouts) I placed Shrike, Chaplain, Librarian, and all 3 ASM squads in Reserve to attempt "Shadowstrike Killteam 2.0" My opponent deployed spread fairly wide covering half his side of the board One immortal unit on each flank paired up with a barge The remaining immortal unit in the center on an objective, with the lord and cyptek Tomb blades to one side, Heavy Destroyers opposite the other He had one less unit meaning he got first turn. Battle Round 1, Necron Turn 1 - He drew the kill X units card, bonus for 3, more bonus for 6 He moved all his immortals up a little bit while keeping them in cover. He kept his immortals in reserve. His barges and heavy destroyers squeaked up a small amount to get better firing arcs His shooting phase all his infantry opened up on my scouts, killing nearly every sniper scout. I was left with one sniper and one missle launcher left from one unit on a midfield objective. Both barges, and the heavy destroyers opened up on the contemptor and took it to 4? wounds remaining crippling it (I didn't make a single invuln). During Morale phase, I rolled for the 2 scouts left, and got a 5, thus giving me an 8, so I would lose one scout - I used ATSKNF, rerolled, and got a 6, wiping the squad - Great. He killed 3 units and scored D3, for 3. Battle Round 1, Raven Guard Turn 1 - I drew an objective that was under his lord/cryptek/immortals in the center On my turn I moved my dreads into a better position to shoot at the heavy destroyers, and the contemptor and bolter scouts moved on the Tomb Blades I dropped all my Jump boys in his corner, he responded by fortifying that flank and dropping in all his Deathmarks. I made the mistake of dropping the librarian first thinking he could soak one units worth of interceptor fire to spare me bodies. One unit is double tap snipers (20 shots), and he cranked out 2 mortal wounds and 2 saves, which I failed. Dead libby, never even cast a power. His interceptor fire (whatever you want to call it) from the other two deathmark units killed 4-5 ASMs. In my shooting phase I opened up on the tomb blades and killed 3 of 5. My dreads opened up on the far side flank annihilation barge and took a few HPs off. My remaining HQ and ASMs opened up with all their plasma on the other annihilation barge, overcharged, and with Shrike's reroll took it out quite easily. I attempted to charge the closest unit of Deathmarks. I had 5 charges in total to make, all of which were the minimum distance (9"), and I had the reroll for every charge, and I only made ONE unit into combat. Every single one of my units took overwatch fire, shrike took two wounds, chaplain took one, lost 2 ASMs from one unit, and 1 ASM from the other, and 2 more from the already weakened unit he focused on with Interceptor fire. Ironically the LAST unit to charge and make it in was the unit reduced to 5 guys from interceptor/overwatch. I killed one immortal, and even with my Chaplain nearby to buff LD, I still lost another guy to morale. I didn't score anything. Battle Round 2, Necron Turn 2 - Necrons 3 / Raven Guard 0 On his turn he moved up, secured two more cards (objectives in his deployment, regular hold and the 2 turn hold). The unit of Deathmarks I charged warped out and left me exposed. He opened up with about 50% of his army on my dreads, finishing the contemptor, and wounding one venerable. The remainder of his army on the flank shot up my jump boys real bad. I lost one whole unit, exposing Shrike, then lost Shrike, then lost another 2 guys off the other unit that didn't charge, and I lost a 6th from the unit left scratching their heads after the Deathmarks warped out. At this point I had 0 points, a wounded Dread, a healthy dread, my chaplain on one wound, and remnants of two ASM squads. I decided to concede. SO ON TO LESSONS LEARNED: Deep Strike to try to charge, even with a reroll is REALLY STUPID and should not be tried, ever. Aura buffs are very strong in 8th Ed, and ill be doing everything I can to stack them in future builds/modelling opportunities. It is extremely aggravating there are no Jump Pack options for the buffing elite guys (Apothecary, etc) I was really excited to run the Contemptor, and watching it getting taken to critical wounds and then be worse than a Ven Dread was very sad. I think I need to run more/all Contemptors for saturation, or none. Overcharged plasma with Shrike is great. Relying on assault to do the bulk of your lifting in 8th Ed is a mistake, I think. I used to play a very assaulty-alpha list in 7th, and it worked, but you just need more guns/dice/men on the field in 8th I believe. In hindsight, with this list, I should have dropped into cover on his half of the board, shot him up, then tried to charge the NEXT turn after securing safer charge ranges. Scouts in area cover with Camo Cloaks die like flies when looking in the face of 60+ Tesla shots. Which leads me to my next point: Point for Point, immortals are SO STRONG in 8th with Tesla. You can buff their hit rolls with the lord, so they proc Tesla hits (3 hits off a 6, now a 5 or a 6 with the buff), meaning a 10 man unit can easily garner 25-30 hits every time they shoot. Take into account that it is an assault weapon (with 24" range), so they can run and shoot if necessary, there threat range is quite large. ALSO Deathmarks are probably the 2nd most efficient unit for dealing mortal ones. The fact they can warp every turn, respond to your opponents deep strike, and get to rapid fire is insane. I think the only other snipers in the game better are maybe ratlings because they are so cheap. Also the fact that Snipers put out the mortal wound AND the normal wound is crazy. I kinda wished at the end I had 2 large units of scouts (10 each with rifles), and maybe no missle launchers, just to maximize my odds of mortal wounds. That's it for now, I got a couple other oddities I have noticed about 8E, but it's getting late and ill have to add more later.
-
I'm officially undefeated in 9th edition! Got my first game in this past Saturday, and boy did it feel good to roll dice. Still lots of rules to get used to and I realized just this evening that I completely forgot to use the +1 to hit ability on the Techmarine...but still. The army I took was: Terminator Captain with thunder hammer & storm shield, Warlord (All Flesh is Weakness), Automedicae Bionics Librarian with force sword, Tome of Malcador, Reforge, Psysteel, Psychic Fortress Techmarine with the Ironstone 10x Tacticals with chainsword, combi-grav, gravgun, grav cannon 10x Tacticals with chainsword, combi-grav, gravgun, grav cannon 5x Tacticals with chainsword, combi-grav, gravgun Ironclad Dreadnought with chainfist, heavy flamer, hurricane bolter Ironclad Dreadnought with seimic hammer, DCCW, 2x heavy flamers Venerable Dreadnought with twin lascannon, DCCW, heavy flamer Land Raider Redeemer with stormbolter Vindicator with stormboler Stalker Rhino Razorback with twin lascannon I played against a Death Guard army with approximately the following: 2x Lords of Contagion Malignant Plaguecaster Foul Blightspawn 10x Plague Marines 5x Plague Marines 5x Plague Marines 20x Poxwalkers 5x Blightlord Terminators 2x Chaos Spawn Rhino 3x Blighthaulers 1x Plaguedrone We played on a pretty decent urban map -- I prefer my cityfights to be really close-quarters, but we went easy to keep long-range firing lanes open a little. My opponent was ready to concede after my first turn as I did a number on army (and his dice weren't helping him at all -- I killed the Rhino and three of the Plague Marines inside died in the explosion, for example). However, since the LGS is using a 4-hour limited reservation time, we didn't really have the time to reset and start over. In any case, from my left to right were an Ironclad, the Razorback with Libby & Tacticals, Land Raider with captain and Tacticals, the Techmarine, the Vindicator, the Venerable Dread, the Stalker, the other Ironclad, and the Rhino with Tacticals. He placed an LoC, the terminators, and one small unit of PMs in reserve; the rest were deployed (again, my left to right) a unit of two drones, a unit of two blighthaulers, the two spawn, the Rhino with ten PMs, five PMs on foot, the third blighthauler, then the last three HQs and the Poxwalkers on the far side. I won't give a play-by-play, especially without pictures (I went into it planning to take photos, but the time limit we were operating under convinced me not to kill more time than we should0, but suffice to say that the combination of my lascannons and Vindicator laid out some hurt. I killed the Rhino and popped a few of its riders to boot, plus one blighthauler, a few more PMs, and some Poxwalkers. My Vindicator and Land Raider, supported by the Ironstone Techmarine and Psychich Fortress/Psysteel Librarian, took up position in the center of the table and mercilessly annihilated any infantry that got within reach. In the end, the Death Guard didn't do a lot of damage. When we had to call it due to time, I was convincingly ahead. My captain and 15x Tacticals were in the act of dragging down the LoC and Blightlords that had the temerity to deep strike in my backfield, while I had completely cleared the right flank and had an Ironclad sitting on an objective in enemy territory. We played through three turns but discussed how Turn 4 would most likely go and settled on an Iron Hands victory of 80-35. I would eventually lose the Rhino, an Ironclad (to a mulitmelta on overwatch from a blighthauler!), and one big squad of Tactical Marines, but I was giving my opponent fits with all of the saves and Flesh is Weak rolls I was making. Several times, my Tacticals rolled two sixes out of three to avoid losing a model to a 3-damage weapon and boy was I a grinning fool. I invested a lot of points and positioning into protecting my two big tanks; my opponent simply chose to ignore them and try to punch into my flanks instead. This strategy failed on my right, where my chainfist/hurricane bolter Ironclad was running roughshod (MVP right there -- he killed about ten poxwalkers, a blight hauler, the Plague Caster, and the Blight Bringer and ended up sitting on an objective), but succeeded on my left where he had five PMs, a blight hauler, and a drone against just a Razorback. I had cleared the center except for three PMs and one spawn (which was tying up my Vindicator until the Techmarine cut it apart). It wasn't all sunshine and rainbows, though. I had a few bad misplays, including striding the Venerable off an objective that he was supposed to by camping (cost me some points on Primary); throwing away my last CP on a reroll in the Shooting Phase when I was saving it for the Fight Phase; and moving my Rhino-mounted Tacticals too far forward and getting them charged by an LoC who proceeded to cut them apart across two turns. All in all, it was a fun game and I can't wait to take the Firstborn back into battle!
- 3 replies
-
- Iron Hands
- Death Guard
-
(and 1 more)
Tagged with:
-
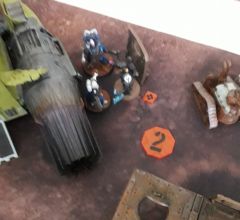
19 Jun 14 Turn 1 Death Riders Charge
Nicodemus Doloroso posted a gallery image in Battle Reports, Games in Progress, Dioramas
From the album: Nico's Treatise on Bayonet Stabbing
-
- Death Riders
- DKoK
-
(and 2 more)
Tagged with:
-

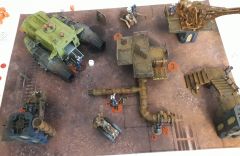
19 Jun 14 Turn 1
Nicodemus Doloroso posted a gallery image in Battle Reports, Games in Progress, Dioramas
From the album: Nico's Treatise on Bayonet Stabbing
-
- Batrep
- White Scars
-
(and 1 more)
Tagged with:
-

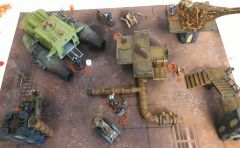
19 Jun 14 Setup 2
Nicodemus Doloroso posted a gallery image in Battle Reports, Games in Progress, Dioramas
From the album: Nico's Treatise on Bayonet Stabbing
-

19 Jun 14 Setup 1
Nicodemus Doloroso posted a gallery image in Battle Reports, Games in Progress, Dioramas
From the album: Nico's Treatise on Bayonet Stabbing
