The_Chaplain Posted June 12, 2015 Share Posted June 12, 2015 Keep the thread, put the minotaurs on the back burner for now. I really need to read through the codex once I get in hand-- these multiple formations, cads, etc is all very confusing to me. So, what's first on the block for this new ultra force? Marius Perdo 1 Back to top Link to comment Share on other sites More sharing options...
One-eye Posted June 12, 2015 Share Posted June 12, 2015 Considering the huge amount of stuff it seems you own, just pick up whatever you prefer doing now, to keep the motivation. If now it's Ultra, go Ultra ! :) I would love to see you handle the poster boys. Always have been inspired by the poses you manage to achieve on your models. Build us a Marius Perdo captain. Keep it up ! Marius Perdo 1 Back to top Link to comment Share on other sites More sharing options...
Marius Perdo Posted June 12, 2015 Author Share Posted June 12, 2015 (edited) Back from the gym. Opened one of the Ultramarine upgrade packs. Very nice. The shoudlers are very blingy though, excellent for honour guards and 1st company, maybe too much for ordinary squads. As an aside my best mate has challenged me to actually do this, as in I will get a Gladius Strike Force Deatchment of Ultramarines actually done, consisting of a Dem-company and a 1st Company Task Force done. Oaths have been sworn and un-ending piss-taking will ensue if I fail. He also suggested I share what I am intending to do and what tools I use, and maybe give some idea as to why I do what I do, with as little rambling as possible. Mainly so he can copy I suppose, but some of it might be handy. I'll do that tomorrow, starting with the fine art of salvaging less-loved miniatures (that you might have inherited from someone quitting the hobby, or got cheap off ebay): a theme for this is going to be Upcycling and re-use. The FW bits will be optional, or could be purchased with what you save doing the rest more cost effectively. In the morning I'll take a picture of my favourite and cheapest tool, that by some sort of mystical alchemy can turn lead into gold, or disprove the saying that you cannot polish a turd. Edited June 12, 2015 by Marius Perdo Link to comment Share on other sites More sharing options...
Marius Perdo Posted June 13, 2015 Author Share Posted June 13, 2015 (edited) Okay, so first things first (which should answer The_Chaplains question eventually). The codex matches the leaks. The Gladius is presented as a historical solution, and thus the absence of reserve units, so hopefully some alternate Detachments with differeing Core and Auxillaries will be presented in future. However this is now. You need goals. Or targets. Or objectives. Regardless you need something to aim for. To make these have a hope in hell of happening you need a plan. Well, plans really. I am not suggesting Gantt charts or anything but having some concrete goals with some plans at the start can really help. Look at how my usual chaotic approach leads to not very much (actually, not quite as we will see later). My goals: i) Ultimatley have a 2000 point army with about 3000 points of units to choose from. However within that: ii) I want to re-use lots of less loved and/or old/inherited or cheaply acquired miniatiues as much as possible. iii) Build a force that is characterful to teh chapters background and effective, whilst using the new CAC Detachment: the Gladius Strike Force. iv) Use as much of the tricks and techniques I have learned over the years to make the models look good whilst being effective at doing so regarding resources i.e. time & money. So, to the codex. Fairly simple when doing a Gladius Strike Force Detachment, you have to take a Demi-company formation mimimum as a Core (and there aren't any other Core choices at this stage), and also one Auxillary formation. A simple place to start but as these are like building blocks, and these initial choices are almost like foundations, decisions you make now will have far reaching consequences so it is best to think those through now rather than later (after you have bought or built models for example). Demi-company: Okay, some are compulasory and some are optional. Whilst appearing straightforward (you are going to have 3 tactical squads for a start), consider if eventually you are going to take two to form a battle company. If you are doing that as an ultimate goal, you are probably going to want all those "free" transports. If you are doing this you will not want units that cannot get those dedicated transports (rhino/razorback/drop pod), like bikes, or assault marines with jump packs, or centurions. Or maybe you do, but probably best to think about it now. I am doing the compulsory choices first, and then the 0-1s later. For the "assault" unit I am choosing an assault squad. I am still pondering whether to give them a pod or packs. The new box just arrived this morning, when I examine the sprues I'll make an informed decision. Also consider Drop Pod Assault. If you want a big drop you'll need a fairly large (odd) number of units in pods. As I do I know I'll be putting 2 of the tactical squads in pods. Auxillary choice: You have to take at least one. There are a lot to chose from and some very rough maths shows that taking a full Demi-company and a full Armoured Task Force isn't easily done in 2000 points, and as you'd need 15 tanks and 3 thunderfires (and a techmarine most likely on a bike), very expensive interms of £$s. The gist is that it is down to personal taste and how you play. A constraint may be what miniatures you have and what are available. As I fancy taking terminators due to their points cost reduction, and I think I can spread the bits from a single sternguard and vanguard box quite far, I am going for a 1st Comnpany Task Force. However as I want to do a Strike Force Ultra at a later date that means I will take that into consideration now. The formation gets some interesting rules. Whilst selecting an enemy unit for Extremis Level Threat is fun, as is casuing Fear and being Fearless, it is Terrifying Proficiency (especially combined with Fear) that interests me most. Mix in a libarian conclave in the squads, hope for Intimidating Presence as a warlord trait, and some Psychic Shrieks and it could get messy. Still pondering. If it is doable and I chain it I'll call it the Lion's Roar of Macragge. The formation is 3-5 units. Initially I am going to do a terminator squad, terminator assault squad, sternguard squad (and pod), and vanguard squad (probably with packs). Note I haven't pointed this as yet, and given squads can be 5-10 it can obviously vary alot. At a guess it'll be between 1800 and 2000 straight off with reasonable weapons. After that other units will just be for variety. Right, off to look at the assault marines and then the next post will be on procurement. Edited June 16, 2015 by Marius Perdo Link to comment Share on other sites More sharing options...
Marius Perdo Posted June 13, 2015 Author Share Posted June 13, 2015 For the Demi-company: You'll need marines. Boxed sets have a plethora of bits but usually a set number of legs and backplates. So I have bought a tactical box, and assault box, and a devastator box. You can usually find a webstore that does discount. There is one I do in UK that does 25% off GW RRP, and my local games shop does the same for our club. My local computer games store does 10-15% discount as well. You need these complete boxes for all the bits to upcycle the rest. I am going with a captain. I have 4 of the commnader boxes, and one each of teh clam pack captain and the two web store exclusives. However the commander can probably be bought off eBay cheap and then sorted out with other bits. 1st Company Task Force: I also bought a sternguard box and vanguard box a while ago. I have a lot of termies already but I guess one each of normal and assault will help. The Ultramarines upgrade sprue will help with the veterans and captain, probably with bits spare for other optional units in future (such as a command squad box or scratch built honour guard). At this point you are still short of a lot of marines. I'll need 20 odd to finish of the tactical squads, about 10 assault marines to fill out the assault squad and vanguard, 5 tacticals for the devastators, 5 more for the sternguard, and 5 of each type of terminator. So on eBay I'd be looking for 30 odd "tactical" marines, and 10 assault marines, and 10 terminators. Firstly I'd avoid old 2nd edition plastic, Battle of Macragge, and Assault on Blackreach fixed position models. Even Doghosuing them isn't going to be great with that many men (I'll do a few to show how they can pad out squads in extremis). The cheapest and most effective will probably be painted and built previous edition plastics (like the 3rd edition box set ones, or old tactical boxes). I have seen some of the most recent tacticals, badly built and over painted (undercoat and base coat) for under a tenner for 10. Basically if you can get a marine for under a pound it is all good. With all the bits from the mint boxes you'll be able to salavage them all, and make them look good to boot. One box set does come with two bodies per leg, and that is the assault box. If you put jump packs on them you'll have 5 spare bodies that can be used on an old mini that may have a damaged body, which can happen when stripping. You also get six chest plates and that spare plate is also useful (I'll show how later on). If you want to go full 32mm bases you'll need to order some. GW do free postage in the UK for orders £40+, so as 10 cost £4 I ordered 10 packs of 10, giving me 100 bases. That'll do for a goodly while. With luck, even factoring in the bases, you'll get all the extra guys off ebay for less than half price, even with the 25% discount. Next is stripping. Link to comment Share on other sites More sharing options...
Marius Perdo Posted June 13, 2015 Author Share Posted June 13, 2015 (edited) So, you will need: Gloves, I use surgical, about Edited June 13, 2015 by Marius Perdo Chaeron and Nemac Vradon 2 Back to top Link to comment Share on other sites More sharing options...
Marius Perdo Posted June 13, 2015 Author Share Posted June 13, 2015 If you look through thsi thread you'll see sort of whitish, or stained marines throughout. An example of some I did for Imperial Fists here: http://www.bolterandchainsword.com/topic/278184-ultramarines-an-upcycling-project/?p=3510086 Note I am going to go a lot further this time with "modernising" them, but as you can see they look fine (especially when kit bashed with new parts or Forge World bits), and with paint on no one will know. Lots and lots of examples in my profile gallery. However, this all needs a sound base to build on.... Link to comment Share on other sites More sharing options...
Marius Perdo Posted June 13, 2015 Author Share Posted June 13, 2015 (edited) I tend to do my own scenic bases, either using base parts to conglomerate into my own unique ones, or making them from scratch using various bits. Here are some I was working on: I am going to strip the painted ones and modify them, as I painted them before I started 2D casting stuff. I use all sorts of bits, spares from building kits, vehicle kits, bits shops, textured plastic-card, plastic rod, plastic tubes, model railway I beams, Grant Line rivets & bolts (very important later on) etc. Model shops are great, and you can sometimes get spare bits in sort of lucky bags, to keep the cost down. Really it is down to your personal taste and theme/narrative. Good bases do tie an army together though, and apparently can "frame" the model. The new 32mm bases give a lot more scope for this. Casting has a tendency to not be cheap, quite the opposite. Getting rubber, making casting boxes, liquid resin/plastic, and full model accessories from Grandt Line or Evergreen Scale Models can quickly add up. However if you restrain yourself you can make a little go a long way. It also saves time in the long run. For example(s), I live next to the sea and just go and get bags of very fine sand, which I but in a baking tray in the oven on a low heat (to dry the sand out), then use the manky sieve to filter them into large greek yoghurt pots. I also buy coarse bird sand (for the bottom of budgie cages) at pet stores, which is cheap and lasts forever (still on my first bag). You can also get good, fine gravel from pet stores for fish tanks, some of which is natural and not bright blue or yellow. As a lot of houses around me have slate rooves, and we get gales quite often, I just look for shattered tiles on the pavement and take the slate shards. I put them in an old towel and then smash them to bits with a hammer, thus creating very fine slates parts to mix in with the beach sand and bird sand. This is cheaper than getting it from GW, but the slate will slice the towel so only use the old, manky one (if not it goes way, way beyond "looks"). As I cast now the idea is to make a base I can cast (just the detail part, I'll show you later) which I can then glue onto an actual base and modify it some more (making them unique). Some bits, like guitar wire (usually free from a friend when one snaps), car body mesh (free if you have a mate who works in a garage, you only need the off-cuts but very cheap from Hallfords anyway), and bird feeder wire used as rebar (free when emptied by the birds), do not work well for casting. Anyway, I was waiting for the assault box as I am going to do five 32mm using the scenic bits that come in that kit. Off to get a feel, I'll take photos as I go. Edited June 16, 2015 by Marius Perdo Link to comment Share on other sites More sharing options...
Marius Perdo Posted June 16, 2015 Author Share Posted June 16, 2015 (edited) Scenic parts taken off sprues, and glued to a 32mm base (that has already had a 2 pence piece Araldited underneath for weight). Green stuff to fill gaps as this is a 2D cast and we don't need rubber flowing around and in and tearing. A nice clam pack as a source for a simple casting box. Cut as shown, as close to the top as possible to make the "box" have as equally high sides as possible. Glue the bases with superglue to the base of the box. Have a measuring jug handy. Fill the box with water up to a depth that you will need to cover the bases completely with a fair bit to spare, depending on how resilient you want the mold to be. I usually do it to the top. Pour the water into the measuring jug. Record the volume. Let the box now thoroughly dry out. Use the sealant that comes with a casting kit. Follow the instructions with the product, don't overpsray being the main one (you'll obliterate the detail). Leave to dry as it states. Put on the release agent as per product instructions. Again don't overspray. Leave to dry thoroughly. Most rubber is 2 part silicone in these kits. It can be messy. Wear gloves, make sure you have something down to catch spillages and kitchen roll handy. Get the curing time and setting time clear and work to those constraints. It isn't quick but it can be fast enough that if you asnwer the door or phone the stuff will set before you pour it. Take the volume you have before and divide by 2. Note this stuff is very viscous and flows slowly. Pour that volume into the jug of part A of the rubber. Pour all the way up to the total volume with part B of the rubber in tme same jug. Mix the two parts THOROUGHLY...you don't want pockets of rubber that won't set in the mix. Make sure your box is somehwere it won't get knocked over and on a flat surface. Pour the rubber into the box in a corner and let it build up and flow around the bases. You will see air bubbles. Pound, in this case the desk, with your fist to cause the vibrations to encourage air bubbles to rise. It'll look something like this. It is pouring incorrectly over one corner as I didn't cut close enough when I separated the box from the clam pack. My error but no biggy. I just moved it. Wipe away any spillages with some kitchen towel, you don't want it getting anywhere in a uncontrolled way as when it sets that is it. Walking it through the house into teh carpets on your shoes, for example, is bad. Carefully place the towels in a plastic bag or somesuch and theny tie up before putting it in the bin, otherwise it will just smear everywhere and end up causing household issues i.e. "What is all this blue rubbery stuff all over the kitchen bin?" Leave to cure. If I recall this is OOMOO 30 and does so in about 30 minutes, but I usually leave it longer (a few hours). The other OOMOO is 25, and that is in the starter sets I initially used when learning. It mixes into a purple rubber. There are probably all sorts of manufacturers and brands out there. Leave it be and go and do something else. As an aside not cheap, but if a group of you chip in that want similar bases moving forward it will be cost effective against the time you'll save and the varity just a few can create (see later on). Note I am not doing this to repliacte the bases wholecloth, I am doing it to be able to part pour resin and lift what I want from molds. That will be clear later on, although you could cast full bases (and even and a 2 pence half way through to add weight). You could also use re-usable instant molds but that can be very time consuming when making stuff as you tend to stuff that with greenstuff or Miliput. I will be usuing it later on to lift UM symbols, to make greenstuff masters, to then place ina casting box, to then make a rubber mould, to the cast little resin Ultra symbols (as they have more depth than brass etch and work better for some features). Edited June 17, 2015 by Marius Perdo Link to comment Share on other sites More sharing options...
The_Chaplain Posted June 16, 2015 Share Posted June 16, 2015 Very interested to see how those base casts turn out Marius. Marius Perdo 1 Back to top Link to comment Share on other sites More sharing options...
Marius Perdo Posted June 16, 2015 Author Share Posted June 16, 2015 (edited) Well the rubber is still very slightly tacky but by turning the box upside down I know I sealed it properly as no rubber got in under the edge. As I am going to the gym I know when I get in it'll be ready to crack open (the clam box never survives this) and I'll be ready to do some casting. Remember I am just doing this to get bits that I will then either use alone, or place on another base which I am likely to take a cast of. More on that later. However when I do get into full casting flow I might as well use the dribbles of plastic to make casts of little Ultramarine bits. I'll need to use this to get them off the models. I was lifting bits off a pod last time I used it. However the packing does not lie, use again and again. Dropped in boiled water, lifted out with tongs, straightened and flattened with a palette knife, and back to normal (the greenish hint is green stuff contamination). I'll use a kitchen knife to cut it into small cubes later. I will rummage through my Ultramarines bits and models and see what I might want to lift. The end result will be a small, fine details mold to UpUltra all sorts. I'll probably have a sword scabbard in there too. I know this works well as I did it for my Minotaurs, epecially with Asterion, it is just I never actually did a model I had planned to use it for. As an aside whilst waiting for things to set/dry etc. you'll earn lots of brownie points doing odd jobs. I do more housework when doing things like this than when I do plugged into computer games or out of the house (obviously). Edited June 17, 2015 by Marius Perdo Link to comment Share on other sites More sharing options...
Marius Perdo Posted June 16, 2015 Author Share Posted June 16, 2015 (edited) Was at the gym for a long time. On the way out I noted some delivery person had left a parcel, and somehow not worked out how to use a doorbell, but who had opened the gate so quietly even the dogs weren't set off. It contained the paints for this project from Creative Models. Various blues that I'll thin with acrylic thinners for the airbrush. Late, I'll pop open the mold in the morning and see how it went. Edited June 17, 2015 by Marius Perdo Bryan Blaire 1 Back to top Link to comment Share on other sites More sharing options...
Sgt. Blank Posted June 17, 2015 Share Posted June 17, 2015 I am enjoying the tutorial - thanks for the step by step guide. Very pragmatic advice, which is obviously hard-earned. Also appreciate the tips on maintaining domestic tranquility. Marius Perdo 1 Back to top Link to comment Share on other sites More sharing options...
Marius Perdo Posted June 17, 2015 Author Share Posted June 17, 2015 (edited) The bases popped out of the molds with no problems. The liquid plastic is usually two part. I mix it in disposable drink pots with wooden kebab skewers (cheap, sort of like giant toothpicks). Wear gloves for this. The liquids combined react exothermically and quickly. Very exothermically, and quickly. The more liquid, the greater the heat, which in turn speeds up the reaction. Have spare molds for other things when possible so you don't waste plastic. This stuff sets quickly so work quickly or you'll just have a plastic cup full of white soild plastic. When combining do so in as close to equal portions as possible. If you get it way off it takes ages to set and looks like a sort of dusty glass. In the molds. I don't put release agent in as I have found it just makes the results slimy and I am not using the molds enough for the degradadtion to really kick in. It can also reduce detail, just like when you sealed and coated the initial source parts when making the molds earlier on. And beginning to whiten and set. Note the larger volumes are setting first, even though I poured them after the bases mold, as they are kicking out more heat. When fully cured, which is in less than ten minutes, you can pop them out. Good detail capture on these, I am pleased. And then arrange them as you like on other bases, like on these 50mm centurion bases (purely as an example, this is not what I do): Now I don't actually like flat collpased things, I prefer subtle angles as buildings don't collpase to form perfect flat surfaces. By casting at an angle you can add an angle to the base of the part you are casting. You can just cast flat and then cut but it wastes plastic. Regards waste when you pick away excess bits from overspill put them in a box. On larger casts you can put them in a cheap food blender to smash up into dust and bits. Part pour, top up with plastic shards, then continue pouring. It pads out the contents, re-uses excess plastic, and as the reaction is exothermic it melts it all togther into a whole e.g. you have spent ages making a dug out model, including making greenstuff sandbags. It will be large and is perfect for casting, put will take a lot of plastic. It is ideal for padding out in this way. Again ALWAYS wear the gloves. if you get this stuff on your naked hands, you are going to have a painful exonthermic reaction burning plastic into your flesh. The gloves gives you time to get the gloves off before the heat becomes intolerable. Dune is good and all, but no one sane wants to put their hand in the box and having the itching become a burning etc. You are not the Kwisatz Haderach. Edited June 17, 2015 by Marius Perdo Link to comment Share on other sites More sharing options...
Marius Perdo Posted June 17, 2015 Author Share Posted June 17, 2015 (edited) Before I get into full casting flow I am going to make a mold with little lifted details. I will go through my minitaures and see what I fancy and reckon I'll use repeatedly. I can then use the Insta mold from before to do this, fill it with green stuff, let that cure, and then put the green stuff bits in a casting box and make another mold. Here is a rough example of something I did for the Minotaurs. I was learning back then. Remember I need to make bases to cast, in some cases using parts like above that I have cast. I am going to do this for 32mm, 40mm (terminators), 50mm (centurions), and 60mm (dreadnoughts). So I'll show the Instamold process, and the greentsuff results you'd make a mold from. After that I'll disappear for some time making master base molds I am happy with at all sizes. No need to bore everyone with that though, time will just have to pass as I can't do "and here are some I amde earlier" without actually doing them Edited June 17, 2015 by Marius Perdo BrotherJim 1 Back to top Link to comment Share on other sites More sharing options...
One-eye Posted June 17, 2015 Share Posted June 17, 2015 Thanks for the step by step on casting, very interesting. Marius Perdo 1 Back to top Link to comment Share on other sites More sharing options...
Marius Perdo Posted June 17, 2015 Author Share Posted June 17, 2015 (edited) A note on scenic bases. They can look very cool. Tell a story, create a theme, and are generally better than sand or flock. However, try to have the miniature and the base work in concert. Don't let one define the other, they need to be in balance. What do I mean? Quite literally the base can distort positioning so models just look "wrong" when attached to the base. The bases shape is distorting the models pose and making it look off-balance. Toppling isn't terribly dynamic and heroic. The story it suggests is the marine has an inner ear problem, which marines can't have. If you play remember the rules for cover saves. You are making a model to play with, not figures on top of a wedding cake. You want to obscure 25%+ to get a save for being "in cover behind", this can be hard to do as is without you adding 20%+ to their functional height. Putting a 32mm tall marine on a base that is already 3mm deep (so he is 35mm tall floating above the ground, unlike tanks), and then you add 6mm depth of scenery on top of the base before adding him, is going to mean cover saves are something other peopel get (and that is not taking into account running legs, which make them even taller). Now consider this for terminators, or centurions and it gets worse. It is just something to bear in mind. Conversely I'd imagine building enitre squads of Umpalumpa, kneeling marines legs is not going to get you many repeat opponents, as having them get cover behind small pebbles and actually be out of LOS behind a rock might seem clever but it will look daft Reminds me of Monty Python - How Not To Be Seen. Edited June 17, 2015 by Marius Perdo Link to comment Share on other sites More sharing options...
Marius Perdo Posted June 17, 2015 Author Share Posted June 17, 2015 (edited) Before moving on here are the results of casting with a mold at an angle, and part pouring (this becomes very important generally, and is one of the joys of molds). Parts that you couldn't put a spirit-level on (which is what I want): The front row, obviously. Edited June 17, 2015 by Marius Perdo Link to comment Share on other sites More sharing options...
Marius Perdo Posted June 17, 2015 Author Share Posted June 17, 2015 Okay, a side point about all this 2D molds, and Instamold lifts to get greenstuff masters to make molds from. They really need to be flat, at face value. However the two materials involved can let you do a trick. Green stuf when part cured can be manipulated. This means if you lift something curved (such as off a shoulder pad), you can flatten it out. Also the plastic, when nearly cured is equally pliable. Thus you could take a flat Ultra symbol and place it on a shoulder pad and have it take the shape of the curve of where you intend to glue it onto. Knowing this is possible, and how you can go curved to flat, or flat to curved, or curved to flat to curved, is important for the Instamold part when making greenstuff parts to make rubber molds from. Link to comment Share on other sites More sharing options...
Marius Perdo Posted June 17, 2015 Author Share Posted June 17, 2015 (edited) I took this: And made lots of smaller ones. However when compared to the size of the details I am intending to lift I realised they where still too big. So I cut them in half again. I wouldn't go smaller than this or they will be somewhat difficult to handle and manipulate unless you are eldar or telekinetic. I then rummaged through my collection of Ultra stuff and decided what I fancied and what was doable. Forgeworld aside there is plenty on the upgrade sprue, and the banner top in the command box can have the back of the skull clipped off, and the pole trimmed off. Any of your mates that play space marines that don't play Ultramarines are bound to have this part spare. Remember about curves above. The backpacks and shoulder symbols are liftable. The symbols on the Invictarii and MKIV Praetorian chests have got my ideas engine going into meltdown. Note the swords in scabbards from the Severin Loth command squad will just be getting put into the cast box when the greenstuff parst are made. I used that part before on Minotaurs Capatin Sciron earlier in this thread. Now this is fine for small details. However when finished you can just heat the Instamold and squish it back into a big block again. That means you can lift details like these. For example, you might just want the Ultra symbol with skull from the rhino front plate on a rhino and not all the seals etc. By lifting this you can replicate it to put it wherever you like. However with part pouring, and the fact these are so flat, using Instamolds on these, to make greenstuff casts, to make rubber molds from, probably isn't the most effective way. Anyway, this will take a while. I'll do an example of the process later on in the week when I have gone slightly mad and see tiny Ultramarine Chapter symbols in my sleep. Edited June 17, 2015 by Marius Perdo MagicMan and Meltwater Iconoclast 2 Back to top Link to comment Share on other sites More sharing options...
deathspectersgt7 Posted June 17, 2015 Share Posted June 17, 2015 This has been a great read . IT has Inspired me to do some Ultras but not Blue . Marius Perdo 1 Back to top Link to comment Share on other sites More sharing options...
MagicMan Posted June 17, 2015 Share Posted June 17, 2015 Great stuff, thanks for the step by step! Marius Perdo 1 Back to top Link to comment Share on other sites More sharing options...
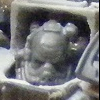
Marius Perdo Posted June 17, 2015 Author Share Posted June 17, 2015 (edited) No problem lads. Glad it helps. Okay, there was something I forgot before regards Instamolds. It can lift anything and there are other generic things to do this for. A long time ago I cut the skulls off a cyclone. This was so it could be glued onto a leg greave, like the old 2nd edition miniatures often have. A bit worn now after being stripped as so delicate. I'll be lifting new ones from another cyclone, and the slightly larger one off an assault cannon, and the skull and bones of the back of a cyclone back plate. Also I'll be making a mold like the bases of the devastator lower legs and knees, by cutting them off carefully. They'll do for all heavy weapon troops, and Iron Hand successors (Sons of Medusa in my case when i eventually get around to it). Edited June 18, 2015 by Marius Perdo Meltwater Iconoclast and Nemac Vradon 2 Back to top Link to comment Share on other sites More sharing options...
Chapter Master Kanithon Posted June 18, 2015 Share Posted June 18, 2015 This thread full of so much inspiration! Really like all the tutorials you're doing alongside this. Really helpful and insightful, especially the casting bits. I've dabbled with casting before and struggled with casting certain thins. Most notable torsos so I'd be interested to see how you achieve that without a huge amount of file and cutting that I seemed to have. Also you mention Doghousing AOBR marine, I remember seeing him post a tutorial for this but for the life of me can't find it anymore. Would you be able to shed anymore light on him this is done, can see shoulders and heads were removed and replaced but I'm wondering how easy this is to achieve. Thanks in advance for you help and again, brilliant work! Marius Perdo 1 Back to top Link to comment Share on other sites More sharing options...
Chaeron Posted June 19, 2015 Share Posted June 19, 2015 Marius - that's excellent! So the Superdrug variety does work well on Forge World resin? I've got a few things to do, and wondered if it would be sensible now that Fairy Power Spray's formula has changed - but wanted to hear from someone with experience. Looks like you've got a good batch there either way! Marius Perdo 1 Back to top Link to comment Share on other sites More sharing options...

Recommended Posts
Create an account or sign in to comment
You need to be a member in order to leave a comment
Create an account
Sign up for a new account in our community. It's easy!
Register a new accountSign in
Already have an account? Sign in here.
Sign In Now