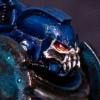
sockwithaticket Posted June 17, 2021 Share Posted June 17, 2021 Think you might have over-done the verdigris a bit, but that NL is very imposing. Good choice of blade on the chainglaive, it looks suitably wicked. Link to comment Share on other sites More sharing options...
Lucerne Posted June 18, 2021 Share Posted June 18, 2021 What spacers do you use on plague marines again? Link to comment Share on other sites More sharing options...
Isengrin Posted June 22, 2021 Author Share Posted June 22, 2021 That helbrute walker is ace Thanks! Besides more Night Lords, another project I'm currently working on is Baraqu - Unification Wars. It's a neat little community project with a few other guys and I've already posted a couple minis belonging to that setting like the proto-Custodes. The UW wouldn't be even half as interesting without Thunder Warriors so here we go: This model looks fantastic! What head did you use for him? Thanks! It's the helmet of Autilon Skorr, unfortunately a limited edition model and no longer available I think. Think you might have over-done the verdigris a bit, but that NL is very imposing. Good choice of blade on the chainglaive, it looks suitably wicked. Yeah I was going a bit overboard with the verdigris there, but only because I like the effect so much. I'll have to reign myself in with the next one. And thanks for the kind words, raptor chainswords were and still are a godsend for Night Lords. What spacers do you use on plague marines again? 1mm plasticard spacers for the legs and 2mm for the torso. Got two sheets where I cut off small squares. Link to comment Share on other sites More sharing options...
Isengrin Posted June 26, 2021 Author Share Posted June 26, 2021 Second old school raptor incoming! This one sports a 3d printer jump pack which was designed by Markus aka legioxivguy and printed by bolterjugend, two excellent guys. Now that I'm well supplied with jump packs nothing can keep me from building more raptors* and the next one is going to carry a melter. *except for my volatile motivation obviously batu, Shovellovin, Sagentus and 9 others 12 Back to top Link to comment Share on other sites More sharing options...
Quixus Posted June 29, 2021 Share Posted June 29, 2021 Awesome. Did you sculpt the legs torso and helmet yourself? Link to comment Share on other sites More sharing options...
Isengrin Posted June 29, 2021 Author Share Posted June 29, 2021 I was asked on a German forum if I could provide a documentation of my truescaling process for the raptors and since I actually took a few pics of the first raptor I built, I was able to throw together a small step-by-step description for the legs. I'll take more pics, especially when I'll sculpt the next torso, to complete the tutorial and show you guys how my old school raptors are made from start to finish. First things first, a small modelling saw like the one picture below is essential for this, as it allows me to have more control over the cut than with other tools. 1. I began with removing the tassets from the upper legs. They would be obstructing the later sculpting work too much and might me salvageable for other conversions. Then I cut off the legs at the hips and the feet. 2. This is the part where I added the clawed raptor feet and glued the legs back together with the groin after adding plasticard spacers (either 1 or 2mm). I always pin them with paperclips to add more stability to the whole conversion. Then I took a plasticard ring with a diameter of 1cm and glued it on top of the groin/hip piece. In my opinion that's one of the most under-estimated steps of (my) truescaled marines, because by beefing up the whole midsection like this the marines become much more sturdy and massive looking. It goes a long way to create the look I'm going for, but can be easily missed. After everything was pinned and glued together I began with the sculpting work, using an 80:20 mix of MagicSculp and Green Stuff (sometimes even less Green Stuff) to create the rough armour shape. After the putty mix had cured I filed it off a bit where it was necessary. Lastly, I used Green Stuff to add trims and armour joints. This tutorial is still incomplete because it's missing the next steps where I add further details to the trims which is owed to my stop-and-go process. I often let minis lie around for days, even weeks, before I go back to them and finish the job. The perks of being busy I guess. 3. I took some pics of the jump back too, because I thought it might be interesting to see that I lengthened them too and how. It's pretty much the same procedure as with the legs, some cutting, adding 2mm plasticard, pinning, and sculpting over everything again. So that's pretty much it for the first part of my step-by-step on how to build a chaos raptor. The second part will follow relatively soon I hope. Awesome.Did you sculpt the legs torso and helmet yourself? I usually go with certain bits as the foundation for my sculpts and don't do it from scratch. That means that I take the legs from Grey Knights Paladins for example (or chaos terminators) or regular CSM torsos and simply sculpt over them after lengthening them with plasticard spacers as you can see in the pics above. The helmet and feet are copied with a blue stuff mold from the original metal raptors, but I almost always have to do a lot of repair work on them. Shovellovin, Quixus, Captain Incompetence and 2 others 5 Back to top Link to comment Share on other sites More sharing options...
batu Posted June 30, 2021 Share Posted June 30, 2021 Thanks for the tutorial. On which German forum are you active? Link to comment Share on other sites More sharing options...
Sagentus Posted June 30, 2021 Share Posted June 30, 2021 dam that Raptor looks good, thanks for the tutorial Link to comment Share on other sites More sharing options...
Isengrin Posted July 1, 2021 Author Share Posted July 1, 2021 Thanks for the tutorial. On which German forum are you active? GW-Fanworld, but under the username Nocturnus. dam that Raptor looks good, thanks for the tutorial It's nice to hear that the first part of the tutorial is helpful. batu 1 Back to top Link to comment Share on other sites More sharing options...
Shovellovin Posted July 1, 2021 Share Posted July 1, 2021 Echoing @Sagentus, thank you for the tutorial. Good stuff. Link to comment Share on other sites More sharing options...
Isengrin Posted July 4, 2021 Author Share Posted July 4, 2021 After having been distracted by other projects I finally put the finishing touch to the plague chosen. I think that's enough effort for one mini now. Echoing @Sagentus, thank you for the tutorial. Good stuff. Thanks man! Stay tuned for the second part! batu, Monstra Sumus, Kizzdougs and 7 others 10 Back to top Link to comment Share on other sites More sharing options...
Sagentus Posted July 5, 2021 Share Posted July 5, 2021 Holy crap that is one mean looking model!!! cant wait to see it painted! Link to comment Share on other sites More sharing options...
Isengrin Posted July 11, 2021 Author Share Posted July 11, 2021 Not to be outdone by Nurgle, Slaanesh needs a proper chosen as well. I've been tinkering with their adornments and accessories for a while and have added a pistol holster, more trims, and a different backpack in the case of the Devram Korda lookalike. What's left to do is improving the blank shoulder pad on his right. Holy crap that is one mean looking model!!! cant wait to see it painted! Thanks mate! Dosjetka, Doghouse, Silas7 and 4 others 7 Back to top Link to comment Share on other sites More sharing options...
Doghouse Posted July 11, 2021 Share Posted July 11, 2021 Really nice stuff, these are coming along great. Isengrin 1 Back to top Link to comment Share on other sites More sharing options...
Isengrin Posted December 12, 2021 Author Share Posted December 12, 2021 Building a heavy bolter marine has been on the top of my list for so long I can't believe I haven't done this sooner. I had a lot of fun converting the havoc, the hassle of fitting the belt feed to the backpack is real though. Using a broader torso than the one from the old marine devastators means it doesn't quite attach to the back, but it is only a small gap which will be filled with green stuff. Monstra Sumus, Shovellovin, Grotsmasha and 8 others 11 Back to top Link to comment Share on other sites More sharing options...
BadgersinHills Posted December 12, 2021 Share Posted December 12, 2021 Looks great!! Link to comment Share on other sites More sharing options...
Augustus b'Raass Posted December 12, 2021 Share Posted December 12, 2021 (edited) Can't believe I've never seen this thread before. WOWI will follow you for all eternity!EDIT: hold up, I've commented on this thread before in 2018 - and it didn't show up on my content folder! Edited December 13, 2021 by Augustus b'Raass Link to comment Share on other sites More sharing options...
acrowsperch Posted December 12, 2021 Share Posted December 12, 2021 WOW these are INSPIRED. Absolutely love the scale of the chosen, and the details. How do you do the under-structure for the sculpting of the legs (slaanesh chosen)? Link to comment Share on other sites More sharing options...
Sherrypie Posted December 12, 2021 Share Posted December 12, 2021 Excellent stuff, always inspiring to catch up on your blog. The hulking stature and the threatening poses, malicious yet at ease, go so well together. Liking the plague chosen in particular. Link to comment Share on other sites More sharing options...
Monstra Sumus Posted December 13, 2021 Share Posted December 13, 2021 I'm loving the heft these chunky lads have! Well done! Link to comment Share on other sites More sharing options...
Isengrin Posted December 14, 2021 Author Share Posted December 14, 2021 Looks great!! Thanks! Can't believe I've never seen this thread before. WOW I will follow you for all eternity! EDIT: hold up, I've commented on this thread before in 2018 - and it didn't show up on my content folder! Haha yeah I'm not the most prolific guy, so maybe this thread can slip through the cracks because I don't update it very often. But it's really great to hear you like what's in here, thanks man! WOW these are INSPIRED. Absolutely love the scale of the chosen, and the details. How do you do the under-structure for the sculpting of the legs (slaanesh chosen)? Thanks a lot! I usually use the original legs as a foundation more or less and sculpt over those. I cut them off at a couple places, put in spacers, pin everything and then wrap a lot of putty all around it. On many of the older marines I've used almost the same approach, the only difference to minis like the slaanesh chosen is that I made them even heftier and used more putty. Excellent stuff, always inspiring to catch up on your blog. The hulking stature and the threatening poses, malicious yet at ease, go so well together. Liking the plague chosen in particular. Thanks buddy! I've been trying a few dynamic poses too, but the slightly static menacing standing poses of the big fellas just work so well for them and they really are my favorites. I'm loving the heft these chunky lads have! Well done! Thanks! Marines need, if anything, a whole lotta chunk! Monstra Sumus 1 Back to top Link to comment Share on other sites More sharing options...
Isengrin Posted March 6, 2022 Author Share Posted March 6, 2022 (edited) 5E5E5E; center; padding: 12px 8px 12px 8px; border: 1px solid #DDD; margin-left: 0 auto; text-align: left; color: #fff; text-indent:10px; font-size:130%; ">BARAQU +++ ONEIRID SCOUT NJORDR X672 The new oneirid scout together with the long ago finished one: The whole Unification Wars gang, at least those that have been painted so far: Edited March 6, 2022 by Isengrin Ryltar Thamior, Shovellovin, Khornestar and 7 others 10 Back to top Link to comment Share on other sites More sharing options...
Pearson73 Posted March 6, 2022 Share Posted March 6, 2022 What an inventive use of parts, excellent paint work too, particularly those blades. Link to comment Share on other sites More sharing options...
Valkia the Bloody Posted March 6, 2022 Share Posted March 6, 2022 This is very Blanchitsu. I LOVE it. Great conversions and great use of colours. Link to comment Share on other sites More sharing options...
MikhalLeNoir Posted March 7, 2022 Share Posted March 7, 2022 Nice as always Link to comment Share on other sites More sharing options...

Recommended Posts
Create an account or sign in to comment
You need to be a member in order to leave a comment
Create an account
Sign up for a new account in our community. It's easy!
Register a new accountSign in
Already have an account? Sign in here.
Sign In Now