Search the Community
Showing results for tags 'Battle Report'.
-
From the album: Para's Battle Reports
-
From the album: Para's Battle Reports
-
From the album: Para's Battle Reports
-
From the album: Para's Battle Reports
-
From the album: Para's Battle Reports
-
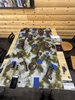
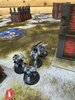
So over the weekend I got in a game of Combat patrol with a new hobbyist. He was looking to get some experience in the game via CP and I was more than happy to help. I managed to gather up 6 CPs, 3 nids, 3 marines and the IK one. I’m debating doing up two more armigars in some freeblade colours to specifically use in CP. We won’t talk about how many knight frames I have in storage still…. Anyway he was using Amonhotekh’s Guard (Necrons), I let him pick his destroyer. To which he selected The Vardesghast Swarm (nids). I had to keep the datasheets up to hopefully not upscale the Pychophage since its CP stats are way different from the normal game. Table was a smallish 3'x4' setup with four objectives (cross formation), plenty of ruins and some central cover. I took Alpha Xenoform for secondary and Psychostic Veil enhancement, he took the Treasure of Aeons for secondary and Protocol of Resonant Focus enhancement. Didn’t know the CP missions so just had it that you scored 5 VP for holding an objective, starting Turn 2, since that is the norm for the base game. I’ll look into seeing if there are any CP missions and gather what I have from the magazine for a little more spice later. For this time we just kept it simple. It was also my opponent’s third ever game so didn’t want to overload him. Positioning wise I had the leapers up near one middle objectives, pychophage and prime set up to got after the other one, barbguants in a ruin next to my home objective and the termaguants were behind the leapers. He had his warriors with overlord on his home objective, the doomstalker in a tall ruin in one corner, scarabs on a flank and the destroyers next to his warriors. I got first turn and ran him turn the phases as I did them just in case. Prime and the psychophage did most of the work. Giants just took frie from the doomstlker for all but one turn when he focused on the pychophage. I held most of the objectives for the game as he was not aggressive enough with the destroyers. They really only got into combat at turn 3 when he took out the big bug with them. Now I’ll explain my teaching method. I do give an after action report telling my opponent what was wrong after the game is done, but during the Movement and target selections I keep my mouth shut. Let them do what they think is right cause I don’t want to be running their army. So that what he did makes some sense. Since he had fought grey knights and eldar prior they shot the destroyers out quickly so he was gun shy with them. He had chances to get his secondary if he had picked the other middle objective instead of the one he did or at least had a better chance had he focused his warriors/destroyers on the other. We did go a full five turns but it was pretty one sided on the score. He did manage to kill the leapers, prime and psyhophage, but was left with just the doomstalker and overlord. We swapped board sides and he picked Mordekai’s Judgement as his opponent since Dark Angels is a force he is thinking of starting up. That game was short as while he got first turn, his only target with the doomstalker, placed over the home objective, was the gravis captain and he tanked the shot like a pro. By the charge phase of my second turn I had wiped the destroyers via bolter and plasma fire and most of the warriors to bolter rounds. Which was scary even to me. The main issue was once again him not moving the destroyers well enough. They moved down the middle at the start, which allowed me to drop one in regular shooting then he moved them into cover but away from an easy charge and I had a really good overwatch roll (five hits with the hellblasters) to drop another. Outside of the good overwatch, those destroyers would have blendered either the hellblasters or intercessors that were grouped there. Not sure if the overlord would have faired against the bladeguard/intercessor combo I had on that flank. I had to abandon my home objective cause the doomstalker would have wiped the unit holding it with a decent shooting phase. There was only one objective safe from it’s gaze so would have been a challenge had his dice just not crapped out. I’ll try and do more detailed reports in the future. Memory gets fuzzier quicker these days and I want them to be accurate. Included for your viewing pleasure are three of the marine CPs that I got models for. I forgot to get pictures of the tyranid/knight ones this time, but will do my best to get some later. Strike Force Octavius (Dark Hunter edition) Eye of Ultramar (Bladeguard - Crimson Jackals, Reivers - Moltifactors) Mordekai’s Judgement (Gravis Caption - Brazen Skulls, Bladeguard - Crimson Jackels, Intercessors/Hellblasters - Ultramarines)
-
This is again from a while back, but my local club had an apoc game in May bank holiday which was great fun. This was a custom mission designed by myself to try and force a narrow frontage with waves of models coming at one another, but ended up a bit one sided. We went for a long, narrow table with a depth of deployment, to give long raged guns some chance to shine also (how often do fellblades get to use their 120"range?). Two players wanted to get away quickly, but hoped to have a smaller gmae that would still impact the larger game, so I came up with a custom mission: Explosive Payload. This was fought between Death Guard (traitor) and Dark Angels (loyal) and resulted in a DA win and several missiles fired at the main table. They were a bit weak though, so I might give them a boost if we every play it again. This was my first outing using Alpharius, and I took him with 10 firedrakes in a spartan, with primus medicae. Gigaros, the Spear of Hades - my Cerberus. Traitor Deployment featuring Dark Angels and My Alpha Legion. Much armour as you can see. After Alpharius sneakily infiltrated himself, the Primus Medicae, the Firedrakes (and spartan) and the Leviathan. The BA Fellblade takes potshots from the reat, but struggles for line of sight, or to hit anything as the sponsons are out of range. The triad of predators rumble fowards to unleash their heat weaponry. You can see how far back the Blood Angels deployed - thir fear of deep strikes really prevented them from getting into the game at all. That spartan started something like 36" away from any enemy units. The BA player loves conversion beamers and tries to keep everything as far away as possible... MISSILE LAUNCH! The Death Guard gain control of the launch controls and fire an ICBM into Valdor. Alpharius gets out of the spartan to hunt valdor, who runs away. I fail the charge, and next turn the cheeky vindicare tried to kill my Primus medicae, however failed to wound. Phew. With his ride near wrecked, Alpharius hops out to get his old nemesis Valdor. The Dread Drop Pod arrives filled with Leviathan, which proceeds to chop up the fellblade. Traitor vehicle pool T3. Big old messy combat. Alpharius and Valdor fought one another to a standstill, Alphy really is one of the weker primarchs, however my many thunderhammers reduced his custodian bodyguard to paste, then finished valdor off before the custodian lord could kill alpharius. Overall this was a traitor victory - the loyalists couldn't get any distance up the table and were thwarted by the wall of steel and infiltrating leviathan - this was largely their own fault as if you cannot kill a spartan and leviathan in one round with 8k points of models, then you only have yourself to blame - in this case, poor deployment meaning their stuff was mostly out of the fight.
-
- 4
-

-
- Battle Report
- Alpha Legion
- (and 1 more)
-
Mission Dominion, Diagonal Deployment Forces Alpha legion Army List Custodes Valdor Blade Champion 3x terminators 4x 5 man custodian squads Achillus Dread - Spear 3x Caladius - 2x anti infantry, 1x anti tank 5 objectives were put in no mans land, and we hadprogressive scoring so 1VP at the start of your turn per objective, giving me the immediate advantage with my infiltrators. I lost the roll off for deployment so deployed first, moving my stuff as close to the objectives as possible, bit dangerous wit the custodes. The lascannons deployed on a ruin at the back, the grav behind a building closer in, the fulmentarus under the lascannons and out of sight to act as counterpunch, and my short ranged dreads in the middle to get stuck in asap. Recons went on a far left back corner objective to hold that for me. My opponent was afraid of the lascannons and castled everything in the ruins to the back, putting everything out of LOS of the lascannons, bunching together. 2x guard squads, the terminators and valdor went into reserve, again like 1k points that would be off the table. I think if my opponent had deployed everything on the table, and agressively, he might have won due to my aggressive deployment, but this wasn't to be. Deployment - distraction headhunters are between the ruins in the top left to go caladius hunting, as their meltas are useless v custodian guard. Photo is after scout moves. ALT1 Recons score me 1VP. Movement - the effrit get within 12" of the custodes, the headhunters advanceon the left hand caladius, however he had boxed himself in so couldn't fall back, and just rotated it to face my front armour, incidentally getting closer to my melta guns, which fired into it, wrecking it. The fear of the lascannons was their undoing, as the grav rapiers rounded the corner, to my opponent's surprise (he thought they couldn't move and fire, not something I thought I'd have to go over), and they dropped 3 pie plates onto the clustered 2 caladius and dread, doing 3 hp to one caladius, 2 to the other, and 3hp to the dread, as well as putting them all in dangerous terrain. The Effrit killed one or 2 custodes, the seekers took down another probably, and the leviathan shot into the achillus, doing some damage. 1-0 to the Alphas. After AL movement Custodes T1 After taking a severe mauling, the anti tank caladius went to the left, and the anti infantry one on 1HP skimmed forwards to land on the central objective. the achillus moved forwards to content the central objective. I don't react to get 2x shooting reactions. The left hand custodians went after, charged and killed the heahunters (but theyd done their job, twice by killing a tank then distracting a unit). Not much happens in the shooting phase, maybe some wounds off the MM dread. The achillus charges the mm dread, now next to the 1hp caladius. I overwatch with melta and grav, and knock it down to 1W, and put it in terrain. It still makes the charge, and handily splatters my contemptor...which then explodes for a 1" blast....it wounds the achillus....and my opponent fails the save, killing it! The Achillus explodes 3" catching the caladius in the side...I roll a 4 and it's glanced, stripping the last HP killing it also! Almost on Titanicus levels of destruction. ALT2 That was insane. I now have 3 units on objectives for 3VP. My dreads, seekers and everything movel up and wipe out the rest of his custodes and the last caladius, now in lascannon LOS. 4-0 to the Alphas. After ALT2 movement Custodes T2 Valdor and co finally arrive. They land just behind the central building out of LOS of most of my lascannons and contemptor, and next to my rapiers. With my 2 movement reactions from my WLT, I intercept with the rapiers to put the terminators and custodians into dangerous terrain X3, not killing anything. The lascannons augury the terminator that 5 of them can see and they kill one. The reaction point is used on the fulmentarus who punk some custodians. The seekers react and kill one, and the recons do stuff from across the board. The terminators and valdor fail their charge, the custodians make it into the rapiers on like a 10, and wipe them. The rapiers probably overwatched again to have 6 dangerous templates down, which I think killed another custodian on the way in. Start of CGT2 Assault ALT3 After that is was pretty much clean up. Between the effrit, fulmetarus, lascannons and 2 dreads, I killed off everything, the leviathan and contemtor then double teamed Valdor to finish him off in combat Playing out the rest of the game, my opponent scored 0 VP while I had 1 objective in T1, and 3 objectives from turns 2-6, for 16pts, then 1 for slay the warlord, 2 from leviathal, then 2 for attrition for 21VP total. A fair drubbing to the custodes, 21-0.
-
I managed to get my first game of 10th Edition in on Weds night and thought I'd report back - there was a lot of on the fly learning going on, so I forgot to take photos from the start, and only remembered to get them well into the game. This was a 1500pt battle missions/temptest of war style game, we both picked random objectives. Mission - Supply drop - 3 objectives in no mans land, one dissappears in t4, the other in t5. Diagonal deployment. I don't remember the exact secondary objectives, so wont list them. Tyranids Hive Tyrant, lash whip+bs, venom cannon Parasite 20x termagants - fleshborers 20x termagants - devourers 10x horms 10x horms 5x barbgaunts 3x VRL's 3x venomthropes 3x zoanthropes 3x zoanthropes 3x raveners with thoracic weapons Screamer Killer Exocrine 160w Dark Angels Belial (w/knights) Vindicare assassin Judiciar - heavenfall blade (w/bladeguard) 10x hellblasters 6x aggressors with flamers 6x bladeguard 5x deathwing knights, master with flail 1x landspeeder hailstrike 3x eradicators 113w DA won the roll off for T1 and went first. DA T1 Remarkably little died, maybe 10-12 gants, a few gaunts. They played devastator doctrine for advance and shoot, so the aggressors sprinted 10" towards the objective on the top right, one stepping onto it, and then flamed one unit of gaunts T1, killing 9/10. Hailstrike fired the grenades into the gaunts and the rest into the screamer, doing a couple of wounds to the screamer and thankfully rolling low on the shots to the gants, despite getting +8 shots for the 20 of them - maybe 8 died. The venomthropes had a lot to do with this, giving the gaunts stealth and cover for a 4+ save at -1 to hit. Las-fusils shot the screamer, doing loads of damage, they're somehow D6 damage this time instead of the 3 they were before! Screamer is on 6w. DA achieve both secondaries, one of which was hold most of the no mans land objectives, and hold the one nominated by me. Nid T1 In my command phase I endless swarm the mauled hormagaunt unit bringing 6 back to life, then use it a second time with my tyrant on the termagant units , restoring 4 to one and 5 to another. As units were above half strength, no battleshock tests. Screamer moved forwards towards the aggressors, who overwatch it, lots of hits, 3/4 wounds with twin linked, no damage. Screamer shoots them and kills one, then charges in and bounces off with shocking rolling, killing one, before getting punched for 4W in return - I'm crucially holding the objective though vs the one aggressor on it. Exocrine shoots the eradicators and rolls a one, killing one. devilgants shoot them putting a wound through. I give up and charge them with the horms who do some damage and drag one down, however a couple get punched to death in return. I still hold that objective. Zoans shoot the bladeguard, killing maybe 1. VRL's get onto the middle objective, taking it, but dont charge due to the players whose turn it isnt having the advantage on the charge. I get the secondary for taking an objective from the opponent and one other. DAT2 Belial appears behind my exocrine, who overwatches and doesnt do anything. Belial fails the charge into the exocrine, needing a 10 for terrain. Eradicator falls back and the hellblasters shoot the horms, wiping them. Bladeguard charge the VRL's, who strike first and do nothing, getting killed in return.Aggressors punch the screamer to death (twin linked). Speeder moves onto central objective and shoots the tyrant and gaunts. NidT2 I drew defend stronghold and somthing else, so had to hold my home objective v belial. I used shadown in the warp to force break tests, and absolutely everything passed with marines Ld6+. pointless exercise. Heal the terms back to full with endless horde strat and moved the borergaunts onto my home objective to tie up belial, hopefully for the game. Zoans move forwards and opponent uses overwatch to put the lasfusils into them,killing one. This allows me to move my horms onto the objective held by the aggressors, denying it to them. zoans and gaunts put shots into bladeguard reducing them to one guy + judicar. Tyrant multicharges bladeguard and speeder, murdering both bladeguard and judiciar, despite them striking first (T10, 2+, 4++, 4+++). Exocrine kills the last eradicator. DAT3 Belial move toward the exocrine, ignoring the gaunts, who scuttle towards him to try and block the charge, but also getting most on the objective, staying within 6" of zoans and venoms for the boosts. Belial gets the charge and poor rolling sees only 4 wounds knocked off the exo. Aggressors flame then punch the horms, taking back the top left marker. hellblasters pop the right hand zoans. no primaries for DA. Nid T3 Exo falls back to thwart belial. Gants shuffle more onto objective to stop them from toeing onto it and shoot belial, doing nothing. barbs shoot belial, doing nothing. devilgants shoot hellblasters, amazingly killing 4. With all my bad luck with zoan shooting, I forget about the blast warp blast and go straight for lance, with CP rerolls to protect me. Left hand zoans lance the aggressors, hitting, wounding, killing. The D3 shot blast is a trap, as you might just roll a 1 anyway, so 1/3 time you're better off with the better shot, even moreso against 3+ wound targets. Reveners pop up on the bottom right objective to hold it, out of LOS of the hellblasters. Start of DA T4 - the alpha objective in the top left has been removed from no mans land. After this photo, Belial moved towards the exocrine who opten to overwatch. To counter all my bad luck in this game so far, I rolled a 6 on the attacks, for 9 shots, then amazingly this: From 9 shots, I rolled 5 6's, garnering an additional 5 hits. So 10 exocrine hits on belials knight unit, which was enough to wipe the remaining 2 and the grandmaster. That was pretty much game over right there. My opponent didnt have that much to threaten me, and no objective positioning, while I was all over the board. Mop up time. Evrything shoots the hellblasters and the raveners charge in finishing them off. Overall this was a fun game, with a lot of swings, however we spent a lot of time checking and double checking rules. This will get better hopefully as we get more used to the game. I'm not 100% sure it's less complex than 9th - each unit now has a bespoke rule that triggers all the time, as opposed to a set of universal special rules that are easy to remember. Some of the time consuming decision making still exists, like bladeguard having to choose whether to attack or defend, and then additional reactions like overwatch, while cool, slow the game down when you have to measure who is in range of what etc. It works in heresy as heresy is a faster system with pass/fail for saves, and no modifiers. In terms of unit performance, this is what I think: Hive Tyrant, lash whip+bs, venom cannon - B+ - Venom cannon is pointless in this edition, ill go full melee next time. The free strat per turn is amazing. Parasite - D too weak, too slow, cant join gargoyles, sub par melee. Should be 50pts or so. 20x termagants - fleshborers - B- Solid unit, output ws poor, but kept in the game with strats and held them objectives 20x termagants - devourers - B+ decent output, did some good damage, took up a lot of space. Better with a tervigon to proc lethal hits. 10x horms - A - cheap, cheerful, fast, did the job of dropping OC20 onto objectives, surprisingly good in melee with 30 attacks per 10. 10x horms - as above 5x barbgaunts - C - poor positioning from me meant they couldn't hit the opposing moving units. Considering the points they cost, I'll give them a C for performance, but a B+ for being 5pts per wound, and 10W and putting out average 18 shots. 3x VRL's - C - in this matchup. Good for a speedbump but not much else, they can't break through power armour. 3x venomthropes B - flat -1 to hit on everything is great, however they have zero damage output of their own. 70pts is a tricky investment. definitely if you're running more monsters, as the -1 will hurt lot shot stronger weapons more, also a good pick for infantry for the +1 save. 3x zoanthropes -C+ Undecided. The blast version was underhwhelming, the lance was ok, but on BS3+. The battleshock thing never came up nd is too close range to ever have an impact on zoans, who want to be at 24" range. 3x zoanthropes 3x raveners with thoracic weapons - A- great unit for the points - same cost and identical statline to VRL's however with deepstrike and twin linked instead of stealth and infiltrate. Deepstrike allows stealing of late game objectives, and twin linked is worth it's weight in gold with the increased T across the board. Screamer Killer - D+ - T10 and 3D is about the only great thing about this. It seems overshadowed by carnifexes, who despite having 2D are...1/3 cheaper at 120pts. I think 3 carnis are better than 2 screamers, and they get the blistering assault rule, and you can add OOE. Exocrine B+ - Blast means it cant shoot in combat, gun is still swingy from 4 - 9 shots (100% variation) At 135pts though, this is a good option, and T10 to boot, so overall a solid pick. Tyranids overall Adapations: The 3 'options' to privide to nids at the start (sustained, lethal on vehicles or precision hits) is silly, and only sustained hits to me is a good choice, outside of playing knights, which is never fun anyway. Precision is dumb as you'll put the odd single shot into a character, that likely wont kill them. Maaaaybe it'll have some use against stuff with really weak characters in...tough units? I haven't read all the indexes yet, but I don't see any characters so far that buff their units to such an extent that you need to kill them asap - in this game, perhaps the judicar, which would have stripped FF from the bladeguard? In my opinion, 90% of the time you'll be taking sustained, it's just so good, as exemplified by the exocrine above. Shadow in the warp was poor, which you can realise just by reading the rule and looking at Ld stats in the game. My opponent did, however only just pass many of the rolls, so I think you'll need to bake a neurotyrant into every list if you want to have a hope of this having an effect - even then it just takes marines from a significantly above average chance to pass (Ld6), to a very above average (Ld7) chance to pass. I wouldn't even think about this, never mind building around it. A flat -Ld when within 12" would have been nice, thematic and useful.
-
- 3
-
-
- 10th Edition
- Battle Report
- (and 2 more)
-

Bloginnings and my first game of 10th Edition
toaae posted a blog entry in Faith and Teef, a toaae blog
It's Blog and Beginnings. Get it? ----- To avoid burying the lede, this blog will act as both a replacement for my two discussion threads (Order of the Penitent Saint: A Project Thread and toaae presents: WAAAAGH! Tortoof), as well as a general blog for my hobby thoughts. I was a big fan and user of the B&C's blogs the last time they were around, and with my hobby mojo reinvigorated by a new edition, it felt like the right time to get this rolling. But I had to have something to actually put some thought out for. And other than gross sentences like that (I very much blog in a "stream of consciousness" method), I didn't have anything that I thought was worth blogging about. Until now. bum-dum-DUM Nah, I'm just playin'. I played my first game of 10th this past weekend (a Fathers' Day miracle), and remembered to take some pictures! So, BOOM, we've got content. This game was at the excellent Gamers Guild in Tempe, Arizona. If you're ever in the Sonoran Desert, try to swing by and check out this excellent store. I have no stake, I just love the place and the people. Anyways, I arranged a game via the store discord, and got to play against World Eaters and Angron for the first time since the angry primarch stomped out of the Cicatrix Maledictum. 2,000 points, the Only War mission from the core rules. My list was: Ghazghkull Thraka (warlord) Warboss (power klaw, attack squig, ENHANCEMENT: Head Woppa's Killchoppa) Warboss (power klaw, ENHANCEMENT: Follow Me Ladz) Weirdboy Nob with WAAAGH! Banner Big Mek with Shokk Attack Gun Mozrog Skragbad Deffkilla Wartrike (ENHANCEMENT: Supa-Cybork Body) Boyz (20 models, Power Klaw, 2x Big Shootas, 9x Slugga/Choppa, 8x Shoota) Boyz (20 models, Power Klaw, 2x Big Shootas, 9x Slugga/Choppa, 8x Shoota) Gretchin (11 models) Gretchin (11 models) Meganobz (6 models, 6x Kombi-weapon/Power Klaw) Killa Kans (3 models, 3x Skorcha) Megatrakk Scrapjet Mek Gunz (3 models, 3x Bubblechukka) Warbikers (3 models, Power Klaw, 2x Choppa) This list was basically "what stuff did I want to try?", 2k points. I wasn't trying to make a good list, per se, but just stick the units that most excited me from the index into a game. I know some people don't like that Ghazghkull is now an INFANTRY model, with only T6; in contrast, I'm so excited he's now able to join a unit. I've always been a big fan of Warbikers, and I really like my Deffkilla Wartrike, so I had to slam them in. I hope the SAG can have a solid role in fire-support, and I had to give the new Bubblechukka a swing. And on and on, with every unit I selected. Really, the only thing I didn't really want to include was the Gretchin, but I wanted more Command Points, and I get ansy whenever my Ork lists have less than 100 models (only got to 87, even with the grots). My opponents list was constructed much the same way, I think: Angron Lord Invocatus 2x6 Exalted Eightbound 10 Bloodletters some character (lord of executions?) Lord of Skulls Now I didn't take enough pictures to post a full battle-report, but here's what I did manage to collect. My deployment: My opponent's deployment: My opponent got the first turn, and between his World Eater rolls and scout moves, he was immediately into my lines: (a note, we realized the rules for FLY are different in this edition, and Angron was moved back) The Killa Kans were murdered, though they lasted longer than they probably should have in no small part to this roll: But otherwise, with the Lord of Skulls off-table and Angry Ron unable to make a charge, my boys were able to absorb some casualties before hitting back. In my turn, Ghaz stomped up to Angron and punched the Red Angel to death. The Prophet might be less tough, but he still punches like a true monster. In all, I got to kill Angron three times, with Ghaz personally taking his head twice. The daemon-primarch got him in the end, though Makari saved ol' Ghazghkull's life after Angron massacred all six meganobz in one round. Mozrog got the final kill. The Lord of Skulls was ineffective, though I did let it kill my Deffkilla, just cause I wanted to see how well that thing punched: In the end, it was a complete tabling, but who cares? Winning wasn't really the goal for either player. The things I took away were: Ghaz is still a heavy hitter, and the 435 points for the full Meganobz support may not be as high as I thought; giving the Prophet 18 ablative wounds seems worthwhile, without even talking about what they get from him (+1 to-hit and to-wound). Mozrog may be a solid staple in my lists, and there may also be space for the Beastboss on Squigosaur. Mozrog eats vehicles, is incredibly tanky, and despite not having Lone Operative, being a single model means he can hide fairly easily, but still has the movement speed to get out and pounce on the enemy. The Beastboss is less of a monster, but I don't hate his profile, cost, or abilities. I've long sat on a second box; I may have to get that guy up soon. I think the Big Mek and Mek Gunz may be something. Not necessarily the Bubblechukka, but also not-not the Bubblechukka. The random profile is hard to plan around, sure, but the fact that you get to determine the profile before selecting targets is a big boon. Warbosses are good, I think. At least satisfying. Next up, I plan to try my Gorkanaut and Morkanaut, meganobz with a big mek, and units in trukks. ----- "So you're excited about 10th?" I'm excited about a new edition. I'm super bummed by the switch to Power Level, which is what this is in all but name. They've changed the granularity of Power Level, but it's otherwise the same. This deserves its own post, but suffice to say, the rules themselves interest me less than the fact that a new edition is always a great start. I played a ton of 8th edition, and I miss those days of attending monthly tournaments, organizing narrative games, and just meeting tons of new people. 9th's launch during the pandemic, me moving back to Arizona (but a part I didn't know any of the stores in) and my complete dislike of the Ork codex meant I didn't play a fraction as much. I'm really hoping that despite my misgivings with 10th's ruleset so far, I'll be able to roll a bunch of dice and have a good time.- 1 comment
-
- 4
-
-
- Orks
- Adepta Sororitas
- (and 1 more)
-
Not so much a batrep as showing off my friend Dom's gorgeous DG army. I'm trying to get in some practice games for WHFest, and Dom has been working hard on these awesome DG so we got a game lined up! Alpha Legion - No RoW Vigilator - nemesis, dagger Librarian - telepathy, force axe, power maul, pinning wlt. Contemptor talon - 1x melta, grav fist, 1x las, fist 2x rapier grav cannon 5 fulmentarus, 3 fists, 2 axes 10 Effrit - daggers 10 tacs - arty 10 tacs, arty, dagger 5 recons nemeis 10 seekers, arty 5 Headhunters, arty, 4 cmeltas, mmelta. 3x preds 2x meltacannon, 1x pred cannon, all lascannons Deredeo - hellfire plasms, aiolos, hvb's. Death Guard - Creeping Death RoW Praetor - MC hammer, claw, pinning wlt. Siege breaker, nemesis, with autocannon havocs 10 grave wardens in spartan (as las no flare) contemptor - 2x grav las contemptor - 2x fists 20 tacticals - arty 10 tacticals - arty 5 seekers, nemesis, arty 2 scorpius's 10 autocannon HSS, arty Typhon Mission was tide of carnage, so 3/5/7 VP for holding own dz/no mans land/opposing dz, with the quarters deployment rolled - we'd be starting 18" from one another with a typhon on the table. A double edged sword if there ever was one. Neither army was really optimised, just taking what we had [mostly, in my case] painted. DG won the roll off and deployed first, two scorpiuses, 2 contemptors, a typhon and spartan full of grave wardens was pretty scary. I deployed as much out of LOS behind the central building as possible, and out of LOS of the typhon even with a 12" move, including the melta preds, HH's and fulmentarus, then my other infiltrators to the left to try and get the tactical marines, and left my 2 tac squads in reserve to come into the game later and maybe try to mop up. I was all set to be on the receiving end of a whole lot of pieplates when this happened Which basically won me the game. The headhunters scouted to 9.1" away from the typhon, then moved to within 6" of it. The Typhon was blocked by the whirlwinds so couldn't retreat, the melta dread got in MM range, and while the HH's fluffed their rolls, the dread did not and blew it sky high. The melta preds moved 14" to get a bead on the whirlies, and a single salvo from the melta cannon made both explode, wasting 6 lascannons, another melta and predator cannons. Job done, though. The fulmentarus plasma shot the nearby melee contemptor, scoring 3 wounds and failing 5 saves for brutal 2, the dread was then finished off by the rending, breaching 6+ shotguns on the effrit. The las contemptor fluffed the bolt shots at the seekers, but the lascannons killed 2, they failed morale and ran off the board! Other scattered fire chipped 2HP from the spartan. That's about 1000pts dead T1, and myopponent's army crippled! Return fire, the autocannons and twin las cotemptor shot my preds, killing 2 outright through HP strupping and took the last to 1HP and snap shots. Down but not out. The spartan shot the deredeo for 2W, the grave wardens disembarked, fired everything at the mm contemptor then charged it, easily mashing it in melee. At this point we'd spent so long chatting and catching up it was late, so we called it there, with a win to the Alphas! Next time, we need a bit more terrain on the table, and to put the scorpius behind cover instead of in the open, The Death Guard Praetor has learned to fear the melta! Takeaways: I'd planned the army to mess with the opponent with grav templates, dangerous terrain and such, but DG ignore some of that natively, and creeping death lets them ignore the rest of it - this might be the natural counter match up to what I'd planned for the army, despite the end result. Other legions all seem to have amazing or at least decent RoW's, while the Alphas have 1 DoA one (coils) and one that restricts army building to the point of being difficult to list write to be able to take on armoured targets with the current plastic range from GW, meaning heavy weapons need to go into FA or Elites. This will change when/if we get plastic javelins. I think I might drop 1 pred from the list, despite the discount, as 3 seems too unwieldy with terrain, alternatively get better at using the AL special reaction and save it for the preds to get them out of dodge asap. This might mean blowing it in T1 though. The rapiers underperformed here, though DG were their weakness. Zero casualties from them, but in other games this might change. If I get rid of them, I could swp the deredeo for a Levi for the fun that entails. I could always directly swap the deredeo for a 2xlas+helical contemptor, which frees up a HS slot, meaning 1 less FA is needed for Leviathal.
-
- 2
-
-
- Battle Report
- alpha legion
- (and 2 more)
-
 Or: I really need to make a proper urban-themed board for this narrative campaign that is set in a bloody city... 18 November, 2022 The sharp claws hunting us from the shadows have all but confirmed it: an ancient relic is buried under the surface of Hive Secundus, one that is of particular significance to the World Eaters. Rumour and hearsay had led them to this place, and it is time to claim the prize. The final preparations must be made to bombard this city and reach the relic within. Now, Genestealer Cultists have been found swarming the city, and we suspect that the foul xenos may have worked out how to use the fell technology within. Kratus, his flickering form uncertain in the material universe, leads Baruda, Murdax's Red Butchers, Validon's and Gorm's Berzerker squads, Xarian the Bloody Idiot and Vervek the Condemned in their Dreadnought chassis, and a mob of Cultists. The mission objective is essentially kill points (score VPs equal to the PL value of enemy units destroyed). The defender gets Light Cover while they're in their deployment zone, unless the attacker can turn off the objectives, which also earns the attacker VPs. Ever keen to show his worthiness to the Blood God, I have chosen Eye of the Gods (kill characters, vehicles or monsters for XP and Personal Glory) and Reaper (unit that kills the most gets XP) as my main Agenda picks. For my third, I figure that Deploy Vox Relays would be a good narrative choice for the story. I deploy aggressively, as normal with the Terminators and Cultists. I lose the first turn, but decide to rush both units up the board anyway with Apoplectic Frenzy to hopefully keep my opponent on the back foot. I figure the Atalan Jackals (gods, that name is going to be confusing in a few months...) will spring forward and try to threaten my Helbrutes, so I get the Cultists to help screen the machines against the dirt bikers' damnable bombs. Terminators plod up the field, knowing full well that they won't be protected by Illusory Supplication just yet. It's just GSC, how much firepower could they have? I keep Gorm's Berzerkers in Strategic Reserve, in the hope that they can nab an objective late in the game. In my opponent's first turn, the Goliath truck rumbles forward on my left flank. As expected, the bikers zip forward, past the suspiciously xenoform ruin in the centre, to harrass my Cultists. A Goliath Rockgrinder and a couple of light Ridgerunners wheel around to get some shots off at the Terminators. A not insignificant amount of shooting later, and four Red Butchers are taken out of action, their riddled bodies barely held together by their ancient armour. On the left, a wall of fire from the cultists (soon to be Jakhals?) inflicts a minor burn on the Jackals. The bikes charge, killing a few cultists, who in turn knock two bikers out of their saddles while the other speeds away. In my turn, the cultists advance to turn off the objective on the left. Weirdly, this is not an Action, so can be done after advancing - fine by me! Unfortunately, I forgot that they can't score VPs in the first round, but at least they'll be a distraction. In the middle/right, I send the Terminators out to secure the middle objective, and the Rhino to threaten the right objective. The Terminators also deploy a vox beacon for one of my Agendas. The Helbrutes ponder up and inflict a few wounds on each of the Goliaths. The Genestealers' second turn sees some Purestrains leap out of cover to maul the hapless cultists, turning the objective back on in the process. While the Rockgrinder hops on the objective on the right. Despite the Illusory Supplication from Baruda, the Terminators lose three models (note to self: trans-hit doesn't help much against BS4 enemies...), the Rhino suffers significant damage, and the Kellermorph pick off both of Baruda's little buddies and wound the priest himself. Oof. The cultists prove about as resilient as one can expect, and swiftly become a xenos meal. Frustratingly, the Genestealers burrow underground and head into Strategic Reserves. I always forget about that Stratagem... Meanwhile, the Rockgrinder ploughs into the Rhino, destroying it. Four (!!!) Berzerkers apparently tried, in vain, to stop the machine using nothing but their own bodies. It did not work, and half the squad disappears in a blisteringly bad roll. Things are not looking good, but I know I can still get this if I can disable some objectives and kill a bit more. On the left, Xarian the Helbrute atomises a good portion of the Goliath truck, destroying it. I didn't get good photos of this, but the Terminators likewise melt the Rockgrinder on the right, which turns out was rigged with explosives, killing a Berzerker and wounding everything else around it. Turns out that having 90% of your shooting be short-ranged against such a Stratagem is not wise! In my opponent's turn three, the trap is sprung and his Genestealers and the Muscle Beach make themselves known. Some sneaky buggers are also set up to cordon off the table edges against my own reserves. Back in the centre, the Aberrants and Purestrains clobber and scrabble into the remnants of my force. Unfortunately, one of Kratus's battle scars prevents him from performing a Heroic Intervention, so it's pretty much just down to the Terminators and Baruda. In a show of favour from the Bloodfather, Baruda is barely left standing, though the Genestealers' quick reflexes prevent his return swings from landing. The Red Butchers were not so lucky, and the Aberrants demolish the veteran warriors, though Murdax brings a couple of them down with him. My third turn is one of desperation. Kratus flickers into combat with the Purestrains, supported by Xarian, while the remaining Berzerkers from Validon's squad and Vervek launch themselves at the Aberrants. Meanwhile, my reserves move on from my own table edge, utilising an often-forgotten rule to be able to set up close to the enemy by keeping one model within 1" of my own table edge. Sadly, the charges in the middle weren't as successful as I had hoped. Vervek's power scourge was not the best weapon against 3W Aberrants, and the Berzerkers didn't quite finish them off, while the Purestrains proved to be too quick for even Astartes physiology. They finished off Baruda with numerous, viscious slashes. The lone Aberrant did end up fleeing, however unfortunately it wasn't due to my attacks, so I couldn't get XP for it. At least I could get VPs, though! At least Gorm's Berzerkers on the left were a little more successful, wiping out the Purestrains trying to hunt them down. Unfortunately, despite thinning my opponent's force somewhat, he still has tricks up his sleeve. The Patriarch, which we've learned calls itself the Salt Wyrm (though I still prefer "Big Daddy") blitzes through the ruins to stalk Kratus in an eerily familiar showdown. Meanwhile, shooting from the Ridgerunners knock out the last of Validon's Berzerkers, and the Hybrids that had been guarding the board edge throw themselves at Vervek, cutting at hydraulics and power cables, disabling the dreadnought. I try a couple of tricks: first, negating the damage from one of Big Daddy the Salt Wyrm's attacks using the Divine Shield stratagem from the Righteous Path rules. The blood shield succeeds in protecting him from the Patriarch's attacks...but I hadn't factored in the final genestealer. Kratus's blurred form, one second standing and fighting was on the ground bleeding in less than the blink of an eye. Fine, we'll play it that way! I use the last of my CPs on He Is Risen!, also from the Righteous Path rules. For a second, Kratus's body blinks out of existence... ...Only for him to reappear, a blood-curdling warcry on his lips. Kratus lays into both xenos, finally slaying the last of the Purebloods, but the legendary dexterity of the Big Salt Daddy Wyrm saves him from harm. Luckily, Kratus's terminator armour keeps him alive with only one wound remaining. GSC turn four, he still has some substantial shooting left, and Gorm's squad takes heavy casualties, In the middle, the Patriarch's witch powers prove too much, even for the divinely-inspired Kratus. Invading the heretic's mind with dark tendrils of energy, Kratus - standing in a pool of his own blood oozing from many wounds - begins bleeding from his eyes and other cranial orifices. He drops to his knees, but before the Patriarch can take his head, reality shudders around the Chaos Lord, and he disappears again in a wisp of warp smoke. With that, there's not much else that the World Eaters can do, and the Genestealers succeed in defending their territory from the Heretic Astartes once again. I do, however, manage to scrounge two Chaos Points to help keep some of my trackers at reasonable levels. Result: 53-65 Loss Kratus's Personal Glory: 7 -> 7Khorne's Dark God Glory: 6 -> 7Cruentes' Warfleet Glory: 7 -> 6 After the battle, however, Kratus doesn't reappear. At least, not immediately...
 -
11 November, 2022 With news of Hive Secundus housing something powerful, several armies are converging on the city. Kratus, having been thwarted in breaking into the catacombs himself, has resolved to instead locate the weakest crust of the inner city and simply bombard it from space, cracking it open and exposing the bounty within. The Cruentes believe they have found the perfect position. The only problem is that a strike force of Imperial Knights stand in their way. As a further obstacle, something seems to be lurking in the shadows. Superstitious cultists rant about "vampyrs" and "shapeshifters" that have hunted the city's denizens since the war began, snapping up whole communities as they tried to escape the conflict. Indeed, the darkness itself seems to have eyes...and claws... For this battle and the next, units in range of objectives (or in area terrain, if there are no objectives) are at -1Ld and -1 to Combat Attrition tests, as somthing unnervingly stalks the shadows and preys on the unwary. Kratus's physical form is becoming increasingly detached from time and space. His outline appears almost wispy. And his movements, rather than being smooth motion, appear more like short-distance jumps through space. One moment he might be looking away, the next moment he could be turned to face you - only to suddenly be looking away again, all without appearing to move. Baruda, ever the zealot, loudly proclaims it is simply yet another boon bestowed upon his Lord by the god of war. Kratus is accompanied by Baruda the Dark Apostle, Murdax's Red Butchers, Validon's Berzerkers, a mob of Cultists, and Bardûl's wretched form. In this mission, the objective is to secure the battlefield - however, the communication issues present in Secundus and the presences in the shadows have jumbled the orders somewhat. There are four objectives, two of which can only be captured by part of your army, and the other two can only be captured by the rest of your army, randomly determined before deployment. Kratus, Baruda and the Berzerkers are trying to take the nearer two objectives, while the Terminators, Cultists and Spawn are trying to take the farther two objectives. For Agendas, I choose the nearly ubiquitous Eye of the Gods to kill characters and vehicles, and supplement that with one of the Agendas from this mission pack, Machine Vendetta, to get even more experience from killing vehicles. I deploy almost everything on the right flank, hoping to overwhelm this side of the board and prevent the Knights from taking my closer objectives, while sneaking up and capturing one of his for just a turn or so. Kratus himself deploys on the far right with the Cultists, hoping to hold an objective while the mortals are thrown into the fray. As is normal, the Terminators form the anvil in the centre of the battlefield, supported by Baruda's dulcet singing voice. Unfortunately, the Knights win first turn, so I don't have a chance to activate my defensive prayer with Baruda. Despite this, I push on with the plan, and with a blood-curdling roar the Terminators and Cultists move up the field with Apoplectic Frenzy. Baruda uses his Warlord Trait, Eternal Vendetta, to mark the big Knight, Prince Arthur, for death. The chivalrous fools leap at this chance, knowing the Red Butchers' reputation for resilience. The two melta Armigers round on Murdax's squad, supported by the autocannon Armiger in the distance. Prince Arthur likewise moves down the street to offer his - not insubstantial - firepower. On the right flank, a few Cultists were slain by some incidental stubber fire, while a few more were dragged silently into the shadows by the denizens there. (In hindsight, I have no idea why I moved them onto the objective that they couldn't even capture anyway...) The combined firepower of all four Knights sends a storm of shrapnel, high-calibre shells and superheated gas towards the ancient, frenzied warriors. Their priceless plate holds surprisingly well without the machinations of the warp to help them, however six of them are still felled - four of them to the Helverin's autocannons! The ground rumbles as Arthur and one of his Armigers thunder into the survivors. Prince Arthur swings first, cutting open three of the berserk Terminators. Murdax himself survives and, of course, barrels into the Armiger in a Counter Offensive. The junior Knight suffers terribly from the Champion's chainfist as it carves through metal plating, reinforced conduits and locomotive stabilisers. With only four wounds left, the Knight is unable to land a killing blow on the World Eater. Losing nearly an entire Terminator squad on the top of turn 1 is obviously not ideal, however this now means that around two thirds of my opponent's force is out of position. The Berzerkers vault over the pipelines, while Baruda leaps over his attendants to hammer into the damaged Armiger. Kratus - not visible in this photo - moves up to try charging into Arthur as well. Unfortunately, his blasted bionic leg continued to plague him, as he failed his charge even with a reroll from Warp Stalker. The Berzerkers struck first, swarming up the Knight's legs and sawing into various joints and other weak spots, bringing the adamantine giant down to just 10 wounds. Arthur swung back, choosing to mete out his vengeance against the bugs clinging to his hull, killing most of the Berzerkers. Murdax leapt from the Armiger and slammed his chainfist into Arthur's weakened hull, inflicting just enough damage (12) to cause the Knight to lose its remaining power and topple onto its back. Meanwhile, Baruda slammed his corrupted crozius into the Armiger, likewise only bareuly causing enough damage (4) to sever the right hydraulics and conduits to cripple the war machine. In my opponent's turn, having lost two critical Knights, he steps up with his last Warglaive to avenge his fallen. Another punishing salvo from the last two Armigers incapacitates the last Berzerkers and knocks out Murdax. The plucky Knight pilot sees his chance, and launches into Baruda. Luckily, the priest still has two lackeys happy to sacrifice themslves, with one dying. Baruda swings back, inflicting significant damage to the Armiger's hull. In my turn, the Spawn gribbles up to help Baruda in his struggle against the warmachine. Elsewhere, unpictured, Kratus continues to set up his bombardment beacon, while the cultists advance onto one of my opponent's objectives to do the same there. The Spawn knocks a few more wounds off the Armiger, who splits his attacks between Baruda and the Spawn. The Spawn is easilly cut in half, but Baruda's final attendant leaps in the way of the whirring chainblades (an outstanding feat in itself, given that the disciple lacks a face), allowing his master to continue his onslaught, breaking the Knight's steed. Since I controlled more objectives for this turn, I now took the lead in VPs. Now it's just a matter of surviving long enough to keep it that way! In my opponent's turn, the last Armiger makes a good attempt at killing everything left in my army. The autocannons thump away at Baruda, knocking off two wounds thanks to his 6+ FNP, while the heavy stubbers kill off the Cultists (though maybe one or two more were claimed by the shadowy claws!). At this point, I had a choice to make: either keep Baruda on his objective and guarantee the win, or "do the Khorne thing" and charge. I do the Khorne thing and charge. The Armiger lands a single hit in overwatch, killing Baruda. Hmpf. With one model each left on the table, there's not much that either of us can do. He spends the last two turns firing on Kratus, whose Gorget of Eternal Hate easily deflects the heavy rounds while he finishes setting up the beacon. What a battle! The fates certainly swung from one side to the other, and my plan to just nab more objectives ended up working in my favour. Just one single turn of scoring more VPs than my opponent is all it took. Unfortunately, such a narrow victory (I assume) means that I only gain a paltry 4 Chaos Points. Bardûl the Wretched Fool earns the Fatigued Battle Scar. Baruda is the clear MVP for this battle, and so is Marked for Greatness, though this is not quite enough to progress to Heroic level. With the first of the beacons set, the warfleet of the Cruentes begins moving into position... Result: 45-35 Win Kratus's Personal Glory: 7 -> 7Khorne's Dark God Glory: 6 -> 7Cruentes' Warfleet Glory: 7 -> 7
-
Battle Report Battle 12: 75PL vs GSC, Let It Burn
Cheex posted a blog entry in The Aksha'i Cruentes - A World Eaters Crusade Blog
This battle occurred a few weeks ago, but real life got in the way. Sorry for the lack of updates! Regular scheduling is to follow. I've also noticed that the recent formatting change on the B&C has deleted all of my paragraph breaks in previous entries, so I will eventually go back and fix them...eventually. 7 October, 2022 Burning with the power of the warp following his last encounter with the Imperial Knights, Kratus presses onwards through the dust-strewn wreckage of Hive Secundus. He's on a mission to uncover something buried in the heart of the city. With an awkward, limping gait, Kratus leads his forces onward to a processional way to the dark belly of the hive. Those who can see Kratus notice something unusual about him - like if they see him from the corner of their eyes, his outline is slightly blurred. Kratus is supported by the raving chants of Baruda the Dark Apostle, Validon's and Dreior's Berzerkers, a mob of Cultists, Murdax and his Red Butcher Terminators, Xarian the Helbrute, and a new Helbrute named Vervek. One of the Berzerker squads is mounted in a Rhino. This newcomer was, in fact, one of Kratus's former bodyguards who stole a glory kill from him several games back, and has been languishing in torture ever since... The World Eaters are defending in this mission, as they must secure this site as a point of ingress to the core of the city. The Genestealers, being the current owners of this mysterious objective, must sabotage this potential entryway by performing actions on the objectives. I choose the following Agendas: Blasphemous Ritual (perform an action in the centre of the table for potential XP and Dark God Glory points) - the World Eaters wish to 'consecrate' their entryway to the city's centre. Cull the Hordes (gain XP for killing 6+ models in one phase) - Khorne demands blood. Assassins (gain XP for killing characters) - Khorne demands worthy skulls. As always with GSC, you get very little information on where they're going to deploy, and I know they can spring up out of nowhere so I try to screen my weaker left flank while focusing mainly on the right. Kratus sees his unnamed follower loping off ahead, moving in a way that Terminator plate shouldn't, apparently unnoticed by the other Berzerkers. The figure, clad in the colours of the War Hounds Legion, turns back and reveals the positions of the enemies. The warning was of little help, however. On the left, the mutants' bikers scream as they surge forward before the battle was even underway, followed by the skittering of claws on dusty pavement. On the right, the jerryrigged civilian vehicles scamper back to try and avoid the fire of the two Helbrutes. In the ruins of some ruins of strangely non-Imperial origin, some shadowy figures can be seen waiting and watching. With a roar, the Berzerkers and Terminators surge forwards using the Apoplectic Frenzy stratagem. Note: these photos were taken after pre-game moves, but before my opponent had taken his first movement phase. The bikers zip forwards, prayers to their Four-Armed False Emperor on their lips as they prepare their demolition charges. Their pure-blooded brothers follow in the dust they kick up. In the centre, a mutant witch saunders forwards, her skull writhing with disgusting energies as she strikes down a couple of Berzerkers with mind bullets. The makeshift explosives do their destructive work, blasting armour plates off Vervek's dreadnought hull and damaging several systems, before barrelling into the Cultists. The cultists open fire in Overwatch, slightly damaging one of the bikes. Elsewhere, other shots ring out across the battlefield, including more than a little firepower directed at Vervek's already damaged form. However, none of them are able to finish off this beast and - despite the photo you see below - he is reduced to a single wound. The bikers run down several Cultists, but their bodies gum up the light steeds. One of the bikers is thrown from the saddle and clubbed to death, while another suffers some damage. Luckily, the Cultists are so intoxicated by the bloodshed that none of them flee. In my first turn, Xarian the Helbrute and the Berzerkers on foot advance up the centre, hoping to draw out the Genestealers. The Rhino moves up cautiously in a position to send reinforcements where needed. Xarian fires up his new multimelta, sighting the foul mutant witch across the battlefield, and in an explosion of superheated matter, wipes her off the table. (Though I have no doubt she used some kind of trickery to escape!) Meanwhile, Vervek lends a hand to the cultists, killing two more bikers as they struggle to extricate themselves from the mass of maddened humans. A few more Cultists are trampled, but again they pass their Morale test with a heroic stubbornness. Vervek gets bored and wanders off to fight the Genestealers...with his whole remaining wound. Meanwhile, I realise I should probably invest in some more disposable bait units, as the Genestealers on the right scamper forwards and make short work of Dreior's squad. And the incredibly fast blue buggers just bypass Vervek entirely to grab one of my home objectives. Some lesser mutants show up to help them out and they sabotage his potential Hive Core entrance. A mutant gunslinger appears with altogether too many arms and altogether too many pistols, taking aim at Baruda, whose chanting is messing with reality around the Terminators in the middle. He(?) succeeds in killing two of Baruda's buddies, and wounding the priest himself. I spend a command point to reroll one of his saves and he survives. The outcome against Dreior's berzerkers was never really in question, but I take a photo anyway. Even less contentious was the other Genestealers against the Cultists and Vervek, however here at least I am able to perform a Counter Offensive to kill a few of them with Vervek before he crumples to the ground. Somehow, the Cultist champion actually survives...and passes another Morale test! Turning to deal with the new threat to the rear, Kratus blurs through reality to charge the mutants. The Red Butchers begin desecrating the Imperial shrine in the centre of the table, knowing they could draw the attention of Khorne to the battle. I seem to have missed a photo here, but Validon's berzerkers jump out of their Rhino and easily take care of the Genestealers on my right. In my opponent's turn, the Patriarch makes himself known, followed by several Abominants as they counter my countercharge. Kratus butchers the lesser mutants in my rear, chasing down the gunslinger that was leading them, but rescue is at hand. Meanwhile, some more mutants appear to demolish another possible route into the heart of the city. They really don't want me in their lair, for some reason. Various combined arms brings Xarian practically to his knees. He retaliates out of rage using the Fire Frenzy stratagem, blasting a decent hole out of the Goliath truck but failing to destroy it. Kratus is surrounded by horrid, blue aliens. His ancient warplate wards off most of pistol shots from the Kellermorph as it disengages, but he is starting to bleed. As he bleeds, however, his silhouette begins to blur more and more frequently. On the right, a variety of mutants, aliens and vehicles launch into the Berzerkers and Helbrute. Taking first swing, the Genestealers tear at Kratus, cutting deep into his armour. His strange warping and blipping through reality continues as he fights off the aliens, before he eventually disappears entirely. Seizing the initiative with Counter Offensive, the Berzerkers launch themselves at the Patriarch and the Abominants, killing all but one of the horrible mutants and almost dragging down the Patriarch himself. However, despite being forced to the ground himself, the Patriarch tears through the Astartes, scattering the squad, while Xarian is knocked over by the truck. Emboldened by their newly desecrated/consecrated shrine to Khorne, the Terminators hurl themselves at the enemy with a mighty 12" charge. Baruda is also feeling lucky, and turns to show the Genestealers his stick. The Red Butchers, unsurprisingly, butcher their way through what was left on my right. While Baruda knocks down a couple of xenos and takes a couple of scratches in the process. Thinking their job was done, the Terminators failed to notice the biotech grafted into the Patriarch's carapace. His Archeotech Nano-meds pump stimulants into his body and he scurries away to join some mutants that had been skulking around my right flank for some time. The Genestealers in my rear, clearly deciding that they had no interest in Baruda's shiny stick, scamper off to take my other objective.... ...while the gunslinger mutant easily caps the priest. In my final turn, Murdax's Butchers close in with the slippery Patriarch, burning his makeshift bodyguards with their heavy flamers, before pummelling the Genestealer lord again. The battle ends there, with the Genestealers having danced around the battlefield and destroying all of the objectives. The Terminators, seeing this fate, head back to the World Eaters' drop zone, leaving behind the Patriarch's corpse. They fail to notice the swarm of nanobots still in the creature's bloodstream, knitting its flesh back together. One of the Terminators turns....only to see the body missing. Back at the drop zone, Kratus rematerialises with cuts and bruises all over. His silhouette is now blurred even when viewing him directly, and his blood is looking unusually black in colour. No units level up this battle and the Rhino (which was destroyed at some point, but I now can't remember how) gains a pretty inconsequential battle scar. However, a solid roll for my Chaos Points after the battle and one successful Blasphemous Ritual puts my force in a better position to when they started. Result: 30-65 Loss Kratus's Personal Glory: 7 -> 7Khorne's Dark God Glory: 5 -> 6Cruentes' Warfleet Glory: 7 -> 7 -
Or: It's Fistin' Time! 22 September, 2022 After a series of stinging defeats and anaemic offerings to the Blood Father, the World Eaters are eager for a worthy fight. Kratus, in particular, is determined to prove his worth as a successor to the Hand of Khorne. As scattered bands of Cruentes stalk the streets, they encounter a scouting force of Imperial Knights, presenting them with an opportunity to take some worthy trophies. Since the last battle, I used Repair and Recuperate to remove the battle scar from Thrax, the Exalted Champion. It appears his pact with a shadowy daemon has instilled him with new confidence... Kratus and Thrax lead this force, composed of all three Berzerker squads led by Validon, Dreior and Gorm, and backed by a Cultist mob and Bardûl, the Spawn. Eager to salvage his reputation and silence any possibility of usurpation from within his ranks, Kratus seeks to draw the Eye of the Gods (kill characters or vehicles) and solidify himself as an Instrument of Vengeance (Path of the Righteous - kill characters or units bearing relics). In this mission, half of each player's units (rounding down) must start in Strategic Reserve, at no cost. With seven units in my army, I opt to keep Kratus, two Berzerker squads and the Cultists on the board. Thrax leads a reserve band of eight Berzerkers and the Spawn. The objectives for this mission are simply to kill enemies and end the game in the opponent's deployment zone. We also set up a couple of supply cache secondary objectives, per our campaign's rules. Performing a special Action on these objectives would provide free uses of certain Requisitions. A wave of determination sweeps over the World Eaters, and although my opponent gains first turn I decide to use Apoplectic Frenzy to sprint almost everyone forwards. In the Knights' first turn, their warlord, Prince Arthur, shimmies between two ruins to draw a bead on the Berzerkers on my right. In a storm of extremely accurate firepower, six Berzerkers are blasted apart. On the left, one Berzerker is downed by an autocannon from the shooty Armiger. Following up on his successful shooting, Prince Arthur barrels between the ruined buildings to charge and easily destroy the two remaining Berzerkers. Kratus, still suffering from some Deep Scars, cannot use Heroic Intervention. (Our campaign has a house rule where a unit can only use the Repair and Recuperate requisition if they sit out a battle, and Kratus has been fighting in every battle since gaining that scar.) In response, I abandon my original plan of using the Cultists to just nab some supplies, and instead hurl them at the Knight along with Kratus. If push comes to shove, they can use Fury of Khorne to help get a few extra wounds in if needed. The Berzerkers on the left instead head over to pick up those supplies...but I forget that they have the Battle-weary scar, preventing them from performing Actions. Dangit. Kratus leaps from the corpses of dead Berzerkers to latch onto the Knight's carapace. With the help of the Wrath of the Chosen (+1 to hit with Terminators or Chosen) and Stoke the Nails (puts the unit into Wanton Slaughter) stratagems, as well as his various abilities, Kratus drives his chainfist repeatedly into the Knight's body. Inflicting an impressive 27 damage, Kratus manages to rupture the fuel cells of Prince Arthur's mighty steed, causing a catastrophic explosion that kills several Cultists and wounds the Chaos Lord. Seeking retribution for the demise of their Warlord, the two Armigers in reserve start racing towards Kratus. Six cultists (and a couple of Berzerkers on my left) are slain by the Knights' firepower. Wading into the Cultist mob, the Armigers make short work of the mortals and their remains are sprayed onto the walls of the nearby ruins and silo, leaving Kratus decidedly vulnerable. In my second turn, Thrax and his Berzerkers stream in from Strategic Reserve, taking advantage of the ability to set up closer to the enemy if you arrive close to your own table edge. Thrax's aim with his combi-melta is uncanny, scoring a direct hit on one of the Armigers and stripping six wounds off it. Elsewhere, Bardûl wanders onto the table near my opponent's deployment zone, ready to wander in on the last turn to earn some endgame VPs if things go badly. Meanwhile, Gorm's Berzerkers stalk through the ruins, hoping for a long charge on the Armigers to help out the Chaos Lord. Unfortunately, everyone except Kratus fails their charges. I guess it's down to the Hand of Khorne, now! Kratus has an impressive nine attacks on the charge, so I allocate three to the wounded Armiger and six to the other. Using the Wrath of the Chosen and Stoke the Nails stratagems again, he gains an absurd number of attacks from exploding 6s, but even so he barely finishes off the wounded Armiger and, with a lucky Command Re-roll to wound, he destroys the unwounded Armiger. Unfortunately, Kratus's luck can't last forever. The last Armiger sidesteps the ruin and unloads his autocannons into the Chaos Lord, who fails two of his 2+ saves, so even a Command Re-roll wouldn't help. High-impact, explosive rounds tear into Kratus and he crashes to the ground, ending his rampage. In my third turn, Thrax and all the Berzerkers hurl themselves at the last Armiger, eager for the kill. In the Knights' fourth turn, he knocks out a couple more Berzerkers from Gorm's squad, but the writing is definitely on the wall. Thrax and Validon's Berzerker squad pack into the last Armiger, with Thrax severely damaging the machine (seriously, I can't seem to roll 6s to save my life with Gorefather), and it is easily dismantled by the Berzerkers. What a brutal game. I made one mistake in sending my one Berzerker squad that can't perform Actions after some objectives that require Actions, but other than that things went unbelievably well, and probably need to start screening Berzerkers with Cultists to prevent them from getting charged so easily. I also kept forgetting to use the Skulls for the Skull Throne stratagem, since all of the Knights were Characters. But I think that would've just been rubbing salt in the wound at that point! Result: 50-10 victory Kratus's Personal Glory: 1 -> 7Khorne's Dark God Glory: 6 -> 5Cruentes' Warfleet Glory: 7 -> 7 I only gain four Chaos Points for the victory, but with Kratus killing the enemy Warlord and two more characters/vehicles, he gains another three Personal Glory points. I put another three Chaos Points from the victory into Kratus's Personal Glory (I think he deserved it!), catapulting him from being Forsaken to being Favoured! Evidently, his followers were impressed by his showing in this game. Unfortunately, Kratus does fail his Out of Action test, and it turns out that one of his legs was turned into a pulpy mess by a hail of mass-reactive rounds. His body has not yet accepted the crude bionic replacement, giving him the Lost Leg battle scar (-1Mv, -1 to Advance and Charge rolls). Oof. However, he gained a whopping 8XP from the Eye of the Gods agenda, and a further 4XP (and 2 Righteous Inspiration points) from the Instrument of Vengeance agenda, plus he killed three units and was Marked for Glory for a total of 17XP (including the one for fighting a battle). And this is the part I've all been waiting for: Kratus finally levelled up to Heroic rank, giving him another chance to roll on the Chaos Boons table. He already has serpentine fangs (13) and a scorpion's tail (21), and if I roll either of those two results again he gets to join Bardûl in the ranks of spawndom. I roll the Chaos Boon - and get 23. Warp Stalker (reroll Advance and Charge rolls). My heart skipped a beat on the first D3 roll, but that result was a very good one, and partially offsets the Lost Leg battle scar. Kratus is now at 47XP, so levelling up to Legendary rank is realistically only a couple of games away. And who knows what awaits him when he does...
-
Or: Maybe Don't Choose To Go Second Against Custodes Next Time 16 September, 2022 After being surrounded by the foul xenos forces, the World Eaters only manage to fall back thanks to the enemy armies' preoccupation with each other. Returning in force and hoping to catch these enemies off-guard, the Cruentes are surprised to not see Necrons or xenos mutants, but instead the transhuman might of the Adeptus Custodes. After the last battle, I used the Repair and Recuperate requisition to remove the battle scar from the Terminators. Kratus and Baruda lead the force, consisting of Murdax's Red Butchers, all three Berzerker squads led by Validon, Dreior and Gorm, a big mob of Cultists, Xarian the Helbrute and Bardûl the Spawn. In this mission, there are six objective markers in No Man's Land, which players must perform "loot" actions on to score VPs. Each objective can be looted three times in total before being removed. I choose the agendas Blasphemous Ritual (perform an action in the centre for XP and Chaos God Glory), Instrument of Vengeance (a Path of the Righteous agenda to kill characters) and Reaper (unit that kills the most gets bonus XP). I win the roll-off for first turn, and decide that I want to go second, to draw the enemy forward or something. It sounded like a good idea at the time. At the top of the first battle round, I spend a few CPs on Apoplectic Frenzy to rush the Red Butchers, Cultists and two Berzerker squads forward. The Berzerkers on my left flank rage forward but somehow maintain the wherewithal to take cover. The Cultists move into a position to capture an objective on my first turn, while the Terminators look all menacing in the middle. And finally, the Berzerkers on the right start shuffling around a piece of terrain. Why didn't I Frenzy the other Berzerker squad, you ask? You know, the one in a perfect position to nab an objective on turn 1? Your guess is as good as mine, dear reader. In my opponent's first turn, things move up and start shooting. I quickly realise that I should've taken the first turn, if only to get Illusory Supplication off on the Apostle. Thankfully, my dice are extremely hot - who knew that frenzied Berzerkers would be so situationally-aware that they could make so many saves in cover! A few Terminators are, however, blasted off the table. Remind me again why I chose to go second? In response, everything surges forward in a great, red tide. Terminators begin a mission action in the centre of the table, while Baruda sings them a nice prayer. I didn't want to risk failing the dice roll, so I quite happily used the Fell Prayers stratagem to guarantee it. On the left-centre, the Cultists also begin the mission action on an objective. Near them, some Berzerkers Advance to cover. Not sure why I didn't Frenzy them at the start, since it would've meant that they could do the mission action now...but I digress. Past Cheex is not best Cheex. On my right, Berzerkers file forwards, while Xarian opens up on the Custodes with jump packs (I forget their name). Xarian gets a little too trigger happy, rolling two shots and landing both a 1 and a 6 - thanks to Wanton Destruction, the 6 turns into two hits but the 1 still causes a mortal wound. In my opponent's turn, some fancy bolters kill several Berzerkers out on the left flank, a pile of Cultists are turned to mist, and a couple more Terminators are killed. Many Terminators are saved by the Illusory Supplication, though - against an army that relies on a small number of high-quality shots, nearly halving their ability to shoot is extremely useful. I seem to be missing some photos of my second turn, but simply: Terminators continue moving forward, this time enacting the Blasphemous Ritual on the centre of the table. Baruda again uses Fell Prayers to automatically succeed in using Illusory Supplication on them. On the right, my Berzerkers charge and massacre some Sisters of Silence who were on an objective, while the remnant Berzerkers on the left attempt to charge some bolter-wielding Custodes. Unfortunately, Tanglefoot Grenades root them to the spot (reduced my charge range by a whopping 6"!). On my opponent's turn, he decides he's had enough of the Dark Apostle's shenanigans and sends a Shield Captain over to assassinate him. Meanwhile, more jetbikers head off to intercept the Berzerkers on my right, and a couple of Terminators are killed. The Berzerkers on my left, out in the open from their failed charge, are mercilessly cut down, with four dying to shooting. The few that are left are easily mopped up in melee. Yeah, this turn isn't looking good. On the right, the Berzerkers there are skewered by the jetbike charge. The only glimmer of hope this round is Baruda, whose loyal disciples are cut down while the Apostle himself is merely wounded. In return, he lands a successful hit on the Captain. In my turn, I remember that Baruda has the Mantle of Traitors relic, so he can use the Fell Prayers stratagem once for free. He beseeches his daemonic patrons to splinter reality around the Red Butchers once more, while he turns his attention back to the Captain. Sensing an opportunity for a gory kill, Kratus steps up to claim a worthy skull for Khorne. Xarian stomps forward to handle the jetbikes on the right flank. Meanwhile, the Cultists keep chanting "wE cAptOrEd iT fOr ChAyOssS" into their vox for some reason. They've just been quietly earning me VPs all game, bless their hearts. I've got some good charges lined up, which would give me the opportunity to stay in the game. If I can clear out a few of these enemy units, I'll be able to stay ahead on VPs and potentially win the game. Unfortunately, the dice gods would not agree. Tanglefoot Grenades yet again ruin my day, dropping the Terminator charge by 6" again (my opponent profusely apologised for rolling a 6 twice with that stratagem!). They end up failing their charge, even with a reroll. Even more unfortunately, this leaves his Allarus Captain free to use his own relic, which allows him to perform a Heroic Intervention to anywhere on the table. He chooses to go after Kratus. Had this not happened, I would've activated Xarian first to kill the jetbikes on my right, trusting that I could weather the attacks from one captain. But with two captains squaring off against my characters in the centre, I opt to activate Kratus first. He splits his attacks between the two captains (first mistake). The jetbike captain makes enough Invulnerable saves to barely survive, while the Allarus captain uses Transhuman Physiology to absorb the rest of the attacks. Of course, the jetbikes then interrupt combat and demolish poor Xarian, and a string of bad saves means that both my characters die. From there, my opponent simply had to mop up the rest of my Terminators and Cultists to win the battle. Result: 25-45 loss Kratus's Personal Glory: 2 -> 1Khorne's Dark God Glory: 6 -> 6Cruentes' Warfleet Glory: 7 -> 7 Oof, what an unfortunate series of events. My opponent played his stratagems well, twice using Tanglefoot Grenades to severely hamper key charges, but that last Hail Mary charge just fell apart spectacularly. Kratus's Personal Glory suffered again after that disastrous mishap, while the Blasphemous Ritual and my paltry 1 Chaos Point kept my Dark God and Warfleet glory at their previous levels. Thankfully, no rivals tried to challenge Kratus still. Gorm's Berzerkers gained the Battle-weary battle scar, while Bardûl lost 1XP from a Devastating Blow. I made a few key mistakes in this game again, particularly with regard to going first and not Frenzying my third Berzerker squad. They would've been able to nab another objective early on, while benefiting from cover. I also should've kept Baruda better covered, rather than letting a jetbike character charge him. I also failed a few key rolls, especially the Terminator charge in the middle. Had they succeeded, they probably would've killed the Allarus Captain while Kratus killed the Jetbike Captain and the Helbrute killed at least one or two of the jetbikes. No units gained a rank in this game, but I did make Kratus Marked for Glory (though in hindsight shouldn't have bothered, given his performance!), which put him just 1XP behind reaching Heroic rank...
-
Or: The One Where I Realised Rhinos Kinda Suck When Forced to Use Strategic Reserves 16 September, 2022 As forces from all factions present on Janus trickle into the Hive Secundus, more engagements break out. The indomitable Necron advance pursues the regrouping World Eaters, however sensors on both sides start pinging with the presence of new enemies... Kratus and his lieutenant, Thrax the Exalted Champion, lead Dreior's Berzerkers and Gorm's Berzerkers, backed by Bardûl the Helbrute and Xarian the Spawn. Two Rhinos are seconded to transport the Berzerkers. In this mission, players are required to keep half of their force (in PL value) in Strategic Reserves, or otherwise deployed elsewhere. Players score VPs by killing things, killing things with Reinforcement units, and killing things in the enemy deployment zone with Reinforcement units, as forces attempt to encircle each other. Per the current campaign rules, each player sets up an objective marker to represent supply caches, which will give players free uses of certain Requisitions. Starting on the board is just one Rhino filled with Berzerkers and the Exalted Champion, and the Dreadnought. Kratus is in Warp Strike, while everything else is in Strategic Reserves. Not wanting to repeat the events of last game, I don't invest much into getting first in the Turn Order. Necrons go first, followed by the GSC, then the World Eaters. Surprisingly, the Necrons choose the central deployment zone. I set up my one Rhino and Dreadnought behind cover. The Necrons set up very cagey, with just some Praetorians behind the central refinery and some Immortals and Annihilation Barge behind the ruin in their deployment zone (ignore the models sitting off to the side). The GSC, of course, are nothing but blips on the auspex. The Necrons move up to take position behind the pipeways, while the Annihilation Barge zaps a few wounds off my Rhino. I move Xarian out of cover to try and plink some shots off at the Barge, to no effect. The Rhino trundles forward, urged on by the bloodthirsty maniacs in its troop hold. The GSC player does his usual shenanigans. Some stuff flings forward to take up positions around supply caches, other things prepare for future assaults. The Patriarch himself holds back, confident in his amazing threat range. In the second battle round, the Necrons get lucky and blast apart the Rhino, killing three(!). Many more Necrons filter onto the battlefield and begin to plink away at the Genestealer Cultists. In my turn, Bardûl arrives on my right flank, getting a long charge on the Plasmancer out in the open. And he proceeds to eat the rather un-nutritious Necron, before piling into the Barge to tie it up. Thrax and Gorm's Berzerkers charge some Skorpekh Destroyers, hoping to draw in the Skorpekh Lord in a Heroic Intervention, but the enemy declines. Ah well. Berzerkers annihilate the Destroyers. I also move up my Rhino from Reserves, preparing the Berzerkers inside to charge in the following turn. Kratus opts to wait in the Warp for one more turn. In the Necrons' turn, return fire from various units knock out three Berzerkers, leaving only Gorm and an injured Thrax still standing. The Skorpekh Lord charges Thrax and Gorm, killing Gorm. Thrax barely survives with a miraculous save (6+ to save, decided to waste a CP on the reroll but it succeeded!). Thrax, unfortunately, fails to land any meaningful hits back. I go fishing for 6s to wound (to trigger both Gorefather and the Flames of Spite WLT), but despite landing several hits and having full rerolls to wound, he rolls not a single 6 to wound. The few normal wounds that go through are saved. Blast. Elsewhere, the sneaky Genestealers continue their domination of the field, nabbing some more supply caches and threatening my flank and rear. Xarian's Dreadnought body suffers some damage from massed promethium from the cultists, while the demolition charges of the bikers succeed in wrecking the Rhino and killing a Berzerker. I forgot to take a photo of the ensuing charge, but the bikes opt to go after the Helbrute, knocking him down to just a single wound. In return, Xarian pummels three of the bikers and causes the last one to flee. Meanwhile, a small unit of Genestealers hits the Necron brick wall and discovers just how resilient they are. Several warriors die, but the melee would grind on for most of the game. In multiplayer games, the Fight phase is resolved in Turn Order, which unfortunately means that the Skorpekh Lord is able to drag down the Exalted Champion. I forgot to take photos in my turn, but with little left in my army I decide to go for some long charges. Kratus and the Berzerkers angle after the Genestealers, hoping to wipe them out before they could rip me to pieces...but both units fail their charges, even with Kratus getting a reroll. That's less than ideal. Xarian shoots something and whiffs (of course) and charges the cultists, only managing to kill a few. The Genestealers and Big Daddy himself swing around to meet Kratus and the Berzerkers head on. Meanwhile, the rock grinders make short work of the poor Dreadnought. The Genestealer and Patriarch charge ends more or less how you would expect, with everything in red dead. With the last World Eaters swept off the field and sent packing, the Genestealers round on the Necrons, but with the way scoring works in this mission, the two xenos forces are drawn in points. Result: Cruentes 20 - GSC 40 - Necrons 40 Kratus's Personal Glory: 3 -> 2Khorne's Dark God Glory: 7 -> 6Cruentes' Warfleet Glory: 7 -> 7 With this rather disappointing display, Kratus's leadership is starting to be called into question, and he is lucky to even make it off this battlefield alive. With such a low Personal Glory score, he risks an attempted leadership coup, but thankfully his champions are quiet for now. Thrax gains the Loss of Reputation battle scar, reducing the range of his auras. However, I decide to mark him for greatness for his epic luck at saving (gotta give it to someone, right?), and he gains a rank. Faced with the frustration of being bested in single combat, Thrax exhorts the empyrean for strength...and is answered by a shadowy benefactor. He gains the Sigil of the Shadowlord Crusade Relic, granting him a much-needed invulnerable save and a 4+ FNP against mortal wounds. Bardûl also ranks up, gaining the Fleet of Foot battle trait, making him much faster. Since I was last in the turn order (and was trailing badly in points for the whole game), under the Catastrophe mission pack rules, I gained a bunch of Underdog points. None of them would've helped me during the game, but I'm able to spend three on gaining an extra Marked for Greatness, which I add to Dreior's Berzerkers. Finally, my Warfleet Favour finally pays off. Shortly after the battle, Dreior and his Berzerkers lead a successful fleet raid, earning him the trust of his Lord. Dreior's Berzerkers also gain the Trusted Hounds battle trait, allowing them to benefit from the aura of one of my characters from anywhere on the battlefield as a Command Phase ability.
-
27 August, 2022 With the Cruentes' supply lines well and truly solidified (Warfleet Glory has been at 7 for several games now), Kratus has set about raising as many edifices to the glory of the Bloodfather as possible. However, in this small satellite city of Hive Secundus, a cultist coven has alerted the Cruentes of a hidden cache of Mechanicus artefacts. Eager to add these to his arsenal, Kratus leads a force to recover them - and pile some skulls in the process. Fortunately for his warriors' Butcher's Nails, a worthy foe looms on the horizon as four Imperial Knights close in on the same target. Kratus leads Baruda the Dark Apostle, Murdax and his 9 Red Butchers, Validon and his 7 Berzerkers, Gorm and his 4 Berzerkers, Bardûl the Spawn, and a small mob of Cultists. The Cruentes' Agenda is to perform a Blasphemous Ritual (perform an Action in the centre of the table for XP and Dark God Glory points) and to destroy some Priority Targets (kill vehicles). The Cruentes push forward as the Attackers in this scenario (personal rule - if I win the roll-off, I always choose Attacker) and manage to get first turn. The mission is Tech Hunt from the Plague Purge mission book, where there are four objective markers near the centre line of the board with a number hidden underneath them (the players know what two of the numbers are, but are not allowed to check after they're placed). Players must perform an Action to uncover an objective's number. The player performing the Action gets 10VPs, but if it's an odd number, the objective is removed from the table. The two remaining objectives, if uncovered, are worth 10-15VPs per turn. With the enemy in their sights, the Berzerkers of the Cruentes surge forward in Apoplectic Frenzy. I forgot to take photos after my first movement phase, so just imagine everything another 5-6" further forward. Turns out that Apoplectic Frenzy is a very useful tool for reaching objectives early to perform Actions, as I uncover two of the objectives in my first turn - one on the right flank (behind that rocky outcrop) and one on my left flenk (behind that big building). The Red Butchers also begin their Blasphemous Ritual action in the centre of the table. My opponent's first turn opens up to him killing my small Berzerker squad on my right flank through shooting and assault. Elsewhere, combined shooting kills a two Berzerkers and a Terminator. The Big Knight turns the Cultists into red slurry. Finishing their Action in the centre and gaining some XP and a Dark God Glory point, the Red Butchers and Kratus surge forward once more to take on the enemy warlord. Baruda, the Dark Apostle, steps up to begin the next Blasphemous Ritual. On the left, Validon's Berzerkers have a choice between charging a shooty or choppy Armiger. I don't particularly want to have my opponent interrupt combat, so I decide to charge the shooty Armiger. The Berzerkers swarm it and, later in the Fight phase, rip it to shreds. The Red Butchers start chewing up armour plates and hydraulics with their chainfists and power fists, knocking out most of the Knight's wounds. In hindsight, I definitely should've used the stratagem that gives Terminators +1 to hit! My opponent declines to interrupt combat, since he only has two CPs left. Kratus then steps up with his chainfist, mag-locked boots giving him access to the knight's carapace and carving off the last of the Knight's wounds. The enemy machine had some relic that caused Mortal Wounds on saves of 6+, so both the Terminators and Kratus take a couple of wounds. As Kratus breaches the machine's cockpit, however, his triumphal roar is interrupted by a deafening explosion. My opponent spends his last CPs to force the Knight to explode, killing a couple more Terminators, knocking some wounds off the nearby Armiger, and pinning Kratus under the bulk of its collapsed machinery. The Knights have lost around two thirds of their force in one turn, so things are getting dire. In desperation, one of the Armigers charges Baruda in the centre while he was still building his pile o' skulls, as the other Armiger loops around my rear to attack Bardûl, who was being held back in case of emergency. To the surprise of no one, the Spawn is instantly gutted by the small Knight's chainblade. In the centre, I opt to interrupt combat and use two additional strats: Fury of Khorne to cause auto-wounds on 6s to hit, and Stoke the Nails for the added Strength and exploding 6s. It's a long shot, but I still hope for the best. Unfortunately for Baruda, however, he fails to land any damage on the Armiger - that's 4CPs well spent... In return, the Armiger cuts apart Baruda's last Disciple (the other was killed by the big Knight's explosion) and lands a hit on the Apostle himself, opening a huge gash in his amour but he is still left standing. Those Disciples also having a 4+ invulnerable save is extremely useful here! Unfortunately, the distraction (and Baruda's poor showing) means that Khorne isn't interested in his offering, and his Action fails - I need to roll a 7+ on 2D6, but only get a 5. Unfortunately, I forgot to take photos of the final turns. Validon's Berzerkers and the Terminators all charge the Armiger harassing the Blood Priest, easily cutting it to pieces. In return, the last Armiger in my back lines sweeps around the big ruin to attack Validon's squad in the rear, leaving only a couple of Berzerkers alive. It is the final gambit by my opponent, but the result was never really in doubt with seven Red Butchers still on the field. As the Armiger is dismantled by the frenzied Terminators, Baruda attempts another Blasphemous Ritual, but is again shunned by the Bloodfather. Result: 70-0 Win Unlocking the archeotech vaults, Baruda has discovered an ancient and potent warp-fuelled power source for his Crozius (improves AP by 1). Only the Cultists suffer a Battle Scar, becoming Battle-weary (no actions, 1XP cap per battle), everyone else recovers without problems. The Cruentes gain 4 Chaos Points for winning the game, and one bonus Dark God Glory for a successful Blasphemous Ritual on turn 1. I use these to keep the Personal and Warfleet glory the same, while bumping up the Dark God Gory to a Favoured level. Kratus's Personal Glory: 4 -> 4Khorne's Dark God Glory: 5 -> 7Cruentes' Warfleet Glory: 7 -> 7 I use the Warfleet Favour to up my Supply Limit again, but can't do anything with the Dark God Favour just yet.
-
- 5
-
-
- khorne
- world eaters
- (and 3 more)
-
Battle 6: 50PL Incursion vs Deffskulls
Cheex posted a blog entry in The Aksha'i Cruentes - A World Eaters Crusade Blog
12 August, 2022 Eager to collect as much loot as possible, greenskins have launched an all-out attack on the Cruentes' position in the industrial outskirts of Hive Prime. Our sources tell us that these greenskins call themselves the Death Skulls. This pleases Khorne. Leading the initial defence is Thrax Gorechosen, the Exalted Champion. He is accompanied by the Berzerker squads led by Validon and Dreior, as well as the Helbrute Xarian the Bloody Idiot and Bardûl the Wretched Fool. Lord Kratus is on standby on his flagship, The Eternal Warrior, ready to reinforce if needed. For Agendas, I chose Eye of the Gods to kill enemy characters, and Cull the Hordes because why not. Wary of the enemy's brutish firepower, the Cruentes deploy defensively, hoping to bait the greenskins into a foolhardy charge. With a reverberating Waaaagh!, the Orks fling themselves forwards, led by their Warboss. We are told that this huge brute is not, in fact, the leader of the group, despite their size and aggressiveness. This confuses Khorne. The greenskins with a penchant for pyrotechnics open up on poor Bardûl, who suffers terrible burns and flees the battlefield in mindless panic. Great, it'll take days to find him again... A couple of the greenskins open up on Xarian as well, who - on Kratus's order from orbit - launches a barrage of obscuring smoke. Regardless, one lucky shot does get through and succeeds in causing some significant damage. Grinning with glee, the actual enemy boss - an apparent field mechanic with a very fancy array of weapons - orders a hail of rockets from his large vehicle at Rhino II, knowing that the Cruentes have wasted their chance to screen it with smoke. Many of the shots go wide, but enough punch through the Rhino to disable it. Two Berzerkers are killed in the barrage. Gunning the engine of their truck, the burners hurtle towards Xarian, staggering him with their heavy ram. Despite this, Xarian catches his balance and stops the flimsy vehicle in its tracks, bringing his huge hammer down to wreck the truck's engine. The greenskins pile out, three getting tangled in the wreckage. Here is where Thrax's arrogance began my downfall. Not wanting to commit all his Berzerkers to a single charge, he order them to remain embarked while he and Xarian charged the greenskins in front of them. The Rhino accelerated in first, distracting the pyromaniacs for long enough for the pair to charge unimpeded. Meanwhile, Dreior's Berzerkers threw themselves at the greenskins in the midfield. In a spray of gore, the brutes were dismembered one by one by the frenzied Berzerkers... ...who then piled into the dimunitive greenskin slaves, only for one of the lucky gits to somehow club one of the (unwounded!) Berzerkers to death! Despite the success against the enemies in the midfield (ignoring that one ignoble casualty), Thrax's and Xarian's charge didn't go so well. The Warboss, Grog, dispatches the Helbrute with apparent ease and claims several useful mechanical components for himself. Thrax sweeps aside three greenskins with Gorefather (only a single 6 to wound - with rerolls - and my opponent passed a lot of Waaagh invulnerable saves). Things go from bad to worse: the flamer Orks pass their Morale check with insane bravery and fall back, the rocket-armed Orks blast apart the second Rhino with ease, killing three (!!) more Berzerkers, and Warboss Grog dispatches Thrax without breaking a sweat. The Berzerkers manage to inflict a bunch of wounds on the Warboss (that Fury of Khorne stratagem is gold), but a -1 to wound and a 1+ save makes him very, very difficult to hurt. Over the next turn, Grog would proceed to butcher the rest of the Berzerkers. Meanwhile, Kevdak the mechanic commander blitzes most of the Berzerkers in the middle. The rest were subsequently minced by their monstrous truck. Sensing that things weren't really going well, Kratus decides that now is a great time to finally teleport in. Failing his charge (even with a reroll), he's left facing the guns of every remaining greenskin. It's at this point that my opponent throws me a bone: Kevdak (or "Big Kev") howls a challenge to the Chaos Lord. No Ork is to raise their weapon to impede the challenge. (To be clear: it wasn't just for my benefit. My opponent wanted to force a leadership challenge between Grog and Kevdak.) In a familiar display of luck, Kratus's armour holds against the flurry of blows from the greenskin warlord, but barely. Finally, in my own turn, and with one wound remaining, Kratus cuts apart his opponent's armour to expose the greenskin inside. However, seeing his demise written on the wall, Big Kev unleashes all remaining firepower from his massive armour, with just one shot finding a chink in Kratus's armour. With that, the last World Eater falls. Result: 8-62 Loss Ultimately, this game was lost in my first turn, when I overestimated how much work my Helbrute and Exalted Champion would do. I think I had the right plan to hold one unit of Berzerkers back, but instead of spreading my charge out, I should've thrown the disembarked Berzerkers at the enemies in my backfield. I think they should've had a good chance to kill the Burnas and Warboss on the charge, when accompanied by the Helbrute and Champion. Ah well, lesson learnt. Xarian suffered an Angered Machine Spirit, so cannot benefit from stratagems. On the plus side, Kratus earned two Personal Glory points for killing the enemy warlord, and increased in rank. Khorne saw him fit to bless him with a Scorpion Tail for +1 Attack. Kratus's Personal Glory: 3 -> 4Khorne's Dark God Glory: 6 -> 5Cruentes' Warfleet Glory: 7 -> 7-
- 3
-
-
- Khorne
- World Eaters
- (and 4 more)
-
5 August, 2022 Kratus once again lead a small Combat Patrol against the Death Guard, this time accompanied by his lieutenant, Thrax, Dreior's Berzerkers, and a small mob of Cultists. The mission was to punch through the enemy line to cause as much havoc as possible. For my Agenda, I chose to initiate yet another Blasphemous Ritual to earn some more Glory for Khorne. Unfortunately, I had been painting Kratus's model and completely forgot to bring him along, so a random Terminator will have to be his stand-in. This was my opponent's third ever game of 40k, so it was going to be another relaxed game with minimal pressure. Just throw some dice and have fun! In this mission, my opponent had to deploy his entire army first, and was forced to split it into three parts. I took advantage of this, by putting the bullet catchers highly valuable Cultists in the middle, backed by my Chaos Lord. My main push would be on the left flank, where the Berzerkers and the Exalted Champion Thrax would be able to overwhelm the flank and sweep around to the middle. I won first turn, and moved everything up the field. The Cultists began an Action in the middle of the board to raise some mighty skull piles for Khorne. I was going to use Apoplectic Frenzy on the Berzerkers to yeet them up the field for a first turn charge, but decided against it at the last minute. My opponent was only new to the game, and I didn't want that to be how he found out about such an ability. I told him what I could have done, and against his protestations I continued simply moving the Berzerkers. In his turn, he shuffled some Plague Marines on both flanks to get some shooting off, and left his Blight Hauler in the middle. When all was said and done, a few Berzerkers were slain and most of the Cultists were killed. I forget how many exactly (and didn't take a photo), but I think there were only 1-2 cultists left - but it was enough to keep their Action going. Khorne was evidently pleased with their sacrifice, as the action succeeded and I gained a Dark God Glory point (and a bunch of XP on the Cultists). In my turn, Thrax killed a couple of Plague Marines, continuing his trend of being completely incapable of rolling 6s to wound for Gorefather, even with rerolls. Thankfully, Berzerkers were more than enough to finish the rest. Meanwhile, Kratus bounced off the Blight Hauler. We both dealt just a few wounds to each other - I always forget how tough these damn things are! My opponent continued to string out his Plague Marines on the right and finished off the Cultists. While the Lord of Contagion swept around to take care of Kratus. Unfortunately, Kratus's knack for surviving against the odds abandoned him and he fell to the Manreaper. In my third turn, I declared the centre objective to be the Alpha objective, since I planned to move there anyway. The Berzerkers and Thrax moved up to wrestle the Blight Hauler off the objective...but I foolishly left my squishy Exalted Champion standing directly in front of the Lord of Contagion. This is a theme you'll see me repeat a lot! Wisely, my opponent charged the Champion and Berzerkers, killing the Champion. In return, the Berzerkers carved chunks off the character's armour, reducing him to just a single wound. In my own turn, the Lord of Contagion slew two more Berzerkers, and shrugged off their attacks. At this point, I was slightly ahead on points. Had my opponent just stayed in combat, there was a good chance I could finish the Lord and just hold the Alpha objective until the end of the game, maybe also shuffle over and add to the cultists' pile of skulls. So, weighing his options, my opponent initiated a Hail Mary charge with his last Plague Marines - and he made it. The sons of Mortarion finished the last of my Berzerkers to claim the objective. Result: 25-45 Loss Unfortunately, Kratus gained some wounds that would not heal after the battle, gaining the Deep Scars battle scar (cannot perform Actions, cannot Heroically Intervene). The Cultists also gained a scar, but I ended up just deleting them from my list to make room for other units. Despite losing, I still rolled well for my Chaos Points. Kratus lost a little glory for dying so ingloriously, but Khorne was pleased with the sacrifices and I made sure to keep my Warfleet in Favour. Kratus's Personal Glory: 4 -> 3Khorne's Dark God Glory: 4 -> 6Cruentes' Warfleet Glory: 7 -> 7
-
- 4
-
-
- Khorne
- World Eaters
- (and 4 more)
-
Supernovas Strike Force: Captain Nyel of the 8th - Cataphractii Armour, combi-melta, chainfist. Librarian Hoxra of the 1st - Terminator Armour, stormbolter, force axe. Lieutenant Tiber of the 5th - Primaris Lieutenant with bolt rifle. The Dead Company - 5 Cataphractii with Lightning Claws. The Ironforged - Sternguard Sergeant with bolter and power fist, 2 Sternguard with meltaguns, 2 sternguard with bolters. The Stalker Kin - Scout sergeant with sniper rifle, scout with heavy bolter, 4 scouts with sniper rifles, 4 scouts with bolters. Squad Cyda - Sergeant with plasma pistol and power sword, 1 Marine with missile launcher, 1 Marine with meltagun, 7 bolter Marines. Squad Oxor - Sergeant with bolt pistol and lightning claw, 1 Marine with heavy bolter, 1 Marine with flamer, 7 bolter Marines. Squad Sigir - Sergeant with bolt pistol and power fist, 1 Marine with missile launcher, 1 Marine with plasmagun, 7 bolter Marines. Ancient Komdai - Venerable Dreadnought with heavy plasma cannon, stormbolter, dreadnought combat weapon. Ancient Lata - Contemptor with assault cannon, combi-bolter, dreadnought combat weapon. Expedition Cawl: Scribe Note: Approximate forces based on field observations. Arch Heretic Belisarius Cawl. 2 Heretek Enginseers. 2 Dunewalkers with large energy weapons. 2 Kastelan battle robots. 3x 10-man squads of Skitarii infantry. Imperial Knight - Paladin Class. 11:03 0564017.M3 - the Stormforge: Captain Nyel cursed the sandstorm that raged around them, scouring at their heraldry and obscuring the way ahead. Somewhere in the sand was a manufactorum, now just a seemingly random collection of half-collapsed towers poking through the dunes at odd angles. The Dreadnoughts led the way, flanked by squads Oxor and Sigir, and Nyel followed as close behind as his bulky armour would allow. Out on the right flank, in a rocky outcrop just south of the old landing platform was squad Cyda, and between them and the main group were the Ironforged, pride of the 8th and siege masters beyond compare. "Stalker one in position," the vox crackled, "We've secured the helipad. There's some kind of storage device here, covered in Mechanicum scrawl." "Stalker two, we've got the same at Nav Point Alpha." "Secure them," Nyel replied. "Whatever's inside, Cawl wants it, and if he wants it then so do I." The dust storm began to dissipate as the Supernovas reached the complex. There, at the base of an old tower, stood Belisarius Cawl, the arch heretic. "CAWL!" Nyel roared, his shout so fierce it seemed even the wind fled in terror from it. "In the name of the Emperor, surrender to me!" The Astartes' vox crackled and Cawl's voice filled the ears of the strike force, "why would I surrender to you, Astartes?" "For your heresy! For the blasphemous monsters you spawned with your degenerate experimentation!" Nyel paused and recalled that one such degenerate was stood beside him. "Present company excepted, of course." "Too kind," Lieutenant Tiber replied, dryly. As the sand storm fled further north more of Cawl's bodyguard appeared in sight, striding forth to defend their master. To Cawl's left were two fighting machines armed with powerful energy weapons; to his right, two Kastellan automata. Flanking this force were two Skitarii squads, with a third appearing within Cawl's tower itself. Shortly after, Stalker One reported the approach of a Knight, but Nyel felt its coming through the quaking ground before their warning reached him. From the top of the tower a Skitarii's voice rang out. "Astartes! The relics of this place are the prop-" "What do you suppose he was going to say?" Tiber asked as he ran after his captain and the advancing Dreadnoughts. "I can't say I really care!" Nyel said, unashamedly blowing smoke from the barrel of his combi-weapon. 11:19 0564017.M3 - Contact Made: Brother Komdai strode forth through the barrage of fire, his plasma cannon raking the Skitarii on the right flank and reducing two of them to nothing but smoking cybernetic legs. Bolt fire poured into them from Squad Oxor as they advanced, killing several more as they ran for the shelter of their precious archeotech. On the left, Lata and Squad Sigir were making equally short work of the other Skitarii, and Komdai took some pleasure in noting how many of these supposedly elite warriors turned and ran rather than risk the fury of the Astartes. Klaxons screamed at him as a cutting beam smashed into his frontal armour, striking him so hard he almost toppled. As he staggered backward, struggling to self-right, he caught a glimpse of the fighting out on the flank. The Ironforged had thrown themselves into a crater just beyond the ruins, chased by fire from the tower and the chattering stubbers of the Knight. Two were wounded, possibly dead, and the survivors could do little but watch as the Knight strode forward and turned its battle cannon upon the Stalkers. Four of the brave snipers were atomised by the blast, the fifth remaining miraculously unscathed. The walkers were charging their guns again, but Komdai had more pressing matters at hand; the pair of Kastellans marching toward him. Fire from the surviving Skitarii on the ground rattled off his armour, but he paid them no heed - seconds later they were blown apart by Squad Oxor, who had secured a higher vantage point from which to control the battle. "Your heretical machines will not save you, Cawl!" Komdai roared as he and Lata charged together at the machines. The lead robot was damaged by Lata's fire already, and the assault cannon had jarred its weaponry at an awkward angle. Komdai burst through the misaimed flamer jet and tore the machine in half with his serrated claws. His blow ruptured the machine's internal systems and it detonated, causing more alarms to flare across his neural interlink. When the smoke cleared one of the Hereteks was dead, impaled by a chunk of his own machine, and Lata was stood victorious over the broken remains of the second. Captain Nyel was behind him, shouting orders to the squads in the buildings, but it was Oxor's voice that cut through the chatter and caught Komdai's attention. The sergeant called out two words that could fill even a Space Marine with dread. "Knight incoming!" 12:21 0564017.M3 - The Trap Closes: From the dead, desert air came the Dead Company, materialising in a sharp flash of light that was over as soon as it had begun. Librarian Hoxra was with them, issuing warnings of incoming fire before the Dunewalkers had even begun to turn and bring their weapons to bear. Despite the Librarian's premonitions, Brother Calyr was lost, reduced to a blackened husk by the searing beams of the crimson machines. Hoxra took solace in the fact that he was with his lost Brothers again at last. The strike force charged forward through the Mechanicum fire, joined by Lata as he smashed his way through a nearby wall with an Imperial Knight in hot pursuit. Lata's atomantic shielding formed a visible aura in the air around him as Skitarii and Knight attacks slammed into him, but for now it seemed he was impervious to their weapons. "Brother Lata! Target the lead machine!" "Yes, Librarian," Lata replied and raked the walker mercilessly. He charged with the Dead Company and together they beat upon its shielding, damaging the contraption but unable to destroy it entirely. The machine backed off, and its retaliation was devastating to behold; the two walkers fired everything they had at the Dead Company, and when the smoke cleared only two remained standing. With a blast that shook the battlefield, Brother Lata fell. The fury of Cawl and the Knight combined had finally overwhelmed his defences and he toppled, legs blown clean off by the Knight's shell. Brother Komdai, smoking from a dozen wounds, overcharged his plasma cannon in a desperate effort to drop the Knight once and for all. The white beam smashed into the machine and blew chunks of adamantine from its hide, but still it moved. Komdai did not; his noble form had fallen still. Too many lives had been lost already; Cawl had to be brought to justice! As if answering the Librarian's summons, Cawl hurled himself toward the Dead Company. He struck the first with an arcane energy weapon that smashed the Cataphractii armour apart like it were paper, and before the final Marine could react Cawl severed his head with his glowing axe. Hoxra channelled his will into a mighty blow with his axe, but even his will was not enough to pierce Cawl's shield. Again and again he beat upon the shimmering energy field to no avail, all the while listening to the sounds of battle as the Knight rampaged through his brothers. He head Tiber cry out in pain as he fell, and Captain Nyel's defiant roar as he buried his chainfist into the machine's legs to try and stop its onslaught. Time was of the essence; Cawl had to die! 12:45 0564017.M3 - The Coward's Retreat: Belisarius Cawl surveyed the field through the eyes of his servants. The ignorant fools of the Astartes had secured all four of the relics, and despite the war raging around them had, to his eternal disgust, begun to plunder the contents! He wanted to order the Knight to drive them out of the ruins, but the noble machine was badly damaged and its systems were failing. Weapons fire from all sides was killing it by a thousand cuts, and Marines armed with lascutters were closing in behind to finish the job. His enginseer servants were dead, most of his Skitarii were dead or fleeing, and while he was confident his Dunewalkers could survive now that the inferior walkers of the Astartes were silenced, time was not on his side - they could not hope to reach the archeotech before the Astartes plundered them and fled. He realised, with cold, detached certainty, that he would be forced to abandon his prize. "Belisarius to the Ark Mechanicum. Initiate emergency translocation protocol". There was a blinding light that filled the entire world, and when it faded there was nothing left of the Skitarii but the dead and destroyed remnants of their expedition. Cawl was gone. Nyel opened his mouth to vox the fleet, but Hoxra cut him off. "It's no good, Captain. His ship will evade us." "Throne take him!" Nyel screamed. "May every saint on Terra in his face!" He turned toward his approaching sergeants. Most of their squads had survived the battle; with the exception of Stalker Squad One, the Dead Company and Dreadnoughts had drawn the worst of the enemy's attention. Even so, they had lost good men. Time would tell whether the loss was permanent. "Get the Apothecaries and Techmarines down here," he growled, the bitterness at losing Cawl refusing to fade. He then gave the relics his full attention. They were large, armoured shapes covered in unfamiliar script, but the Stalkers had made some progress in opening them to study the contents. "I want these brought back to Tasal," he said. "What if Cawl comes after them?" Cyda asked. The Captain gave a dry chuckle. "Let him. Nothing would make me happier than to soak our world in Cawl's blood. Take his prize, and let him die trying to take it back."
-
- 1
-
-
- Space Marines
- Skitarii
- (and 2 more)
-
 T-Minus 40: Training exercise and matching of blades by the Dawn Blades chapter master and the Brothers Noctis 2nd Company Captain Mulier. "Tee minus 40 hours to Primaris Space Marine training exercise versus the Silver Sons and Brothers Noctis. All involved please report to Thunderhawk bay three. All Shinsengumi present, report to the Shogun's chambers at once. Repeat, Tee minus 40 hours...." The message repeated. Shogun Kujo Kamakura glanced at his chrono (a gift from a proud father when he was selected to become a Dawn Blade), even though the machine spirit had just announced the time. He nodded; at least the old thing still worked. He turned to the weapons and honors display that dominated the mantle. There lay four items of great importance to him: his plasma pistol, which had saved his life more times than he could count; his old right arm, which he had crafted a replacement for after it had failed to protect his Daimyo Stonetooth back when he was 4th company champion; his first combat knife, forged as a snake in the depths of the forges here on the Shogun's Might; and the Sunfire Katana, a powerful chapter relic that would kill anything that held contact with the blade for more than a second if they weren't wearing full Terminator plate, or its equivalent. Fortunately, Kamakura wielded it by the hilt, and the Blood Helm and its accompanying suit of armor was easily as tough as Terminator plate, if not stronger as it was backed up by a powerful iron halo. None of these relics would actually see battle that day, but Kamakura would still undergo his standard prebattle ritual. Gesturing, he summoned his serfs. They armored him in the Blood Helm, and after fifteen minutes he was ready to begin. He removed the knife first and touched it to his heart. “Ferrus Manus, forge me as I forged this blade, so that I may be as strong as steel.” The combat knife was strapped to his right leg, where it was easily accessible if needed. Next the Sunfire Katana was taken from its resting place, and touched to his armored forehead. “Vulkan, grant me your fire so the enemies of mankind may know our wrath.” The Katana was scabbarded to his left hip, so as to be drawn quickly on the field of battle. His plasma pistol came third, and touching the muzzle to his left hand he said, “Guilliman, guide my aim so I may bring down my enemy.” It was holstered just above his combat knife. Then he gestured one final time, and as the serfs attached his jump pack, he spoke his final preparation words. “Solis-Imperator, grant me your speed and fury, so that my enemies shall know your mercy-that of a quick but painful death at the hands of your avenging angels.” Flaring the engines, he muttered one last utterance to seal the vow. “As I have sworn in your eyes, so mote it be. Strike me down if I am unworthy.” And with that, Shogun Kujo Kamakura of Dawn Blades strode to the door and left for the Thunderhawk deck, his serfs following quietly behind him. =][= At Tee-Minus 26 hours, the Thunderhawks arrived at the grassy world where the training exercise would take place. The elements of the two other chapters present-the Silver Sons and the Brothers Noctis-were present in-system for recruitment and a joint deployment, and had agreed to this training exercise to see how the Primaris fared in battle and to test their skills against another chapter. At Tee-minus 3.5 hours, a joint spiritual service was held, in which the marines sat and listened to the Chaplains then meditated for a time. At Tee-minus 1.5 hours, a lunch feast was held to promote comradeship and to share stories and songs. At Tee-minus .25 hours, the marines left the tables to find themselves nonlethal versions of their standard weaponry before deploying. Then, at Tee-minus zero hours, battle commenced. =][= End Pre-battle Lore =][= The Armies (both are roughly 1250 points) https://www.flickr.com/photos/157803996@N07/shares/e43bGb Jack’s Brothers Noctis: Captain With power sword and master-crafted boltgun Terminator Captain with storm bolter and power sword (warlord with the Adept of the Codex trait) Predator with Twin linked Lascannon and twin heavy bolters Dreadnought with Multimelta and powerfist with inbuilt stormbolter Dreadnought with powerfist with inbuilt stormbolter and assault cannon Tactical squad with plasma gun, missile launcher, plasma pistol, and power sword (squad 1) Tactical Squad with plasma gun, missile launcher, and no sarge equipment (squad 2) Tactical squad with plasma gun, missile launcher, and power fist and (i think) plasma pistol (squad 3) X4 sniper scouts and one missile launcher Lenoch’s Dawn Blades: Gravis ‘Captain’ Ceticus Stormmoon (standard loadout) Primaris Lieutenants, one with autoboltgun (1) and one with power sword (2) Intercessor Squad 2 (bolt rifles, aux grenade launcher) Intercessor Squad Tiberius (stalker bolters, aux grenade launcher) Hellblaster Squad (assault plasma incinerators for some reason...I would regret this later) Single tactical marine with multimelta Shogun (chapter master) Kujo Kamakura, armed with the Burning Blade and a plasma sword...nabbed the Tenacious Warlord trait for +1 wound and an extra roll to ignore damage Primaris Lieutenant Shonar: Stalker Bolt gun and bolt pistol Lieutenant with twin lightning claws, bolt pistol, and jump pack Lieutenant with power sword, plasma pistol, bolt pistol, and jump pack Lieutenant with grav-pistol, power axe, bolt pistol, and jump pack Lieutenant with power sword, plasma pistol, bolt pistol, and jump pack (Saisho-shinsengumi) Front-line assault deployment, Capture and Control (two objectives), the Brothers Noctis have first turn. He holds two combat-squadded tactical squads in reserve. I hold all jump-equipped units in reserve. Scouts infiltrate to my left flank in a building. https://www.flickr.com/photos/157803996@N07/shares/501549 https://www.flickr.com/photos/157803996@N07/shares/hKVM85 Turn One He takes first turn and advances his forces, taking potshots with his long-range weapons. One of my hellblasters takes a wound, and Intercessor squad two takes one casualty. Intercessor squad 2 advances to the trenchwork on my side of the map and opens fire to little effect. Squad Tiberius, accompanied by Lt. Shonar, take out most of one of the combat squads near his objective. https://www.flickr.com/photos/157803996@N07/shares/0js6k7 https://www.flickr.com/photos/157803996@N07/shares/a4t3Yo I drop my four jump pack Lt.’s down behind his forces with the intent of distraction and blending his forces. Shooting takes a few wounds off of his armor all around, and the infantry (with the exception of one of the combat squads holding the objective) take no casualties. I only make one charge, and predictably it is against a dread with another dread within charge range. All Shinsengumi take overwatch fire and lose wounds. https://www.flickr.com/photos/157803996@N07/shares/1nLW31 https://www.flickr.com/photos/157803996@N07/shares/674920 Turn Two His two reinforcement combat squads walk on, in range of pretty much all of the Shinsengumi they can see. https://www.flickr.com/photos/157803996@N07/shares/xZt98g I think we messed up at one point when I let him shoot across the board at a Shinsengumi even when there was a closer character he could shoot at. (How does that work, anyway?) It may have affected the game to a fair degree, as that krak missile hit the wolverine Shinsengumi and hurt him enough overwatch was able to finish him off, but it doesn’t matter that much. https://www.flickr.com/photos/157803996@N07/shares/PEDTCm His forces advanced in the center to take the breastwork and opened fire once more upon my Intercessors in the center, but all his firepower bounced off their armor. At some point in this turn two hellblasters died to shooting (probably because I moved them from cover). https://www.flickr.com/photos/157803996@N07/shares/37375k Firing Range Trenchwork The two dreadnoughts smashed the single Shinsengumi in melee, after I spent two command points to go first (and after he died I spent two more to get some extra hits in). The two Intercessor squads advanced and opened fire, with Squad Tiberius killing the single plasma marine left on that flank and squad one killing a single marine in the center. My hellblasters advanced out of the building and opened fire at -1 on the predator, dealing an extra wound. https://www.flickr.com/photos/157803996@N07/shares/kn86US (Recommend Powerwolf’s Amen and Attack to listen to whilst reading this bit) To begin the assault phase, I ate a bunch of overwatch that knocked out two Shinsengumi and had the one remaining one down to one wound. When charging, squad 1 charged the center, and heroic interventions brought his captain in. Maybe one marine died in the center and one on my right flank (his left). 3+ to hit and 4+ to wound with a power sword doesn’t equate to many hits, but I guess it’s better than 4+ to both. https://www.flickr.com/photos/157803996@N07/shares/kn86US https://www.flickr.com/photos/157803996@N07/shares/i53D12 https://www.flickr.com/photos/157803996@N07/shares/229493 And here we have Tactical Devastator Antreas sitting behind the statue, aching to take a shot at something. https://www.flickr.com/photos/157803996@N07/shares/QF5Z4F Turn Three At the start of turn three, by agreed-upon rules breaking, both myself and my opponent deployed our warlords on the battlefield, right in the center of the map. No one shot at them; they didn’t shoot at each other either. It would come down to bladework (okay, there was one plasma pistol overwatch shot. So sue me). https://www.flickr.com/photos/157803996@N07/shares/9sfCW6 https://www.flickr.com/photos/157803996@N07/shares/8o6c54 https://www.flickr.com/photos/157803996@N07/shares/aar4j3 His combat squadded tactical squad moved left and right, the one with the plasma gun coming over to kill the Saisho-shinsengumi after their brothers fell back towards the monument. https://www.flickr.com/photos/157803996@N07/shares/RP2267 His dreads and tank moved up the flank, and at this point he pretty much forgot about the snipers because they didn’t have line of sight to anyone (and in fairness I forgot about them too). Opening fire, the armor killed another Hellblaster. In melee, Kamakura knocked two wounds off of 2nd Captain Mulier, despite the fact that Mulier charged first and thus attacked first. The sword Lt. held his own for a while against Captain Foxworthy but eventually died in my melee phase. https://www.flickr.com/photos/157803996@N07/shares/2m3557 In my turn little happened except in the melee phase (though devastator Antreas took a shot at one of the dreads, it missed. If I had any more command points I would have used them to reroll that; I really needed that shot to connect. Oh well). Once in melee, Kamakura took three wounds off of Mulier, though he lost two (2 6+’s to avoid wounds only works so well). I charged my Hellblasters and my autobolter Lt. into his predator and tied it up for the rest of the game (we had forgotten about falling back out of combat). The Gravis character (Ceticus Stormmoon) had finally made it into combat with the tactical squad, and promptly went into a duel with Foxworthy that took the rest of the game as well (this one, I think, was a glory thing. Which characters were better swordsmen?). https://www.flickr.com/photos/157803996@N07/shares/cfw4yg https://www.flickr.com/photos/157803996@N07/shares/419Px9 https://www.flickr.com/photos/157803996@N07/shares/34JfJq Turn 4 Volleys from the squads on the left killed two Intercessors from squad Tiberius (one was already wounded), and another combat squad opened fire on my now-unengaged (by virtue of killing everything within one inch) Intercessor Squad and killed the sergeant (who was also wounded by a power sword earlier in melee). His assault cannon dreadnought opened fire and knocked out Antreas with a lucky shot...i saved four wounds. The fifth got through. (This may have been turn five though; it's hard to remember.) In melee, Kamakura defeated Mulier and consolidated into the other deployment zone. The power sword sarge finally died and my Hellblasters and Lt. almost took a wound off of the predator, but not quite. His Predator wasn’t able to kill anything. https://www.flickr.com/photos/157803996@N07/shares/Bvqv9G Squad Tiberius ended up killing all the models they could see and still charge, so I couldn't make the charge to get in close and potentially contest his objective, despite being in range. Kamakura moved on to mince (but not annihilate) a squad of tacticals with the help of the two remaining members of squad two. Hellblasters and autobolter Lt. actually managed to wound the Predator (but only one would). At this point photos begin to degrade in regularity. Apologies. End Turn 4 photos Turn 5 At this point we are just mopping up. I had a hard departure time, and it was rapidly drawing near...so we ended up calling after turn five. That changed a little bit, but mainly it killed my chances at winning now Antreas was KO’d. We were just having a central bloodbath now. His remaining unengaged central tactical squad moves toward the center and prepares to charge Kamakura and his remaining entourage. His leftmost squad manages to completely wipe out squad Tiberius when I get supremely unlucky at save and IH FnP rolls. Only Shonar is left on my right flank (He was actually the only character with full wounds, including sergeants). https://www.flickr.com/photos/157803996@N07/shares/Ax5C2d In my turn, Kamakura wipes out 4 marines in 5 attacks with one swing of the Burning Blade, and the rest do laughably little in melee on either side. https://www.flickr.com/photos/157803996@N07/shares/wL958g In the end, it ended up being 4-2 in Jack’s favor; he had his objective and First Blood, and I had Slay the Warlord and Linebreaker. https://www.flickr.com/photos/157803996@N07/shares/5Mb1Az (I know this is doubled-this was the end-of-game match.) https://www.flickr.com/photos/157803996@N07/shares/382500 https://www.flickr.com/photos/157803996@N07/shares/u84393 =][= He and I both had fun, and I definitely think I have some things to learn. Now for the unit grading and review. A is exemplary, B is good, C is meh, D is bad, and F is would not play again unless I had to. Gravis Captain: B. Good anchor, but slow. CM with Jump pack+Burning Blade: A+. Excellent blender and when given Tenacious Survivor is a monster to shift in melee (ever, honestly) when backed up with an Iron Halo. Ended up having effective 9 wounds-+1 from Tenacious Survivor and 3 saved 6+’s. JP Lieutenants: D+, but that’s mostly how I played them. Dropping them individually with no screen got them killed (and probably cost me the game) before either they or I knew it. Overwatch ate them alive. Definitely running an Assault Squad or Inceptors to screen them. Intercessors with Stalkers: A-. Oh Throne YES! Amazing at killing MEQ’s, and at 2 ppm an ultimate steal. Shonar gets the same grade and reason. Regular Intercessors: B-. Decent enough but I made the mistake of removing the aux grenade launcher first. *headdesk* DI Primaris Lieutenants: B. Good anchors but lacking in survivability for their points (ie. no invuln, but that’s just me whining). Hellblasters with plasma incinerators: C-, maybe D. If you had a plan to utilize these guys with these weapons and remembered it (spoilers: I didn’t), then you were okay. Otherwise go with regular incinerators or the heavy plasma incinerators, or regular plasma devastators, who are cheaper and more reliable but not as powerful. Tactical Devastator Antreas: C. He’s a one-wound model worth 40 points and only cover for survivability; what should I have expected? Did his job well enough until he died; he’ll be joining his squad soon where he’ll be much more effective. Overall, I had fun and learned quite a bit about Primaris and my Shinsengumi. This list will probably be modded to include supporting elements and some heavy armor (read: a pair of Land Raiders and Dreads) to make it better. =][= Begin Post-battle Lore =][= “End of training exercise. All personnel please clear the area so cleanup may begin. Repeat. End of training exercise. All personnel please clear the area so cleanup may begin.” The voxcast droned on for a while before a Techmarine who got annoyed with it shut it off. As the marines began to clear the field, they began to chat amongst themselves, discussing the battle they had just been in and offering advice to each other. Kamakura observed this from overhead, hanging off the spar of a Land Speeder Storm that had recorded the battle in video. The Shinsengumi were being brutally teased and mocked for getting themselves-ALL of them-cut down by overwatch fire. Even the pair who had made it through had been either been cut down when his opponents had fallen back or been ‘pulverized’ after a few blows from a dreadnought (or rather, a combat servitor that had sophisticated electronic warfare machinery that allowed the two dreadnoughts to participate in the fight). Kujo grimaced. His Arrows would all need a stern talking to about getting overconfident and careless in the face of a milk run or training exercise. In the aftermath of the training exercise, there was much camaraderie and mutual respect to be had between the warriors of either chapter. Unsurprisingly, the green Primaris troops had made their mistakes, rookie mistakes, but that was what scout training was for, and the Primaris would, by consensus of all assembled personnel from all chapters involved, be forced to undergo the same exact training regimen that 13 year olds did; vat-sim time didn't equate to time under a drill sergeant with two centuries of battle and another century of training experience under his belt. What was also not entirely a surprise was that the Dawn Blades had superior blade skills. Kamakura had bested Captain Mulier of the Brothers Noctis in combat, and after the exercise was over the captain had approached the Shogun and congratulated him on his amazing swordsmanship, to which Kamakura had replied that beating him had been no mean feat-and that was about the best praise the Shogun gave when it came to melee. What had amazed more than one person, though, was that one of the Primaris Lt.’s had almost beaten Captain Foxworthy in a duel-and the Lt. was still green. He would bear watching for any emergent skill, and training to become part of a training cadre for snakes. Foxworthy had already commended the Astartes for his skill, and was already being praised by some of the Techmarines who had experience with bladework. There was a second feast going on now, and the marines were intermingling. Kamakura lazily drifted down from the Land Speeder, gesturing for the pilot to follow, and landed next to Mulier. “It was a good fight, yah?” Mulier said, not looking at the Shogun. Kujo walked up next to him. “A damn good fight. You've got good men.” “Thank you. I'll…consider these Primaris. We’ll see about them.” Soon Captain Foxworthy came besides them. “Gentlemen.” “Foxworthy,” they replied. “I am afraid my forces must leave now; our Chapter Master has recalled us.” “Then give him my respects,” Kamakura said, and Mulier indicated the same. “I shall. Perhaps we shall fight side by side at some point.” “Indeed.” And with that, Foxworthy walked away, his forces falling in behind him. Soon Mulier left too, troops trailing like so many ducklings. And only the Dawn was left to leave, and when they did so came with them a brand new day. ==================================================================================================================== More photos may follow later in another topic, and I may correct the format later to make it look better-at this point it's just links to the photos unfortunately.
 -
Space Wolves, 2k 1 Bjorn. 1 Thunderlord with pair of wolfclaws. 2 units of 15 blood claws each, the fighters. 1 unit of 5 grey hunters, the objective holders. 1 unit of 5 sniper scouts, to try and snipe someone. 1 unit of 5 Termiwolves with chainfists; chainfists suck. 1 unit of 3 Thunderwolves with storm shields. 2 units of 5 Longfangs with heavy bolters. 1 Stormfang Gunship. Skiitari, (sorry, I really don't know the official names of this "new" army) 1 Belisarius Cawl 1 Skiitari tech priest 4 Kastelan Robots /Baymax (The giant robot that looks like the one in the movie big hero 6) 15 Electropriest 5 units of 5 skiitari, each with 2 super snipers 2 Dunecrawlers Giant Spiders 2 Ironstriders with lascannons This was a great battle! I got first turn and it was the Stormfang time to make the Wolves proud; my friend made a mistake and deployed with Belisarius in the middle with enough space for the Stormfang to fit a hole and have him as the closest target, so I fired the twin multi melta, the lascannons and the helfrost cannon.... And He lived. With my extremely bad luck and his extremely good combined, only 3 wounds were made... So that was fun! Then the heavy bolters gunned down one unit of rangers and a couple of electropriests, My bloodclaws moved to the center with the characters and thunderwolves. In his turn, the 70 inches strength 7 ap -3 snipers started to wreck hell on my thunderwolves and killed 4 heavy bolters. His dunecrawlers and lascannons fired to the stormfang and it barely survived, he started to move to the center of the field. The second turn decided the whole battle, his low armor low invul electropiests died all to shooting and Bjorn with the bloodclaws and thunderwolves charged the 4 Kastelan robots, Belisarius and the techpriest made heroic interventions and got in the batlle, my chainfists terminators deepstriked near the duncrawlers and ironstriders. The close combat was awful for me, Bjorn only did 5 wounds, not even one Kastelan robot... The Bloodclaws did killed one of the robots and his characters killed plenty of bloodclaws, the Kastelan robots wounded Bjorn. In his turn he gunned down the Stormfang, killed some termis and in close combat finished killing Bjorn and some bloodclaws. Every turn after was the exact same, the mass of bloodclaws wounded the kastelans, but Belisarius slowly killed them; termis were attacking the back line duncrwalers but the chainfists don't do that much damage and his op snipers are really annoying. My back line grey hunters and snipers secured obectives and the Thunderlord hunted all the little units of snipers but was killed in the end by the Ironstriders. It was a solid Victory for the Sons of Russ, even if in the end one Kastelan, the skiitari characters and the Ironstriders were alive, the multiple small units gave me much more objectives. The stormfang is extremely powerful and having that long movement range you can probably put him in the middle of an enemy so he can kill an important character, but if your dice hate you like mine do, don't get angry, bad luck happens.
-
Hey everyone! We featured a great TSons list in this weeks battle report if you guys wish to check it out. Cheers https://youtu.be/Sl8XEXWJkuI
-
 Hey everyone! We ran the Horde of Jaghatai against the dusty boys in this weeks battle report. Feel free to check it out. Cheers https://youtu.be/Sl8XEXWJkuI
- 1 reply
-
- 2
-
-
- White Scars Chapter
- White Scars battle report
- (and 3 more)